
Subscribe to Our Youtube Channel
Related Manuals for Pelgrim MWA105KOR


Summary of Contents for Pelgrim MWA105KOR
- Page 1 MWA105KOR Gebruiksaanwijzing Afzuigkappen Mode d’emploi Hotte cheminée Bedienungsanleitung Dunstabzugshaube Instructions for use Cooker hood...
- Page 2 Gebruiksaanwijzing NL 3 - NL 15 Mode d’emploi FR 3 - FR 15 Bedienungsanleitung DE 3 - DE 15 Instructions for use EN 3 - EN 15 Gebruikte pictogrammen - Pictogrammes utilisés - Benutzte Piktogramme Pictograms used Belangrijk om te weten - Important à savoir - Wissenswertes - Important information Tip - Conseil - Tipp...
-
Page 3: Table Of Contents
INHOUD Uw afzuigkap Beschrijving Inleiding Afzuigsystemen Gebruik Bedieningselementen Onderhoud Reiniging Vetfilters verwijderen Lampen vervangen Installatie Algemeen Elektrische aansluiting Voorbereiding Voor gebruik met een centraal afzuigsysteem Voor gebruik met een externe motor Montage Bijlage Apparaat en verpakking afdanken NL 3... -
Page 4: Uw Afzuigkap
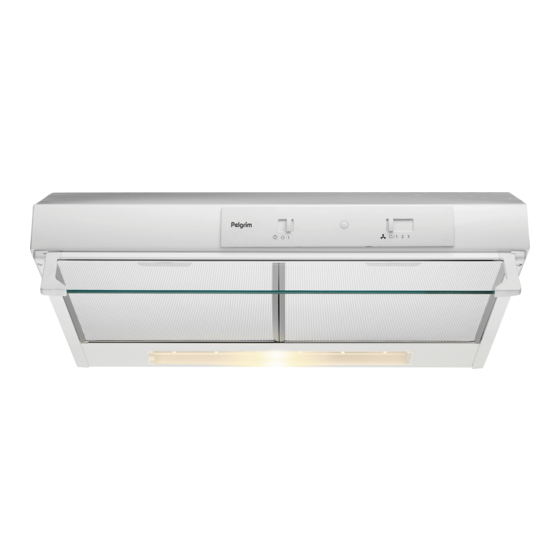
UW AFZUIGKAP Inleiding Deze gebruiksaanwijzing biedt een helder overzicht van alle mogelijkheden van het apparaat. U vindt hierin informatie over veiligheid en onderhoud van het apparaat. Bewaar deze gebruiksaanwijzing evenals de installatiehandleiding. Deze kunnen later van pas komen. Beschrijving Schuifknop voor verlichting Indicatielampje Schuifknop voor externe ventilator/klep NL 4... -
Page 5: Afzuigsystemen
UW AFZUIGKAP Afzuigsystemen Deze motorloze afzuigkap kan op twee manieren worden aangesloten op een centraal afzuigsysteem: • Klep openen/sluiten. ▷ Tijdens het koken kan de klep worden geopend om kookgeuren af te voeren naar het centrale systeem. • Klep openen/sluiten en snelheid van het centrale afzuigsysteem regelen. -
Page 6: Gebruik
GEBRUIK Bedieningselementen De verlichting in- en uitschakelen 1. Gebruik schuifknop A om de verlichting in- of uit te schakelen. Voor gebruik als een motorloze kap die is aangesloten op een centraal afzuigsysteem. De elektrische klep openen en sluiten. 1. Verplaats de schuifknop naar stand 2. De elektrische klep gaat open. -
Page 7: Onderhoud
ONDERHOUD Reiniging Let op! Vóór het uitvoeren van onderhoudswerkzaamheden moet altijd eerst de elektrische voeding naar de kap worden uitgeschakeld door het apparaat bij de connector uit te schakelen en de zekering van de connector te verwijderen. Is het apparaat met de stroom verbonden door middel van stekker en stopcontact, haal de stekker dan uit het stopcontact. -
Page 8: Vetfilters Verwijderen
ONDERHOUD Vetfilters Reinig de vetfilters ten minste éénmaal per maand. Tijdens reiniging kunnen de aluminiumonderdelen van de filters vanwege het gebruik van schoonmaakmiddelen dof worden, in het bijzonder wanneer deze in de vaatwasser worden geplaatst. Dit is normaal en valt niet onder de garantie. Vetfilter verwijderen 1. -
Page 9: Installatie
INSTALLATIE Algemeen Dit apparaat moet op het elektriciteitsnet worden aangesloten door een erkende installateur die bekend is met de toepasselijke veiligheidsvoorschriften en conform deze voorschriften werkt. Dit apparaat voldoet aan de eisen van de Europese regelgeving. Belangrijk om te weten: •... -
Page 10: Elektrische Aansluiting
INSTALLATIE Aansluiting Elektrische aansluiting Het apparaat is gemaakt als een apparaat uit klasse II. Er is daarom geen aardekabel nodig. Controleer of de vermogenswaarden van de voeding overeenkomen met de waarden die op het gegevensplaatje op het apparaat zijn aangegeven. U sluit het apparaat als volgt aan op het elektriciteitsnet: BRUIN = fase L (stroomvoerend) BLAUW = fase N (neutraal) Let op:... -
Page 11: Voorbereiding
INSTALLATIE Voorbereiding De leiding van de afzuiglucht kan aan de bovenzijde van de afzuigkap worden gemonteerd. Voorbereiding voor gebruik met een centraal afzuigsysteem en snelheidsregeling De snelheid wordt geregeld op de afzuigkap. 1. Verwijder de vetfilters. 2. Draai de kleine klep naar de stand ‘open’. Draai zo nodig de montageschroef een beetje los. -
Page 12: Voor Gebruik Met Een Externe Motor
INSTALLATIE De motorunit • De motorunit moet geschikt zijn voor enkelfasig (230V-50Hz) aansluiting en voor diverse toerentallen. • Het mag nooit mogelijk zijn om de motorunit uit te schakelen, ongeacht welke afzuigmethode wordt geselecteerd (zie hiervoor alleen de handleiding van de motorunit). •... -
Page 13: Montage
INSTALLATIE Bedrading • Raadpleeg het bedradingsschema voor aansluiting van de externe motor. • Het verdient aanbeveling eerst de afzuigkap te monteren en deze daarna op de muur te bevestigen. • Controleer de schakelaarfuncties. Montage NL 13... - Page 14 INSTALLATIE NL 14...
-
Page 15: Bijlage
BIJLAGE Afdanken Apparaat en verpakking afdanken Door het product op de juiste wijze af te danken, voorkomt u mogelijke negatieve gevolgen voor het milieu en de volksgezondheid. Voor relevante informatie kunt u terecht bij uw gemeente. De verpakking van dit apparaat kan worden gerecycled. De verpakking kan gemaakt zijn van: •... - Page 16 NL 16...
- Page 17 SOMMAIRE Votre hotte aspirante Description Introduction Systèmes d’extraction Utilisation Commandes Entretien Nettoyage Dépose des filtres à graisse Changer les ampoules Installation Généralités Branchement électrique Préparation Utilisation avec un système d'extraction central Utilisation avec un moteur externe Montage Annexe Mise au rebut de l’appareil et de l’emballage FR 3...
-
Page 18: Votre Hotte Aspirante
VOTRE HOTTE ASPIRANTE Introduction Ce mode d'emploi offre une vue d'ensemble rapide de toutes les fonctions de l'appareil. Il contient des informations relatives aux consignes de sécurité et à l'entretien de l'appareil. Conservez ce mode d'emploi et le guide d'installation. Ils seront utiles aux futurs utilisateurs de l'appareil. -
Page 19: Systèmes D'extraction
VOTRE HOTTE ASPIRANTE Systèmes d’extraction Cette hotte aspirante non motorisée peut être raccordée à un système d'extraction central de deux manières : • Ouverture/fermeture du clapet. ▷ Pendant la cuisson, l'ouverture du clapet permet d'évacuer les odeurs de cuisson vers le système central. •... -
Page 20: Utilisation
UTILISATION Commandes Allumer et éteindre l’éclairage 1. Utilisez le commutateur à glissière A pour allumer ou éteindre les lampes. Utilisation de la hotte sans moteur et raccordée à un système d'extraction central. Ouverture et fermeture de l'électrovanne 1. Placez le commutateur à glissière sur la position 2. L'électrovanne s'ouvre. -
Page 21: Entretien
ENTRETIEN Nettoyage Attention ! Avant toute opération d’entretien, vous devez mettre la hotte hors tension en la débranchant du circuit électrique et en coupant l’interrupteur général de l’habitation. Si l'appareil est branché au circuit par une prise, enlevez la fiche de la prise de courant. La hotte doit être régulièrement nettoyée à... -
Page 22: Dépose Des Filtres À Graisse
ENTRETIEN Filtres à graisse Nettoyez les filtres à graisse au moins une fois par mois. Il est possible que les parties en aluminium des filtres ternissent sous l'effet des produits d'entretien durant le nettoyage, en particulier lorsqu'ils sont placés dans le lave-vaisselle. Ce phénomène est normal et n'est donc pas couvert par la garantie. -
Page 23: Installation
INSTALLATION Généralités Le raccordement électrique de cet appareil doit être effectué par un installateur agréé qui connaît et applique les normes de sécurité en vigueur. Cet appareil est conforme aux directives européennes. Important : • La distance entre le point le plus bas de la hotte aspirante et la plaque de cuisson doit être d’au moins 65 cm. -
Page 24: Branchement Électrique
INSTALLATION Branchement Branchement électrique Cet appareil est de classe 2, il n'est donc pas nécessaire de le relier à la terre Assurez-vous que les valeurs de tension d'alimentation correspondent à celles indiquées sur la plaque signalétique de l'appareil. Le raccordement à l'alimentation électrique doit être exécuté comme suit : BRUN = phase L BLEU = phase N Attention :... -
Page 25: Préparation
INSTALLATION Préparation Montez le conduit d'évacuation d'air sur le dessus de la hotte aspirante. Préparation dans le cas d'une utilisation avec un système d'extraction central et un régulateur de vitesse La vitesse est régulée sur la hotte aspirante. 1. Retirez les filtres à graisse. 2. - Page 26 INSTALLATION Le moteur • Le moteur doit être de type monophasé (230 V - 50 Hz) à plusieurs vitesses. • Le mode d'extraction sélectionné, quel qu'il soit, ne doit jamais permettre d'éteindre le moteur (voir à ce sujet le manuel du moteur). •...
-
Page 27: Montage
INSTALLATION Câblage • Consultez le schéma de câblage pour le branchement au moteur externe. • Nous vous conseillons d'assembler la hotte aspirante avant de l'installer sur le mur. • Vérifiez les fonctions des commutateurs. Montage FR 13... - Page 28 INSTALLATION FR 14...
-
Page 29: Annexe
ANNEXE Mise au rebut Mise au rebut de l’appareil et de l’emballage En vous conformant à une procédure de mise au rebut correcte de ce produit, vous aiderez à prévenir tout effet nuisible sur l'environnement et la santé, qu'une manipulation inappropriée de celui-ci pourrait autrement provoquer. - Page 30 FR 16...
- Page 31 INHALT Ihre Abzugshaube Beschreibung Einleitung Sauglüftungssysteme Bedienung Bedienelemente Pflege Reinigung Fettfilter entfernen Lampen auswechseln Installation Allgemeines Elektrische Anschlüsse Vorbereitung Verwendung mit zentraler Absauganlage Verwendung mit externem Motor Montage Anhang Entsorgung von Verpackung und Gerät DE 3...
-
Page 32: Ihre Abzugshaube
IHRE ABZUGSHAUBE Einführung In dieser Bedienungsanleitung finden Sie eine Übersicht aller Möglichkeiten, die Ihnen das Gerät bietet. Sie erhalten Informationen zur Sicherheit und zur Wartung des Geräts. Bewahren Sie diese Bedienungsanleitung und die Installationsanweisungen für zukünftige Nutzung sorgfältig auf. Beschreibung Schiebeschalter Beleuchtung Kontrolllampe Schiebeschalter für externen Lüfter / Ventil... -
Page 33: Sauglüftungssysteme
IHRE ABZUGSHAUBE Sauglüftungssysteme Diese motorlose Abzugshaube kann je nach Modell auf zwei verschiedene Weisen angeschlossen werden: • Ventil öffnen/schließen. ▷ Während des Kochvorgangs kann das Ventil geöffnet werden, um Kochgerüche zum zentralen Lüftungssystem zu leiten. • Ventil öffnen/schließen und Drehzahl des zentralen Lüftungssystems steuern. -
Page 34: Bedienelemente
VERWENDUNG Bedienelemente Licht ein- und ausschalten 1. Licht mit Schiebeschalter A ein- oder ausschalten. Bei Verwendung als motorlose Abzugshaube mit Anschluss an zentrale Absauganlage. Elektrisches Ventil öffnen und schließen 1. Schiebeschalter in Position 2 bewegen. Elektrisches Ventil wird geöffnet. Kontrolllampe leuchtet. 2. -
Page 35: Pflege
PFLEGE Reinigung Achtung! Abzugshaube durch Ziehen des Netzsteckers oder Ausschalten der Sicherung stromlos machen, bevor Sie mit Wartungs- oder Reinigungsarbeiten beginnen. Falls das Gerät über einen Stecker und eine Steckdose angeschlossen wurde, Stecker aus der Steckdose ziehen. Die Abzugshaube muss sowohl innen als auch außen regelmäßig gereinigt werden (Intervalle mindestens wie bei der Wartung der Fettfilter). -
Page 36: Lampen Auswechseln
PFLEGE Fettfilter Fettfilter mindestens einmal pro Monat reinigen. Durch die Reinigungsmittel wird der Aluminiumfilter stumpf, insbesondere bei Reinigung im Geschirrspüler. Das ist normal und kein Garantiefall. Fettfilter ausbauen 1. Schalten Sie die Abzugshaube aus. 2. Ziehen Sie den Fettfiltergriff zu sich heran und schwenken Sie ihn vorn nach unten. -
Page 37: Installation
INSTALLATION Allgemeines Der Anschluss dieses Geräts an die Stromversorgung muss durch einen Elektriker erfolgen. Dieses Gerät erfüllt die Anforderungen der europäischen Vorschriften. Wichtig: • Der Abstand zwischen dem niedrigsten Punkt der Abzugshaube und einem Gaskochfeld muss mindestens 65 cm betragen. Bei einer elektrischen Kochplatte, einer Induktionskochplatte oder einem Keramikfeld muss dieser Abstand mindestens 55 cm betragen. -
Page 38: Elektrische Anschlüsse
INSTALLATION Anschluss Elektrischer Anschluss Das Gerät entspricht Klasse II. Es ist deshalb kein separates Erdungskabel erforderlich. Vergewissern Sie sich, dass die Versorgungsspannung mit der auf dem Typenschild des Geräts angegebenen Spannung übereinstimmt. Der Netzanschluss wird folgendermaßen durchgeführt: BRAUN = Phase L BLAU = Phase N Achtung: Wenn Sie einen festen Anschluss anbringen möchten, sorgen Sie... -
Page 39: Vorbereitung
INSTALLATION Vorbereitung Das Abluftrohr wird auf der Oberseite der Abzugshaube montiert. Vorbereitung für Verwendung mit zentraler Absauganlage und Drehzahlsteuerung Die Drehzahl wird an der Abzugshaube gesteuert. 1. Entfernen Sie die Fettfilter. 2. Stellen Sie das kleine Ventil in die Position „Geöffnet“. Bei Bedarf, Montageschraube etwas lockern. - Page 40 INSTALLATION Motoreinheit • Die Motoreinheit muss ein Einzelphasengerät (230 V, 50 Hz) mit variabler Drehzahl sein. • Unabhängig vom verwendeten Abzugsverfahren darf es unter keinen Umständen möglich sein, die Motoreinheit auszuschalten (siehe dazu ausschließlich Anleitung des Motors). • Die verschiedenen Möglichkeiten sind meist mit Bezeichnungen wie „Mittel“...
-
Page 41: Montage
INSTALLATION Verkabelung • Hinweise zum Anschließen an den externen Motor finden Sie im Schaltbild. • Wir empfehlen, die Abzugshaube zu montieren, bevor Sie sie an der Wand befestigen. • Prüfen Sie die Schaltfunktionen. Montage DE 13... - Page 42 INSTALLATION DE 14...
-
Page 43: Anhang
ANHANG Entsorgung Entsorgung von Gerät und Verpackung Nach Ablauf seiner Nutzungsdauer muss das Gerät verantwortungsbewusst entsorgt werden. Durch die ordnungsgemäße Entsorgung von Haushaltsgeräten werden Umwelt- und Gesundheitsschäden vermieden. Informationen zur Entsorgung erhalten Sie von den zuständigen Behörden. Die Verpackung des Geräts ist wiederverwertbar. Folgende Materialien können verwendet worden sein: •... - Page 44 DE 16...
- Page 45 CONTENT Your canopy hood Description Introduction Extraction systems Controls Maintenance Cleaning Removing the grease filters Changing the light bulbs Installation General Electrical connection Preparation For use with an central extraction system For use with an external motor Mounting Appendice Disposal of appliance and packaging EN 3...
-
Page 46: Description
YOUR COOKER HOOD Introduction This user manual gives you a quick overview of all the possibilities offered by the appliance. You will find information on safety measures and maintaining the appliance. Please retain this user manual and the installation guide. They may be of use to future users of the appliance. -
Page 47: Extraction Systems
YOUR COOKER HOOD Extraction systems This motorless cooker hood can be connected in one of two ways on a central extraction system: • Valve open/close. ▷ During cooking the valve can be opened to extract cooking odours to the central system. •... -
Page 48: Use
Controls Switching the light on and off 1. Use slider A to turn the lights on or off. For use as a motorless hood connected to an central extraction system. Opening and closing the electric valve 1. Move the slider to position 2. The electric valve opens. -
Page 49: Maintenance
MAINTENANCE Cleaning Attention! Before performing any maintenance operation, isolate the hood from the electrical supply by switching off at the connector and removing the connector fuse. Or if the appliance has been connected through a plug and socket, then the plug must be removed from the socket. -
Page 50: Removing The Grease Filters
MAINTENANCE Grease filters Clean the grease filters at least once a month. During cleaning, the aluminium parts of the filters may become dull as a result of the cleaning agents used, particularly when placed in the dishwasher. This is normal and is not covered by the warranty. Removing the grease filter 1. -
Page 51: Installation
INSTALLATION General This appliance should be connected to the power supply by a recognized fitter who is familiar with, and works according to the correct safety regulations. This appliance meets the European requirements. Important that you know: • The minimum distance between the supporting surface for the cooking vessels on the gashob and the lowest part of the range hood must be not less than 65 cm. -
Page 52: Electrical Connection
INSTALLATION Connection Electric connection The appliance has been manufactured as a class II, therefore no earth cable is necessary. Make sure the supply voltage ratings correspond with those stated on the appliance data plate. The connection to the mains is carried out as follows: BROWN = phase L BLUE = phase N... -
Page 53: Preparation
INSTALLATION Preparation The exhaust-air pipe can be mounted to the top of the cooker hood. Preparation for use with an central extraction system and speed control The speed is controlled on the cooker hood. 1. Remove the grease filters. 2. Turn the small valve to the ‘open’ position. If needed, release the mounting screw a bit. - Page 54 INSTALLATION The motor unit • The motor unit must be single phase (230V-50Hz) with various speeds. • Whichever method of extraction is selected, it must never be possible to switch the motor unit off (see for this only the motor unit manual).
-
Page 55: Mounting
INSTALLATION Wiring • Consult the wiring diagram for connecting the external motor. • We advise you to assemble the cooker hood first and then to mount it on the wall. • Check the switch functions. Mounting EN 13... - Page 56 INSTALLATION EN 14...
-
Page 57: Appendice
APPENDICE Disposal Disposal of appliance and packaging By ensuring this product is disposed of correctly, you will help prevent potential negative consequences for the environment and human health, which could otherwise be caused by inappropriate waste handling of this product. The local authorities can provide you with the relevant information. - Page 58 EN 16...
- Page 59 EN 17...
- Page 60 *707463* 707463...
Need help?
Do you have a question about the MWA105KOR and is the answer not in the manual?
Questions and answers