Table of Contents
Advertisement
Advertisement
Table of Contents

Related Manuals for Asus G51J


Summary of Contents for Asus G51J
-
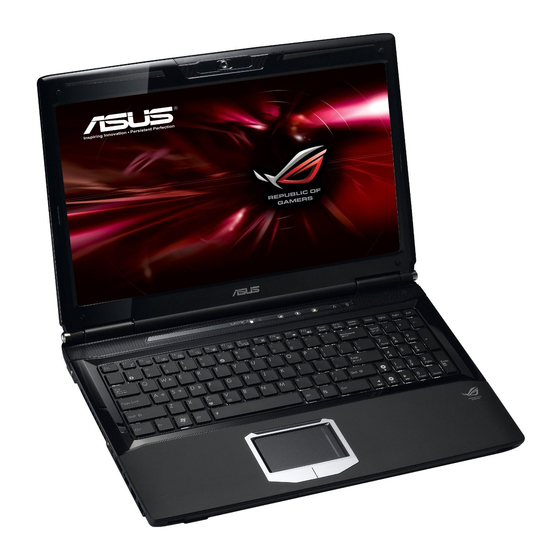
Page 1: Notebook Pc User Manual
E4878 Notebook PC User Manual July 2009... -
Page 2: Table Of Contents
Table of Contents Safety Precautions ... 3 Preparing your Notebook PC ... 5 Using the Touchpad ... 7 Knowing the Parts ... 8 Right Side ... 8 Left Side ...11 Rear Side ...14 Front Side ...16 Recovering Your Notebook PC ...17 Using Recovery Partition ...17 Using Recovery DVD (on selected models) ...18 Declarations and Safety Statements ...20... -
Page 3: Safety Precautions
Safety Precautions The following safety precautions will increase the life of the Notebook PC. Follow all precautions and instructions. Except as described in this manual, refer all servicing to qualified personnel. Disconnect the AC power and remove the battery pack(s) before cleaning. - Page 4 SAFE TEMP: This Notebook PC should only be used in environments with ambient temperatures between 10°C (50°F) and 35°C (95°F) DO NOT carry or cover a Notebook PC that is powered ON with any materials that will reduce air circulation such as a carrying bag.
-
Page 5: Preparing Your Notebook Pc
Preparing your Notebook PC These are only quick instructions for using your Notebook PC. Installing the Battery Pack Connecting the Power Adapter 2 0 V V - 2 1 1 0 Notebook PC User Manual... - Page 6 Opening the LCD display panel Carefully lift up the display panel with your thumb. Slowly tilt the display panel forward or backward to a comfortable viewing angle. Turning on the Power Push and release the power button located beneath the LCD display panel.
-
Page 7: Using The Touchpad
Using the Touchpad A. Slide your finger across the touchpad to move the pointer. You can also hold the left button and slide your finger to drag the selected item. Use the left and right buttons like a standard mouse. Slide your finger up or down on the right side to scroll up or down a window. -
Page 8: Knowing The Parts
Knowing the Parts Right Side 1 2 3 Microphone Input Jack The mono microphone jack (1/8 inch) can be used to connect an external microphone or output signals from audio devices. Using this jack automatically disables the built-in microphone. Use this feature for video conferencing, voice narrations, or simple audio recordings. - Page 9 USB Port (2.0/1.1) The USB (Universal Serial Bus) port is compatible with USB 2.0 or USB 1.1 devices such as keyboards, pointing devices, cameras, hard disk drives, printers, and scanners connected in a series up to 12Mbits/sec (USB 1.1) and 480Mbits/sec (USB 2.0).
- Page 10 Optical Drive Emergency Eject (location varies by model) The emergency eject is used to eject the optical drive tray in case the electronic eject does not work. Do not use the emergency eject in place of the electronic eject. Notebook PC User Manual...
-
Page 11: Left Side
Left Side Display (Monitor) Output The 15-pin D-sub monitor port supports a standard VGA- compatible device such as a monitor or projector to allow viewing on a larger external display. Air Vents The air vents allow cool air to enter and warm air to exit the Notebook PC. - Page 12 IEEE1394 Port (on selected models) IEEE1394 is a high speed serial bus like SCSI but has simple connections and hot-plugging capabilities like USB. The interface IEEE1394 has a bandwidth of 100-400 Mbits/sec and can handle up to 63 units on the same bus. IEEE1394 is also used in high-end digital equipment and should be marked “DV”...
- Page 13 ExpressCard Slot One 26pin Express card slot is available to support one ExpressCard/34mm or one ExpressCard/54mm expansion card. This new interface is faster by using a serial bus supporting USB 2.0 and PCI Express instead of the slower parallel bus used in the PC card slot. (Not compatible with previous PCMCIA cards.) Notebook PC User Manual...
-
Page 14: Rear Side
Rear Side Kensington® Lock Port The Kensington® lock port allows the Notebook PC to be secured using Kensington® compatible Notebook PC security products. These security products usually include a metal cable and lock that prevent the Notebook PC to be removed from a fixed object. Some may also include a motion detector to sound an alarm when moved. - Page 15 Power (DC) Input The supplied power adapter converts AC power to DC power for use with this jack. Power supplied through this jack supplies power to the Notebook PC and charges the internal battery pack. To prevent damage to the Notebook PC and battery pack, always use the supplied power adapter.
-
Page 16: Front Side
Front Side Flash Memory Slot Normally an external memory card reader must be purchased separately in order to use memory cards from devices such as digital cameras, MP3 players, mobile phones, and PDAs. This Notebook PC has a built-in high- speed memory card reader that can conveniently read from and write to many flash memory cards. -
Page 17: Recovering Your Notebook Pc
Using the Recovery Partition: Press [F9] during bootup. Press [Enter] to select Windows Setup [EMS Enabled]. Read the ASUS Preload Wizard screen and click Next. Select a partition option and click Next. Partition options: Recover Windows to first partition only. -
Page 18: Using Recovery Dvd (On Selected Models)
This option deletes all partitions from your hard drive and creates two new partitions “C” (60%) and “D” (40%). Follow the onscreen instructions to complete the recovery process. Visit the ASUS website at www.asus.com for updated drivers and utilities. Using Recovery DVD (on selected models) Creating the Recovery DVD: Double-click the AI Recovery Burner icon on the Window desktop. - Page 19 Follow the onscreen instructions to complete the recovery process. WARNING: Do not remove the Recovery disc, unless instructed to do so, during the recovery process or else your partitions will be unusable. Visit the ASUS website at www.asus.com for updated drivers and utilities. Notebook PC User Manual...
-
Page 20: Declarations And Safety Statements
Declarations and Safety Statements Federal Communications Commission Statement This device complies with FCC Rules Part 15. Operation is subject to the following two conditions: • This device may not cause harmful interference. • This device must accept any interference received, including interference that may cause undesired operation. -
Page 21: Fcc Radio Frequency (Rf) Exposure Caution Statement
(Reprinted from the Code of Federal Regulations #47, part 15.193, 1993. Washington DC: Office of the Federal Register, National Archives and Records Administration, U.S. Government Printing Office.) FCC Radio Frequency (RF) Exposure Caution Statement Any changes or modifications not expressly approved by the party responsible for compliance could void the user’s authority to operate this equipment. -
Page 22: Ce Mark Warning
CE Marking CE marking for devices without wireless LAN/Bluetooth The shipped version of this device complies with the requirements of the EEC directives 2004/108/EC “Electromagnetic compatibility” and 2006/95/EC “Low voltage directive” . CE marking for devices with wireless LAN/ Bluetooth This equipment complies with the requirements of Directive 1999/5/ EC of the European Parliament and Commission from 9 March, 1999 governing Radio and Telecommunications Equipment and mutual... -
Page 23: Wireless Operation Channel For Different Domains
Wireless Operation Channel for Different Domains N. America 2.412-2.462 GHz Japan 2.412-2.484 GHz Europe ETSI 2.412-2.472 GHz France Restricted Wireless Frequency Bands Some areas of France have a restricted frequency band. The worst case maximum authorized power indoors are: • 10mW for the entire 2.4 GHz band (2400 MHz–2483.5 MHz) •... - Page 24 60 Oise 63 Puy du Dôme 66 Pyrénées Orientales 68 Haut Rhin 71 Saône et Loire 82 Tarn et Garonne 88 Vosges 90 Territoire de Belfort This requirement is likely to change over time, allowing you to use your wireless LAN card in more areas within France. Please check with ART for the latest information (www.art-telecom.fr) Your WLAN Card transmits less than 100mW, but more than 10mW.
-
Page 25: Ul Safety Notices
UL Safety Notices Required for UL 1459 covering telecommunications (telephone) equipment intended to be electrically connected to a telecommunication network that has an operating voltage to ground that does not exceed 200V peak, 300V peak-to-peak, and 105V rms, and installed or used in accordance with the National Electrical Code (NFPA 70). -
Page 26: Power Safety Requirement
REACH Complying with the REACH (Registration, Evaluation, Authorization, and Restriction of Chemicals) regulatory framework, we publish the chemical substances in our products at ASUS REACH website at http://green.asus.com/english/REACH.htm. Notebook PC User Manual... -
Page 27: Nordic Lithium Cautions (For Lithium-Ion Batteries)
Nordic Lithium Cautions (for lithium-ion batteries) CAUTION! Danger of explosion if battery is incorrectly replaced. Replace only with the same or equivalent type recommended by the manufacturer. Dispose of used batteries according to the manufacturer’s instructions. (English) ATTENZIONE! Rischio di esplosione della batteria se sostituita in modo errato. - Page 28 This product is protected by one or more of the following U.S. Patents: 7,416,423; 7,415,588; 7,413,402; 7,411,791; 7,408,855; 7,403,378; 7,400,721; 7,399,011; 7,394,533; 7,392,968; 7,388,754; 7,388,752; 7,388,743; 7,382,605; 7,382,314; 7,375,952; 7,374,433; 7,373,493; 7,369,402; 7,369,064; 7,362,568; 7,362,521; 7,362,276; 7,361,034; 7,359,209; 7,359,189; 7,355,372; 7,353,408; 7,352,586; 7,343,645; 7,342,777;...
- Page 29 Notebook PC User Manual...
- Page 30 Manufacturer Address, City Country Authorized Representative in Europe ASUS COMPUTER GmbH Address, City Country ASUSTek COMPUTER INC. No. 150, LI-TE RD., PEITOU, TAIPEI 112, TAIWAN R.O.C TAIWAN HARKORT STR. 21-23, 40880 RATINGEN GERMANY Notebook PC User Manual...
Need help?
Do you have a question about the G51J and is the answer not in the manual?
Questions and answers