Table of Contents
Advertisement
Quick Links
Installation Manual - Intended for specialized personnel or expert users
Please read these instructions carefully before installing, servicing, or operating the equipment.
This manual may be modified without notice. In the event of this manual being translated, the English version is definitive. For latest
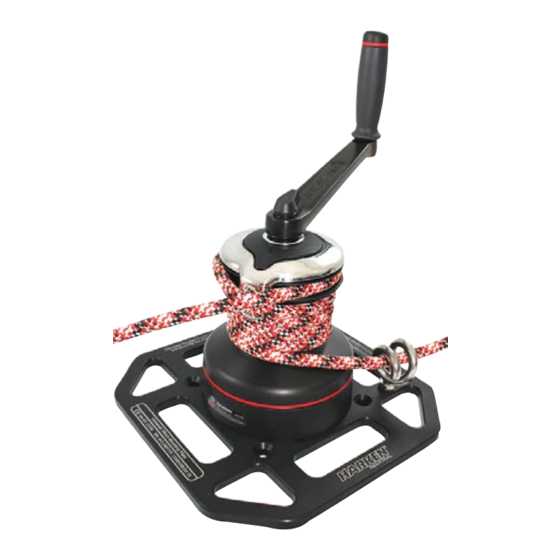
RIGGERS WINCH 500
manual revision go to www.harkenindustrial.com/manuals
PLEASE SAVE THESE INSTRUCTIONS
Maintenance
Parts
INRW500_A 03/19
3
4
5
6
7
8
9
10
10
11-13
14
15-17
18
19-20
21-22
Advertisement
Table of Contents

Subscribe to Our Youtube Channel
Related Manuals for Harken Industrial 500


Summary of Contents for Harken Industrial 500
-
Page 1: Table Of Contents
RIGGERS WINCH 500 Installation Manual – Intended for specialized personnel or expert users INRW500_A 03/19 Introduction Safety Precautions Applications/Limitations Specification Installation Plan Installation Pre-Use Checks Operation Lifting Loads Lowering Loads Maintenance Inspection Maintenance Disassembly 11-13 Cleaning Assembly 15-17 Declaration of Conformity... - Page 2 Riggers Winch 500 01/03/19...
-
Page 3: Inrw500_A
Such systems are classified as “machinery for lifting persons” and would require separate CE marking. Please read these instructions carefully before operating equipment. Keep these instructions in a safe place for future reference. Riggers Winch 500 01/03/19... -
Page 4: Applications/Limitations
Plate Winch Plate A. USE Harken Riggers Winch 500 is designed to be used as a manually powered, rope-handling winch secured on a ® universal mounting plate, for lifting, lowering and pulling loads. B. LIMITATIONS DO NOT USE: • With wire rope •... -
Page 5: Specification
SPECIFICATIONS Maximum Working Load: Winch: 500 kg Break Load: 2800 kg WARNING! Subjecting the winch to loads above the maximum working load can cause the winch to fail or pull off the mounting plate suddenly, possibly resulting in severe injury or death. -
Page 6: Installation
The following illustrate some possible ways that the plate can be mounted. Riggers Winch 500 - Location The Winch kit must be installed in a position to allow sufficient working space around the unit, so not to impede operation of the handle. -
Page 7: Pre-Use Checks
7) Winch drum cannot be turned by hand counter-clockwise 8) Handle can be inserted in winch and lock-in mechanism prevents accidental removal 9) Handle can be rotated in both directions, resulting in the winch drum rotating Riggers Winch 500 01/03/19... -
Page 8: Operation
(see images overleaf). Check that rope remains secured in self- tailing jaws while cranking. Failure to secure rope in jaws may cause rope slippage which can cause lifted load to fall, possibly resulting in severe injury or death. Riggers Winch 500 01/03/19... -
Page 9: Lowering Loads
WARNING! Use caution when lowering load using winch. Carefully hold rope when it is out of self-tailing jaws. Rope tail must not be released. Releasing rope tail will result in rope slippage, causing the load to fall, possibly resulting in severe injury or death. Riggers Winch 500 01/03/19... -
Page 10: Inspection
® CAUTION! Periodic service must be carried out regularly. Lack of adequate maintenance shortens the life of the Harken Riggers Winch 500, can cause serious injury and also invalidate the warranty. Installation ® and maintenance of Harken Riggers Winch 500 must be carried out exclusively by trained personnel. -
Page 11: Disassembly
5. Lift off the drum n°22 rotating and lifting it. 7. Remove the self-tailing arm support n°21 8. Slide out the central shaft n°19 9. Unscrew the 6 stainless hex screws n°16 (8 Nm/71 in-lb) NOTE not those painted red Riggers Winch 500 01/03/19... - Page 12 14. Slide off gear n°3 15. Slide off gear n°14 16. Slide off gear n°10 18. Remove washer n°9 17. Remove the pawls n°5. To facilitate the operation press the spring against the pawl with a blade. Riggers Winch 500 01/03/19...
- Page 13 Tools You Will Need If it is necessary to replace winch jaws, proceed Medium flat-blade screw- as follows: driver Torque to apply when assembling 1. Unscrew four (4) screws (23) 2. Remove jaws (22). 4 Nm/35 in-lb) Riggers Winch 500 01/03/19...
-
Page 14: Cleaning
2. Use brush to lightly lubricate all gears, gear pins, teeth, and all moving parts with Harken Grease. 3. Lightly lubricate pawls and springs with Harken Pawl Oil. Do not use grease on pawls! BK4513 BK4521 Riggers Winch 500 01/03/19... -
Page 15: Assembly
Correctly position spring in housing as shown at left. Hold spring closed and slide pawl into housing. Once in position, check that pawls can be easily opened and closed with a finger. If you have questions concerning the assembly procedure contact Harken Tech Service: techservice@harken.it. ® Riggers Winch 500 01/03/19... - Page 16 5. Slide off the hub n°28 and the cover n°29 (4 Nm/35 in-lb) 7. Remove the self-tailing arm n°26 by 8. Lift off the drum n°22 9. Note down serial number of winch and rotating and lifting it. record Riggers Winch 500 01/03/19...
- Page 17 Extreme heat may distort composite parts. Extreme cold can cause the material to become brittle and cause the lubrication to congeal. Storage Store in clean/dry place Avoid impact damage which could damage jaws and skirt; ensure good packaging when shipping. Riggers Winch 500 01/03/19...
-
Page 18: Declaration Of Conformity
4 turns XXXXXXXXX ø 8-12 mm diametro fune clockwise Max Working Load (MWL) 500 kg 1. Manufacturer’s name 2. Product name and code Label affixed to drum skirt 3. Manufacturer's address 4. Pictogram instruction to read the manual 5. -
Page 19: Exploded View
Parts EXPLODED VIEW 1/2 Riggers Winch 500 01/03/19... - Page 20 Parts EXPLODED VIEW 2/2 Riggers Winch 500 01/03/19...
-
Page 21: Parts List
Parts Riggers Winch 500 Pos. Q.ty Code Description A94141300 Winch 40 Base Assy Winch Serial Number Sticker A94141400 Assembly - Skirt Winch 40** S 41302 00 04 Gear Z12 S 41303 00 04 Pawls Carrier Ø8xN2* S 00008 00 03 Pawl Ø8*... - Page 22 Pos. Q.ty Code Description Plate Riggers winch 500 S 688540052 DRIVE LINE S 688560002 Nut M10 UNI5588 M 0602803 Screw M6x30 M 0624203 Washer 10.5 U1751 DIN127 M 0611703 Riggers Winch 500 01/03/19...
- Page 23 Riggers Winch 500 01/03/19...
Need help?
Do you have a question about the 500 and is the answer not in the manual?
Questions and answers