Advertisement
Advertisement
Table of Contents

Related Manuals for Improved Racing EGM-136

Summary of Contents for Improved Racing EGM-136
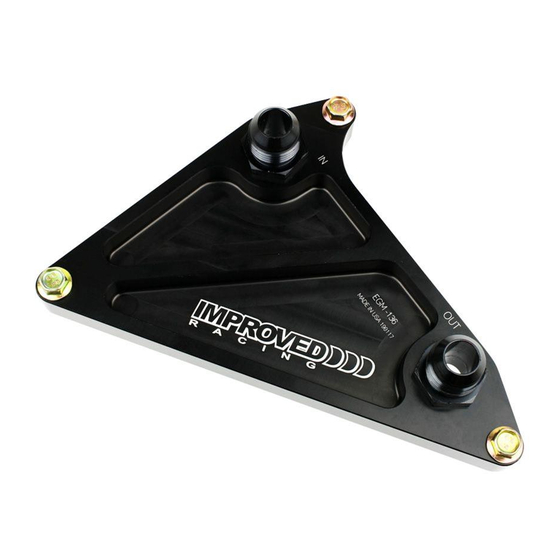
- Page 1 2016+ Camaro SS/ZL1 & CTS-V oiL CooLer adapTer parT No. eGm-136 MADE IN USA ImPoRtAnt: ReAd these InstRuCtIons In theIR entIRety PRIoR to InstALLAtIon For contact information, visit www.improvedracing.com Copyright © 2008-2020 Improved Racing Products, LLC. All rights reserved. Rev 201117...
- Page 2 2016-2019 Cadillac Cts-V • 2016+ Chevrolet Camaro V8 • All Lt1 / Lt4 crate engines with Gm oil pan part number 12639931 SCHemaTiC, parTS LiST & HardWare Figure 1 - EGM-136 Schematic Item Qty Part Number Description eGm-136 oil Pan Adapter...
- Page 3 (17.8 cm x 15.5 cm x 1.5 cm) -10 sAe J1926-1 straight thread o-ring Port, Fitting Ports Weight (Adapter Only) 10.5 oz (298 g) EGM-136 Material CnC-machined 6061-t6 Billet Aluminum EGM-136 Finish mIL-A-8625, type II, Black Anodizing prepariNG For iNSTaLLaTioN DO NOT CAP OFF THE OIL COOLER PORTS after the adapter is in- stalled.
- Page 4 2. Remove all necessary underbody panels to gain access the oil pan and radiator. 3. Place a drain pan under the oil fi lter and remove the fi lter. Oil may be hot! 4. Place a drain pan under the factory oil cooler and use a 10 mm tool to parti ally loosen all four m6 screws securing the factory oil cooler to the oil pan.
- Page 5 FACTORY HRG-1010 O-RING O-RING Figure 3 - Installing the HRG-1010 Replacement O-Ring on Factory Fitting 13. Assemble oC-10 and the factory oil cooler fitting as shown in Figure 4. torque to 20 lb-ft (27 n-m) using a vise and 1- inch or 1- inch tool depending on which side is in the vise.
- Page 6 Refer to Figure 1. 2. use a 10 mm tool to secure eGm-136 to the oil pan using the three hsC- 1056 m6 flange screws. torque to 11.8 lb-ft (16 n-m). 3. Install the adapter fittings into eGm-136. torque to 20 lb-ft (27 n-m).
- Page 7 15. Reinstall all underbody panels and lower the vehicle back onto the ground. 16. Reinspect for leaks after one heat cycle and re-tighten fittings if neces- sary. Installation is now complete. thank you for purchasing an Improved Racing product! Visit www.improvedracing.com for additional support...
Need help?
Do you have a question about the EGM-136 and is the answer not in the manual?
Questions and answers