Table of Contents
Advertisement
Quick Links
Advertisement
Table of Contents

Related Manuals for BSi OGCare


Summary of Contents for BSi OGCare
- Page 1 USER’S MANUAL In-Vitro Diagnostic aid for self testing of GLUCOSE...
-
Page 2: Table Of Contents
Test Principle Special Features Usage and Storage Important Test Strip Information Safety Information Healthcare Professional Information OGCARE Meter OGCARE Test strips Explanation of the display Disinfection before test Testing Your Performing a Blood Glucose Test Blood Glucose Flagging Test Results... - Page 3 Meter Setup, Using The Set-Up Mode Memory and Deleting Test Results Downloading Reviewing Test Results Downloading Test Results to a PC When perform Control Tests Control Test Performing a Control Solution Test Understanding Control Solution Test Results Performing the Check Strip Test Cleaning your meter Maintenance Replacing Battery...
-
Page 4: About Your
Before using your monitoring system for the first time, please read this manual carefully. # INTENDED USE This OGCare Blood Glucose Monitoring System is intended for the quantitative measurement of the concentration of glucose in whole blood from fingertip, palm and forearm by diabetic patients or healthcare professionals as an aid in the management of diabetes. -
Page 5: Application
Glucose in the blood sample reacts with glucose oxidase (GOD) on the test strip and a harmless DC electrical current is produced. This current is measured by the OGCare Meter and displayed as your blood glucose result. The strength of these currents changes with the amount of glucose in the blood sample. -
Page 6: Usage And Storage
# USAGE AND STORAGE • Before using your monitoring system, please place it in the environment of system’s normal operating temperature ranging 10-40°C (50-104°F ) for about 20 minutes. • Don’t allow dust and foreign bodies into test strip slot in order to avoid affecting the system’s accuracy. -
Page 7: Important Test Strip Information
• Be sure to check the glucose measurement unit on the meter before the test. • Store in capped vial in a cool and dry environme n t between 5-30°C (41-86°F). • Keep away from direct sunlight and heat. Do not refrigerate. CAUTION: OGCare Meter is for use only with OGCare Strips... -
Page 8: Safety Information
• Before using the system, please read this manual carefully. • The meter and test strips should be handled at same temperature. • For accurate results, keep the OGCare blood glucose monitoring system at test place under the operating temperature 10-40°C (50-104°F ) for more than 20 minutes before testing. -
Page 9: Healthcare Professional Information
• When using the OGCare meter follow always the recognized procedures for handling objects that are potentially contaminated with human material. • Practice the health and safety policy of your laboratory or institution. -
Page 10: Ogcare Meter
#OGCARE METER FRONT Display “M” Button “C” Button Test strip slot... - Page 11 BACK USB port Battery lid Serial number...
-
Page 12: Ogcare Test Strips
TEST STRIP VIAL TEST STRIP • Use OGCare Test Strip with the OGCare Meter. • Please check the expiration date of test the strips before use. • Please write the opening date of the new test strip vial in order to avoid using... -
Page 13: Explanation Of The Display
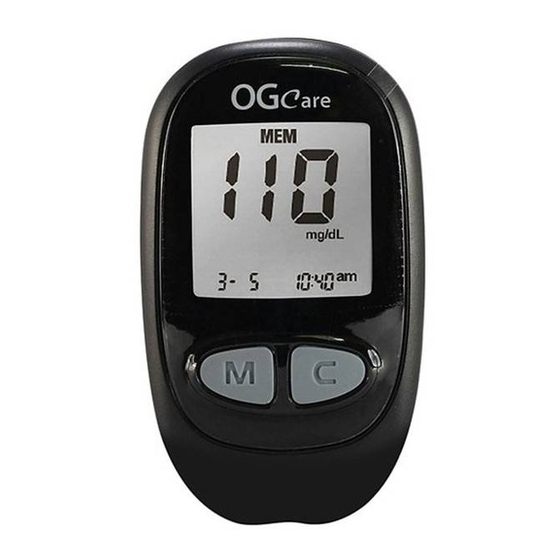
# EXPLANATION OF THE DISPLAY Low Battery Warning Stored test result Test results Unit of measurement Temperature error No beep Pre/post meal mark Ready to test Control solution Average result Month/Date 8 7 9 Time... -
Page 14: Disinfection Before Test
TESTING # DISINFECTION BEFORE TEST YOUR BLOOD GLUCOSE Before test, please clean hands with soap and water and then dry then well. You can also use an alcoholic cotton cloth to clean the finger. Please wait until the alcohol disappears completely. -
Page 15: Performing A Blood Glucose Test
# PERFORMING A BLOOD GLUCOSE TEST Turn the cap counterclockwise to remove it. Insert the lancet into the lancet holder and push down firmly until it is fully seated. Do not twist the lancet. Twist the protective disk until it separates from the lancet. Replace the lancing device cap. - Page 16 Insert a test strip to turn on the meter. Push it all the way in until it will go no further. Avoid bending the test strip. The meter identifies the code number automatically. Compare the code number display with the code number on the test strip vial. If they do not match try again with an another test strip.
- Page 17 Select the puncture depth if necessary with the lancing device cap. Activate the lancing device by pulling back the barrel until it clicks. If it does not click, the lancing device may have been activated when the lancet was inserted. Hold the lancing device firmly against your finger.
- Page 18 Put blood on top of the test strip. When you hear the beep sound, you have enough blood in the test strip. After five seconds, the test result will appear. NOTICE: When the blood sample is not sufficient, the display will show the message of ‘Er 4’.(Please refer to error messages in this manual.)
- Page 19 CAUTION: • Do not drop the blood directly on the end of the test strip. The sample channel at the end of the strip should be filled with blood. • When you hear the beep sound, you have enough blood in the test strip.
- Page 20 Display for unit mg/dL Display for unit mmol/L The test result will appear after the meter counts down 5 seconds. During count down, please do not shake it. After 5 seconds, you can hear the beep sound: the screen will display test result. After taking the strip out, the meter will be turned off automatically.
- Page 21 CAUTION: • Never use a lancet that has been used by someone else. • Do not leave the lancet in the device after use and discard it properly. • If the lancet cap has loosened or fallen, please do not use it. •...
-
Page 22: Flagging Test Results
# FLAGGING TEST RESULTS Display for unit mg/dL Display for unit mmol/L If you wish to flag post-meal results or control solution results, you can flag the meal or control solution mark using ‘M’ or ‘C’ button with the test result shown on the display, and the test strip still in the meter. -
Page 23: Handling The Used Test Strip
# HANDLING THE USED TEST STRIP After testing, please write the test result in the logbook every time. When you ask the doctor please take the logbook out: it is helpful for your treatment. Use the strip ejector located backward of the meter to remove the used test strip. -
Page 24: Alternative Site Testing (Ast)
# ALTERNATIVE SITE TESTING (AST) Contact your healthcare professional before you begin using anyone of these alternative sites to test your blood glucose. 1. Alternative site results may be dif f erent from fingertip results when glucose levels are changing rapidly (e.g., after a meal, after taking insulin, or during or after exercise). - Page 25 Do not rely on test results at an alternative sampling site, but use samples taken from the fingertip, if any of the followings applies: - you think your blood sugar is low - you are not aware of symptoms when you become hypoglycemic - the site results do not agree with the way you feel - after a meal - after exercise...
-
Page 26: Lancing And Sampling From
# LANCING AND SAMPLING FROM AN ALTERNATIVE SITE Sampling from your palm or forearm allows you to use your fingertips less often. You may find that obtaining a blood sample from an alternate site is less painful than using a fingertip. Getting a blood sample from your forearm or palm is different from getting a sample from your fingertips. - Page 27 Palm sampling Choose a fleshy area on the palm below your thumb or pinky finger. Select a spot with no visible veins and away from deep lines which may cause your blood sample to smear. Palm NOTICE: • You may need to wait a little longer to get a large drop of blood from the forearm or palm.
- Page 28 METER SETUP, MEMORY # USING THE SET-UP MODE DOWNLOADING Press “M” button for 3 seconds, you will hear the beep, the screen will show the whole symbols of the system. After 1 second, the ‘SEt’ will be displayed on the screen.
- Page 29 3. Setting Month: when month blinks, press and release “C” button until the correct month appears. Press ‘M’ button to set and move to date set mode. 4. Setting Date: when date blinks, press and release “C” button until date appears.
- Page 30 6. Setting Hour: when hour blinks, press and release “C” button until the correct hour appears. Press ‘M’ button to set and move to minute set mode. 7. Setting Minute: when minute blinks, press and release “C” button until correct minute appears.
- Page 31 Display for unit mg/dL Display for unit mmol/L 9. Glucose measurement unit: your new meter has the glucose measurement unit set to “mg/dL” or “mmol/L”. You cannot change the unit. Otherwise, please contact your Customer Service. CAUTION: • Use of the wrong glucose measurement unit may cause you to misinterpret your blood glucose level and incorrect treatment.
- Page 32 10. Beeper ON/OFF: your new meter has the beeper preset to “On”. You can set the beeper to “Off” with pressing ‘C’ button, if you prefer this will not work during the system functioning. Press ‘M’ button to set and move to the next mode.
- Page 33 # DELETING TEST RESULTS Turn on the meter by pressing button ‘M’ for 3 seconds to enter the Set-Up mode Display shows the “SEt” when enter Set-Up mode. Press and release ‘M’ button until the screen will show the word ‘dEL’ briefly.
- Page 34 If you wish to leave the test results in the memory select “NO” option. You can toggle the option with ‘C’ button. Press ‘M’ button to move to the next set mode. If you wish to delete the all test results from the memory, toggle the option to set “YES”...
- Page 35 # REVIEWING TEST RESULTS Display for unit mg/dL Display for unit mmol/L Display per mg/dL Display per mmol/L Begin with the meter off. Press ‘M’ button, you will hear a beep sound and the meter will be turned on . The screen will display the date and time.
- Page 36 Display for unit mg/dL Display per mg/dL Display for unit mmol/L Display per mmol/L Press ‘C’ button once, the screen will show the most recent test result. Each time pressing ‘C’ button, the screen will show the previous test result. After completing the reviewing, press ‘M’...
- Page 37 # DOWNLOADING TEST RESULTS TO A PC You can transfer the test results from the OGCare Meter to a computer, where they can be summarized in a report with graphs and tables. To make use of this feature, you need OGCare Link Software and the OGCare Link Cable .
- Page 38 CONTROL # WHEN PERFORM CONTROL TESTS TEST Performing a control test lets you know that your meter and test strips are working properly to give reliable results. You should perform a control test when: - You open a new box of test strips. - You left the test strip container open.
- Page 39 # PERFORMING A CONTROL SOLUTION TEST Insert the test strip. Then the code number will appear. Be sure the meter and teststrip codes match. If they do not, please contact your Customer Service. Shake well before using the control solution. Discard the first drop. Wipe the dispenser tip.
- Page 40 Display for mg/dL Display for mmol/L Display per mg/dL Mark all control solution test with ‘Control Solution Mark’ to distinguish them from blood glucose test results in the meter memory. Marked control solution tests will not be included in your averages. CAUTION: If you continue to get control solution test results that fall outside of the range printed on the vial, the system may not be...
- Page 41 # UNDERSTANDING CONTROL SOLUTION TEST RESULT mg/dL mmol/L 103-154 5.7-8.5 Level 1 283-325 15.7-18.1 Level 2 Example The label on the vial of test strips show acceptable range for both level 1 and 2 of control solution. The result obtained should fall within this range. Be sure to compare the result with the correct level of control solution.
- Page 42 OGCare Glucose Check Strip only tests the function of the meter. To test the entire system, please rely on the results from testing a control solution. Begin with the meter off, insert the OGCare Glucose Check Strip in the meter’s test strip slot.
- Page 43 AND TROUBLE- # CLEANING YOUR METER SHOOTING Caring for your OGCare meter is easy. Just keep it free of dust. If you need to clean it, follow guide lines carefully to help you to get the best performance possible: Make sure the meter is off Gently wipe the meter’s surface with a soft cloth slightly dampened...
- Page 44 # REPLACING BATTERY When the energy of the batteries is not enough, the screen shows and blinks the battery mark. It indicates that the energy left could operate testing about 50 times more. In this period, we suggest that you should replace the battery. After replacing the battery, the stored results will remain, but the date and time need to be reset.
- Page 45 # SCREEN MESSAGES SOLUTION MESSAGES DESCRIPTION Use a new test strip Test Strip is used or damaged. Blood sample was applied to Apply blood sample to the test the test strip before the blood strip after the blood symbol appears symbol ( ) appeared on the screen.
- Page 46 SOLUTION DESCRIPTION MESSAGES Please check if the strip is OGCare. You put the wrong strip. Please check the strip is inserted properly. Please test once again with a new test strip. Please contact Customer Service This error is shown when the meter itself finds out internal problems.
- Page 47 # TROUBLESHOOTING CAUSES SOLUTIONS Make sure the test strip is inserted into the test strip slot completely. The meter does Check whether the test strip has foreign bodies adhered. not work after the Make sure the blood is applied to the test strip correctly. blood is applied Make sure the test strip inserted direction is correct and repeat test.
- Page 48 OGCARE MODEL NAME GLUCOMETER CALIBRATION PLASMA-EQUIVALENT SAMPLE VOLUME 0.5 µL TEST STRIPS TYPE OGCARE STRIPS RESULT RANGE 20-600 MG/DL (1.1-33.3 MMOL/L) TEST TIME 5 SECONDS METER POWER SOURCE DC 3V (CR2032) X 2 BATTERY LIFE APPROXIMATELY MORE THAN 1000 TESTS...
- Page 49 # WARRANTY The makers guarantee that the OGCare Blood Glucose Meter shall be free of defects in material and workmanship for a period of three years. This guarantee is valid from the date of purchase. The guarantee extends only to the original purchaser and is not trans- ferable.
- Page 50 # EMC TEST RESULTS It is the manufacturer’s responsibility to provide equipment electromagnetic compatibility information to the customer or user. It is the user’s responsibility to ensure that a compatible electromagnetic environment for the equipment can be maintained in order that the device will perform as intended.
- Page 51 # WARRANT CARD (3 YEARS) Name: Age: Sex: Address: City: zip code: Tel. Serial No.(Back of the Meter) Date of purchase: Place of purchase: Notes : # ADDITIONAL SUPPLIES The following supplies and accessories are available from your authorized Biochemi- cal Systems International representative, pharmacies, or your medical/surgical supply dealer: Control Solutions...
- Page 52 BIOCHEMICAL SYSTEMS INTERNATIONAL S.R.L. Loc. Palazzo del Pero, 23 Arezzo AR 52100 (ITALY) tel. +39 0575 984164 biosys@biosys.it www.biosys.it MOGC ED2016 APRILE ENG...
Need help?
Do you have a question about the OGCare and is the answer not in the manual?
Questions and answers