
Related Manuals for MiniFinder Nano


Summary of Contents for MiniFinder Nano
- Page 1 MiniFinder Nano ® User Manual English Updated: 2020/06/26 © 2020 MiniFinder® All rights reserved...
-
Page 2: Package Contents
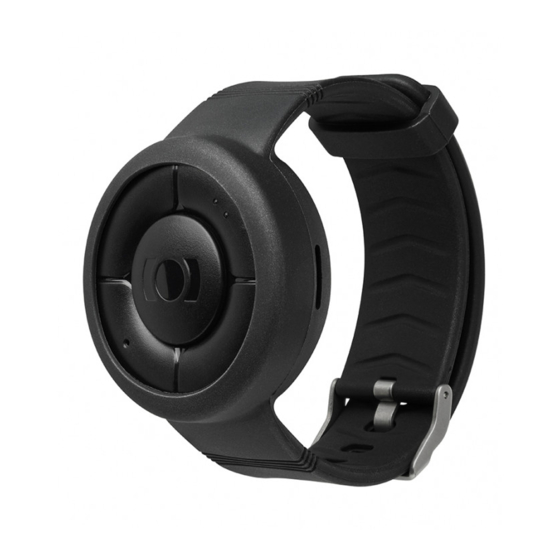
We believe you made the right choice. MiniFinder ® ® Nano is full of smart features that help you monitor, protect and locate your loved ones remotely. Before you start using your Nano, please read this manual in its entirety. PACKAGE CONTENTS PACKAGE CONTENTS 1. -
Page 3: Product Management
User Manual PRODUCT MANAGEMENT PRODUCT MANAGEMENT A. Please charge your device for 4 hours before using for the first time. B. During charging, the blue LED is steady. C. Blue LED light goes out when fully charged. D. START the unit by pressing ON/OFF button for 3 seconds. - Page 4 User Manual EXPLANATION OF LED LIGHTS EXPLANATION OF LED LIGHTS GREEN LED: Slow blink = Searching for GSM network 1 sec Single blink = Connected to GSM network 3 sec Double blink = Connected to GPRS network 3 sec...
- Page 5 = Nano has detected a fall. Click the SOS button to cancel the alarm. 7. “Calling contact number 1” = When fall alarm is detected, Nano dials authorized number 1. Only if fall alarm is activated. 8. “Calling contact number 2”...
-
Page 6: App Overview
User Manual APP Overview APP Overview After logging in the MiniFinder GO APP, you will see the view as shown below. This consists of 11 different parts: 1. Menu (Device list) 2. Alarm notification 3. Show map 4. Create / Edit GeoFence 5. -
Page 7: Device Status
Alarm Notification Alarm Notification MiniFinder GO APP supports various types of alarms: Geofence alarm, Fall alarm, SOS / Panic alarm, Low battery alarm and speeding alarm. All alarms send an alarm notification to the phone’s or tablet’s screen. Audio alert, vibration and flashing alarm can be activated when opening the APP. -
Page 8: Action Menu
User Manual Action Menu Action Menu At the far right of the row of units is an Action Menu (three vertical points). In the Action Menu you can see history (History), call (Call), activate live tracking (Live tracking) and change settings (Setup). - Page 9 User Manual - Select a time period and then click “View History” to display the device’s positioning history. - The following information is displayed for positioning history: 1. A is the start position 2. B is the end position 3.
- Page 10 User Manual - When bringing up the sub screen, the detailed statistics are shown, including total distance, total time and max speed. To clear the selected history, simply click “Clear History” Call the Device Call the Device To ring your device from your telephone, simply click on Action Menu (1) and then click on “Call”...
-
Page 11: Live Tracking
User Manual Live Tracking Live Tracking Live tracking allows users to track their MiniFinder Nano in real time in a quick and easy way over a short period of time. By clicking on Action Menu (1) and then Live Tracking (2), the position update intervals change to 10 seconds for 10 minutes. -
Page 12: Make A Call
Telephone number 1 is used as the first alarm receiver of the panic alarm (SOS button). Only phone number 2 receives calls from the call button. - Open MiniFinder GO APP, click the Action Menu (1) and then click on the “Setup” (2). - Enable authorization (3). -
Page 13: Low Battery Alarm
Fall Alarm Fall Alarm An accidental fall can cause devastating consequences. When an accidental fall occurs, the MiniFinder remote sensor sends an alarm to the APP in the form of an alarm notification on the mobile device’s screen and an alarm bell in the APP. - Page 14 User Manual After SOS function is activated, an alarm notification is sent to the MiniFinder GO APP if the SOS / panic alarm is activated on the device. The alarm is followed up with telephone calls to authorized telephone numbers or a local alarm center.
-
Page 15: Speeding Alarm
User Manual Speeding Alarm Speeding Alarm Click Action Menu (1) of the device that you want to set Speeding Alarm to, and then click “Setup” (2). Activate ”Speeding Alarm” (1). Drag the circle to a desired speed (2). Finally, click “Apply” (3) to set the alarm for speeding. -
Page 16: Power Saving Mode
User Manual Power Saving Mode Power Saving Mode Power Saving Mode is an effective way to optimize battery life. GPS and GSM modules will only be acti- vated in case of an alarm or event occurs, otherwise, stay deactivated. -
Page 17: Geofence Alarm
User Manual Geofence Alarm Geofence Alarm Geofence is a virtual limited area on the map. When a GPS device leaves a defined area, an alarm notification, a ringing and an e-mail are sent according to the preferences in the setting. - Page 18 User Manual 2) Edit a GeoFence - Start by clicking on the GeoFence tab (1) as shown below. Then click “Edit” (2). - In the list, select a GeoFence that you want to edit (3). - To delete a Geofence, click on the dustbin (4).
- Page 19 Tag Function (Mark Places) Tag Function (Mark Places) On the map in the MiniFinder GO APP, you can mark places with particular information. - Long press on the place where you want to mark on the map. (1) - You can give a name (2), a description (3), an icon (4) on the map and even attach an image (5).
-
Page 20: App Settings
User Manual APP Settings APP Settings - Click on the gear symbol to make settings in the MiniFinder GO APP. - Settings Menu. 1. Number of licenses and your username. 2. Change your password. 3. Map selector (Classic, Hybrid, Terrain and Satellite) 4. -
Page 21: Memory Function
(eg in sparsely populated areas, indoors, underground locations, etc.). Stored positioning data is automatically transmitted as soon as GSM coverage is available again. This function depends on the additional service of MiniFinder GO. Contact your dealer for more information. SAFETY STATEMENT... -
Page 22: Recycling Information
EU (European Union) EU (European Union) Declaration of Conformity with Regard to the EU Directive 1999/5/EC MiniFinder Sweden AB is authorized to apply the CE Mark on MiniFinder , thereby declaring conformity ® to the essential requirements and other relevant provisions of Directive 1999/5/EC. -
Page 23: Technical Specification
User Manual TECHNICAL SPECIFICATION TECHNICAL SPECIFICATION Size 41 mm x 16 mm Weight Battery 3.7V 380mAh, rechargeable GSM Frequency 900/1800 850/1900Mhz Power Source 5V DC Operating Temperature -20°C to +70°C Fix Time Against GPS Active 1s, Warm 5s, Cold 15s... - Page 24 www.minifinder.com...
Need help?
Do you have a question about the Nano and is the answer not in the manual?
Questions and answers