Table of Contents
Advertisement
Advertisement
Table of Contents

Subscribe to Our Youtube Channel
Related Manuals for Archos Jukebox Jukebox FM Recorder


Summary of Contents for Archos Jukebox Jukebox FM Recorder
- Page 1 Jukebox FM Recorder User’s Guide 101 496 Manual version 1.1...
-
Page 2: Table Of Contents
Introduction to ARCHOS Jukebox FM Recorder...5 Technical Specifications ...6 Before you use the Jukebox FM Recorder ...7 Operating your Jukebox FM Recorder...8 4.1 Connections ... 8 4.2 Controls... 9 Jukebox FM Recorder Functions...11 5.1 Starting up and shutting down your Jukebox ... 11 5.2 Playing MP3 Music ... -
Page 3: Warnings And Safety Instructions
Warranty and Limited Liability This product is sold with a limited warranty and specific remedies are available to the original purchaser in the event the product fails to conform to the limited warranty. Manufacturer’s liability may be further limited in accordance with its sales contact. In general, the manufacturer shall not be responsible for product damages caused by natural disasters, fire, static discharge, misuse, abuse, neglect, improper handling or installation, unauthorized repair, alteration or accident. -
Page 4: Fcc Warning Statement
ARCHOS. All brands and products names are registered trademarks and the property of their respective owners. Specifications are subject to change without notification. Errors and omissions excepted. -
Page 5: Introduction To Archos Jukebox Fm Recorder
We at ARCHOS are excited about this product and believe that you will enjoy it for years to come. In order to best enjoy this product, please read through this manual and run the Flash... -
Page 6: Technical Specifications
Software scalability: Downloadable firmware updates from ARCHOS web site. Power Source: Internal Power: Flat Lithium-Ion battery. ( ARCHOS type only). This battery will last for the life of the product (need not be changed). External Power: Use only the AC/DC Charger/ Adapter delivered with product. -
Page 7: Before You Use The Jukebox Fm Recorder
Before using the Jukebox FM Recorder for the first time, you are required to recharge the built in batteries for a minimum of 6 hours. Plug the ARCHOS AC power adaptor into an available wall outlet, then plug the mini power connector to the “DC In” of the Jukebox. The Jukebox FM Recorder will display a message screen to indicated battery charge cycle is active, as shown below. -
Page 8: Operating Your Jukebox Fm Recorder
USB 2.0 connection. DC POWER IN PLUG Use this plug to connect your DC Power Adapter. Use ONLY the included ARCHOS AC Adapter. Your Jukebox will display a message screen to indicate charging is in progress. You can use your Jukebox during the charging period. -
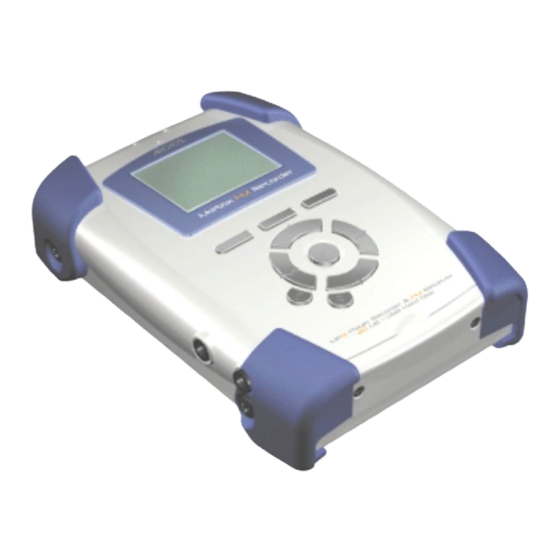
Page 9: Controls
4.2 Controls Power on indicator Built-in microphone LEFT ON/Menu Off/stop/cancel F1, F2 or F3 : These function buttons perform several operations, depending upon the mode your Jukebox is in. The function of each button is displayed above it on the LCD screen. UP or DOWN : These buttons allow you to navigate between files or subfolders while your Jukebox is in Browse Mode, or to choose an option in a menu. - Page 10 LCD Icons The Jukebox FM Recorder uses several icons on it’s LCD to convey important system and file information. Please refer to the diagram below for location and identification. Battery level Level within directory structure Current location within directory Go to FM Radio mode Artist Name Tag (ID3) or current...
-
Page 11: Jukebox Fm Recorder Functions
Jukebox is in Browser mode and the root folder of the hard disk is displayed (use navigation buttons to move through folders and files). If you have ‘RESUME’ mode set, you will return to the last folder you were in when you shut off your Jukebox. ARCHOS Jukebox Recorder OS version : 1.28 5.2 Playing MP3 Music... - Page 12 Once in the folder you will see your MP3 tracks. Use the “p” and “q” arrow buttons to navigate through the folder. Once the triangle (your cursor) is in front of the song you want to play, press the center “>II” button. Your Jukebox FM Recorder will begin to play the selected song and the LCD will display current track data.
-
Page 13: Recording Mp3 Music From An External Source
5.3 Recording MP3 Music from an External Source Using the supplied audio cable, plug the two RCA type connectors into the Line-out of the audio device (audio player or stereo set) you want to record from. Plug the other end into the line-in of the Jukebox FM. -
Page 14: Fm Radio Operation
Incremental Recording Feature: During the recording process, your can press F2 [NEXT] to end the current recording and begin a new recording. For example, you can press F2 during the blank space between music tracks on a CD. (You should be aware of all applicable laws concerning the copying of copyrighted materials) Your current recording file name will have a numbered part (pt) appended to it. - Page 15 Radio Station Preset Memories List: While in Radio mode, press F2 [LIST] to enter the radio station preset list. You can use the “p“ and “q“ buttons to select a preset radio station. Locate the preset desired then press the center “>||” play button . The frequency will change to match the chosen preset. Press the F1 [DEL] button to delete the selected preset station.
-
Page 16: Fm Radio Mp3 Recording
5.5 FM Radio MP3 Recording Press F1 [RADIO] button to enter the radio menu. Press the F3 [REC] to start recording the currently displayed FM station. Please note that your FM Recorder has a 30 second Pre-Recording buffer, this means that when you start recording a FM broadcast, your song file will have the last 30 seconds of the broadcast stored in RAM. - Page 17 Editing a Retro-Recorded Song (Cut-in and Cut-out) Go to the browser and play the recording you made from the radio. You will notice that the F1 button is labeled [Edit]. If an MP3 file was not recorded from the radio, the word [Edit] will not appear.
-
Page 18: Music Playlists
5.7 Music Playlists A Playlist is a file that contains a list of music tracks to play. This features allows you to compile a list of your favorite songs and store them in file for playback later. Playlists can support up to 999 songs and can contain songs from multiple folders. - Page 19 Saving a Playlist: Once your current Playlist is populated with song tracks you can then save the Playlist for future use. Browse to a location you wish to save the Playlist to. We suggest you create a new folder called “Playlists”...
-
Page 20: Playing A Playlist
Naming a Playlist: Your Jukebox FM will propose the name “Playlist 01” . If you do not want this name, then use the F2 [DEL] button as a backspace key. Using BACK, FORWARD, UP, and DOWN, locate the character you want to enter, then press the “>||” play button enter it. Use F3 to select between [èabc] (lower case), [èABC] (upper case) or [è123] (digits). -
Page 21: Updating Jukebox Fm Recorder Firmware
Playlist” function. 5.8 Updating Jukebox FM Recorder Firmware New Jukebox firmware (internal software) can be downloaded from the ARCHOS web site (www.ARCHOS.com). In order to upgrade the existing firmware, connect your Jukebox to your computer, and copy the firmware update file into the root directory (top level folder) of your Jukebox FM Recorder’s hard drive. -
Page 22: Deleting Files/Folders And Creating Folders
5.9 Deleting Files/Folders and Creating Folders Deleting Files and Folders: Locate the file or folder you want to delete. Once the triangular cursor is in front of the file or folder, press F3 [File] and then press F3 [Del] to delete the file or folder. If it is a folder, the entire contents of the folder will be deleted. -
Page 23: Jukebox Fm Recorder Settings
To change the settings for the Jukebox FM Recorder, first go to the browse mode. Now, press the “On” button momentarily . You will see three possible setting types, F1 [Music] for Music settings, F2 [Rec] for Recording Settings, and F3 [Set] for General Settings. F1 [Music] is the Music settings menu and is used to change sound quality, play modes, Playlists, and Radio functionality. - Page 24 2) Playlist Submenu There are 4 menu items in the Playlist submenu. Select the desired function by using the “ “q“ arrow buttons. After selecting, press the PLAY button to enter the selected function. Press the “Off” button to return to Music menu of Jukebox FM Recorder. Start Playlist : Use this option to start playing the current Playlist.
- Page 25 Radio Submenu There are 2 functions in the Radio submenu. Select the desired function by using the “ arrow buttons. After selecting, press the PLAY button to turn the selected function on/off or to adjust. Press the “Off” button to return to the Music menu. Stereo : Use this option to choose the stereo mode, On or Off.
-
Page 26: Recording Settings
6.2 Recording Settings Press the F2 [Rec] button to enter the Recording settings menu: In this menu, there are 6 functions available. 1) Change Artist Tag Function: Use this option if you would like to add a new artist name or rename the current one in the ID3 tag data. - Page 27 3) Change Song Title Tag Function: Use this option if you are changing the Song Title ID3 tag. Enter new Title name. Follow same steps as outlined above. 4) Recording Source Submenu: There are three sources you can choose to record from. Select one then click “off” to go back to the previous menu Analog = line in from hi-fi set or other line level device Mic = built-in microphone.
-
Page 28: General Settings
OK. 3) Firmware Submenu: This option will display the current OS firmware version with date of creation. You can check the website www.ARCHOS.com for newer versions (and update information) of the firmware that become available. 4) Contrast Submenu: Use this option to adjust contrast. - Page 29 5) Power Off Timeout (Pwr Off t.) Submenu: Use this option to adjust the length of time before the Jukebox turns itself off. Use the right arrow to set a longer timeout (far right 10 minutes), use left arrow for a shorter timeout.
-
Page 30: Emergency Master Reset
To update the Operating System (OS) firmware, go to the ARCHOS website and download the zipped file. Upon unzipping it, you will find the new version of the OS (a file with the extension .ajz) and a revision history in a text file. -
Page 31: Connecting Your Jukebox Fm To A Pc
Windows USB Driver Installation: Note that the installation CD will be requested for Win98 SE only. Windows ME, 2000 and XP do not need the installation CD, standard Windows USB drivers will be installed automatically. Turn on your computer and wait until it has finished booting. Turn on the Jukebox. -
Page 32: Connecting Your Jukebox Fm To A Macintosh
Macintosh™ USB Driver Installation: Turn on your computer and wait until it has finished booting. Turn on Jukebox. ARCHOS power adaptor may be required if there isn’t enough power from the batteries. Gently connect one end of USB cable to the Jukebox. -
Page 33: Appendix A - Jukebox Fm Recorder Menus
Appendix A – Jukebox FM Recorder Menus Browse Mode Radio F1 [Add] Enter text F2 [List] Delete, move, edit preset radio stations F3 [Rec] Start radio recording F1 [pause], F2 [next], F3 [stop] Play to start, F3 [Stop] F2 [Next], F3 [Stop] File –... - Page 34 Settings Menu (Press ON button to enter into one of the setting types) Music Settings F1 [Music] Play Mode (Choose your Playing Mode with Up or Down and " >II " for validation) Normal Single Repeat All Shuffle Queue Scan Playlist Start Playlist Edit Playlist (Select Back, Move, Delete)
- Page 35 General Settings F3 [Set] Language English Francais Deutsch File Utility Free space (available / total) Diagnose Firmware (Firmware version) Contrast – Lightness / darkness of the LCD screen Pwr Off t. (auto shut down time – 1 minute gradations) B.light t. (auto backlight time –...
-
Page 36: Appendix B - Trouble Shooting
- Recharge the Jukebox using Only ARCHOS included power adaptor. - Check Battery Level on LCD. - Jukebox play features are disabled when USB cable is connected - Check to make sure that the battery trap door on the top of the Jukebox FM is securely in place - HOLD mode is on. - Page 37 - Check that you are not connected to a USB port repeated through a keyboard. - Try to connect to the USB port directly without going through a USB hub. - Out of battery power, use ARCHOS DC power adapter to recharge the Jukebox FM.
-
Page 38: Appendix C - Contact Technical Support
They can typically clear up your questions. There is a FAQ – Frequently Asked Questions section at the ARCHOS Website www.ARCHOS.com that can help answer many of your questions. If you need additional help, you may contact ARCHOS directly via the Web or by phone. 949-609-1400...
Need help?
Do you have a question about the Jukebox Jukebox FM Recorder and is the answer not in the manual?
Questions and answers