Table of Contents
Advertisement
Quick Links
Advertisement
Table of Contents

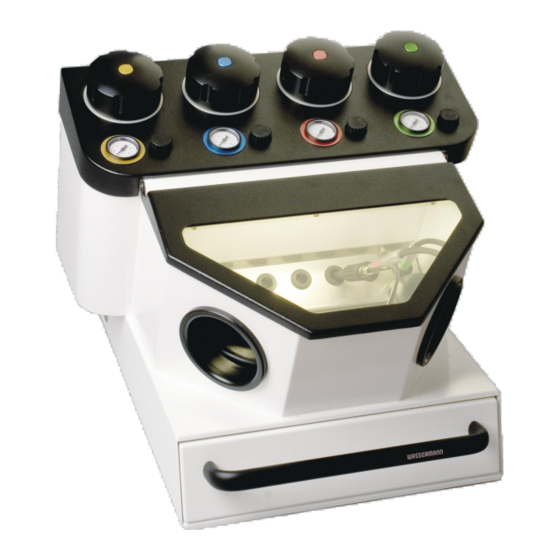
Summary of Contents for Wassermann Cemat-NT 4
- Page 1 Fine Blasting Unit Cemat-NT 4/3/2 Cemat- NT 3 Cemat- NT 4 Cemat- NT 2 USER MANUAL...
- Page 2 Dear customer, Thank you for choosing a product from the Wassermann range. Wassermann Dental- Maschinen incorporates the highest standards of quality and the latest technology. In order to enjoy maximum performance and years of trouble-free operation, please read this user manual carefully before you connect this device and start work, and operate the device according to the recommended guidelines.
-
Page 3: Table Of Contents
Contents 1 Features............................4 2 Safety Symbols used in this Manual.....................4 3 Safety Guidelines......................... 5 4 Responsibility for Operation or Damage..................5 5 Application............................ 6 6 Before Starting..........................6 6.1 Transport............................... 6 6.2 Storage..............................6 6.3 Installation............................. 7 7 Installation/ Start-up........................7 8 Operation............................. -
Page 4: Features
Features ■ precision long-life fine blasting units for blasting, roughening and polishing ■ multifunctional fine blasting appliances with 2 to 4 chambers ■ even, pulse-free blast from 1–6 bar, low consumption ■ individual, pneumatic blasting control by means of key contacts directly on the stylus ■... -
Page 5: Safety Guidelines
The unit has to be maintained and operated in accordance with this user manual. Wassermann Dental-Maschinen GmbH is not responsible for damage arising from the nonobservance of these instructions. -
Page 6: Application
Application The Cemat-NT family of fine-abrading units have multiple chambers for abrading, roughening and polishing, and are used to bring a lasting finish to the workpiece. The latest technology means that system blockages are virtually a thing of the past. The instruments operate accurately and can prevent clumping of the abrasive. -
Page 7: Installation
Installation Open the box, remove the packing materials, and carefully lift out the device and accessories. Check the included accessories. The device has to stand horizontally on a steady and even surface. Install the device in a place where it will not block the working area and the functionality (take the dimensions into account). -
Page 8: Operation
Operation General Operating Instructions All instructions for using the unit, whether in verbal or written form, are based on our own experience and experimentation and can only be regarded as guidelines. All abrasive tanks are colour-coded to match the pencils in the abrasion chamber. Thus, if you use the blue pencil, it will be fed with abrasive from the blue tank. -
Page 9: Abrading
Abrading You hold the pencil in your hand like a stylus. One finger must be placed at the top end of the flat recess. You then apply light finger pressure to initiate the abrasion process. Regulating the Abrasive The pressure regulator at the rear of the instrument is set at the factory to 6 bar. This setting must not be changed. -
Page 10: Troubleshooting
Troubleshooting Fault Cause Solution Irregular abrasive flow Too little abrasive in tank or Fill tank pencil nozzle too small Use larger nozzle or abrasive wet Replace with dry abrasive No abrasive flow Tank empty Fill tank Nozzle and/or hose blocked Unscrew nozzle from pencil and clean (eg, with a needle) and try process again;... -
Page 11: Care And Maintenance
Care and Maintenance 10.1 Cleaning Disconnect the power plug before starting any maintenance work. The identification plate has always to be kept in easily legible condition and has not to be removed. Remove external dirt from time to time with some form of cold cleaner. Use only cold cleaners to avoid damaging the paintwork or removing the lettering. -
Page 12: Maintenance/ Replacing Worn Components
10.2 Maintenance/ Replacing worn Components 10.2.1 Sleeves The sleeves can be replaced by gloves. The procedure is the same: 1. Remove the ring with the spring inside the chamber. 2. Remove the old sleeve. Install the new sleeve on its mount so that it faces the wall. 3. -
Page 13: Pencils
7. The hose is directed from the chamber through the port to the thrust valve, and then guided onto the nipple on the tank (do not forget the nut and the plastic cap). Before tightening the nut, make sure that the woven casing has been pushed fully over the rubber. -
Page 14: Nozzles
10.2.6 Nozzles You has to ensure that the nozzles suit the size of the abrasion media used. Replace nozzles by unscrewing the current nozzle and screwing on a new one. Important: Before you screw on the new nozzle, use a short burst of compressed air to clear any residual abrasive from the hose. -
Page 15: Spare Parts
190251 Spare fine blasting jet 1.2 mm 190252 We recommend the use of Wassermann blasting materials and our low-pressure suction units SG-10, SG-1/1 and SG-1/2 D with a long-life brushless motor and an extra large micro fine dust filterbag. 10.7 Repairs Servicing or repairs to the unit has only to be carried out by qualified technicians. -
Page 16: Technical Data
Technical Data Cemat-NT 4 Item no.: 190992 Cemat-NT 3 Item no.: 190990* Cemat-NT 3 115 V version Item no.: 190989*** Cemat-NT 2 Item no.: 190993** Voltage 220–240 V / 50/60 110–120 V / 50/60 Hz*** Power consumption 0.2 A/ 0.4 A *** Female connector power consumption max. -
Page 17: Eu Declaration Of Conformity
Product description: Fine Blasting Unit Dental-Maschinen GmbH for dental Rudorffweg 15-17 applications 21031 Hamburg Germany Model: CEMAT-NT 4 Item No. 190992 CEMAT-NT 3 Item No. 190990 CEMAT-NT 3 115 V version Item No. 190989 CEMAT-NT 2 Item No. 190993 Applicable... - Page 18 Notes:...