
Related Manuals for Graphic Whizard PT 331SCC


Summary of Contents for Graphic Whizard PT 331SCC
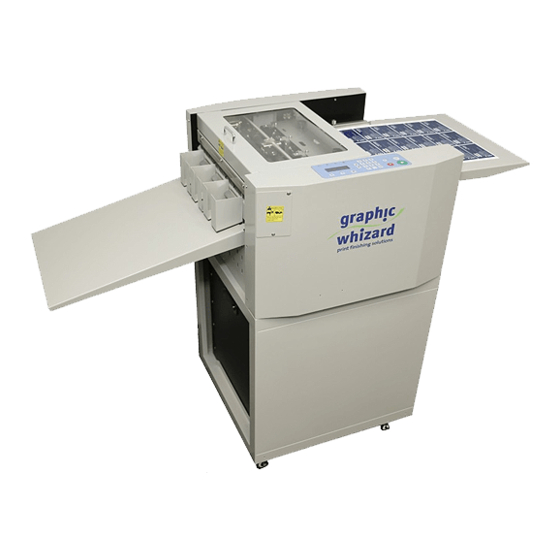
- Page 1 PT 331SCC Hand Feed Slit-Cut-Crease Operator Manual 755 Griffith Court, Burlington, Ontario, Canada L7L 5R9 Tel: +(905) 633-7663 Fax: +(905) 637-4419 Toll Free: 1-800-265-3376 www.graphicwhizard.com...
-
Page 2: Table Of Contents
1/13/2021 Table of Contents Chapter 1 Introduction ..............................3 1.1 Preface ................................3 1.2 Safety .................................. 3 Power Supply ................................ 3 Chapter 2 Specifications ............................... 4 Chapter 3 Main Parts & Assemblies ..........................5 Chapter 4 Installation ..............................7 4.1 Unboxing and Inspection ............................ 7 4.2 Machine Assembly .............................. - Page 3 5.5 Slitters Setting ..............................28 5.5.1 Compensation for Image Shift Left/Right ....................29 5.5.2 Side Trimming ............................30 5.5.3 Paper Deflectors ............................31 5.5.4 Set Crease Data ............................31 5.6 Side-Sheet Trimming ............................31 5.6.1 Slitter Placement ............................31 5.6.2 Set Cut Data ............................... 32 5.7 Slide-in Tools ..............................
-
Page 4: Chapter 1 Introduction
Ensure the power input and ground are correct before powering on the PT 331SCC. This machine runs on 110 volts • Ensure all safety covers are in place. Do not run the PT 331SCC without the covers installed. The top cover has an interlock switch that will stop the machine if open or removed. •... -
Page 5: Chapter 2 Specifications
Chapter 2 Specifications Item Parameter 52.36” x 22.44” x 38.5” Package Dimensions Length*Width*Height (inch) (mm) (1330 x 570 x 980mm) 26.38” x 24.80” x 45.28” Machine Dimensions Length*Width*Height (inch) (mm) (670 x 630 x 1150mm) Net Weight KG / LBS 100kg / 220 lbs. -
Page 6: Chapter 3 Main Parts & Assemblies
Chapter 3 Main Parts & Assemblies No. Item Description Waste Bin Catches the cut waste Out Feed Tray For longer cut crease jobs Card Collector Collect finished business cards Top Cover Protection Keypad Machine programming and operation Feed Table Paper input Machine Body Working body of the PT331SCC Access panel for changing the crease die or... - Page 7 No. Description Remark Turn clockwise to lighten the depth, counterclockwise to deepen the Crease Depth Adjust Screw depth. Cross Cutter Cut paper in cross direction Lag Wheel Set Adjust the roller pressure Slitter #1 Slit the side edge of paper Slitter #2 Slit with fixed gutter, gutter is 8mm or 3/8”...
-
Page 8: Chapter 4 Installation
If there is no visible damage, open the package and use the packing checklist to check for any missing or broken parts. If there is any visible damage or parts that are missing, please take pictures and notify Graphic Whizard immediately. -
Page 9: Machine Assembly
Use the deflectors to help guide the cut stock. 4.2.2 Extension Table Installation Attach the feed extension table to the PT 331SCC by loosening the three hex screws and slipping the tray over the screws. Ensure the tray remains level when tightening the screws. -
Page 10: Chapter 5 Operation
Chapter 5 Operation 5.1 Key Panel Introduction The control panel consists of keys and screen, as per following picture: Description Stop Stops the current job. Start Runs the current job. Test Runs a single sheet for testing purposes. Clear Clears the data or error. Number Pad Used to input job data. -
Page 11: Quick Start
5.3 Screen 5.3.1 Welcome Screen When you first power on the PT 331SCC, the screen will show a welcome message, then go to the Ready Screen. 5.3.2 Ready Screen From the ready screen, press the Page down key to scroll through the various options. There are five options from the ready screen: •... - Page 12 Cut Data Screen The data cut screen shows the currently programmed cuts. If no cuts have been programmed, the values will display as 0. The maximum number of programmable cuts is 32. To page through the programmed cuts, press the Up or Down arrows on the keypad (page up / page down).
-
Page 13: Mode Introduction
The following is a list of available options: Recall Job Recall Job The PT 331SCC can save a total of 20 jobs. Each job is saved under a number (starting at 1). To recall a job, key in the number that corresponds to the Job No. 1 required job on the number pad and press the enter button. - Page 14 The default value for the mark reader is Off however, once a change has been made, the function will remain active, even after the PT 331SCC has been powered off. If the register mark is turned on, a square box will also be displayed on the main screen.
- Page 15 Set Shrink/Stretch Ratio To compensate for printer image shift, the PT 331SCC is equipped with a INK/DEC Ratio shrink/stretch feature. This function is designed to balance any image shrink 100.0 % or stretch that may have happened while printing. This will shift cuts up or down by a percentage without changing the card size.
- Page 16 To turn on the slit motor, select 1, turn off the slit motor, select 2. Press Enter to save changes. Note: The default state is off. When the machine is restarted, the PT 331SCC will default to slit motor off.
-
Page 17: Smart Input Mode
0.2” When printing jobs for the PT 331SCC, the image should be centered on the sheet. The PT 331SCC feeder is center registered. The slit gutters are fixed. The lead edge and the gutter cut indicate the distance of the first card from the lead edge and the space between the cards. - Page 18 Trim: 0.300 cut. For the Graphic Whizard business cards, this value is 0.3. Press enter to advance to the next screen. Next, enter the length of the finished job. For the standard North American Length 2.000...
-
Page 19: Job Layout Creation
Tail Trim Error A tail trim error occurs when the values entered do not fit the sheet length and the tail trim is out of machine spec. The last cut range is 0.197” ~ 0.591”. If the last cut is out of range, the SCC will display the tail trim error. Ensure the sheet length, card length, and trim lengths are correct and try programming the job again. -
Page 20: Job Layout Parameters
5.3.7 Job Layout Parameters 12”x18” sheet... - Page 21 12”x18” sheet...
- Page 22 12”x18” sheet...
- Page 23 12”x18” sheet...
-
Page 24: How To Create A Register Mark
The PT 331SCC is designed to center register, however the registration mark reader is located on the non-operator side of the PT 331SCC. When creating a print layout with a registration mark, ensure the mark is placed within the following parameters. -
Page 25: How To Use A Register Mark
5.3.10 Using the Cut Mark Registration The PT 331SCC is equipped with a Cut Mark Reader. A cut mark is a solid black bar that is printed at the top of the sheet, usually to the left-hand side. When the cut mark registration is used, the PT 331SCC will read the placement of the cut mark and adjust the slitter and knife location to compensate for image shifting on the sheets. -
Page 26: Hardware Setting
5.4 Hardware Setting 5.4.1 Side Guide Setting Infeed Table The minimum infeed paper width is limited to 6.5” (165mm). The maximum width is 13” (330mm). Insert the paper by loosening the thumb screws (shown in the above image) on the side guides and slide the rails out. -
Page 27: Skew Adjustment
To custom set the slitter position, install the paper, and press the Test button. This will feed the paper in, stopping just before the slitters. Set the slitter position according the job. Position the collars against the slitters and tighten the set screws to lock the slitters in place. -
Page 28: Outfeed Tray Setting
5.4.4 Outfeed Tray Setting The PT 331SCC ships with two long paper guide stops and one smaller back stop. For straight crease jobs or larger finished output, place the guides slightly wider than the finish product and line up the back stop with the ends of the paper guide stops. -
Page 29: Slitters Setting
5.5 Slitters Setting While the slit gutters are fixed, the PT 331SCC slit positions can be customized to fit almost any job. make switching between standard sized jobs easier, 331SCC is equipped with a slitter placement gauge. As a starting reference the gauge is marked with two standard widths: 3.5... -
Page 30: Compensation For Image Shift Left/Right
5.5.1 Compensation for Image Shift Left/Right The PT 331SCC is equipped with a manual side to side (left/right) image shift adjustment. If the finished job is shifted left or right, turn the knob in the correct direction to resolve the issue. Run a test sheet to ensure the image is properly centered on the finished job. -
Page 31: Side Trimming
5.5.2 Side Trimming Move the Slitters #1 and #4 all the way to the side. Slitter #2 and Slitter #3 will be used to trim the sides. Since they are a fixed gutter slitter, the amount of trim that can be done has the same limitations. Trying to trim less than 3.2mm (0.126”) will be too thin and the waste will not go into the bin and can get stuck in the slitter head. -
Page 32: Paper Deflectors
5.5.3 Paper Deflectors The PT 331SCC is equipped with deflector rollers. These rollers help compensate for paper drop as the sheets pass through the slitter section. The deflectors should be centered in the machine. 5.5.4 Set Crease Data • To set the crease parameters, press the Mode Key 6 times, or until Input CR Data is displayed on the screen. -
Page 33: Set Cut Data
5.6.2 Set Cut Data With the slitters in the correct position for the trim job and the register mark function set to off, use the PT 331SCC programming to set the cut positions. • Press the M button until Set Cut Data is displayed on the screen. A total of 32 cuts can be programmed for a single job. -
Page 34: Change Perforate Crash Pad
To replace the crash pad: Remove the crash pad anvil tool from the PT 331SCC (installed) Peel up one edge of the crash pad and pull along the length of the tool. -
Page 35: Crease Depth Adjustment
5.7.2 Crease Depth Adjustment Crease depth is important for crease quality and should be adjusted according to the paper thickness. It may also be necessary to adjust the crease depth when switching between the cross-crease tool and the cross-perf tool. Low crease depth will create a light crease and too much crease depth may cause cracking. -
Page 36: Slitter Removal And Replacement
5.8 Slitter Removal and Replacement Complete the following steps to remove the slitters. Note: this procedure is applicable for both the 331SCC manual and 331SCC Air 1. Power down the 331SCC. This is for safety. 2. Locate the slitter removal tools that were shipped with the 331SCC. There should be two thumb screws and two notched plates. - Page 37 9. Insert the notched plates between the slitter removal shaft and bearings by pulling on the thumb screws. The slitter blades are spring loaded. 10. The upper slitter blades rest outside of the lower blades. When installing, ensure the blades remain to the outside by pinching the notched plates in or pulling on the thumb screws.
-
Page 38: Slitter Blade Removal Procedure
5.9 Slitter Blade Removal Procedure 1. Complete the steps listed above, stopping at step 6. 2. Remove the op and non-op side covers. 3. Locate and remove the slitter side cover from the op and non-op side. 4. Remove the slitter drive belt. You can remove the gear as well, but it’s not necessary. 5. - Page 39 6. Carefully remove the entire assembly from the machine. You now have access to all four slitter assemblies. 7. Remove the 2 screws securing the deflector plate. 8. The slitter blade hub can be removed by sliding the slitter drive rod through the hub. Note: there is a T-pin that fits into the groove in the slitter drive shaft.
-
Page 40: Chapter 6 Trouble Shooting
Chapter 6 Trouble Shooting 6.1 Error and Warning Codes The PT 331SCC has built-in error and warning indicators. When an error or warning is encountered, the coinciding LED will flash. The PT 331SCC has the following indicators: C Errors are checks and E Errors are faults 6.1.1 Warning... - Page 41 • Check the quality of the paper before running the job again. C – 3 Paper Jam at Outfeed Roller The outfeed sensors are located at the exit of the PT 331SCC. C – 3 Jam at Outfeed. Ensure the finished paper is clearing the exit sensors. If running a business card job, watch the cards as they exit the machine.
-
Page 42: Error
• Run several crease tests to ensure the unit is functioning. E-2 Cut Motor Error A Cut Motor Error indicates the PT 331SCC has encountered an error with the E – 2 cut motor and is a hard fault. Cut Motor Error. -
Page 43: Image Compensation
Manual Side to Side Adjustment If the image of the finished job is not centered or requires left to right adjustment, the PT 331SCC has a manual side to side adjustment feature. Before adjusting, ensure locking collars are secured on either side of the slitter by tightening the set screws. -
Page 44: Chapter 7 Maintenance
Lubricate the knife pivot points and springs with a 3-in-1 oil after every 200,000 cuts. • Empty the waste bin after every job or if the PT 331SCC starts jamming. • Contact your local GW dealer for preventative maintenance and service.
Need help?
Do you have a question about the PT 331SCC and is the answer not in the manual?
Questions and answers