
Related Manuals for RINGSPANN Brake HS 165 FHM

Summary of Contents for RINGSPANN Brake HS 165 FHM
- Page 1 Installation and operating instructions for Brake HS 165 FHM E 09.778e Schaberweg 30-38 Phone +49 6172 275 0 www.ringspann.com 61348 Bad Homburg +49 6172 275 275 info@ringspann.com Germany...
- Page 2 Disregarding or misinterpreting these installation and operating instructions invalidates any product liability or guarantee by RINGSPANN; the same applies if the product is taken apart or changed. These installation and operating instructions should be kept in a safe place and should accompany the product if it is passed on to others -either on its own or as part of a machine- to make it accessible to the user.
-
Page 3: Table Of Contents
Installation and operating instructions for E 09.778e Brake HS 165 FHM spring activated – hydraulically released Issue: 27.05.2021 Version: 3 Drawn: BAHS Checked: EISF Pages: 28 Page: 3 Contents DESCRIPTION OF THE CALIPER 1.1 Principle 1.2 Delivery condition 2 INSTALLATION 2.1 Preparing the positioning area... -
Page 4: Description Of The Caliper
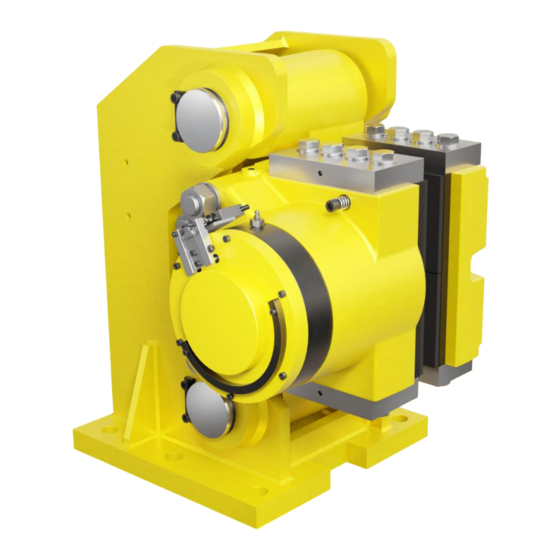
Installation and operating instructions for E 09.778e Brake HS 165 FHM spring activated – hydraulically released Issue: 27.05.2021 Version: 3 Drawn: BAHS Checked: EISF Pages: 28 Page: 4 Description of the caliper 1.1 Principle The HS 165 FHM calipers are hydraulic fail-safe calipers; the braking force is applied by spring washers and hydraulic pressure is necessary to hold the brake released. -
Page 5: Installation
Installation and operating instructions for E 09.778e Brake HS 165 FHM spring activated – hydraulically released Issue: 27.05.2021 Version: 3 Drawn: BAHS Checked: EISF Pages: 28 Page: 5 Life-threatening danger! Disc must be absolutely degreased before all contact with the brakes linings. - Page 6 Installation and operating instructions for E 09.778e Brake HS 165 FHM spring activated – hydraulically released Issue: 27.05.2021 Version: 3 Drawn: BAHS Checked: EISF Pages: 28 Page: 6 Brake HS 165 FHM-420 L-H (Thrustor mounted left shown) Fig. 2.1...
-
Page 7: Installing The Disc
Installation and operating instructions for E 09.778e Brake HS 165 FHM spring activated – hydraulically released Issue: 27.05.2021 Version: 3 Drawn: BAHS Checked: EISF Pages: 28 Page: 7 Brake HS 165 FHM-420 R-V Fig. 2.2 8 Brake off monitoring switch... -
Page 8: Installing The Caliper
0,2mm. Check that the disc is fully between the pads. 2. Brake HS 165 FHM-420 H check the disc position 8mm mini fixed pad side 2a; 18mm mini from the other side 2b Fig. 2.3. - Page 9 Installation and operating instructions for E 09.778e Brake HS 165 FHM spring activated – hydraulically released Issue: 27.05.2021 Version: 3 Drawn: BAHS Checked: EISF Pages: 28 Page: 9 A crowbar can be used in the area shown by the arrow 2a and 2b to slide the caliper from one side to the other.
- Page 10 Installation and operating instructions for E 09.778e Brake HS 165 FHM spring activated – hydraulically released Issue: 27.05.2021 Version: 3 Drawn: BAHS Checked: EISF Pages: 28 Page: 10 Fig. 2.4 Longitudinal spacing: 0.3mm max. over pad length. If necessary, set the support using foil 4...
- Page 11 The tightening torque (Cs) which has to be applied on the screws M30 class 8.8 rows for each nut is: Cs = 1200Nm ±10% with greased screws. Brake HS 165 FHM-420 R-V 8 screws M30 class 8.8 Brake HS 165 FHM-420 L(R)-H 6 screws M30 class 8.8...
- Page 12 Installation and operating instructions for E 09.778e Brake HS 165 FHM spring activated – hydraulically released Issue: 27.05.2021 Version: 3 Drawn: BAHS Checked: EISF Pages: 28 Page: 12 The caliper must be connected to its source at a hydraulic pressure 250bar max, by threaded plug G 3/8’’.
-
Page 13: Initial Start-Up
Installation and operating instructions for E 09.778e Brake HS 165 FHM spring activated – hydraulically released Issue: 27.05.2021 Version: 3 Drawn: BAHS Checked: EISF Pages: 28 Page: 13 2.4 Initial start-up 2.4.1 Hydraulic circuit bleed Tools: AF spanner, 6mm ID flexible hose. - Page 14 Installation and operating instructions for E 09.778e Brake HS 165 FHM spring activated – hydraulically released Issue: 27.05.2021 Version: 3 Drawn: BAHS Checked: EISF Pages: 28 Page: 14 2.4.2 Deactivate the manual release The principle is to position the stopping rings in the piston groove once the pressure is applied.
-
Page 15: Operational Running
Installation and operating instructions for E 09.778e Brake HS 165 FHM spring activated – hydraulically released Issue: 27.05.2021 Version: 3 Drawn: BAHS Checked: EISF Pages: 28 Page: 15 2.4.4 Control of the general running Important! Be Careful: The disc must be degreased and free from any deposits so as not to decrease the friction coefficient. -
Page 16: Periodic Maintenance
Installation and operating instructions for E 09.778e Brake HS 165 FHM spring activated – hydraulically released Issue: 27.05.2021 Version: 3 Drawn: BAHS Checked: EISF Pages: 28 Page: 16 PERIODIC MAINTENANCE Every two months, check: - As a general rule, inspect the entire system for correct operation - Check that there is not any leakage - Also, check the brake pad gap see chapter 5.3. - Page 17 Installation and operating instructions for E 09.778e Brake HS 165 FHM spring activated – hydraulically released Issue: 27.05.2021 Version: 3 Drawn: BAHS Checked: EISF Pages: 28 Page: 17 Put the 2 retaining segments 14 in the piston groove 04 Fig. 5.2.
-
Page 18: Manual Release: Deactivation
Installation and operating instructions for E 09.778e Brake HS 165 FHM spring activated – hydraulically released Issue: 27.05.2021 Version: 3 Drawn: BAHS Checked: EISF Pages: 28 Page: 18 5.2 Manual release: deactivation With the pressure cut off, remove the cover 21 with its 6 Allen screws V09. -
Page 19: Adjustment Of Brake Pad Clearance, Pad Wear Take Up
Frequently check the total gap between pads and the disc. (a 1mm increase to this gap corresponds to 9% loss of torque). Refer to the RINGSPANN Datasheet for the nominal clearance. Attention! When the remaining lining thickness reaches 3mm, proceed to pad exchange as per chapter 5.4. - Page 20 Installation and operating instructions for E 09.778e Brake HS 165 FHM spring activated – hydraulically released Issue: 27.05.2021 Version: 3 Drawn: BAHS Checked: EISF Pages: 28 Page: 20 Fig. 5.4 Reposition the lock washer 15 each side and secure with screws V04 and washers V14.
-
Page 21: Replacement Of Worn Brake Pads
Installation and operating instructions for E 09.778e Brake HS 165 FHM spring activated – hydraulically released Issue: 27.05.2021 Version: 3 Drawn: BAHS Checked: EISF Pages: 28 Page: 21 Fig. 5.5 Replacement of worn brake pads Tools: AF spanner, Allen wrench Procedure: For thrustor pad side Put the caliper into manual release position, see chapter 5.1 and switch off the pressure. - Page 22 Installation and operating instructions for E 09.778e Brake HS 165 FHM spring activated – hydraulically released Issue: 27.05.2021 Version: 3 Drawn: BAHS Checked: EISF Pages: 28 Page: 22 Fit a screw M10 V30 into the end of the pad 11 to facilitate gripping. (recommended length: 60 mm).
- Page 23 Installation and operating instructions for E 09.778e Brake HS 165 FHM spring activated – hydraulically released Issue: 27.05.2021 Version: 3 Drawn: BAHS Checked: EISF Pages: 28 Page: 23 Procedure: For the other side Fit a screw M10 into the stop plate 10 to facilitate gripping.
- Page 24 Installation and operating instructions for E 09.778e Brake HS 165 FHM spring activated – hydraulically released Issue: 27.05.2021 Version: 3 Drawn: BAHS Checked: EISF Pages: 28 Page: 24 Fig. 5.7...
-
Page 25: Opening And Wear Contacts (Mechanicals) Adjustment
Installation and operating instructions for E 09.778e Brake HS 165 FHM spring activated – hydraulically released Issue: 27.05.2021 Version: 3 Drawn: BAHS Checked: EISF Pages: 28 Page: 25 Opening and wear contacts (mechanicals) adjustment Information! Contacts are factory set and do not need any adjustment. - Page 26 Installation and operating instructions for E 09.778e Brake HS 165 FHM spring activated – hydraulically released Issue: 27.05.2021 Version: 3 Drawn: BAHS Checked: EISF Pages: 28 Page: 26 - Power the brake with opening pressure. - Check that state contact is "Open". Execute this operation till correct monitoring of the" open &...
- Page 27 Installation and operating instructions for E 09.778e Brake HS 165 FHM spring activated – hydraulically released Issue: 27.05.2021 Version: 3 Drawn: BAHS Checked: EISF Pages: 28 Page: 27 5.5.2 Adjustment of ‘pad wear’ switch This switch is permanently closed and opens when the pad wear reaches 1mm.
-
Page 28: Spare Parts
Page: 28 Spare parts Monitoring switches (Opening/wearing) Ref.: CONOUVREG-PIN-HW - Set of pads: 2 pads 11 „Dynamic“, Ref: JG ST5 RINGSPANN 132 - Hydraulic control parts comprising (Refer to assembly drawing): 1 Piston 12660-026 1 Piston rod JOITIG-090 105 Z ...
Need help?
Do you have a question about the Brake HS 165 FHM and is the answer not in the manual?
Questions and answers