Table of Contents
Advertisement
Quick Links
Rev. 5/12/2017
Receiving instructions:
After delivery, remove the packaging from the product. Inspect the product closely to determine
whether it sustained damage during transport. If damage is discovered, record a complete description of
it on the bill of lading. If the product is undamaged, discard the packaging.
NOTE:
The end-user is solely responsible for confirming that product design, installation, use, and
maintenance comply with laws, regulations, codes, and mandatory standards applied where the product
is used.
Signal Words......................................................................................................................... 2
Hazards of Improper Use............................................................................................................ 2
Assembly and use Instructions..................................................................................................... 3
Loading the lifter....................................................................................................................... 4
Inspections & Maintenance............................................................................................................ 4
Exploded Parts Diagram and Bill of Materials............................................................................... 5
Label placement diagram ............................................................................................................... 6
Limited warranty..................................................................................................................... 7
Copyright 2017 Vestil Manufacturing Corp.
Vestil Manufacturing Corp.
2999 North Wayne Street, P.O. Box 507, Angola, IN 46703
Telephone: (260) 665-7586 -or- Toll Free (800) 348-0868
Website:
www.vestilmfg.com
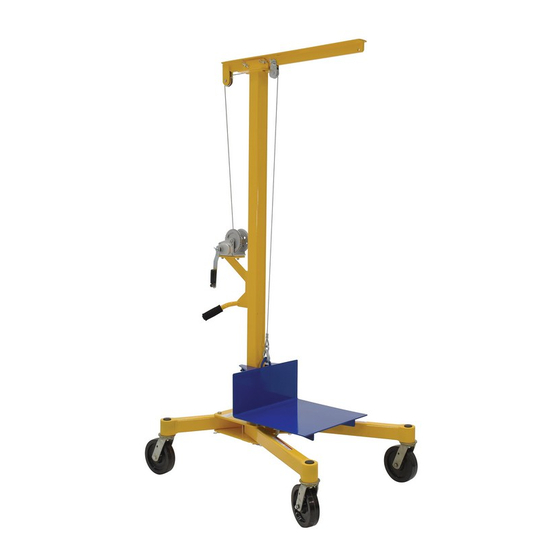
Lifter-2 Worksite Lift
Instruction Manual
Table of Contents
LIFTER-2, MANUAL
Fax: (260) 665-1339
e-mail:
Page 1 of 7
info@vestil.com
Advertisement
Table of Contents

Related Manuals for Vestil Lifter-2

Summary of Contents for Vestil Lifter-2
- Page 1 Hazards of Improper Use………………………………………………..………………………….…....2 Assembly and use Instructions………………..………..………..………………………………………....3 Loading the lifter……………………………………………………...……………………………………....4 Inspections & Maintenance…………………………………………………………………......... 4 Exploded Parts Diagram and Bill of Materials……………………………………………………………………. 5 Label placement diagram …………………………………………………………..........6 Limited warranty……………………………………………………………………………………………….…….. 7 Copyright 2017 Vestil Manufacturing Corp. Page 1 of 7...
- Page 2 DO NOT attempt to resolve any problem(s) with the product unless you are both authorized to do so and certain that it will be safe to use afterwards. DO NOT modify the product in any way UNLESS you first obtain written approval from Vestil. Unauthorized modifications automatically void the Limited Warranty and might make the product unsafe to use.
- Page 3 LIFTER-2, MANUAL Assembly Instructions: The Lifter-2 ships in fully assembled form. However, the lifter can easily be disassembled. Refer to the exploded parts diagram and bill of materials on p. 3, and then: 1. Disconnect the hook (on the winch cable) from the deck (5);...
- Page 4 : Remove any dirt or other matter from the cable and pulleys and other lifter surfaces. Step 4 : Perform all other necessary adjustments and/or repairs. DO NOT modify the lifter. Step 5 : Make a dated record of the repairs, adjustments and/or replacements made. Copyright 2017 Vestil Manufacturing Corp. Page 4 of 7...
- Page 5 11105 plated, 3/8” – 16 x 1” 37039 ” – 10 zinc-plated lock nut 21-042- Hand winch, foldable handle 002-001 grip PH-F-8/2-S-SWB-ST stem 16-132-204 caster Clasp hook, ” hook 08-145-045 opening Copyright 2017 Vestil Manufacturing Corp. Page 5 of 7...
- Page 6 The product should always be labeled as shown in the diagram below. Replace all labels that are faded, damaged, or not easily readable. A: Label 598 B: Label 287 C: Label 527 D: Label 212 E: Label 208 Copyright 2017 Vestil Manufacturing Corp. Page 6 of 7...
- Page 7 (you) for warranty service. Who may request service? Only a warrantee may request service. You are a warrantee if you purchased the product from Vestil or from an authorized distributor AND Vestil has been fully paid.
Need help?
Do you have a question about the Lifter-2 and is the answer not in the manual?
Questions and answers