Godox WMicS1 Instruction Manual
Uhf wireless microphone system
Hide thumbs
Also See for WMicS1:
- Instruction manual (11 pages) ,
- Instruction manual (13 pages) ,
- User manual
Table of Contents
Advertisement
Quick Links
神牛微信公众号
Follow Wechat Public Account
深圳市神牛摄影器材有限公司
地址: 深圳市宝安区福海街道塘尾社区耀川工业区厂房2栋
电话: +86-755-29609320(8062) 传真: +86-755-25723423
邮箱: godox@godox.com
GODOX Photo Equipment Co., Ltd.
Add: Building 2, Yaochuan Industrial Zone,Tangwei Community, Fuhai
Street, Bao'an District, Shenzhen 518103, China
Tel: +86-755-29609320(8062) Fax: +86-755-25723423
E-mail: godox@godox.com
godox.com
Made In China
说明手册
Instruction Manual
UHF无线麦克风系统
UHF Wireless Microphone system
Advertisement
Table of Contents

Related Manuals for Godox WMicS1


Summary of Contents for Godox WMicS1
- Page 1 说明手册 Instruction Manual 深圳市神牛摄影器材有限公司 地址: 深圳市宝安区福海街道塘尾社区耀川工业区厂房2栋 电话: +86-755-29609320(8062) 传真: +86-755-25723423 邮箱: godox@godox.com GODOX Photo Equipment Co., Ltd. Add: Building 2, Yaochuan Industrial Zone,Tangwei Community, Fuhai Street, Bao’an District, Shenzhen 518103, China UHF无线麦克风系统 Tel: +86-755-29609320(8062) Fax: +86-755-25723423 E-mail: godox@godox.com UHF Wireless Microphone system godox.com...
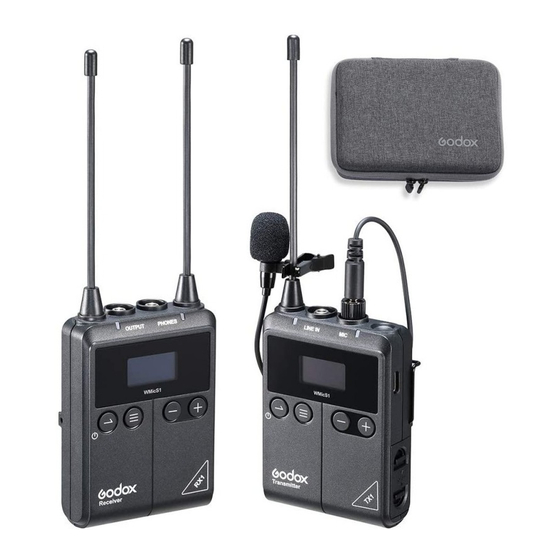
- Page 2 前言 部件名称 欢迎使用UHF无线麦克风系统⸺WMicS1,本产品非常适用于摄影录制,现场采访及语音 腰包发射器(TX1) 录制等场合。请仔细阅读本说明书,以便能正确的操作,发挥本产品的优越性能。 产品特点 • UHF频率范围:514MHz-596MHz • 96个无线频道可选,有效减少热频干扰 • 无线距离最大可达100m • OLED显示屏提供各项参数设置 • 3.5mm耳机实时监听 • 输出音量控制,提供静音功能 • 发射功率可调节 • 一个接收器可同时连接两个发射器 • 两种供电方式 (注:最大支持频率为514MHz-596MHz,96个无线频道在此频率范围中选择,会存在部分 频率没有利用的情况。) 1. 天线 6. 麦克风输入接口 11. USB Type-C 警告 2. 3.5mm 音频线输入接口 7. Audio 指示灯...
- Page 3 9. 音量 +/ 菜单 + 1/4”冷靴 x1 5. 菜单键 10. 音量 -/ 菜单 - 发射器 x1 接收器 x1 腰夹 x2 OLED显示屏: 全向型领夹式麦克风×1 UHF无线麦克 WMicS1 风系统组合一 3.5mm插头音频线×1 1. A 组射频信号 Kit 1 3.5mm卡侬头音频线×1 2. B 组射频信号 1/4”冷靴 x1 3. 电池电量显示 RCVR-A...
- Page 4 可搭配产品 Version 1. 10 13 • 软件版本:短按+/-显示Version时,表示软件的版本。 BackLight 无线手持麦克风发射器 卡侬口插接发射器 WH-M1 TX3-XLR • 背光时间:短按 +/- 至显示屏显示 BackLight,再长按菜单键背光时间跳动,短按 +/- 键选 择背光时间:ON 常亮, OFF 常闭, Delay10S/30S/60S。 供电方式 两种供电方式 Restore Default TYPE-C 接口 (5V) • 恢复出厂设置:短按 +/- 至显示屏显示 Restore Default ,再长按菜单键即可进行恢复出厂 设置。 两节 AA(5 号 ) 干电池 Key lock Long press “+”...
- Page 5 二、接收器设置 BackLight • 开关机:长按 2 秒电源开关按键即可开 / 关机; • RCVR/CH/VOL 设置:当需要设置 A 组别参数时,在显示 A 组别参数时长按菜单键进 • 背光时间:短按 +/- 至显示屏显示 BackLight,再长按菜单键背光时间跳动,短按 +/- 键选 入设置界面, 再短按菜单键切换下一个设置, 需要设置 B 组别参数时, 则需在显示 B 组别参 择背光时间:ON 常亮, OFF 常闭, Delay10S/30S/60S。 数时长按菜单键进入设置界面。 RCVR-A ON Restore CH: 01 VOL: 25 Default 514.
- Page 6 故障排除 发射器 ① 将全向型领夹式麦克风插入发射器的“MIC”接口; • 如不能接收到音频信号,请检查电池是否正确安装以及是否打开发射器电源;发射器和 ② 打开发射器,设置相应参数; 接收器是否设置在同一组别和频道;麦克风及耳机是否已正确牢固连接到位;功能模式 ③ 用腰夹将发射器夹在腰带上或将发射器直接放进口袋里。 是否设置正确。 接收器 • 检查发射器是否设置的静音。 ① 将 1/4” 冷靴连接到接收器, 并将其安装在相机 / 摄影设备上; • 如您的发射器受到他人干扰,改变发射器和接收器的频道设置即可。 ② 将 3.5mm 插头音频线的一端插入接收器的“OUTPUT”接口,另一端插入相机的“MIC” • 如您发现发射音频距离有限或者有漏发现象,请检查是否电池耗尽,请尝试更换电池。 接口; ③ 打开接收器, 设置相应参数。 维护保养 注意:设置参数时,需将发射器与接收器设置相同的组别和频道; 避免跌落:如果受到强烈碰撞或振动, 发射器和接收器可能会发生故障。 一个接收器连接两个发射器使用时,必须A发射器设置在A组别使用,B发射器设置在B组别 使用。 保持干燥:本产品是非防水产品,...
-
Page 7: Names Of Parts
Forward Names of Parts Thank you for purchasing UHF Wireless Microphone system-WMicS1. These products Body-pack Transmitter(TX1) are suitable for video recording, journalistic shooting, audio recording, etc. Please read this manual carefully before using to make sure the correct operation and exert the optimum function. - Page 8 10. Volume -/Menu - Transmitter x1 OLED Display: Receiver x1 Omnidirectional Lavalier 1. A Group Frequency Signal UHF Wireless Microphone WMicS1 Kit 1 Microphone×1 Belt Clip x2 System Kit 1 2. B Group Frequency Signal 3.5mm Audio Cable×1 XLR To 3.5mm Audio Cable×1 3.
-
Page 9: Power Supply
Recommended Combination OLED Light • Display brightness setting: short press +/- button until OLED light is displayed on the panel. Then, long press the menu button to choose the corresponding brightness level of OLED light. Short press +/- button to choose brightness from 1 to 8 levels. Wireless Handheld Microphone Plug-On XLR Transmitter TX3-XLR Version... -
Page 10: Operation
Receiver Setting • Power On/Off: long press the button for 2 seconds to power it on or off. BackLight • RCVR/CH/VOL setting: to set channel A's parameters, long press the menu button to enter setting interface during the A's parameters are displayed. Then, short press the menu button to switch to the next setting. -
Page 11: Technical Data
Troubleshooting Transmitter ① Insert the omnidirectional lavalier microphone into the transmitter’s MIC port. ② • Unable to receive audio signal. Make sure batteries are installed correctly and Power Turn on the transmitter to set the relevant parameters. ③ Switch is turned on. Check if the transmitter and the receiver are set to the same Clip the transmitter onto the belt or put it into your pocket.
Need help?
Do you have a question about the WMicS1 and is the answer not in the manual?
Questions and answers