
Related Manuals for Brüel & Kjær B&K 2245


Summary of Contents for Brüel & Kjær B&K 2245
- Page 1 B&K 2245 with Product Noise Partner User Guide for Version 1.5 BN 2492–11 Copyright © Hottinger Brüel & Kjær A/S. All rights reserved.
-
Page 3: Table Of Contents
TABLE OF CONTENTS TABLE OF CONTENTS OVERVIEW Licences About the instrument About the PC application About the mobile app System requirements Data storage Service and support Additional documentation THE INSTRUMENT Hardware interface Instrument GUI Web server display Charge the battery Fix an unresponsive instrument Drying the instrument DOWNLOAD THE APPS... - Page 4 Table of contents DUTS DUTs (PC) DUTs (mobile) METADATA Metadata (PC) Metadata (mobile) SETUP Setup (PC) Setup (mobile) TEMPLATES Create a template Create a new DUT from a template Upload templates CALIBRATION CHECK How to perform a calibration check Calibration history Calibration settings MEASUREMENTS Data explorer...
- Page 5 Table of contents Access instrument settings on the mobile app Input settings Measurement control Broadband parameters Spectrum parameters Statistical parameters Audio recording Display settings Regional settings Power management Data management Network settings Voltage output Lock the settings TERMINOLOGY...
-
Page 6: Overview
OVERVIEW Your instrument works with applications: Noise Partner for general-purpose, basic sound level measurements Enviro Noise Partner for measuring and analysing sound levels in the world around us Work Noise Partner for determining sound exposure levels in the workplace Product Noise Partner for testing noise emission levels of products There is a mobile version and a PC version of each application. -
Page 7: Licences
Overview Licences B&K 2245 is a type-approved sound level meter (SLM). However, this basic functionality can be extended with optional licences; it can perform frequency analysis, log broadband and spectral data, perform statistical analysis and make audio recordings. Licences for the instrument control the functionality of the instrument and to which applications it can connect. BZ-7300: Noise Partner This licence enables you to make simple, broadband measurements, to make general-purpose sound pressure level measurements, and to make basic occupational, product and environmental measurements. -
Page 8: About The Instrument
Overview BZ-7304: Exhaust Noise Partner This licence enables you to measure exhaust noise. Measure broadband parameters. Connect to Noise Partner mobile app and PC application. About the instrument The instrument measures sound level meter parameters (Leq, LE, Lpeak, Lmax, Lmin, L(SPL), L) with up to two sim- ultaneous frequency weightings (A, B, C, Z) and up to three simultaneous time weightings (F, S, I) for the exponential averaging. -
Page 9: About The Mobile App
Overview Play back recorded audio (digitally gained). Export data to Microsoft® Excel® for reporting. About the mobile app The mobile app interfaces with the instrument, making remote measurements possible and making it easier to change settings and interact with the data. It is recommended that you use the mobile app whenever possible. Functionality of the mobile version of Product Noise Partner: Create and edit devices under test (DUTs). -
Page 10: Data Storage
Overview Data storage The instrument Data storage: Approximately 12 GB The instrument has 16 GB of built-in storage, of which approximately 12 GB is available for data storage. All meas- urement data and annotations are stored on the instrument. Measurements and annotations are imported to the PC application from the instrument. They can then be saved to your computer or to a location on a network. -
Page 11: Additional Documentation
Overview ✐ Note: When you return your instrument for service, the firmware will be updated to the latest version. For type-approved firmware versions, you may need to return the instrument to a certified service centre to update the firmware. Check with your type-approving authority before updating the firmware. Application updates Updates are handled via the application. - Page 12 Overview Manuals and guides Getting Started Guide: BR 1812 Instruction Manual for B&K 2245 with Microphone Type 4966: BE 1910 Phone / Tripod Holder UA-2237 Guide: BR 8071 Windscreen UA-1650 Guide: BR 0011 Help Help for B&K 2245 with Product Noise Partner is also available in HTML format.
-
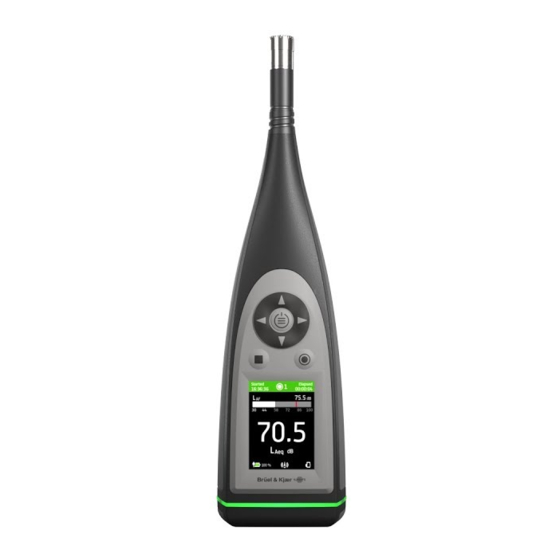
Page 13: The Instrument
THE INSTRUMENT Hardware interface The microphone is at the top of the instrument. is the power/menu/reboot button. Press and hold the button to power the instrument on or off. When the instrument is on, press the but- ton briefly to open the menu. If the instrument becomes unresponsive, press and hold the button for approximately 40 seconds (remove cables first). - Page 14 The instrument is the stop/reset button. Press the button once to stop a measurement. At this point, averaged measurement parameters will stop updating and you can review the results. Press the button again to clear the results and reset the instrument for the next measurement.
-
Page 15: Instrument Gui
The instrument The light ring is colour-coded to reflect the status of the instrument. The light ring is solid green while measuring. The light ring flashes yellow slowly while idle or quickly while paused (measuring). The light ring flashes red quickly for intermittent overloads. The light ring is solid purple for latched overloads. - Page 16 The instrument The top region shows measurement information and instrument status. When idle, the instrument displays the current time (to the left) and input settings (to the right). : Indicates the clock is controlled from a network time protocol (NTP) server on the Internet.
- Page 17 The instrument The number in the centre is the measurement number. The first measurement of every day is number 1. The number increments with each new measurement. The background colour of the top region and the centre symbol change to indicate the state of the instrument.
- Page 18 The instrument ✐ Note: The bar graphs in SLM view and List view are unique, that is they can each be set to show a different para- meter. Go to Menu > Display settings > SLM view > Graph parameter to set the parameter for the bar graph when dis- playing one broadband parameter.
-
Page 19: Web Server Display
The instrument The menu Use the buttons on the instrument to interact with the menu. : Open / close the menu; open a response dialog; confirm a setting in a response dialog; enable / disable parameter selection boxes. : Navigate up a list; increment a value in a response dialog. : Navigate down a list;... -
Page 20: Charge The Battery
The instrument Charge the battery The instrument has an internal Lithium-ion rechargeable battery. Procedure 1. Connect the instrument to a power source. indicates that the battery is charging with a readout of the percentage charged. 2. Disconnect the power source to stop charging. Approved power sources Mains Base station (the base station is powered via mains) -
Page 21: Fix An Unresponsive Instrument
The instrument 3. Select Enabled. 4. Go to: Calibrate battery. Follow the prompts to calibrate your battery. Fix an unresponsive instrument If your instrument freezes, try rebooting the instrument. 1. Remove all external connections, including the charger. 2. Press and hold until the instrument reboots. - Page 22 The instrument Where can water get in? It is possible for water to enter the space between the microphone cartridge and the microphone preamplifier when, for example, the instrument is exposed to heavy rain. Also, water may enter the instrument body if, for example, the instrument is submerged in water.
-
Page 23: Download The Apps
DOWNLOAD THE APPS Download the PC application You will need: A computer with access to the Internet and a web browser System Requirements: Windows® 8.1 or 10 (64-bit) operating system Microsoft® .NET 4.7.2 framework Recommended PC: Intel® Core™ i5 or better Sound card Solid State Drive (SSD) 8 GB of memory... -
Page 24: Download The Mobile App
Download the apps Download the mobile app You will need: iOS-based phone or tablet See supported iOS versions for current app version in the App Store®, under Product Noise Partner > Inform- ation > Compatibility. Procedure: 1. Go to the App Store. 2. -
Page 25: Connect Devices
CONNECT DEVICES Communication between the instrument and the devices running the applications is an essential part of using the instru- ment. Once you understand the ways in which the devices can communicate, you will be able to change connections to suit your circumstances. -
Page 26: Remote Connections
Connect devices e. Select the network you wish to join. f. Enter the password at the prompt. to scroll through the character menu. to move left or right. Press to advance to the options: OK or Cancel. Use the instrument as a hotspot Connect your mobile device and / or PC to the instrument's hotspot so that the devices can communicate. - Page 27 Connect devices Before you begin, you will need some information about your Internet service: Is your IP address IPv4 or IPv6 or both? The instrument supports both. The difference is that IPv4 requires port forwarding while IPv6 does not. If you have an IPv4 address, is it static or dynamic? You can use either static or dynamic addresses.
- Page 28 Connect devices 3. From another network, such as a mobile network, test the setup. ✐ Note: Turn off Wi-Fi on your mobile device to make sure that you are not connected to the same network as the instrument. a. Open the mobile app. b.
-
Page 29: Connect The Pc Application To The Instrument
Connect devices Connect the PC application to the instrument Connect the PC application to the instrument to upload templates to the instrument, to import devices or meas- urements from the instrument, or to control the instrument remotely. 1. Power on the instrument. 2. -
Page 30: Connect The Mobile App To The Instrument
Connect devices Connect the mobile app to the instrument The mobile app connects to the instrument via Wi-Fi® and Bluetooth®. What you will need: The instrument An iOS-based mobile device (phone or tablet) with the mobile app installed ✐ Note: You will need to enable Wi-Fi and Bluetooth on your mobile device. How to connect You can connect the mobile app to one instrument at a time. - Page 31 Connect devices How to add the instrument manually If you want to find an instrument that is not showing up in the list of discovered instruments, such as an instrument on another network, you can manually add the instrument to the list using its IP address. ✐...
-
Page 32: Databases
DATABASES The main storage facility of Product Noise Partner are databases. Databases store devices under test (DUTs) and tem- plates. Databases also store the data for each DUT, which includes metadata, test setup properties, measurement data, calculations and annotations. Create a database The first time you start the PC application, the first thing to do will be to create a new database. - Page 33 Databases Add metadata fields 1. In the Metadata Fields dialog, click . 2. Enter a name for the metadata field. 3. Enter a description, if desired. Descriptions will be visible when filling out the metadata fields in both the PC and mobile version of the applic- ation.
-
Page 34: Open A Database
Databases Delete metadata fields 1. Select a metadata field in the list. 2. Click 3. Click Yes. ✐ Note: You cannot delete the default metadata fields (Date and Description). Open a database 1. Start the PC application. 2. Click Open Database. 3. -
Page 35: Duts
DUTS DUTs (PC) The device under test (DUT) is the product whose sound power levels are being determined. DUTs and their metadata, setup properties, measurements, calculations and annotations are stored in a Product Noise Partner database. You can save a DUT as a template, which simplifies the process of adding DUTs to a database. Create a DUT 1. - Page 36 DUTs Import a DUT DUTs that have been created and tested using the mobile app will be stored on your instrument, including their metadata, setup information, measurement data and annotations. Import these DUTs to the PC application to add them to the database, review the results, and export data for reporting.
-
Page 37: Duts (Mobile)
DUTs Filter the DUTs Click to show or hide DUTs that have been deleted from the database. Search the DUTs The search bar searches the names and serial numbers of DUTs in the database. DUTs (mobile) The mobile app allows you to add, test and measure devices under test (DUTs) using a mobile device. To use the mobile app when testing a device, you must create a template using the PC application. - Page 38 DUTs All DUTs Tap DUTs to view a list of DUTs that have been created using the mobile app. DUTs are listed in order by the time of cre- ation, with the newest devices at the top of the list. Tap a device to open it.
-
Page 39: Metadata
METADATA Metadata (PC) The Metadata window is where you add metadata to a device under test (DUT). The metadata fields that you see in the Metadata window are the fields that have been defined for the database. See Databases on page 32 for more information about creating and editing metadata fields in a database. - Page 40 Metadata Description If a description was added when the metadata field was created, it will be displayed below the metadata fields. ✐ Note: To read the description of the metadata field in the mobile app, tap a field then tap Done to close the keypad or selector.
-
Page 41: Setup
SETUP Setup (PC) The Setup window is where you enter the test setup for the device under test (DUT). To do this, you will fill out the fields in the Sound Power Properties panel. The properties you enter will be saved with the DUT. You can create a tem- plate of the DUT to reuse its setup. - Page 42 Setup Radius: Enter the radius of the hemispherical measurement surface in meters. Reference box (width, length, height): Enter the dimensions of the hypothetical shape that represents the DUT in meters. Characteristic dimension: The characteristic dimension is automatically calculated by the application. Measurement distance: Enter the distance from the reference box to the parallelepiped measurement surface in meters.
- Page 43 Setup Environment Room surface area: For calculating K2A from absorption. The surface area of the room in which the test is taking place. Absorption coefficient: For calculating K2A from absorption. The absorption coefficient of the test environment. ✐ Note: Room surface area and Absorption coefficient are enabled when K2A calculation type is set to From absorp- tion in the Calculation section.
-
Page 44: Setup (Mobile)
Setup Return the view to the default orientation: Click Copy the geometry or measurement points to your clipboard: Click Hint: Paste copied data into Microsoft® Office applications, for example. Edit the coordinates of measurement points The ability to edit the Cartesian coordinates of measurement points allows you to create custom measurement surfaces. 1. -
Page 45: Templates
TEMPLATES Templates simplify the process of adding devices under test (DUTs) to a database by allowing you to reuse metadata and setup properties. Templates also carry information from the database to the mobile app (via the instrument) so that you can use the mobile app for the test and to make annotations. -
Page 46: Create A New Dut From A Template
Templates 3. Enter a new name. 4. Click OK. Delete a template 1. Right-click on a template in the list of templates. 2. Click Delete. ✐ Note: When you click Delete, the template will be deleted. You will not be asked to confirmation the deletion. Create a new DUT from a template 1. - Page 47 Templates Automatic upload of templates Enable templates to upload to the instrument automatically. Every time the instrument and the PC application connect, the templates will be uploaded. This eliminates the need to manually upload templates (that is, click Automatic upload is a setting for the application, not the database. This means that templates will upload automatically regardless of the database that is open.
-
Page 48: Calibration Check
CALIBRATION CHECK It is a best practice to check the accuracy of your instrument before and after a measurement by performing a cal- ibration check. A calibration check is not a calibration. Calibration includes an adjustment of the instrument's sensitivity. A calibration check compares the current sensitivity of the instrument with the sensitivity from its initial calibration, checking that it has not changed too much. - Page 49 Calibration check 2. Gently seat the calibrator on the microphone. 3. Turn on the sound calibrator. 4. After a short period the instrument will initiate a calibration check, choose Yes. 5. The calibration check will have one of two results: Pass: The measured sound level is within tolerance.
-
Page 50: Calibration History
Calibration check Calibration history Go to: Menu > Calibration history. Here you can view an instrument's history of calibrations and calibration checks. Calibration settings Go to: Menu > System settings > Advanced settings > Calibration. Automatic calibration check The instrument is set to perform a calibration check automatically by default. To change this setting, set Automatic check to Disabled. -
Page 51: Measurements
MEASUREMENTS The exact steps of a measurement will vary depending on the settings you use in Measurement control. A basic overview is as follows: 1. Press to start a measurement. 2. If necessary, press to pause. 3. Press to resume. 4. -
Page 52: Data Explorer
Measurements Data explorer Go to: Menu > Data explorer. Browse the measurements stored on the instrument, with the option to open or delete measurements. 1. Navigate to the desired folder. 2. Press 3. Choose Open to view the measurement on the instrument. ✐... - Page 53 Measurements Lw ref, atm: Sound power calculation at reference atmospheric conditions Atmospheric conditions are entered in the Environment section of the Sound Power Properties panel in the Setup window (see Setup (PC) on page 41 for more information). Sigma tot (σ ): Total standard deviation Background criteria: Criteria for use of background correction at each frequency Make a measurement using the PC application...
- Page 54 Measurements 5. Repeat the measurement process for Reference Sound Source (if applicable). ✐ Note: For reference sound source measurements, the DUT must be off. 6. Repeat the measurement process for Device Under Test. ✐ Note: For DUT measurements, the reference sound source must be off. Import measurements from the instrument 1.
-
Page 55: Measurement (Mobile)
Measurements Show/hide the reference box: Click Copy the geometry or measurement points to your clipboard: Click Hint: Paste copied data into Microsoft® Office applications, for example. Measurement (mobile) You can make measurements using the mobile app. This enables you to make measurements from a distance without your PC. - Page 56 Measurements 4. Repeat the measurement procedure for the reference sound source (if applicable). Make sure that the DUT is off and the reference sound source is on. Set the measurement to Point 1 and Reference Sound Source. 5. Repeat the measurement procedure for the DUT. Make sure that the DUT is on and the reference sound source is off.
-
Page 57: Annotations
ANNOTATIONS Annotations Use the mobile app to add annotations, or comments, to the DUT. There are four types of annotations: photo, video, note, and commentary. Every DUT can have multiple annotations of different types. It is always a good idea to add annotations to your measurements. For example, they can help you and your colleagues identify measurements at a later date and provide valuable information about the context of a measurement. -
Page 58: Review Annotations In The Pc Application
Annotations View annotations in the mobile app 1. From the home screen, tap DUTs. 2. Tap on a DUT in the list to open it. 3. Tap Annotations. 4. Tap on an annotation to expand it. ✐ Note: Only one annotation at a time can be expanded. To view a video annotation or listen to an audio annotation tap the play button. - Page 59 Annotations Listen to commentary You will find any voice memos that have been attached to the measurements in the project in the Commentaries win- dow. 1. Click on a DUT in the list to select it. 2. Open the Commentary window. 3.
-
Page 60: Application Menu (Pc)
APPLICATION MENU (PC) The application menu gives you access to settings for the application. You can also open and create databases from the application menu, which can be useful when a database is open. Open the application menu Click on the Product Noise Partner tab in the upper left corner. Database menu Create a database You can create a new database from the application menu. - Page 61 Application menu (PC) Automatic upload is a setting for the application, not the database. This means that templates will upload automatically regardless of the database that is open. Any templates on the instrument that are not in the open database will be removed from the instrument.
-
Page 62: Configure Your Instrument
CONFIGURE YOUR INSTRUMENT You can edit instrument settings using the instrument or using the mobile app. The functionality of the mobile app enhances the usability of the instrument. For example, it is easier to use the keypad on your mobile device to enter passwords than it is to scroll through characters on the instrument. It is recommended to use the mobile app to set up the instrument wherever possible. - Page 63 Configure your instrument Microphone Use this setting to tell the instrument which microphone is attached. The instrument is designed for use with Microphone Cartridge Type 4966. Type 4966 is prepolarized, so it can be used with battery-operated equipment such as B&K 2245, and is optimized for use in free-field environments. By default, the instrument is set up to use the attached Type 4966 microphone cartridge.
-
Page 64: Measurement Control
Configure your instrument Sound field It is important that the instrument knows the type of sound field in which you are measuring so it can apply the appro- priate correction to your measurements. These corrections will enhance the overall frequency response of the system regardless of whether or not the microphone you are using is designed for the sound field in which you are measuring. - Page 65 Configure your instrument Measurement time This setting controls how the measurement stops: automatically or manually. Preset: The instrument will measure for the time specified in Preset time, then stop and save automatically. Free: You control the measurement manually. Preset time This setting controls the amount of time for which the instrument will measure when Measurement time is set to Pre- set.
-
Page 66: Broadband Parameters
Configure your instrument Enabled: Overwrite measurement data for the Back-erase time. Disabled: Resume the measurement without overwriting earlier data. Back-erase time This setting controls the number of seconds that will be erased when the measurement is resumed. This setting is enabled when Back-erase mode is set to Enabled. - Page 67 Configure your instrument How to set up broadband parameters using the instrument 1. Enable a frequency weighting. a. Press to navigate to a weighting box. b. Press to scroll through the frequency weightings. 2. Enable measurement parameters. a. Press to navigate to a parameter. b.
- Page 68 Configure your instrument How to set up broadband parameters using the mobile app 1. Tap 1 to enable parameters for the first frequency weighting. The instrument measures broadband parameters with up to two frequency weightings simultaneously, you will enable parameters for each frequency weighting separately. 2.
- Page 69 Configure your instrument Exponentially averaged levels Exponentially averaged sound levels provide easy-to-read values. A number of parameters are derived from expo- nential averaging: Lmax = maximum sound level This parameter gives you the highest time-weighted sound level that occurs during the measurement time. Lmax is often used in conjunction with another noise parameter (for example, Leq) to ensure a single noise event does not exceed a limit.
- Page 70 Configure your instrument About frequency weightings Frequency weightings mimic how humans hear sound. A-weighting Represents the human ear’s response at low to medium sound levels Equal loudness curve: 40 dB The most commonly applied frequency weighting Can be used for all sound levels B-weighting Represents the human ear’s response at medium sound levels Equal loudness curve: 70 dB...
-
Page 71: Spectrum Parameters
Configure your instrument Table of parameters This table gives an overview of all the possible parameter/frequency weighting combinations. ✐ Note: The parameters are listed as they appear in the Broadband parameters menu. LAeq LBeq LCeq LZeq Lpeak LApeak LBpeak LCpeak LZpeak LFmax LAFmax... - Page 72 Configure your instrument Set up spectrum parameters using the instrument 1. Press to navigate to the bandwidth box. 2. Press to toggle between bandwidths. = 1/1-octave = 1/3-octave 3. Enable a frequency weighting. a. Press to navigate to the weighting box. b.
- Page 73 Configure your instrument 4. Enable measurement parameters. a. Press to navigate to a parameter. b. Press to enable / disable parameters. 5. Navigate to 6. Press to close the parameter selection menu. Set up spectrum parameters using the mobile app 1.
- Page 74 Configure your instrument About bandwidth The bandwidth of the frequency analysis. You can choose 1/3-octave (third-octave) or 1/1-octave (full-octave). 1/3-octave will give you a finer analysis of the frequency than 1/1-octave. The range of the centre frequencies are: 1/3-octave: 12.5 Hz to 16 kHz 1/1-octave: 16 Hz to 8 kHz About parameters Leq = equivalent continuous sound level...
- Page 75 Configure your instrument Time weightings use time constants. Time constants define the time it takes for the instrument to respond to a change in sound levels. F = 125 ms time constant, decay of 34.7 dB/s The fast rise and decay of this time weighting means it will show a lot of the variations in the acoustic signal. You can use this weighting to measure sounds that fade rapidly, such as a dog bark.
-
Page 76: Statistical Parameters
Configure your instrument C-weighting Represents the human ear’s response at fairly high sound levels Equal loudness curve: 100 dB Mainly used to assess peak values of high sound pressure levels (LCpeak) Z-weighting No frequency weighting Used to collect unweighted data ✐ Note: An equal loudness curve is a frequency response curve. Equal loudness curves are the experimental results of presenting pure tones and levels at different frequencies to young people with no hearing impairment. -
Page 77: Audio Recording
Configure your instrument Basis parameter Basis parameter specifies the parameter to sample. In other words, the parameter you choose will characterize the stat- istical data that the instrument collects. LAF is sampled every 16 ms. LAF is the instantaneous time-weighted (F) sound level with frequency weighting A. LAS is sampled every 128 ms. -
Page 78: Display Settings
Configure your instrument 3. Open the Measurement window. 4. Use the controls at the bottom of the window to play back the recording. Display settings Display settings control how the instrument screen looks (brightness, colour scheme), the brightness of the light ring, and the data that is displayed. - Page 79 Configure your instrument Display view settings The following list contains information about the settings for the different views. Graph parameter (SLM view, List view) Choose the parameter for the bar graph; that is, the instantaneous (or fast) display of instantaneous sound levels. Parameter (Spectrum view) Choose the parameter for the spectrum display;...
-
Page 80: Regional Settings
Configure your instrument Regional settings Regional settings allow you to choose the language, date and time settings of the instrument. Go to: System settings > Regional settings. Language Choose the language of the user interface of the instrument. ✐ Note: From the home screen, go to About > Preferences > Language. Time zone Set the time zone in which you are measuring. -
Page 81: Data Management
Configure your instrument Switch screen off after Use this setting to switch off the screen on the instrument automatically after a period of inactivity (that is, when you are not pushing its buttons). The instrument will stay on and continue to measure even if the screen is off. Never: The screen will not switch off. -
Page 82: Network Settings
Configure your instrument Procedure: 1. Go to: Backup settings > Backup. 2. Select Disabled. 3. Enter the host name or IP address of the device or network (so the instrument can find it). 4. Enter the user name and password (so the instrument can access the device or network). 5. - Page 83 Configure your instrument Nickname A nickname can make your instrument easier to identify. This is because the default name of the instrument is based on its type and serial number, and they are fairly long. Also, if you have multiple instruments, the default instrument names will all look very similar.
- Page 84 Configure your instrument Add a password using the mobile app 1. Tap Password. 2. Use the keypad to enter a password. 3. Tap Done. Web server display Web server display is a setting that allows you to view the instrument GUI on a web browser that is connected to the same network as the instrument.
-
Page 85: Voltage Output
Configure your instrument Change the hotspot password on the instrument 1. Select Password. 2. Use to scroll through the character menu. 3. Press to confirm the changes. ✐ Note: Restart the instrument to apply the new password. Change the hotspot password using the mobile app ✐... -
Page 86: Lock The Settings
Configure your instrument Source Input X-weighted: Output the frequency-weighted input signal for listening purposes. LXF: Output the frequency-weighted instantaneous sound level with time weighting F as 10 mV/dB. X = the frequency weighting. ✐ Note: The frequency weightings available correspond to the parameters that the instrument is set to measure. Lock the settings After you have finished setting up the instrument, you can lock the measurement, display and system settings to pre- vent changes. -
Page 87: Terminology
TERMINOLOGY Frequency weighting corresponding approximately to the 40 dB equal loudness curve, that A-weighting filter is to say, the human ear’s response at low to medium sound levels. It is by far the most com- monly applied frequency weighting and is used for all levels of sound. Frequency weighting corresponding approximately to the 70 dB equal loudness curve, that B-weighting filter is to say, the human ear’s response at medium sound levels. - Page 88 Terminology The number of pressure variations per second. Frequency is measured in hertz (Hz). The Frequency normal hearing for a healthy young person ranges from approximately 20 Hz to 20000 Hz (20 kHz). Our hearing is less sensitive at very low and very high frequencies. In order to account for this, weighting filters can be applied when measuring sound.
- Page 89 Terminology Time-averaged (RMS) weighted acceleration (or voltage) value, averaged over the entire Linear measurement period with frequency weighting Linear. Loudness is the subjective judgement of intensity of a sound by humans. Loudness depends upon the sound pressure and frequency of the stimulus and whether the sound field is dif- Loudness fuse- or free-field.
Need help?
Do you have a question about the B&K 2245 and is the answer not in the manual?
Questions and answers