
Related Manuals for Nicols MAGIC LED


Summary of Contents for Nicols MAGIC LED
- Page 1 MAGIC LED MANUEL D’UTILISATION Nous vous recommandons de lire attentivement le manuel avant toute utilisation...
- Page 2 TABLE DES MATIERES 1. Instructions de sécurité 2. Caractéristiques techniques 3. Fonctions principales 4. Fonctionnement de l’appareil 4.1 Master/Slave 4.2 Contrôleur CA8 4.3 Contrôleur DMX universel 5. Configuration DMX 512 6. Connexion DMX 512 7. Dépannage de l’appareil 8. Entretien de l’appareil...
- Page 3 1. Instructions de sécurité Lire attentivement les consignes ci-après. Elles contiennent des informations importantes sur la sécurité de l'installation ainsi que sur l'utilisation et la maintenance de l'équipement. Conservez le présent manuel avec l'équipement pour référence ultérieure. En cas de vente de l'équipement à...
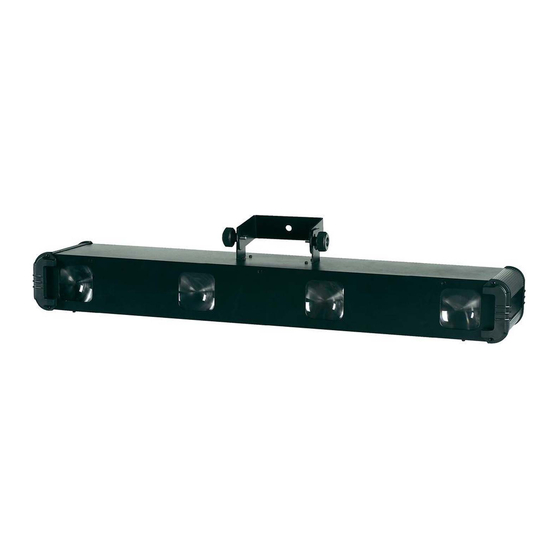
- Page 4 Alimentation : AC 230V~50Hz Consommation : 29W LED : Total 256pcs (64 x rouges, 64 x vertes, 64 x bleues, 64 x blanches) Dimensions : 975 x 121 x 213mm Poids : 6.4 kgs 3. Fonctions principales Pour sélectionner n'importe quelles fonctions de l'appareil, appuyez sur le bouton MENU jusqu'à...
- Page 5 Le réglage de l’adresse DMX 512 Appuyez sur le bouton MENU jusqu'a ce que s'affiche. Appuyez ensuite sur le bouton ENTER. L'affichage clignote. Utilisez les boutons DOWN et UP pour changer l'adresse DMX 512. Une fois l'adresse sélectionnée, appuyez sur le bouton ENTER pour la valider.
- Page 6 ou … (couleur 15). Appuyer sur le bouton ENTER pour valider. A défaut, vous allez retourner automatiquement sur le menu des fonctions principales sans aucun changement enregistré si vous attendez plus de 10 secondes avant d'appuyer sur le bouton ENTER. Appuyez sur le bouton MENU, si vous désirez retourner à...
- Page 7 Le mode FhRS Appuyez sur le bouton MENU jusqu'à ce que s'affiche et clignote. Appuyez sur le bouton ENTER. L'affichage indique le nombre d'heures de fonctionnement de l'appareil. Appuyez sur le bouton MENU, si vous désirez retourner à toutes les fonctions principales sans avoir fait de sélection.
- Page 8 4.2 Le mode autonome (télécommande CA-8) Vous pouvez utiliser télécommande CA-8 seulement mode MASTER/SLAVE. En reliant le câble de la télécommande à l’entrée DMX du premier appareil, vous contrôlez toutes les autres unités et par conséquent toutes les fonctions et les modes de ces mêmes unités. Blackout de l’appareil Blackout 1.
- Page 9 5. Configuration DMX 512 Mode 4 canaux Mode 256 canaux Remarque : si vous considérez 4 canaux comme un groupe, veuillez vous référez à la configuration DMX 1 / 4 canaux pour contrôler les autres canaux dans le mode 256 canaux. Dans cette configuration, vous pouvez contrôler les 256 LED séparément.
- Page 10 6. Connexion DMX 512 Le mode DMX512 est couramment utilisé pour réaliser des effets de lumières. 512 est le nombre maximum de canaux. 1. Sur le dernier appareil, le câble DMX doit avoir un bouchon de terminaison afin de réduire les défauts du signal. Il faut alors souder une résistance de 120 Ohm 1/4W entre la borne 2 (DMX-) et la borne 3 (DMX+) dans une prise XLR 3 points.
- Page 11 l'adresse et la polarité du signal DMX. 3. Si vous rencontrez des problèmes avec le signal DMX mais de façon intermittente, vérifiez les connecteurs ou la carte électronique de l'appareil défaillant ainsi que de l'appareil précédent. 4. Essayer d'utiliser un autre contrôleur DMX. 5.
- Page 12 TABLE OF CONTENTS 1. Safety Instructions 2. Technical Specifications 3. How to Set the Fixture 4. How to Control the Fixture 5. DMX 512 Configuration 6. DMX 512 Connections 7. Troubleshooting 8. Fixture Cleaning...
- Page 13 1. Safety Introductions Please read the instructions carefully which includes important information about the installation, operation and maintenance. WARNING Please keep this User Manual for future consultation. If you sell the fixture to another user, be sure that they also receive this instruction booklet. ...
- Page 14 LED: Total 256pcs, Red 64pcs, Green 64pcs, Blue 64pcs, White 64pcs Dimension: 975 x 121 x 213mm Weight: 6.4kgs 3. Main Function To select any functions, press MENU button until the required one is shown on the display. Select the function by ENTER button and the display will blink.
- Page 15 Press the MENU button up to when the is shown on the display. Pressing ENTER button and the display will blink. Use DOWN and UP button to change the DMX 512 address. Once the address has been selected, press ENTER button to setup or automatically exit menu mode without any change after 10 seconds.
- Page 16 Press the MENU button up to when the is shown on the display. Pressing ENTER button, Use DOWN and UP button to select the (blackout) or (normal). Once select, press ENTER button to setup or automatically exit menu mode without any change after 10 seconds.
- Page 17 give an automatic, sound activated, synchronized light show. This function is good when you want an instant show. You have to set the first unit in master mode and select (show 1) or …or (auto show), (show 12). Its DMX input jack will have nothing plugged into it, and Its master LED will be constantly on and sound LED will flash to the music.
- Page 18 4 channels: 256 channels: 5. DMX512 Configuration 4-CH mode: 256-CH mode: 4 channels as a group, please refer to the DMX configuration of 1-4 channels to control the other channels when you choose 256 channels mode. Under this mode, you can control the 256 LEDs separately.
- Page 19 6. DMX512 Connections The DMX512 is widely used in intelligent lighting control, with a maximum of 512 channels. Connect the fixture together in a “daisy chain” by XLR plug cable from the output of the fixture to the input of the next fixture. The cable cannot be branched or split to a “Y” cable.
- Page 20 5. Check if the DMX cables run near or run alongside to high voltage cables that may cause damage or interference to DMX interface circuit. C. Some fixtures don’t respond to the easy controller 3. You may have a break in the DMX cabling. Check the LED for the response of the master/ slave mode signal.
Need help?
Do you have a question about the MAGIC LED and is the answer not in the manual?
Questions and answers