Table of Contents
Advertisement
Quick Links
Advertisement
Table of Contents

Subscribe to Our Youtube Channel
Related Manuals for Wassermann Wasi-Steam Classic II

Summary of Contents for Wassermann Wasi-Steam Classic II
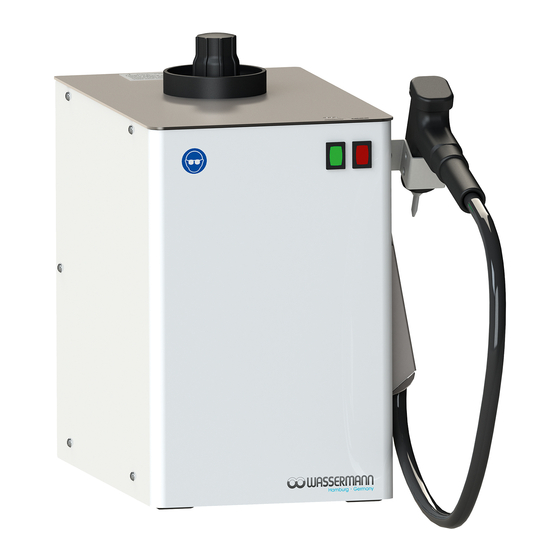
- Page 1 Steam Cleaner Wasi-Steam Classic II USER MANUAL...
- Page 2 Dear customer, Thank you for choosing a product from the Wassermann range. Wassermann Dental- Maschinen incorporates the highest standards of quality and the latest technology. In order to enjoy maximum performance and years of trouble-free operation, please read this user manual carefully before you connect this unit and start work, and operate the unit according to the recommended guidelines.
-
Page 3: Table Of Contents
Contents 1 Features...........................4 2 Safety Symbols used in this Manual.................4 3 Safety Guidelines......................4 4 Responsibility for Operation or Damage................6 4.1 Warranty.........................6 5 Application........................6 6 Before Starting.........................7 6.1 Transport........................7 6.2 Installation......................7 6.3 Storage........................8 6.4 Mounting Instruction Fastening Set for Wall Mounting Wasi-Steam Classic..8 7 Start-up/ Installation......................12 8 Operation........................14 8.1 General Operating Instructions................14... -
Page 4: Features
Features Wasi-Steam Classic II: Perfect for use with limited space • Manual filling so the location can be flexibly selected • Operation with distilled / softened water is possible and is recommended • Comfortable application through single-handed operation of the jet gun •... -
Page 5: Safety Guidelines
Safety Guidelines Configuring and operating this equipment requires precise knowledge and observance of the instructions in this user manual. The equipment is designed only for its intended application. WARNING: Servicing and repairs should be carried out only by authorised specialists. Disconnect the power plug before starting any maintenance work. -
Page 6: Responsibility For Operation Or Damage
Because of its variable work pressure of up to 5 bar it offers the user a gentle but quick and thorough cleaning of all small parts in the dental laboratory. Only use the unit Wasi-Steam Classic II for this type of application. -
Page 7: Before Starting
Before Starting Transport Before transporting the unit, ensure that it has been unplugged from the power socket. Make sure that it is packed correctly in order to avoid accidental damage. Be sure to check for any transport damage when unpacking the goods. Note down any damage if found. -
Page 8: Storage
An even temperature and wooden supports also help. The unit should not be stored or set up outdoors. Mounting Instruction Fastening Set for Wall Mounting Wasi-Steam Classic II In case of wall mounting a fastening set is necessary. Item.-no. 174358, available as accessory Incl. - Page 9 Mounting instruction : Please drill the holes as indicated in the following drilling template. Please make sure before that the wall is really suitable for mounting a unit (aerated concrete walls and drywall are problematic). Drilling template drilling drilling...
- Page 10 Secure the enclosed screw anchors as shown in Figure 1. Screw the 6x50 screws into the two upper holes; keep a distance of 6-7 mm to the wall! (Figure 2) Screw anchor fig. 2 Srew 6 x 50 Screw anchor fig.
- Page 11 Screw the securing bracket to the Wasi-Steam Classic II as shown in Figure 3. Do not yet fully tighten the Phillips head screw, however – you still need to be able to move the securing bracket. Securing bracket Washer Serrated washer Phillips head screw fig.
-
Page 12: Start-Up/ Installation
Carefully hook in the unit. Check, whether the unit hangs loosely (i.e. moving back and forth on the screws). If this is the case tighten the 6x50 screws until the unit hangs securely. Finally tighten the securing bracket. First at the wall, then tighten the screw on the unit itself. - Page 13 Please note the details on the equipment and equipment stickers! 1 = Light red (low water) 2 = Light green (heating operation) 3 = Controller steam quantity „0 – 5 bar“ (max. = 5 bar) 4 = Main switch (unit on / off) 5 = Srew top (pressing down to unscrew) 6 = Thermo-safety switch with manual reset (please see 8.1.1!) 7 = Fuse...
-
Page 14: Operation
Open the screw top (5) of the container carefully while pressing down the screw top • Fill with at most 2 litres of water • Operation with distilled / softened water is possible and is recommended • Tighten container screw top (5) sturdily again (hand-screwed) •... -
Page 15: Refill
8.1.1 Refill the unit with water After the red light (1) lights up, wait approx. 45 min. (cooling down ● period) until you refill again, or else there is a risk of scalding as long as the temperature remains above 100°C Container must be pressureless;... -
Page 16: Troubleshooting
Troubleshooting Fault Cause Solution The red light (low This is a safety Please see page 14/15. water) lights up and feature of the the heating turns off steamer: Thermo- safety switch (temperature delimiter 165°C) with manual reset No function, only the Devise fuse faulty Replace fuse and investigate cause;... -
Page 17: Care And Maintenance
Care and Maintenance 10.1 Cleaning Disconnect the power plug before starting any maintenance work. The identification plate has always to be kept in easily legible condition and has not to be removed. Remove external dirt from time to time with some form of cold cleaner. Use only cold cleaners to avoid damaging the paintwork or removing the lettering. -
Page 18: Maintenance
10.2 Maintenance The Wasi-Steam Classic II should, depending on frequency of use, but at least twice a year, be decalcified in accordance with the following instructions. Depending on water hardness a more frequent decalcification could be required. Operation with distilled / softened water is possible and is recommended. -
Page 19: Spare Parts
If necessary please contact our service hotline phone. 10.5 Service Hotline 0049 (0)40 730 926 -20/ -24 10.6 Accessories for the item 174996 Wasi-Steam Classic II Accessories Item no. Splash protection (W 250 x H 262 x D 255 mm) 174460 Special spray nozzle Ø... -
Page 20: Disposing Of The Unit
Disposing of the Unit The unit has to be disposed by an authorized recycling operation. The selected company has to be informed of all possibly health-hazardous residues in the unit. 12.1 Information on Disposal for Countries within the EU To conserve and protect the environment, prevent environmental pollution and improve the recycling of raw materials, the European Commission adopted a directive that requires the manufacturer to accept the return of electrical and electronic units for proper disposal or recycling. -
Page 21: Eu Declaration Of Conformity
Product description: Steam Cleaner for Dental-Maschinen GmbH dental Rudorffweg 15-17 applications 21031 Hamburg Germany Model: Wasi-Steam Classic II Item no. 174996 Aapplicable DIN EN 61010-1 standards: DIN EN 61000-6-3 DIN EN 61000-6-1 DIN 45635-1 DIN EN 60335-1 Hiermit wird bestätigt, dass die oben bezeichnete Maschine den genannten EU-Richtlinien entspricht. - Page 22 Notes:...
Need help?
Do you have a question about the Wasi-Steam Classic II and is the answer not in the manual?
Questions and answers