Table of Contents
Advertisement
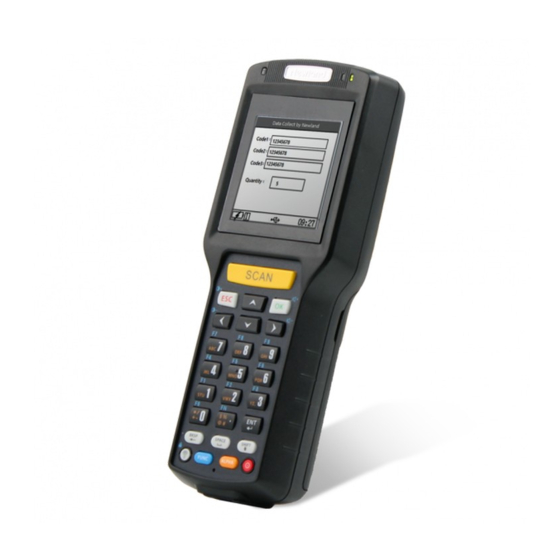
Quick Links
Advertisement
Table of Contents

Related Manuals for Newland DC850 Susu


Summary of Contents for Newland DC850 Susu
- Page 1 SCANNING MADE SIMPLE DC850 Susu mobile computer user guide...
- Page 2 All pictures in this manual are for reference only and actual product may differ. Regarding the product modification and update, Fujian Newland Auto-ID Tech. Co., Ltd. reserves the right to make changes to any software or hardware to improve reliability, function, or design at any time without notice.
- Page 3 Revision History Version Description Date V1.0 Initial release 2019-10-28...
-
Page 4: Table Of Contents
Contents Chapter 1 About This Guide ................................ 1 Introduction ..................................1 Documentation Set ................................1 Chapter Descriptions ................................ 1 More Information ................................1 Chapter 2 Getting Started ................................2 Introduction ..................................2 Unpacking ..................................2 Getting Started ................................. 2 Installing the Battery ................................. 2 Removing the Battery ............................... - Page 5 LCD ..................................11 Sound ..................................12 Volume ................................... 12 Power ..................................13 Services ................................. 13 Password ................................14 MenuSet................................. 14 Barcode.................................. 15 U Disk ..................................15 Recovery ................................16 Barcode Test .................................. 16 SelfTest................................... 17 Keypad test ................................17 LCD Backlight test ..............................18 LCD test .................................
- Page 6 Important Safety & Handling Information ........................31 Disassembly and Retrofit ............................31 External Power Supply ............................31 Abnormal Situation ..............................31 Drop Damage ................................. 31 LCD Screen ................................31 Stacking Heavy Objects ............................31 Mounting Location ..............................31 Use & Maintenance ..............................32 Battery Safety Guidelines............................
-
Page 7: Chapter 1 About This Guide
Chapter 1 About This Guide Introduction This guide provides instructions for operating the NLS-DC850 portable data collector and its accessory (hereinafter referred to as “the DC850” or “the terminal”). Documentation Set The documentation set for the DC850 includes: NLS-DC850 Portable Data Collector Quick Start: Describes how to get the NLS-DC850 up and running. ... -
Page 8: Chapter 2 Getting Started
Chapter 2 Getting Started Introduction This chapter lists the parts and accessories for the DC850 and explains how to install, remove and charge the battery, and power on the DC850 for the first time. Unpacking Carefully remove all protective material from the pack and verify that the following were received: ... -
Page 9: Removing The Battery
Step 4: Close the cover and lock the battery cover latches. Removing the Battery Step 1: Long press the Power key to turn off the terminal. Step 2: Unlock the battery cover latches. Step 3: Remove the cover. Step 2: Remove the battery. -
Page 10: Attach The Hand Strap
Attach the Hand Strap Step 1: Insert the loop on the hand strap into the slot at the back of the device. Step 2: Thread the upper portion of the hand strap into the loop. Pull the clip through the loop over the tether point and tighten it into place. -
Page 11: Led Indicator And Keypad
USB Connection Note:When the device is in sleep mode, connect or remove the USB cable will wake up the terminal. LED Indicator and Keypad... - Page 12 Charging LED Indicator: The charging LED indicator is in red when charging, and it will turn to green when fully charged. Remove the device from the power outlet, and then the LED light is off. Scan Key: Press it to scan the barcode. OK/ ESC Key: OK Key: Tap it to confirm the current step.
- Page 13 “ALPHA”+“SHIFT”: Enter the edit box, press "ALPHA" key once for English lowercase, twice for Chinese character and three times for numbers. It is cycling and has durable effects. Press “SHIFT” to toggle between the capital letter and lowercase letter. 12. In the FUNC mode, it will enable the blue function keys (valid for one time and not permanent). For example: to key "F7F8" firstly press "FUNC"...
-
Page 14: Chapter 3 Basics
Chapter 3 Basics Introduction This chapter provides the basics of setting and using DC850. System Menu 1. Run APP: Run the app per current system settings. 2. SystemSet: Set system parameters like time, power, sound, etc. per your needs. 3. BarcodeTest: It is an app for barcode reading. 4. -
Page 15: Systemset
Run APP: Enter the” Run App “from the” system Menu”. SystemSet 1. Program: Enter to configure the user application. 2. Date&Time: Enter to Configure the System Clock. 3. Files: File Management for U Disk and Plugin Directory. 4. Communication: Enter to set USB configuration. 5. -
Page 16: Program
Program 1. In the system Menu, enter “Systemset” – “Program”—“set plugin”, then set the parameter per needs. 2. Press the “OK” button to open the drop down list. Use the direction key to select the plugin you want to select and press the “OK”... -
Page 17: Keypad
2. In the USB mode, press the “OK” key to open the drop down list and select the parameter you need, then press the “OK” key to confirm. 3. After completing the setting, move the cursor to the “Setup” button, press the “OK” button to confirm the setting and exit. Alternatively, press the “ESC”... -
Page 18: Sound
3. Select the brightness level in the drop down list of” Brightness” as needed. 4. After completing the setting, move the cursor to the “Setup” button, press the “OK” button to confirm the setting and exit. Alternatively, press the “ESC” key to cancel the setting and exit. Sound 1. -
Page 19: Power
3. After completing the setting, move the cursor to the “Setup” button, press the “OK” button to confirm the setting and exit. Alternatively, press the “ESC” key to cancel the setting and exit. Power 1. In the system Menu, enter “Systemset” – “Power” and set the parameter per your needs. 2. -
Page 20: Password
Password 1. In the system Menu, enter “Systemset” – “password” and set the parameter per your needs. 2. Input the old password and a new one. 3. After completing the setting, move the cursor to the “Setup” button, press the “OK” button to confirm the setting and exit. Alternatively, press the “ESC”... -
Page 21: Barcode
Barcode 1. In the system Menu, enter “Systemset” – “Barcode” and set the parameter per your needs. 2. Enter the “BarcodeSet” to turn on /off the decoding barcode. 3. Enter “Type Check” to check the current reading module type. 4. Enter the “Recovery” to restore the factory default configuration. U Disk 1. -
Page 22: Recovery
Recovery 1. In the system Menu, enter “Systemset” – “Recovery” and set the parameter per your needs. 2. Press the “OK” button to confirm the setting and exit. Alternatively, press the “ESC” key to cancel the setting and exit. Note: all custom settings will be lost after reset the default setting. Barcode Test 1. -
Page 23: Selftest
SelfTest Note: if the device fails, you can locate the problem with the Selftest menu. Keypad test 1. In the system Menu, enter “SelfTest”, and press “Keypad”. 2. The screen displays the prompt of all keys. When you press a key, the corresponding prompt disappears, if it does not disappear, and then indicate a problem with the corresponding key. -
Page 24: Lcd Backlight Test
LCD Backlight test 1. In the system Menu, enter “SelftTest”, and press “LCD backlight”. 2. Turn on or turn off the LCD backlight as displayed on the screen. 3. Exit the LCD backlight test by pressing the "ESC" key. LCD test 1. -
Page 25: Beep Test
Beep test 1. In the system Menu, enter “SelftTest”, and press “Beep”. 2. Users can choose short, middle, or long options to conduct the beep test as shown on the screen. 3. Press the "ESC" key to exit the test. Note: for the beep test, pleas disable the “All Mute”... -
Page 26: Usb Test
USB test 1. In the system Menu, enter “SelftTest”, and press “USB”. 2. If the device does not connect with the USB cable, the system will prompt a note. 3. Open a text document on PC, then press the “OK” key in the DC850, the system will send characters to text document through the HID way. -
Page 27: Sysinfo
SysInfo In the system Menu, enter “SysInfo”, and it will display system information about DC850, such as firmware version, manufacture date, barcode engine, etc. -
Page 28: Chapter 4 Data Transmission
Chapter 4 Data Transmission Introduction This chapter describes how to connect the DC850 to a PC and realize the data transmission. Connected with PC Open the "USB port protection rubber" at the bottom of the DC850, then connect the device with PC via the USB cable included. - Page 29 Install usb2ethernet driver Step 1: Install the usb2ethernet driver (DC850_usb2ethernet_driver_signed) in the PC. Step 2: Go to the device manager on your PC, and then you will find the Linus USB ethernet /RNDIS Gadget.
- Page 30 Data Transmission under “Ethernet” Mode After the driver installation is complete, a fixed IP address will be assigned to the network card on the DC850 device: 192.168.0.1. You can use remote tools to log in to the IP address and manage files on DC850 devices (copy, paste, delete, etc.).
-
Page 31: Hid Mode
In the remote site, select the direction: /usr/default_app/res-pt86_cd850, which contains the plugins (or programs) for the DC850 device as shown below. Users can upload, download, or delete the file in this directory. HID Mode Step 1: Select the USB-HID in the USB Mode,then press the “Setup” to save the setting. Step 2: Connect the DC850 with the computer via USB cable. -
Page 32: Flash Disk Mode
Flash Disk Mode Step 1: Select the “Flash Disk ” in the USB Mode,then press the “Setup” to save the setting. Step 2: Connect the DC850 with PC via USB cable. Then you will find the U drive in PC. In this mode, the DC850 can be used as a flash drive. -
Page 33: Usb-Vcom Mode
The app folder contains plugins (programs) for DC850 devices. You can copy, modify or delete programs that you need on DC850 under this folder. USB-VCOM Mode Step 1: Select the “USB-VCOM ”in the USB Mode,then press the “Setup” to save the setting. - Page 34 Install vcom driver Step 2: Install the VCOM driver, which is the same installation package as usb2ethernet driver, if the computer has already install file, then no need to install again. Step 3: Connect the DC850 with PC via USB cable. Then you will find below screen in the device manager of PC.
- Page 35 Vcom Usage Step 1:Open the COM debug tool, here we take the hyper terminal tool(Xshell personal)as reference. Step 2: press the “ ” key on the software. Step 3: Select “serial” on the Protocol, and click the “SERIAL” on the category directory and set other parameters per below screen, then press the connect button.
- Page 36 Note: The port O should be the same as the serial number on your PC with "Gadget Serial"(here is COM3). Step 4: Open the" BarcodeTest "in the system menu of DC850, then press the scan key and read the barcode. The barcode data will be displayed on the hyper terminal of PC as shown below: Note: the USB mode should be under USB-VCOM.
-
Page 37: Chapter 5 Maintenance & Troubleshooting
Keep the terminal away from fire or heat sources. If there is an unusual odor, overheating or smoke during charging, immediately cut off the power and disconnect the AC adapter, and contact your dealer or Newland customer service center. Continued use in this case may result in fire or electric shock. - Page 38 Use & Maintenance If the terminal cannot be switched on after experiencing a sudden or unexpected power loss or other abnormalities, remove and then reinstall its battery to reset the terminal. Do not throw, drop or strike the terminal. Doing so may damage the LCD display, interrupt running programs, cause data loss in memory and result in malfunction.
- Page 39 Troubleshooting Problem Possible Cause & Solution Type Description Charging LED is OFF when Ensure the AC adapter is plugged in properly. charging. 1. Check the battery level. If the battery is almost depleted, recharge it. Noticeably short battery life. Battery 2.
- Page 40 SCANNING MADE SIMPLE Need more info? Contact us or one of Newland EMEA HQ our partners at newland-id.com/partners +31 (0) 345 87 00 33 info@newland-id.com newland-id.com...
Need help?
Do you have a question about the DC850 Susu and is the answer not in the manual?
Questions and answers