Table of Contents
Advertisement
Advertisement
Table of Contents

Related Manuals for Fancom IMS


Summary of Contents for Fancom IMS
- Page 1 MANUAL...
- Page 2 Note: The original, authoritative version of this manual is the English version produced by Fancom B.V. or any of its subsidiaries, (hereafter collectively referred to as "Fancom"). Subsequent changes to any manual made by any third party have not been reviewed nor authenticated by Fancom.
- Page 3 EC Declaration of compliance EC Declaration of compliance Manufacturer Fancom B.V. Address Industrieterrein 34 City Panningen (the Netherlands) hereby declares that the Satisfies the conditions set out in: The Low Voltage directive 2006/95/EC According to EN-61010 The EMC directive 2004/108/EC...
-
Page 4: Table Of Contents
Possibilities IMS Pre-defined position / independent control Switch DIP-switches 7-segment display Control The IMS as I/O-network module The IMS as a traditional end station Adjustment procedure 10.1 General 10.2 Air inlet minimum / maximum 10.2.1 Adjusting air inlet minimum 10.2.2 Adjusting air inlet maximum 10.2.3... -
Page 5: About This Manual
This manual also contains a section for the user. It contains information about the daily use of the network module. If you have any questions, please do not hesitate to contact Fancom. The subjects discussed in this manual are listed in the table of contents. -
Page 6: Introduction
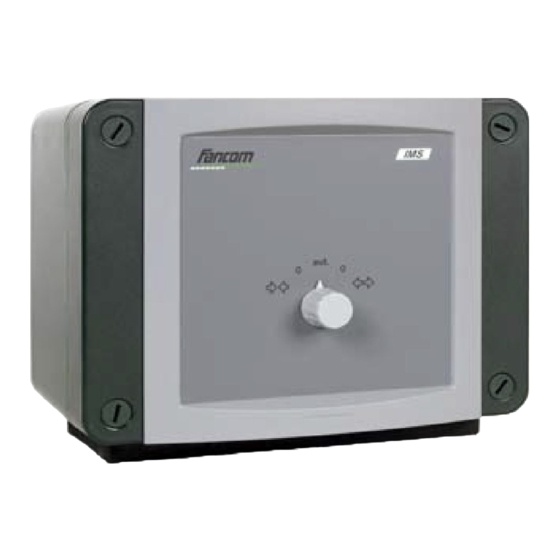
Introduction Introduction The Fancom IMS is an Intelligent Actuator Module to be used in combination with a Fancom climate controller in the agricultural sector. This IMS controls a Fancom actuator. Control is based on the potentiometer feedback (4K7) of the actuator. -
Page 7: Technical Specifications
Technical specifications Technical specifications Power supply Mains voltage 1-phase: 230Vac (-10%, +6%) 3-phase: 400Vac (-10%, +6%) Mains frequency 50/60Hz Fuse electronics (5 x 20mm.) slow blown, 250V T50mA Max. power consumption electronics Inputs Analog In Voltage- or temperature measuring Voltage 0-10V, temperature sensor type S7 ( -50 t/m 110"C) I/O-net I/O-net PF (PowerFail) - Page 8 Technical specifications Operating temperature range 0 to 40°C Storage temperature range -10 to +50°C Relative humidity <95%, uncondensed I/O-netwerk Possibility of communication via the I/O-Network. One control computer and a maximum of 31 network modules may be connected to the I/O- Network.
-
Page 9: Safety Instructions And Warnings
The installation of the network module and trouble shooting must be carried out by an authorized technician/installer, according to the prevailing standards. Fancom takes no responsibility for any possible damage as a result of incorrect settings and a non- or partially functioning installation. During installation Caution Take precautions to prevent electrostatic discharge (ESD). -
Page 10: During Use
Safety instructions and warnings During use Caution network module electronic apparatus, possible malfunctioning cannot therefore be excluded. Check the network module regularly for any damage. Any eventual damage should be directly reported to your installer. A damaged network module is dangerous! Do not use running water (high pressure cleaners) to clean the network module. -
Page 11: Mounting And Installation
Mounting and installation Mounting and installation Observe the following points when mounting/installing the network module: Disconnect power before installation Use the cables mentioned in the instruction diagrams and follow all instructions. Never mount the network module in a place where the weather has direct influence;... -
Page 12: Possibilities Ims
Possibilities IMS Possibilities IMS An IMS controls a 1~ or 3~ Fancom actuator. Control is based on the potentiometer feedback (4K7) of the actuator. The required air inlet position is determined by the I/O-net control or a 10-0V (or 0-10V) control signal from a control computer. -
Page 13: Switch
- if the correct emergency power supply has been connected. Switch The front of the IMS has a 5-position switch. The position of the switch determines the function of the actuator. (see Figure 1). Automatic aut. -
Page 14: Dip-Switches
DIP-switches 1 thru 5 -type control DIP-switches 1 thru 5 determine the type of control. If an I/O-net is used an address between 1 .….31 should be set to identify the IMS to the connected control computer. If an analog (0-10V or 10-0V) control is used, the DIP switches should be all be set to ON. -
Page 15: Control
I/O-network all the I/O-network module must have a unique address. I/O address Temperature measurement adr. IMS doesn’t measure the temperature itself IMS measures the temperature itself 1 2 3 4 5 6 7-segment display Start button adjustment (BUTTON) Temp. - Page 16 The IMS can also take over control in the event of communication problems. If the connected computer can communicate the setpoint and control range to the IMS, these values will be used for further control. The IMS will continue control based on the last received settings and the temperature it measured on the connected sensor.
-
Page 17: The Ims As A Traditional End Station
Control The IMS as a traditional end station If the IMS is used as a traditional end station, it is controlled by a voltage signal. The voltage input should be used as an analog input. Remove jumpers JP1 (see figure 2). After these jumpers have been removed, the IMS can be used for 0-10/10-0Vdc control. -
Page 18: Adjustment Procedure
10. Adjustment procedure 10.1 General Before the IMS can be used, the minimum and maximum air inlet position must be adjusted first and if any emergency power supply is used also set the pre-defined position. The option on the 7-segment display is important here. -
Page 19: Air Inlet Minimum / Maximum
7-segment display. The IMS is now in the 1% adjustment mode. Close the air inlet manually by setting the switch on the IMS to the CLOSE position. This must happen within 10 minutes, otherwise calibration will be interrupted and the display ‘cleared’. -
Page 20: Adjusting Air Inlet Maximum
Adjustment was not successful. 10.2.3 End of adjustment procedure minimum and/or maximum Set the switch on the IMS to the AUT position. If the switch is not set to AUT, the programme will shut down after max. 10 minutes anyway. -
Page 21: Predefined Position
7-segment display. Set the air inlet manually to the required position using the switch on the IMS. This must happen within 10 minutes, otherwise calibration will be interrupted and the display ‘cleared’. When the required air inlet position has been reached, press the BUTTON to confirm the position. -
Page 22: Connection Diagram Ims 1-Phase
220-240 Vac 50-60 Hz I/O-Net 2 wire Feedback 3 wire MAX. 240 Vac MAX. 4Amp IMPORTANT!! All equipment must be grounded correctly. Connect Fancom equipment according to the Technical modifications preserved. prevailing standards of the local electricity company. A5911573 - GB030409... -
Page 23: Connection Diagram Ims 3-Phase
230/400 Vac 3 wire 50-60 Hz Limit switch MAX. 415 Vac MAX. 4 Amp. IMPORTANT!! All equipment must be grounded correctly. Technical modifications preserved. Connect Fancom equipment according to the prevailing standards of the local electricity company. A5911573 - GB030409... -
Page 24: Connection I/O-Network
Connection I/O-Network A5911573 - GB030409...
Need help?
Do you have a question about the IMS and is the answer not in the manual?
Questions and answers