Advertisement
Available languages
Available languages
Quick Links
Advertisement

Related Manuals for briebe TFN-123015.1


Summary of Contents for briebe TFN-123015.1
-
Page 2: Table Of Contents
Inhalt – Content – Inhoud – Teneur – Contenido – Í ndice – Contenuto – Treść Bedienungsanleitung – German .................. - 2 - Instruction manual – English ..................- 9 - Gebruiksaanwijzing – Dutch ..................- 15 - Mode d'emploi – French ................... - 22 - Manual de Instrucciones –... -
Page 3: Bedienungsanleitung - German
Bedienungsanleitung – German SICHERHEITSHINWEISE Lesen Sie vor dem Gebrauch unbedingt die nachfolgenden Anleitungen, um Verletzungen oder Beschädigungen zu vermeiden und das beste Ergebnis mit dem Gerät zu erzielen. Bewahren Sie diese Bedienungsanleitung an einem sicheren Ort auf. Wenn Sie dieses Gerät an eine andere Person weitergeben, stellen Sie sicher, dass Sie auch diese Bedienungsanleitung aushändigen. - Page 4 den Stromverbrauch des Gerätes geeignet sein, sonst kann es zum Ü berhitzen des Verlängerungskabels und/oder des Steckers kommen. Es besteht Verletzungsgefahr durch Stolpern über das Verlängerungskabel. Lassen Sie Vorsicht walten, um gefährliche Situationen zu vermeiden. 7. Ziehen Sie den Netzstecker aus der Steckdose, wenn das Gerät nicht benutzt und bevor es gereinigt wird.
- Page 5 hitzebeständigen Fläche. 20. Lagern oder benutzen Sie das Gerät nicht im Freien. 21. Bewahren Sie das Gerät an einem trockenen, für Kinder unzugänglichen Ort (in seiner Verpackung) auf. 22. Stecken Sie niemals Finger oder andere Objekte durch das Ventilatorschutzgitter, wenn der Ventilator läuft. 23.
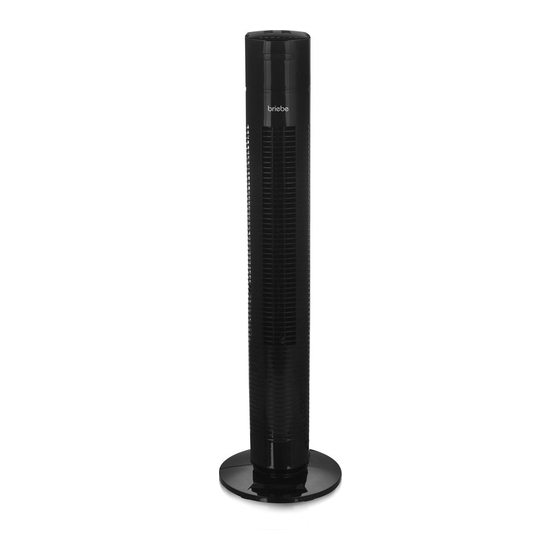
- Page 6 TFN-123015.1 BEZEICHNUNG DER TEILE Bedienfeld Fernbedienung Gehäuse D. Schrauben vorderes Sockelteil hinteres Sockelteil G. Stromkabel AUFBAU Die 3 Schrauben aus der Drehplatte herausschrauben. Vorder- und Rückseite des Sockels zusammenfügen. Sockel und Drehplatte ausrichten und mithilfe der 3 Schauben befestigen. Das Netzkabel in die Kabelaufbewahrung drücken.
- Page 7 BEDIENUNG 1. Stecken Sie das Stromkabel in eine geeignete Steckdose. 2. Drücken Sie die Taste POWER (Ein/Aus), um den Ventilator einzuschalten. Der Ventilator beginnt mit niedriger Geschwindigkeit zu laufen und die LED-Lampe „LOW“ (NIEDRIG) leuchtet auf. 3. Drücken Sie auf den Knopf „SPEED“ (GESCHWINDIGKEIT), um die gewünschte Geschwindigkeit einzustellen “LOW →...
- Page 8 Die Quittung immer aufbewahren, ohne Quittung wird jegliche Garantie ausgeschlossen. Bei Schäden durch Nichteinhalten der Bedienungsanleitung erlischt die Garantie, Wir sind für daraus resultierende Folgeschäden nicht haftbar. Für Materialschäden oder Verletzungen aufgrund falscher Anwendung oder Nichtbefolgen der Sicherheitshinweise sind wir nicht haftbar. Schäden an den Zubehörteilen bedeutet nicht, dass das gesamte Gerät kostenlos ausgetauscht wird.
- Page 9 ERP-Informationen (DE) Lieferant: Electroactiva Calle Huelva, 6 28343 - Valdemoro – Madrid – España Erklärt für das im Folgenden beschriebene Produkt: Erforderliche Angaben Informationen zur Angabe des TFN-123015.1, auf das/die sich die Informationen beziehen: [Turmventilator] Bezeichnung Symbol Wert Einheit Maximaler Volumenstrom...
-
Page 10: Instruction Manual - English
Instruction manual – English SAFETY INSTRUCTIONS Before use make sure to read all of the below instructions in order to avoid injury or damage, and to get the best results from the appliance. Make sure to keep this manual in a safe place. - Page 11 and keep it away from hot objects and open flames. 9. Do not immerse the appliance or the mains plug in water or other liquids. There is danger to life due to electric shock! 10. To remove the plug from the plug socket, pull the plug. Do not pull the power cord.
- Page 12 TFN-123015.1 PARTS OF DESCRIPTION Control panel Remote control Body D. Screws Front base Back base G. Power cord ASSEMBLY Spin 3 screws out from the turnplate. Fasten the back and front base together. Align the base with turnplate and then spin into 3 screws.
- Page 13 OPERATION 1. Plug the power cord into a suitable socket. 2. Press button “POWER” to start the fan. The fan will begin to work under low speed and the LED light of “LOW” will be 3. Press button “SPEED” to choose your desired speed “LOW →...
- Page 14 ENVIRONMENT FRIENDLY DISPOSAL Recycling – European Directive 2012/19/EU This marking indicates that this product should not be disposed with other household wastes. To prevent possible harm to the environment or human health from uncontrolled waste disposal, recycle it responsibly to promote the sustainable reuse of material resources. To return your used device, please use the return and collection systems or contact the retailer where the product was purchased.
- Page 15 Supplier: Electroactiva Calle Huelva, 6 28343 - Valdemoro – Madrid – España Declare that the product detailed below: Information requirements Information to identify the TFN-123015.1 to which the information relates to [Tower Fan] Description Symbol Value Unit Maximum fan flow rate...
-
Page 16: Gebruiksaanwijzing - Dutch
Gebruiksaanwijzing – Dutch VEILIGHEIDSVOORSCHRIFTEN Voor gebruik dient u alle onderstaande instructies te lezen om letsel en schade te voorkomen en om de beste resultaten met het apparaat te bereiken. Bewaar deze handleiding op een veilige plek. Mocht u dit apparaat aan iemand anders overhandigen, dient u ook de gebruiksaanwijzing te overhandigen. - Page 17 geschikt te zijn voor het stroomverbruik van het apparaat, anders kan oververhitting van de verlengkabel en/of stekker het gevolg zijn. Er is risico op letsel door het struikelen over het verlengsnoer. Wees voorzichtig om gevaarlijke situaties te vermijden. 7. Trek de stekker uit het stopcontact als het apparaat niet in gebruik is en voordat u het apparaat reinigt.
- Page 18 21. Bewaar het apparaat op een droge plek, buiten het bereik van kinderen (in de originele verpakking). 22. Steek nooit uw vingers of andere voorwerpen door het rooster van de ventilator als de ventilator in gebruik is. 23. Neem het product nooit zonder correct gemonteerde beschermende roosters in gebruik, aangezien dit ernstig persoonlijk letsel tot gevolg kan hebben.
- Page 19 TFN-123015.1 BESCHRIJVING VAN DE ONDERDELEN Bedieningspaneel Afstandsbediening Romp D. Schroeven Voorste voetstuk Achterste voetstuk G. Snoer MONTAGE Draai de 3 schroeven uit de draaiplaat. Maak de voorste en achterste basis aan elkaar vast. Lijn de basis af met de draaiplaat en draai dan in de 3 schroeven.
- Page 20 WERKING 1. Steek de stekker in een gepast stopcontact. 2. Druk op de knop “POWER” (aan/uit) om de ventilator in te schakelen. De ventilator werkt op de lage snelheid en het LED-lampje “LOW” brandt. 3. Druk herhaaldelijk op de “SPEED” knop om uw gewenste snelheid te kiezen: “LOW (LAAG) →...
- Page 21 zijn wij niet aansprakelijk. In dergelijke gevallen vervalt iedere aanspraak op garantie. Schade aan accessoires of onderdelen betekend niet dat het gehele apparaat zal worden vervangen. Afgebroken glazen of kunststof onderdelen of accessoires vallen niet onder de garantie en zullen tegen vergoeding vervangen kunnen worden. Defecten aan hulpstukken of aan slijtage onderhevige onderdelen, alsmede reiniging, onderhoud of de vervanging van slijtende delen vallen niet onder de garantie en zullen dus in rekening gebracht worden.
- Page 22 ERP-informatie (NL) Leverancier: Electroactiva Calle Huelva, 6 28343 - Valdemoro – Madrid – España Verklaart dat onderstaand vermeld product: Informatie-eisen Informatie voor het identificeren van de TFN-123015.1 waarop de informatie betrekking heeft [Torenventilator] Beschrijving Symbool Waarde Eenheid Maximale stroomsnelheid /min...
-
Page 23: Mode D'emploi - French
Mode d'emploi – French CONSIGNES DE SÉCURITÉ Avant d’utiliser l’appareil, lisez toutes les consignes suivantes pour éviter des blessures et des dommages, et pour optimiser les performances de votre appareil. Conservez cette notice d’utilisation dans un endroit sûr. Si vous donnez ou transférez cet appareil à... - Page 24 la rallonge et/ou la fiche risquent de chauffer excessivement. Il existe un risque potentiel de blessures par trébuchement sur le cordon électrique. Prenez vos précautions pour éviter toute situation dangereuse. 7. Débranchez la fiche électrique de la prise électrique quand l’appareil n’est pas utilisé et avant de le nettoyer. 8.
- Page 25 20. Ne rangez pas et n’utilisez pas l’appareil en plein air. 21. Rangez l’appareil dans un endroit sec et inaccessible aux enfants (dans son emballage). 22. N’insérez jamais vos doigts ni aucun objet dans les grilles du ventilateur quand il est en fonctionnement. 23.
- Page 26 TFN-123015.1 DESCRIPTION DES PIÈCES Panneau de contrôle Télécommande Boî tier D. Vis Partie avant de la base Partie arrière de la base G. Cordon d’alimentation ASSEMBLAGE Dévissez les 3 vis de la plaque pivotante. Assemblez la base avant et la base arrière.
- Page 27 UTILISATION 1. Branchez le cordon d'alimentation dans une prise électrique appropriée. 2. Appuyez sur POWER (marche/arrêt) pour démarrer le ventilateur. Le ventilateur se met en marche à la vitesse lente et le voyant LED « LOW » s’allume. 3. Appuyez sur le bouton « SPEED » pour choisir la vitesse désirée «...
- Page 28 machine sera remplacée gratuitement. Dans de tels cas, veuillez contacter notre assistance. Des pièces brisées en verre ou en plastique sont toujours sujettes à des frais. Les défauts des consommables ou des pièces susceptibles de s’user, ainsi que le nettoyage, l’entretien ou la réparation desdites pièces ne sont pas couverts par la garantie et doivent donc être payés.
- Page 29 Fournisseur : Electroactiva Calle Huelva, 6 28343 - Valdemoro – Madrid – España Déclare que le produit désigné ci-dessous : Exigences en matière d'informations Informations d'identification TFN-123015.1 sur lesquelles portent les informations (Ventilateur colonne) Description Symbole Valeur Unité Débit d’air maximal /min Puissance absorbée...
-
Page 30: Manual De Instrucciones - Spanish
Manual de Instrucciones – Spanish INSTRUCCIONES DE SEGURIDAD Antes de utilizar el producto, lea todas las instrucciones que se presentan a continuación para evitar lesiones personales y daños materiales y para obtener unos resultados óptimos del aparato. Asegúrese de mantener este manual en un lugar seguro. - Page 31 para el consumo eléctrico del aparato, de lo contrario el alargador o el enchufe podrí an sobrecalentarse. Peligro potencial de lesión al tropezar con el cable alargador. Tome las precauciones necesarias para evitar situaciones de peligro. 7. Desconecte el enchufe de la toma de corriente cuando el aparato no se encuentre en uso y antes de cualquier operación de limpieza.
- Page 32 través de las protecciones del ventilador cuando éste se encuentre en funcionamiento. 23. No utilice nunca el producto sin las protecciones del ventilador en su sitio. De otro modo, podrí an producirse graves lesiones personales. 24. El aparato deberá estar montado completamente antes de su uso.
- Page 33 TFN-123015.1 DESCRIPCIÓ N DE LOS COMPONENTES Panel de control Mando a distancia Cuerpo D. Tornillos Parte frontal de la base Parte trasera de la base G. Cable de alimentación MONTAJE Desenrosque y saque los 3 tornillos de la columna giratoria.
- Page 34 MODO DE EMPLEO 1. Enchufe el cable de alimentación a una toma de corriente apropiada. 2. Pulse el botón «POWER» para encender el ventilador. El ventilador empezará a funcionar a la velocidad baja y la led «LOW» se iluminará. 3. Pulse el botón de velocidad «SPEED» para elegir una velocidad (LOW →...
- Page 35 están siempre sujetas a pago. Los defectos de los consumibles o piezas susceptibles a desgaste, así como la limpieza, mantenimiento o la sustitución de dichas piezas no están cubiertas por la garantí a y por lo tanto, se deben pagar. RESPETE EL MEDIO AMBIENTE Reciclaje –...
- Page 36 Calle Huelva, 6 28343 - Valdemoro – Madrid – España Declara que el producto que se detalla a continuación: Requisitos de información Información para identificar la TFN-123015.1 a la que se refiere la información [Ventilador de torre] Descripción Sí mbolo...
-
Page 37: Manual De Instruções - Portuguese
Manual de instruções – Portuguese INSTRUÇÕ ES DE SEGURANÇA Antes da utilização leia todas as instruções abaixo para evitar ferimentos ou danos e para obter os melhores resultados do aparelho. Certifique-se de que guarda este manual num local seguro. Se oferecer ou transferir este aparelho para alguém certifique-se de que inclui também este manual. - Page 38 devido ao perigo de tropeçar na extensão. Tenha cuidado para evitar situações perigosas. 7. Desligue a ficha da tomada quando o aparelho não estiver a ser utilizado e antes de proceder à limpeza. 8. Certifique-se de que o fio da alimentação não fica pendurado sobre extremidades afiadas e mantenha-no afastado de objetos quentes e chamas livres.
- Page 39 23. Nunca coloque o produto em funcionamento sem as proteções da ventoinha instaladas, uma vez que podem ocorrer ferimentos graves. 24. O aparelho deve ser montado completamente antes da utilização. 25. Tenha cuidado com os cabelos compridos! Podem ser apanhados pela ventoinha devido à turbulência do ar. 26.
- Page 40 TFN-123015.1 DESCRIÇÃ O DOS COMPONENTES Painel de controlo Telecomando Corpo D. Parafusos Base dianteira Base traseira G. Fio da alimentação MONTAGEM Retire 3 parafusos da placa giratória. Fixe a base traseira com a base dianteira. Alinhe a base com a placa giratória e, de seguida, rode os 3 parafusos.
- Page 41 FUNCIONAMENTO 1. Ligue o fio da alimentação a uma tomada adequada. 2. Prima o botão “ENERGIA” para iniciar a ventoinha. A ventoinha começa a funcionar na velocidade baixa e o indicador luminoso LED de “BAIXA” acende. 3. Prima o botão “VELOCIDADE” para escolher a velocidade desejada “BAIXA →...
- Page 42 por danos materiais ou danos pessoais causados pelo uso indevido, se o manual de instruções não for correctamente seguido. Danos nos acessórios não significam a substituição de todo o aparelho. Nesse caso, entre em contacto com nosso departamento de atendimento. A quebra de vidro ou quebra de peças plásticas fica sempre sujeita a uma taxa.
- Page 43 Fornecedor: Electroactiva Calle Huelva, 6 28343 - Valdemoro – Madrid – España Declaro que o produto indicado abaixo: Requisitos de informação Informação para identificar o TFN-123015.1 ao qual a informação diz respeito [Ventoinha de torre] Descrição Sí mbolo Valor Unidade Débito de ar máximo da ventoinha...
-
Page 44: Manuale D'istruzioni - Italian
Manuale d'istruzioni – Italian ISTRUZIONI DI SICUREZZA Prima dell'uso, accertarsi di aver letto tutte le istruzioni riportate di seguito per evitare lesioni o danni e ottenere i migliori risultati dall'apparecchio. Conservare questo manuale in un luogo sicuro. In caso di passaggio di proprietà dell'apparecchio, includere anche questo manuale di istruzioni. - Page 45 7. Scollegare la spina dalla presa di corrente quando l'apparecchio non è in uso e prima di pulirlo. 8. Assicurarsi che il cavo di alimentazione non penda da bordi appuntiti e tenerlo lontano da oggetti caldi e fiamme libere. 9. Non immergere l'apparecchio o la spina in acqua o altri liquidi.
- Page 46 23. Non usare mai il prodotto senza le griglie di protezione per evitare il rischio di lesioni gravi. 24. L'apparecchio deve essere assemblato completamente prima dell'uso. 25. Prestare attenzione ai capelli lunghi, perché il flusso d'aria potrebbe risucchiarli nella ventola. 26.
- Page 47 TFN-123015.1 DESCRIZIONE DELL'APPARECCHIO Pannello di controllo Telecomando Corpo dell'apparecchio D. Viti Base anteriore Base posteriore G. Cavo di alimentazione ASSEMBLAGGIO Rimuovere le 3 viti dal supporto girevole. Unire la base anteriore e la base posteriore. Allineare la base con il supporto girevole, quindi avvitare le 3 viti.
- Page 48 UTILIZZO 1. Collegare il cavo di alimentazione a una presa di corrente adatta. 2. Premere il pulsante POWER per avviare il ventilatore. Il ventilatore si avvierà a bassa velocità; l'indicatore LOW si illuminerà. 3. Premere il pulsante SPEED per impostare il livello di velocità...
- Page 49 rispetto del manuale di istruzioni rendono nulla la garanzia; se ciò porta a conseguenti danni non potremmo essere ritenuti responsabili. Decliniamo inoltre qualsiasi responsabilità per eventuali danni o lesioni personali causati da un uso improprio o in caso di mancata aderenza al manuale di istruzioni. Eventuali danni agli accessori non implicano la sostituzione gratuita dell'intero apparecchio.
- Page 50 Informazioni ERP (IT) Il fornitore: Electroactiva Calle Huelva, 6 28343 - Valdemoro – Madrid – España dichiara che il prodotto descritto di seguito Prescrizioni relative alle informazioni Informazioni riportate per identificare TFN-123015.1 [Ventola a torre] Descrizione Simbolo Valore Unità Portata massima d’aria...
-
Page 51: Instrukcja Obsługi - Polish
Instrukcja obsługi – Polish INSTRUKCJE DOTYCZĄCE BEZPIECZEŃSTWA Aby nie dopuścić do urazów lub uszkodzeń oraz aby maksymalnie wykorzystać możliwości urządzenia, przed rozpoczęciem jego użytkowania należy przeczytać wszystkie poniższe zalecenia. Niniejszą instrukcję należy przechowywać w bezpiecznym miejscu. W przypadku przekazania lub odstąpienia komuś... - Page 52 wypadku może dojść do przegrzania się przedłużacza i/lub wtyczki. Istnieje potencjalne ryzyko urazów na skutek potknięcia się o przewód zasilający. Zachowaj ostrożność, by uniknąć niebezpiecznych sytuacji. 7. Przed czyszczeniem i na czas, gdy urządzenie nie jest używane, należy wyjąć wtyczkę z kontaktu. 8.
- Page 53 niedostępnym dla dzieci (w opakowaniu). 22. Nigdy nie należy wkładać palców ani innych przedmiotów w szczeliny w osłonie pracującego wentylatora. 23. Nigdy nie należy włączać urządzenia bez założonych osłon wentylatora, groziłoby to ciężkimi urazami użytkownika. 24. Przed użyciem urządzenie musi zostać w całości złożone. 25.
- Page 54 TFN-123015.1 OPIS CZĘŚCI Panel sterowania Zdalne sterowanie Korpus D. Śruby Przednia podstawa Tylna podstawa G. Przewód zasilający MONTAŻ Wykręcić 3 śruby z płyty obrotowej. Połączyć ze sobą tylną i przednią część podstawy. Dopasować podstawę do płyty obrotowej i wkręcić 3 śruby.
- Page 55 OBSŁUGA 1. Podłączyć przewód zasilający do odpowiedniego gniazdka. 2. Aby włączyć wentylator, należy nacisnąć przycisk „POWER” („ZASILANIE”). Wentylator zacznie pracować z małą prędkością i zapali się dioda “LOW”. 3. Naciśnij przycisk “SPEED”, aby wybrać wymaganą prędkość “LOW → MED → HIGH → LOW …” Odpowiednia dioda będzie się...
- Page 56 unieważnienie gwarancji. Producent nie ponosi odpowiedzialności za szkody materiałowe ani obrażenia ciała spowodowane niewłaściwą obsługą urządzenia i nieprzestrzeganiem instrukcji obsługi. Uszkodzenie akcesoriów nie oznacza bezpłatnej wymiany całego urządzenia. W takim wypadku prosimy o kontakt z naszym serwisem. Stłuczone elementy szklane lub pęknięte elementy plastikowe są wymieniane za opłatą. Uszkodzenia materiałów eksploatacyjnych lub części podlegających zużyciu, a także czyszczenie, konserwacja i wymienia wspomnianych części nie jest objęta gwarancją...
- Page 57 Informacje nt. efektywnej mocy wypromieniowywanej (PL) Dostawca: Electroactiva Calle Huelva, 6 28343 - Valdemoro – Madrid – España Oświadcza, że produkt wyszczególniony poniżej: Informacje wymagane Informacje identyfikujące TFN-123015.1, którego/których informacje te dotyczą [Wentylator kolumnowy] Opis Symbol Wartość Jednostka Maksymalny przepływ...
Need help?
Do you have a question about the TFN-123015.1 and is the answer not in the manual?
Questions and answers