
Related Manuals for Audiophonics RASPTOUCH ES9023


Summary of Contents for Audiophonics RASPTOUCH ES9023
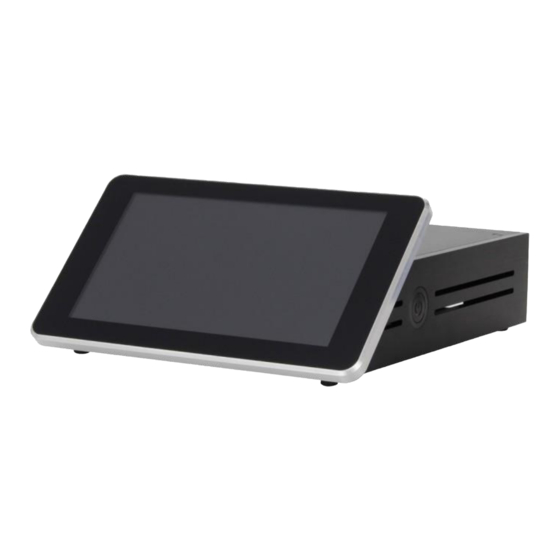
- Page 1 User Manual – Kit DIY ES9023 or ES9018K2M RASPTOUCH Open source network player: Raspberry Pi 3 & DAC...
- Page 2 RASPTOUCH Before starting… We hope you will enjoy our open source network player, the Rasptouch. Read this installation manual thoroughly before using it. To avoid any erroneous manipulation an to protect you and the device from possible dammages caused by inadequate use, we invite you to follow step by step the assembly of the case, the mounting of the screen support and the toutchscreen.
- Page 3 RASPTOUCH 1 – Elements necessary for mounting the case and the display support… In the package you will find many plastic bags containing different elements. To assemble the case and the display support select the following pieces: Display support (Black and silver) ...
- Page 4 RASPTOUCH 2 – Assembling the two sides… First step, mounting both sides on the bottom plate with 4 screws. Page 3 sur 29...
- Page 5 RASPTOUCH 3 – Display support… Select the following elements: Screw the two holding bars onto the support as in the picture: Page 4 sur 29...
- Page 6 RASPTOUCH 4 – Assembling the display support… Fit the display support to the front of the pre-assembled case, then screw the 2 holding bars from the outside, the final result should like the picture bellow. Inside vue… Page 5 sur 29...
- Page 7 RASPTOUCH 5 – Back panel… With the help of another 4 screws just screw them like the photo: It should remain 8 screws, 4 that go to the top cover and 4 others for the display. 6 – Montage de l’écran sur le support d’écran Once you have the official Raspberry Pi 7 ’’...
- Page 8 RASPTOUCH Pay close attention to how you connect the screen o the PCB. Gently unlock the plastic wedge (please check the following picture). Once again please check if all the interconnect cables are like in the picture. Page 7 sur 29...
- Page 9 RASPTOUCH 7 – Assembling the display with the support… As in the step 4, the holding bars should be screwed from the outside (if necessary please refer again to the step 4). Alayw pay close attention to avoid deconnecting the interconnect cables. Screw the display PCB with the help of the M2.5x5mm screws like the photo: Page 8 sur 29...
- Page 10 RASPTOUCH 8 – Extension Micro SD, Extension HDMI & push button… Select the following elements to continue to the next step Push button HDMI Extension Micro SD Extension Micro SD Extension reader support bar HU Acier M2 Nuts + THFC M2x16mm Screws Page 9 sur 29...
- Page 11 RASPTOUCH Once in place the, the HDMI and the Micro should present them like the photo bellow: Please screw the screws and nuts like the photo, including the Micro SD Reader metal bar Keep in mind the Micro SD card reader are fixed using the two screws like the exemple bellow. Page 10 sur 29...
- Page 12 RASPTOUCH For the power button, you need to remove the nut and then insert him in the hole. Use the nut to place the button in the right position like the photo. Don’t forget to turn the button until he is in the right position. It should looke like the example bellow: Page 11 sur 29...
- Page 13 RASPTOUCH DAC ES9023 Page 12 sur 29...
- Page 14 RASPTOUCH 9 – Thermal paste + holding plate… To start, take the smal bag including the 2 squares of thermal paste, their holding plate as well the screw. Place the holding plate and the screw (turn the case and screw from the bottom), then place the thermal paste.
- Page 15 RASPTOUCH Do not be affraid to toghten the screws and spacers, the goal is that the two parts become stable and fixed together. Page 14 sur 29...
- Page 16 RASPTOUCH 10 – « Raspberry Pi + DAC ES9023 in the case… Once the you have finished the previous step you will be able to integrate the Raspberry Pi and the DAC in the case in te location provided for withe all the holes located loke in the picture. The assembly is screwed by the bottom of the case withe 4 screws TBHC M2,5x5mm as in the picture (the screw of the center is for the termal paste holding plate) Page 15 sur 29...
- Page 17 RASPTOUCH 11 – Connecting various accessories to Raspberry Pi… Once teh Raspberry Pi and DAC are integrated into the case, you can connect the various pre assembled accessories and cables: HDMI extension cable, Micro SD Extension Cable and the Touchscreen interconnection, as in the following pictures: Be careful when inserting the interconnecting cable into the slot on the Raspberry Pi (blue side towards the outside of the PCB), as well as the micro SD extension that "snaps"...
- Page 18 RASPTOUCH To connect the PCB of the Raspberry display and the push button to the DAC for power supply, be sure to mark the wires and colors and connect them exactly as shown in the following picture: • Pushbutton: the 2 pins on the inside, on the right side of the PIN (Insert "Button" on the PCB) / The other 2 wires for the LED (external pins) on the left side of the PIN.
- Page 19 RASPTOUCH 12 – Power supply of the Rasptouch with DAC ES9023… The entire system is powered by the AC adapter (6,5 à 7V / 2A) you received in your package. Indeed, the jack present on the ES9023 DAC is accessible from the back panel (see picture below), and you will be able to feed all the components: •...
- Page 20 RASPTOUCH DAC ES9018K2M Page 19 sur 29...
- Page 21 RASPTOUCH 9 – Thermal paste + holding plate… To start, take the smal bag including the 2 squares of thermal paste, their holding plate as well the screw. Place the holding plate and the screw (turn the case and screw from the bottom), then place the thermal paste.
- Page 22 RASPTOUCH Do not be affraid to toghten the screws and spacers, the goal is that the two parts become stable and fixed together. Page 21 sur 29...
- Page 23 RASPTOUCH 11 – « Raspberry Pi + DAC ES9018K2M in the case… Once the you have finished the previous step you will be able to integrate the Raspberry Pi and the DAC in the case in te location provided for withe all the holes located loke in the picture. The assembly is screwed by the bottom of the case withe 4 screws TBHC M2,5x5mm as in the picture (the screw of the center is for the termal paste holding plate) Page 22 sur 29...
- Page 24 RASPTOUCH 12 – Connecting various accessories to Raspberry Pi… Once teh Raspberry Pi and DAC are integrated into the case, you can connect the various pre assembled accessories and cables: HDMI extension cable, Micro SD Extension Cable and the Touchscreen interconnection, and both USB cables as in the following pictures: Be careful when inserting the interconnecting cable into the slot on the Raspberry Pi (blue side towards the outside of the PCB), as well as the micro SD extension that "snaps"...
- Page 25 RASPTOUCH 13 –ATX Power control Management… Once the "Raspberry + DAC ES9018K2M" assembly is fitted, it is time to put in place the ATX power control and connect all the cables. In the picture above you have the ATX ready to use at his place and all the cables on it. Page 24 sur 29...
- Page 26 RASPTOUCH DO NOT FORGET : Add a thermal paste (sold separately) to the underside of the ATX Power control to dissipate heat during use. As in the photo : Then screw in the supply control so that the regulator and its thermal paste are firmly attached to the bottom of the case.
- Page 27 RASPTOUCH Here are the pushbutton connections with its light symbol to the ATX power control. For the pushbutton: the 2 pins on the inside, on the right side of the PIN (mark "Button" on the PCB) / The other 2 wires for the LED (external pins) on the left side of the PIN LED "and" + "). See photo below.
- Page 28 RASPTOUCH Here are the connections of the 2 micro USB cables (Corresponding to the Raspberry Pi and PCB of the touchscreen), to the ATX power control. Be sure to connect each red cable to the terminal marked "+" on the PCB. See photo below.
- Page 29 RASPTOUCH Packaging (Commun à tous les Kits DIY) Make sure you have all of the accessories listed below. Please contact us if any of these items are missing or damaged during shipment. • Chassis aluminum black • Raspberry Pi 7’’ display support (Black or Silver) •...
-
Page 30: Terms And Conditions
Audiophonics product. Audiophonics is not liable for loss of use or inconvenience caused by the failure of an Audiophonics product. Audiophonics is not liable for damage caused to other audio components because of the failure of an Audiophonics product.
Need help?
Do you have a question about the RASPTOUCH ES9023 and is the answer not in the manual?
Questions and answers