Advertisement
Available languages
Available languages
Quick Links
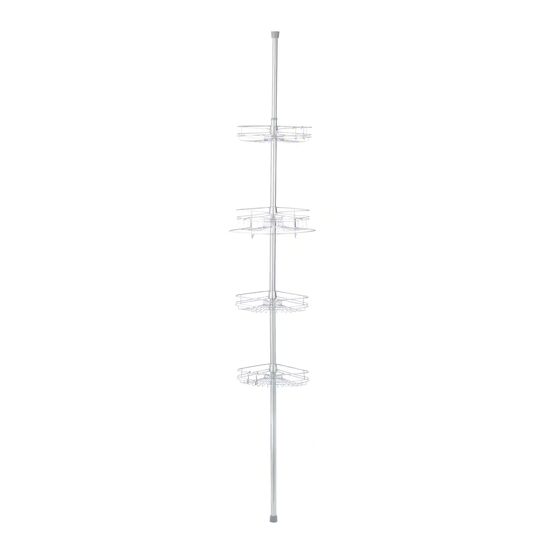
Shower Tension Pole Caddy
Model No. 063-2487-0
Assembly Instructions
Toll-free: 1-800-892-3986
IMPORTANT: Please read this manual carefully before beginning assembly of this product.
Keep this manual for future reference.
IS02161-I2
Advertisement

Subscribe to Our Youtube Channel
Related Manuals for for Living 063-2487-0


Summary of Contents for for Living 063-2487-0
- Page 1 Shower Tension Pole Caddy Model No. 063-2487-0 Assembly Instructions Toll-free: 1-800-892-3986 IMPORTANT: Please read this manual carefully before beginning assembly of this product. Keep this manual for future reference. IS02161-I2...
- Page 2 Imported for Trileaf Distribution Trifeuil Toronto, Canada M4S 2B8...
- Page 3 Table of Contents Parts List Assembly 4-11 Cleaning and Maintenance 3/4 in. (1.9 cm) tube 1 - 1 Shelf 6 - 3 Straight tube (spring packed inside) 2 - 1 Long tapered tube 3 - 1 Medium tapered tube 4 - 1 Shelf with towel bar 7 - 1 Hook 8 - 2 Short tapered tube 5 - 1...
- Page 4 Model No. 063-2487-0 Large end cap - 1 Wedges - 4 Transition ring - 1 Spacer - 3 Small end cap - 1 Tape strip - 2 Let us help you! DO NOT RETURN YOUR PRODUCT TO THE STORE. CALL US FIRST!
- Page 5 Step 1 Measure the distance between the tub ledge or the shower stall floor to the ceiling to the nearest half inch. Fig. 1 tub ledge (opening height) Fig. 2 shower stall floor (opening height)
- Page 6 Model No. 063-2487-0 Step 2 See the chart to determine what tubes (3), (4), (5) and spacers (B) are needed. NOTE: NO MATTER THE DISTANCE TUBES (1) AND (2) ARE ALWAYS USED. Opening Height Use Tubes (3), (4), and (5) Number of Spacers (B) (see fig.1, 2 from step 1)
- Page 7 Step 3 Requires 3, 6, 7, A NOTE: Assembly shown for 97 in. opening height. The following assembly should be modified based on your opening height, SEE CHART ON PAGE 6. Place a wedge (A) (tapered or rounded end up) on one of the long tapered tubes (3) approximately half way down.
- Page 8 Model No. 063-2487-0 Step 4 Place the tapered end of the long tube (3) into the untapered end of the medium tube (4). tapered end tapered end Step 5 Requires 5, D Place the large end cap (D) onto the short tapered tube (5).
- Page 9 Step 6 Requires 2, B NOTE: Assembly shown for 97 in. opening height. The following assembly should be modified based on your opening height, SEE CHART ON PAGE 6. Place straight tube (2) on top of the assembly. Insert three spacers (B) into the straight tube (2). spring is packed inside straight tube (2) tapered end...
- Page 10 Model No. 063-2487-0 Step 7 Requires 1, C, E, F Place the small end cap (C) onto the 3/4 in. tube (1). Insert the transition ring (E) into the straight tube (2). Slide the 3/4 in. tube (1) through the transition ring (E) and into the straight tube (2).
- Page 11 Step 8 NOTE: Make sure you are installing in a clean, dry and safe environment. Compress top of the unit against the ceiling in the desired location. Move the bottom end into place so that the unit is in a vertical position. Attach hooks (8) in the desired location on a shelf (6 or 7).
- Page 12 Model No. 063-2487-0 • Cleaning with a dry cloth may be sufficient. • For other stains or marks, wipe gently with a damp cloth. • Do not use strong detergents or abrasive cleaners; they may damage the surface of this product.
- Page 13 Imported for Trileaf Distribution Trifeuil Toronto, Canada M4S 2B8 IS02161-I2...
-
Page 14: Consignes D'assemblage
Support sur montant à tension pour douche Nº de modèle : 063-2487-0 Consignes d’assemblage Numéro sans frais : 1 800 892-3986 IMPORTANT : Veuillez lire attentivement ce guide avant de procéder à l’assemblage de cet article. Conservez ce guide aux fins de consultation ultérieure. - Page 15 Importé pour Trileaf Distribution Trifeuil Toronto, Canada M4S 2B8...
- Page 16 Table des matières Liste des pièces Assemblage 4-11 Nettoyage et entretien Tube de 3/4 po 1 - 1 Tablette 6 - 3 Tube droit (ressort interne) 2 - 1 Long tube à extrémité conique 3 - 1 Tube moyen à extrémité conique 4 - 1 Tablette avec barre de serviette 7 - 1 Crochet 8 - 2 Tube court à...
- Page 17 Nº de modèle : 063-2487-0 Gros embout - 1 Cales - 4 Anneau de transition - 1 Entretoise - 3 Petit embout - 1 Ruban adhésif - 2 Laissez-nous vous aider! NE RETOURNEZ PAS VOTRE ARTICLE AU MAGASIN. APPELEZ-NOUS D'ABORD!
- Page 18 Étape 1 Mesurez la distance entre le rebord de la baignoire ou le sol de la cabine de douche et le plafond au demi-pouce près. Fig. 1 rebord de la baignoire (hauteur d’ouverture) Fig. 2 sol de la cabine de douche (hauteur d’ouverture)
- Page 19 Nº de modèle : 063-2487-0 Étape 2 Consultez le tableau pour déterminer quels tubes (3), (4), (5) et entretoises (B) sont nécessaires. REMARQUE : LES TUBES (1) ET (2) SONT TOUJOURS UTILISÉS, PEU IMPORTE LA DISTANCE. Hauteur d'ouverture Utilisez les tubes (3), (4) et (5) Nombre d’entretoises (B)
- Page 20 Étape 3 Pièces requises : 3, 6, 7, A REMARQUE : Assemblage indiqué pour une ouverture de 97 po. L’assemblage suivant doit être modifié en fonction de la hauteur d’ouverture, CONSULTEZ LE TABLEAU À LA PAGE 6. Placez une cale (A) (avec l'extrémité conique ou arrondie vers le haut) sur l’un des longs tubes à extrémité...
- Page 21 Nº de modèle : 063-2487-0 Étape 4 Placez l’extrémité conique du long tube (3) dans l’extrémité non conique du tube moyen (4). extrémité conique extrémité conique Étape 5 Pièces requises : 5, D Placez le gros embout (D) sur le tube court à extrémité conique (5).
- Page 22 Étape 6 Pièces requises : 2, B REMARQUE : Assemblage indiqué pour une ouverture de 97 po. L’assemblage suivant doit être modifié en fonction de la hauteur d’ouverture, CONSULTEZ LE TABLEAU À LA PAGE 6. Placez le tube droit (2) sur l’assemblage. Insérez trois entretoises (B) sur le tube droit (2).
- Page 23 Nº de modèle : 063-2487-0 Assemblage 7 Pièces requises : 1, C, E, F Placez le petit embout (D) sur le tube de 3/4 po (1). Insérez l’anneau de transition (E) dans le tube droit (2). Faites glisser le tube de 3/4 po (1) à travers l’anneau de transition (E) et dans le tube droit (2).
- Page 24 Étape 8 REMARQUE : Assurez-vous que vous installez cet article dans un environnement propre, sec et sûr. Compressez le haut de l’article contre le plafond à l’emplacement souhaité. Placez l’extrémité inférieure en place de manière à ce que l’article soit en position verticale. Fixez les crochets (8) à...
- Page 25 Nº de modèle : 063-2487-0 • Le nettoyage avec un chiffon sec peut suffire. • Pour les autres taches ou marques, essuyez doucement avec un chiffon humide. • N’utilisez pas de détergents forts ni de nettoyants abrasifs; ils peuvent endommager la surface de cet article.
- Page 26 Importé pour Trileaf Distribution Trifeuil Toronto, Canada M4S 2B8 IS02161-I2...
Need help?
Do you have a question about the 063-2487-0 and is the answer not in the manual?
Questions and answers