Table of Contents
Advertisement
Quick Links
Advertisement
Table of Contents

Summary of Contents for TDT RX6
- Page 1 Ultrasonic Recording Manual...
-
Page 2: Table Of Contents
Table of contents Introduction ...................... 3 Getting Started ....................3 Starting the RX6 and microphone ................ 3 Opening the program ..................4 GUI Overview ....................4 Terminating the recording session ................ 5 File Naming ...................... 5 File Field ......................5 Manual naming .................... -
Page 3: Introduction
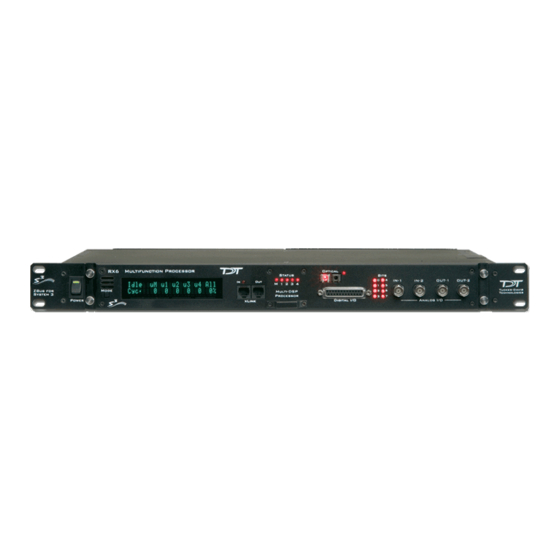
The RX6 and microphone each have a hardware power switch which must be started independently before opening the program. If the RX6 is on, it will display information on the front display. If the microphone is on, the "Power On" button will be lit. -
Page 4: Opening The Program
then press "Transfer Test". If the "Test Passed" message appears, you may press "Done" to close zBUSmon and proceed to the acquisition program. Created with the Personal Edition of HelpNDoc: Create help files for the Qt Help Framework Opening the program A shortcut for the program is placed on the desktop. -
Page 5: Terminating The Recording Session
Please purge your data from the PC regularly to ensure there is always ample memory for new recordings. The microphone should be turned off between program uses. The RX6 can be left on if no recordings are planned within the next week. -
Page 6: Automatic Naming
Created with the Personal Edition of HelpNDoc: Produce electronic books easily Automatic naming When the Automatic Naming button is pressed, a window opens which offers four options for naming based on the lab which the experiment is being run under: Euston, Gibb, Metz, or Other. The selection determines where the .wav file will be saved and what the naming format will be. -
Page 7: Euston
Euston When the Euston automatic naming format is chosen, the entry fields are "Rat ID", "Day ID", and "Cohort ID". Upon entry, the file will be named based on this data and the date and time of recording. For example, if the recording is made on September 3rd, 2017 at 4:30 pm for Rat #63 on Day #8, belonging to Cohort #4, the file will be named R63D8C4_2017-09-03_T16-30.wav. -
Page 8: Metz
Created with the Personal Edition of HelpNDoc: Easily create iPhone documentation Metz When the Metz automatic naming format is chosen, the entry fields are "Rat ID", "Day ID", and "Cohort ID". Upon entry, the file will be named based on this data and the date and time of recording. For example, if the recording is made on September 3rd, 2017 at 4:30 pm for Rat #63 on Day #8, belonging to Cohort #4, the file will be named R63D8C4_2017-09-03_T16-30.wav. -
Page 9: Other
Created with the Personal Edition of HelpNDoc: Full-featured EPub generator Other Other is used by labs other than Euston, Gibb, or Metz. The file naming format follows the same method as Euston, but files are saved in C:\Other\. Created with the Personal Edition of HelpNDoc: Full-featured EBook editor Continuous vs Timed Acquire By toggling the Continuous checkbox, the user can determine whether the recording will time out... -
Page 10: Status Output
Data from the audio recording is displayed to the waveform and spectrogram axes one second at a time to provide live feedback of input. The y-axis on the waveform plot is scaled to the maximum range of the microphone. If at any point the graph breaches the top or bottom of the graph, clipping is occurring and the settings on the microphone must be adjusted to a lower dB level. -
Page 11: New Test Subject
New Test Subject After a recording has been completed and saved, pressing the New Test Subject button will reset elements of the program to enable a new recording. After one recording is complete, the program will not allow the user to press "Start Recording" again until it is initialized for the new recording task. The current directory is maintained, but the local file name is erased. -
Page 12: Errors
PC is properly interfacing with the RX6. If the error continues, turn off the RX6 and microphone, restart the PC, and begin the start up sequence from scratch. Created with the Personal Edition of HelpNDoc: Free help authoring environment "Microphone not connected"... -
Page 13: Dc Offset
This failure has been determined to be an issue with the TDT PCI card. Unfortunately, the PCI card is fundamental to the hardware, and is very expensive to replace. Given that no other issues seem to have surfaced as a result of the card, and the critical failure is immediately rectified by a reboot, the developers have decided to ignore this issue for now. -
Page 14: Fresh Install
If the computer dies, the hard drive is upgraded, or anything else happens to disrupt the executable or the TDT, some or all of the aspects of the recording software and/or hardware will have to undergo a fresh install. Follow the instructions in this section for set-up. Note that depending on the event that necessitated the set- up, all or some of these steps may be necessary. -
Page 15: Ultrasonic Recording Program Directory
Ultrasonic Recording Program Directory The C: drive must contain a folder named "Ultrasonic Recording Program" containing a variety of key files. All files except the manual are located in the "Executables and Key Files" folder in the source code repository; the manual is located in the "Manual" folder. To summarize, the "Ultrasonic Recording Program"...

Need help?
Do you have a question about the RX6 and is the answer not in the manual?
Questions and answers