
Subscribe to Our Youtube Channel
Related Manuals for APV Tined Weeder Pro VS 150 M1


Summary of Contents for APV Tined Weeder Pro VS 150 M1
- Page 1 Version: 1.0 EN US Art. no.: 00602-3-234 Operating Manual – Tined Weeder Pro VS 150 M1, VS 300 M1 Please read carefully before start-up! TRANSLATION OF THE ORIGINAL OPERATING MANUAL...
-
Page 2: Table Of Contents
Table of contents EC Declaration of Conformity ..................... 4 Identification of the implement ................... 5 Service ..........................5 Guarantee ..........................6 Warranty activation ....................6 Safety instructions ......................6 Intended use ......................6 General safety information and accident prevention regulations ........ 7 Attached implements .................... - Page 3 Crop cultivation tips for using the Tined Weeder Pro ............ 27 Accessories ........................28 Spare parts ........................29 Index ........................... 30 Translation of the original operating manual Page 3...
-
Page 4: Ec Declaration Of Conformity
If the mounted implements are modified without prior consultation with APV-Technische Produkte this declaration shall lose its validity. -
Page 5: Identification Of The Implement
If in spite of the information in this operating manual you have questions concerning the handling of the Tined Weeder Pro To order spare parts To commission service and maintenance tasks Service address: APV - Technische Produkte GmbH Telephone: +43 (0) 2913 8001-5500 HEADQUARTERS Fax: +43 (0) 2913 8002 Dallein 15 Email: service@apv.at 3753 Hötzelsdorf... -
Page 6: Guarantee
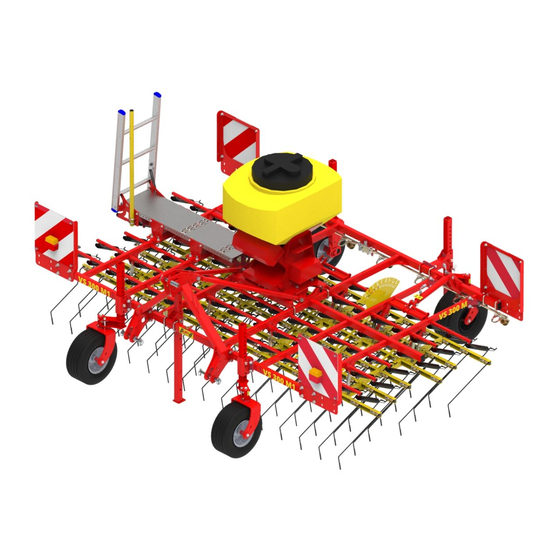
Intended use The Tined Weeder Pro VS 150 M1 or VS 300 M1 is designed and built for use in agricultural operations. It is designed so that its tines penetrate into the soil, loosen it up, and remove weeds that may be present in the soil. -
Page 7: General Safety Information And Accident Prevention Regulations
Unauthorized changes to the implement exclude any and all liability on the part of the manufacturer for the resulting damage. General safety information and accident prevention regulations The operator must have read and understood this operating manual before using the tined weeder. -
Page 8: Attached Implements
Do not work under the implement. The operator must regularly check the implement (before each use) for breakage, cracks, abrasion points, leaks, loose bolts and threaded connections, vibrations, abnormal noises, and proper function. Safety goggles and hearing protection must be used. ... -
Page 9: Tires
To avoid the risk of injuries, a clearly visible and legible sign "Caution: Maintenance tasks" must be affixed when performing maintenance tasks. Regularly check nuts and bolts for firm seat and retighten if necessary! When performing maintenance tasks on the raised implement, always secure it through the appropriate support elements! ... -
Page 10: Information Signs / Hazard Labels
Information signs / hazard labels Pay attention to the stickers on the implement; they alert to particular hazards! Information signs Do not position yourself Only lift the implement Read and comply with Do not stand on the in the danger zone off of the ground slowly the operating manual implement while it is... -
Page 11: Hazard Labels
Hazard labels Nobody is allowed Do not stand on turning Be careful if high- Caution, crushing area! between the machines parts; use the provided pressure fluid escapes! Never reach into the when hitching the climbing aids! Comply with the crush hazard area as implement and when instructions in the long as parts are... -
Page 12: Safe Parking
Safe parking The parking area must be suitable for parking. The substrate must be paved and level, so that the feet of operating personnel do not sink into the ground, and so that the tined weeder cannot roll off. To ensure safe parking of the implement, lower the support stands at the rear of the tined weeder. - Page 13 The higher the feeler wheels are moved up in the frame, the smaller the distance between the frame and the ground and the steeper the position of the tine ends relative to the ground will be. To adjust all of the feeler wheels, including those at the rear, to the same height, the same number of holes must be visible above the bracket.
-
Page 14: Hydraulic Tine Adjustment
Hydraulic tine adjustment The tines are adjusted with one hydraulic cylinder (VS 150 M1) or with two hydraulic cylinders connected in parallel (VS 300 M1). With hydraulic tine adjustment tine pre-tension can be adjusted while driving. All hydraulic cylinders (Figure 9) are integrated in an oil circuit. -
Page 15: Maintenance And Care
4) The pivoting feeler wheels to be used are inserted into the brackets. 5) When all of the pivoting feeler wheels are mounted at the desired positions, the Tined Weeder Pro can be safely parked and uncoupled from the tractor as described in chapter 7.2. 6) In the next step, the headstock is dismounted. -
Page 16: Instructions For Regular Maintenance
Lubricate all lubrication points after cleaning, and uniformly distribute the lubricant in the bearing points (e.g. perform a brief test run). Do not use a high-pressure cleaner to clean bearing parts and hydraulic parts. Cleaning with excessive pressure can damage the paint. ... -
Page 17: Changing The Springs
Changing the springs Overview: Diagram of the spring fastening 1: Plastic half shell 2: Snap-fit 3: Fastening bolt Figure 16: Diagram of the spring fastening Step Unlock the snap-fit on one side of the spring assembly. To do this, press a screw or a bolt (8 mm diameter) laterally into the hole in the spring assembly –... -
Page 18: Information On Nature Conservation And Environmental Protection
Information on nature conservation and environmental protection Reduction of noise exposure in use Any loose parts (such as chains) should be fastened to avoid unnecessary noise. Energy-efficient use The tines of the Tined Weeder Pro should not penetrate any deeper into the soil than is necessary. This ensures that the load on the towing vehicle is no greater than the load that is strictly necessary and fuel can be saved. -
Page 19: Tine Section Widths
Type designation: VS 150 M1 VS 300 M1 PS 120 M1 – PS 200 M1 Can be equipped with: MDP 100 M1 CAUTION! The VS 300 is more than 3 meters in width! When driving on public roads, the applicable country-specific regulations must be complied with. -
Page 20: Combination Possibilities Tined Weeder Pro With A Pneumatic Seeder / Multi-Metering System
10.2 Combination possibilities Tined Weeder Pro with a pneumatic seeder / Multi-Metering System PS 120 E PS 200 E PS 200 H PS 300 E PS 300 H PS 500 E PS 500 H MDP 100 Dimensions for 90x60x80 100x70x90 100x70x110 110x80x100 110x80x115... -
Page 21: Hydraulic System Diagram
Hydraulic system diagram VS 150 M1 Figure 24: Hydraulic system diagram VS 150 M1 Tractor side Coupling connector BG 2 W Weeder side Stop tap Weeder adjustment Shut-off unit Control unit Double-acting cylinder for tine adjustment Coupling sleeve BG 2 Translation of the original operating manual Page 21... -
Page 22: Road Transport Of The Tined Weeder Pro
VS 300 M1 Figure 25: Hydraulic system diagram VS 300 M1 Tractor side Coupling connector BG 2 Weeder side Flow divider 2x Weeder adjustment Shut-off unit Control unit Stop tap Coupling sleeve BG 2 Double-acting cylinder for tine adjustment Road transport of the Tined Weeder Pro 12.1 Transport on public roads (general instructions) ... -
Page 23: Calculation Of The Weight Ratios Of Axle Loads On The Tractor Unit And Ballasting
The holder for the warning signs (supplemental equipment) is installed on the center frame (see chapter Do not exceed the axle load and the total weight of the tractor unit. Do not allow the implement to impair or reduce the tractor's steerability! ... -
Page 24: Table Of Weight Ratios
Calculating the minimum rear ballasting on front-mounted implements G min: Also enter this result in the table on the next page. Calculating the actual front axle load T v tat If the required minimum front ballasting (G ) is not achieved with the front-mounted implement V min ), then the weight of the front-mounted implement must be increased to the weight of the front minimum ballasting! -
Page 25: Lighting Circuit Diagram
Lighting circuit diagram Right Connector, 12 V, 7- Right tail light Turn signal Tail light Brake light Left Left tail light Brake light Tail light Turn signal Connector and cable pin assignment: Color Function Yellow Left turn signal 54 g White Ground Green... -
Page 26: Crop Cultivation Tips For Using The Tined Weeder Pro
Crop cultivation tips for using the Tined Weeder Pro The effect of the Tined Weeder Pro is mainly based on burying, tearing out the weeds, and crumbling the soil surface. Moreover, it also stimulates tillering in cereals. Relative to cultivators, the tined weeder has two great advantages: It operates in a row-independent manner, and it has a very high area efficiency. - Page 27 Accessories Tines with a carbide coating To reduce tine wear, the VS 150 M1 / VS 300 M1 can be equipped with tines that have soldered-on carbide coating. Endurance tests show that these tines wear much more slowly. This considerably extends the service life of the tines before necessary replacement.
-
Page 28: Accessories
– you will be taken directly to our online spare parts catalogue. Please have your product number / serial number on hand. You can also access our online spare parts catalog on our website www.apv.at in the Service area. If you have any questions regarding spare parts or your order, our Customer Service (see point 3 for contact data) is also happy to assist you. -
Page 29: Spare Parts
Index Accessories ............ 28 Maintenance ............ 8 Accident prevention regulations ......7 Maintenance and care........15 Adjusting the working depth ......12 Minimum ballasting ........23 Attached implements ........8 Nature conservation environmental Attachment on the tractor ....... 11 protection ........... 18 Calculating the weight ratios ...... - Page 30 Notes Page 30 Translation of the original operating manual...
- Page 32 Web: www.apv.at Company details APV – Technische Produkte GmbH, Managing Directors: Ing. Jürgen Schöls, Markus Alschner, Dallein 15, 3753 Hötzelsdorf, Austria, marketing@apv.at, www.apv.at, VAT ID: ATU 5067 1107 Photo credits: Werksfotos © APV Concept & text: Mag. Michaela Klein, Julia Zach, M.A., Claudia Redl Graphics: Jürgen Undeutsch, M.A.
Need help?
Do you have a question about the Tined Weeder Pro VS 150 M1 and is the answer not in the manual?
Questions and answers