Advertisement
Installation manual for:
Use this hole
Use this hole
2-DIN
Kia Carens
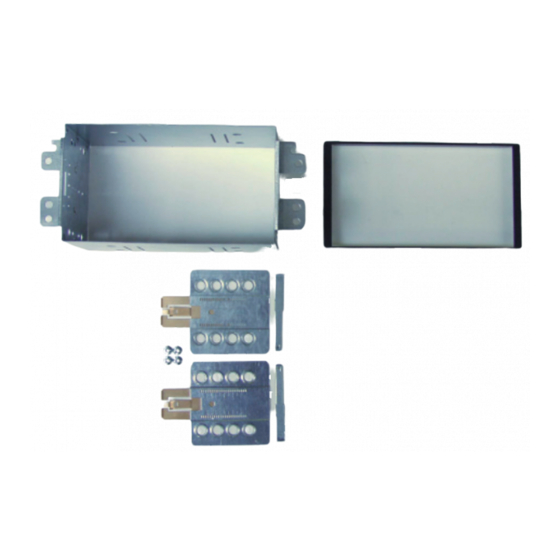
Installation kit includes the following items:
* 1X 2-ISO 100 mm. metal bracket
* 1X Radio trom
* 1X Radio trim D3 (thin trim)
* 2X Mounting plates
* 2X Mounting spacers
* 2X Radio removal keys
* 4X Screws
* Mount the plates.
12.301179-09
Pioneer HD1BT
We advice to use the following positions.
Other positions are also possible.
Use position 1 marked with a cross.
Use position 14 & 16 marked with an arrow.
Measured from left to right.
Pioneer Avic D3
We advice to use the following positions.
Other positions are also possible.
Use position 1 marked with a cross.
Use position 11 & 13 marked with an arrow
Measured from left to right.
Advertisement
Table of Contents

Related Manuals for Pioneer 2-DIN


Summary of Contents for Pioneer 2-DIN
- Page 1 Use position 1 marked with a cross. Use this hole Use position 14 & 16 marked with an arrow. Measured from left to right. Pioneer Avic D3 We advice to use the following positions. Other positions are also possible. Use position 1 marked with a cross.
- Page 2 Remove the two screws and remove the original dashboard by using a plastic wedge. Remove the orginal radio bracket. Place the 2-Din metal bracket and tighten the bracket by four screws. Place the headunit and replace the panels. Connect all of the needed wiring harnesses and check the connections carefully.
Need help?
Do you have a question about the 2-DIN and is the answer not in the manual?
Questions and answers