
Related Manuals for Geba Tronic Cody Universal 2


Summary of Contents for Geba Tronic Cody Universal 2
- Page 1 Cody Universal Assembly, connection and maintenance of the device may only be executed by personnel trained accordingly. At this the underlying national and local regulations have to be observed.
-
Page 2: Master Code
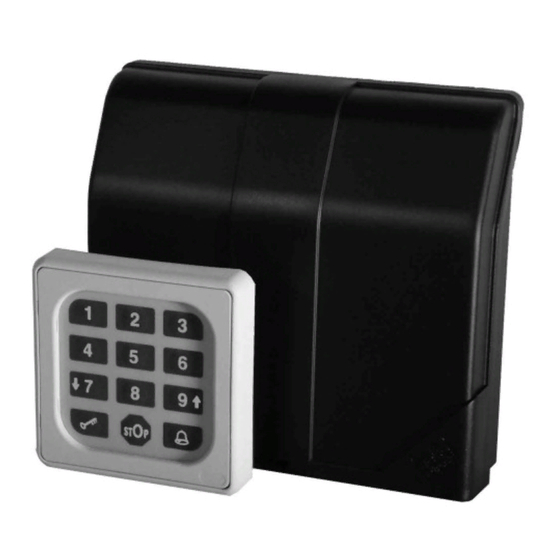
Cody Universal conveniently to your requirements. The Cody Universal 2, gives you the possibility of direct control of A LCD display shows you every programming step, including the # of a a tubular motor or similar equipment. -
Page 3: General Reset
> 5 sec. pass code with which you replace the pass code which is located on the memory place 00. Only by this your Cody Universal 2 is protected against manipulation! TIPTOMATIC:... -
Page 4: Mounting Instructions
Transponder Program 2 Mounting instructions Deleting transponder keys Interior mounting of the logic: Delete specific keys: LED flashes 1. Put the screw-driver into the gap of the enclosure front, push the screw-driver up and (2x long) Put the desired Put DIP of the open the enclosure. -
Page 5: Technical Data
Cody The transponder key is programmed to the desired block! * Note: Cody Universal 2 The keys are distributed among three blocks with each 255 keys of on color. The blocks correspond to the first 3 DIP switches. Netz... -
Page 6: Programming Instructions
1x long Before programming your Cody Universal 2 with your personal codes, please check the faultless button function of the appliance with the help of the factory‘s pass code 1234 and the button. Usually, any programming is made via your personal mastercode. In order to get familiar with that kind of programming, you start with the input of a new pass code, which replaces the one preset by the factory (1234). - Page 7 Keypad Keypad Program 5 Program 2 Changing the control time - lock-out time Creating a new pass code Factory setting = 1- 4 push sound signal push Enter 2 digit push Enter 8 digit push sound signal 2x long memory slot, push Enter 8 digit mastercode...
- Page 8 Keypad Keypad Program 3 Program 4 Deleting a pass code Changing the control time / Tiptomatic time Enter of 2 digit push sound signal push memory slot, Enter 8 digit Enter 8 digit sound signal push push push 2x long e.g.
Need help?
Do you have a question about the Cody Universal 2 and is the answer not in the manual?
Questions and answers