Table of Contents
Advertisement
Available languages
Available languages
Quick Links
COLOUR VIDEO CAMERA
FARB-VIDEOKAMERA
CAMERA VIDEO COULEUR
CAMERA DE VIDEO A COLOR
TELECAMERA A COLORI
For Customer Use:
Enter below the Serial No. which
is located on the body.
Retain this information for future
reference.
Model No.
Serial No.
This instruction book is made from 100% recycled paper.
INSTRUCTIONS
BEDIENUNGSANLEITUNG
MANUEL D'INSTRUCTIONS
MANUAL DE INSTRUCCIONES
ISTRUZIONI
Advertisement
Chapters
Table of Contents

Related Manuals for American Dynamics ADC860


Summary of Contents for American Dynamics ADC860
- Page 1 COLOUR VIDEO CAMERA FARB-VIDEOKAMERA CAMERA VIDEO COULEUR CAMERA DE VIDEO A COLOR TELECAMERA A COLORI For Customer Use: Enter below the Serial No. which is located on the body. Retain this information for future reference. Model No. Serial No. This instruction book is made from 100% recycled paper. INSTRUCTIONS BEDIENUNGSANLEITUNG MANUEL D'INSTRUCTIONS...
-
Page 2: For Usa And Canada
Thank you for purchasing the colour video camera. Before you begin operation this unit. Please read the instructions carefully to be sure you get the best possible performance. For USA and CANADA CAUTION RISK OF ELECTRIC SHOCK DO NOT OPEN CAUTION : TO REDUCE THE RISK OF ELECTRIC SHOCK, DO NOT REMOVE COVER (OR BACK). -
Page 3: Table Of Contents
Contents Features ... 2 Precautions ..3 Controls, connectors and indicators ... 4 Setup functions ... 6 Connection ... 13 Lens ... 14 Installation of camera ... 16 How to use the ferrite core ... 17 Specifications ... 18 Always make a prior test recording to help optimise the final recording. -
Page 4: Precautions
Precautions • Avoid installing the unit in following locations. • Places exposed to rain or moisture • Places with an ambient temperature outside the range of –10 to 50°C (operation) or from 0 to 40°C (recommended). • Places subject to excessive dust or to oil or gas. •... -
Page 5: Controls, Connectors And Indicators
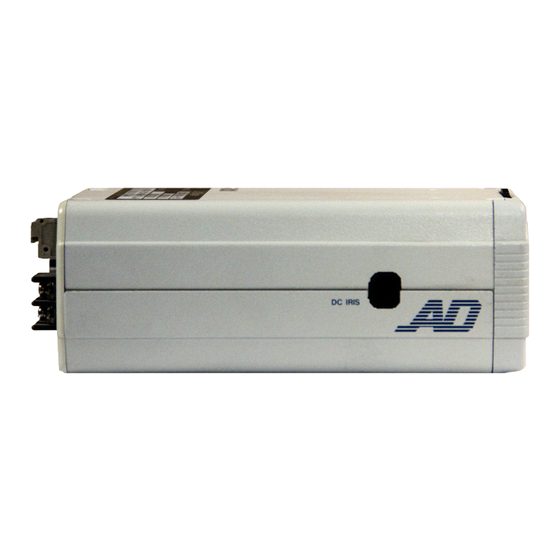
Controls, connectors and indicators Camera mounting holes (1/4 inch) This screw hole is used to install the camera on a mount to PAN/TILT UNIT. Camera mounting bracket locking screws ( x 2 : M2.6 x 5mm) Do not use any screw longer than 5 mm. Camera mounting bracket The camera mounting bracket is mounted on the bottom of the camera at the factory. - Page 6 Controls, connectors and indicators (continued) Y/C OUT POWER VIDEO CAMERA SET UP SYNC SEE INSTRUCTION MANUAL CLASS 2 ONLY (For U.S.A use) ISOLATED POWER ONLY (For EUROPEAN use) [SYNC IN] Sync signal input connector This BNC connector accepts the input of an external sync sig- nal such as a composite video (VBS) or black burst (BB) signal.
-
Page 7: Setup Functions
Setup functions CAMERA SETUP screen The camera is adjusted using the CAMERA SETUP screen. Press the SET button to display the CAMERA SETUP screen on the monitor. CAMERA SETUP screen – – C AME R A S E T U P – – >... - Page 8 Setup functions (continued) SYNC ADJUST menu TERM. [75-ohm termination setting] Set according to whether the signal input – – S Y NC A D J U S T – – into the sync signal input terminal > T E RM . H P H A S E S C COA R S E to be terminated with 75 ohms or not.
-
Page 9: Video Adjust Menu
V COARSE [Vertical phase coarse adjustment] Adjustment to align the vertical phase with – – S Y NC A D J U S T – – another camera operating in the line lock T E RM . H P H A S E (LL) mode. -
Page 10: Mode Select Menu
Setup functions (continued) HUE [Hue adjust] Adjustment of the hue of the video signal. – – V I D EO A D J U S T – – Variable range: – 5 to 5. Initial set: 0. I R I S •To make yellowish CO L OUR P E D E S T A L... - Page 11 Notes: • When AGC GAIN is set to 9 or 18 dB or when SUPER AGC is set to ON, dark parts of the picture may look noisy. This is be- cause sensitivity increased and it is not a malfunction. •...
- Page 12 Setup functions (continued) EDIT 1 User set area EDIT1 Use this area when the metered area is Detecting located at the center of the field of view. area • button ... Move the detecting • button ... Move the detecting Press the SET button EDIT 1 •...
- Page 13 MANUAL adjustment screen 1. Adjustment screen appears when press- > R : – – – – – – – – – – + – – – – – – – : B M g : – – – – – – – – – – – – – + – – – – : G ing the SET button on the “MANUAL”...
-
Page 14: Connection
Connection System connection example ● Do not turn on the power of any component before all connec- tions have been completed. ● Read the instruction manuals of the components to be connected carefully. To video input connector Y/C OUT VIDEO IRIS POWER VIDEO CAMERA... -
Page 15: Lens
Lens Lens mounting procedure Check the mounting of your lens before attaching it to the cam- era. The camera has been set for a C mount before shipment (Figure 1-1). When mounting a CS-mount lens, loosen the BF LOCK screw ( on page 4) by turning it counter-clockwise and turn the backfocus adjustment ring ( tion of the arrow in Figure 1-1 to switch the mounting method. -
Page 16: Backfocus Adjustment
Lens (continued) • After completing connections as shown in “Connection” on page 13, supply power to the camera, display a picture on the monitor and check the image. Auto-iris lenses have generally been adjusted for the widest ap- plicability before shipment, but readjustment may sometimes be necessary depending on the conditions of the objects to be shot and the lens combination. -
Page 17: Installation Of Camera
Installation of camera ● Mounting from the bottom This camera is originally designed to be mounted from the bot- tom, as shown 1. The hole is standard photographic pan-head screw size (1/4” -20). Example the Fixing unit or Pan/Tilt unit. ●... -
Page 18: How To Use The Ferrite Core
How to use the ferrite core To retain electromagnetic compatibility, use the provided ferrite cores when connecting to the lens or the power source. Y/C OUT VIDEO IRIS POWER VIDEO CAMERA VIDEO GND + 9 V SET UP SYNC AC 24V SEE INSTRUCTION DC 12V MANUAL... -
Page 19: Specifications
Specifications Image pickup device : 1/2-inch, interline-transfer CCD Effective pixels : E type : 440,000 pixels [752(H) x 582(V)] U type : 380,000 pixels [768 (H) x 494 (V)] Sync systems : Internal, external power sync (E type : 50 Hz areas only U type : 60 Hz area only) Scanning frequency : E type : 15.625 kHz (H), 50.0 Hz (V) -
Page 20: Besonderheiten
Vielen Dank für den Kauf der Farbvideokamera. Bevor Sie dieses Gerät in Betrieb nehmen, sollten Sie die Anleitungen sorgfältig durchlesen,um die bestmögliche Leistung zu erhalten. WARNUNG: VERHINDERUNG ELEKTRISCHEN SCHLÄGEN DIESES GERAT NICHT REGEN ODER FEUCHTIGKEIT AUSSETZEN. Änderungen der in dieser Bedienungsanleitung enthaltenen Daten sind vorbehalten. -
Page 21: Vorsichtsmassnahmen
VORSICHTSMASSNAHMEN ● Die Kamera sollte nicht an folgenden Orten aufgebaut werden. • Orte,die Regen oder Feuchtigkeit ausgesetzt sind. • Orte,an denen die Umgebungstemperatur -10 bis 50 C (Betrieb) oder 0 bis 40 C (empfohlen) unter- oder überschreitet. • Orte,die übermäßig Staub,Öl oder Gasen ausgesetzt sind. ●... -
Page 22: Regler, Anschlüsse Und Anzeigen
REGLER, ANSCHLÜSSE UND ANZEIGEN Kamerabefestigungslöcher Dieses Schraubenloch wird für die Befestigung der Kamera auf einer Halterung oder SCHWENK/KIPPEINHEIT verwendet. Befestigungsplattenspannschrauben für Kamera (x 2 : M2,6 x 5 mm) Keine Schraube verwenden, die länger als 5mm ist. Kamerabefestigungsplatte Die Kamerabefestigungsplatte wird im Werk an der Unterseite der Kamera montiert. - Page 23 Y/C OUT VIDEO IRIS POWER VIDEO CAMERA VIDEO GND + 9 V SET UP SYNC AC 24V SEE INSTRUCTION DC 12V MANUAL CLASS 2 ONLY (For U.S.A use) ISOLATED POWER ONLY (For EUROPEAN use) Synchronsignal-Eingangsanschluß [SYNC IN] Über diesen BNC Anschluß wird der Eingang eines externen Synchronsignals aufgenommen, wie z.B.
-
Page 24: Einstellfunktionen
REGLER, ANSCHLÜSSE UND ANZEIGEN Bedienknöpfe für Kameraeinstellbildschirm [CAMERA SET UP] Mit diesen Knöpfen erfolgt die Betriebseinstellung. zu Einzelheiten siehe “Einstellfunktionen” auf Seite 23. Video-Irisanschluß [VIDEO IRIS] Ein automatisches Irisobjektiv mit einem EE Verstärker anschlies sen. (Siehe “Objektiv” auf Seite 32.) Netzeinganganschluß... - Page 25 SYNC ADJUST Menü Für Einstellungen, die auf die Synchronsignale bezogen sind. 1. Den Cursor nach “SYNC ADJUST” – – S Y NC A D J U S T – – bewegen. > T E RM . H P H A S E 2.
- Page 26 EINSTELLFUNKTIONEN (Fortsetzung) SC FINE (Zwischenträgerphasen-Feineinstellung) Feineinstellung der Zwischenträger-phase – – S Y NC A D J U S T – – bei Generator-verriegelung. T E RM . H P H A S E Veränderlicher Bereich S C COA R S E >...
- Page 27 COLOUR (Farbpegel) Einstellung des Farbpegels für das – – V I D EO A D J U S T – – Videosignal. I R I S Veränderlicher Bereich > CO L OUR P E D E S T A L Ausgangseinstellung E NH A NC E HU E...
- Page 28 EINSTELLFUNKTIONEN (Fortsetzung) Monitorbild bei Einstellung von Monitorbild bei Einstellung von “EDIT” “ON” (Werkseinstellung) Blinkender Zeichen-Cursor C AME R A 0 1 2 3 4 5 6 7 8 9 – : / , A B CD E F GH I J K L MNO PQR S T U VWX Y Z a b c d e f g h i j k l m n o p q r s t u v w x y...
- Page 29 SHUTTER (Elektronischer Verschluß) Einstellen,ob der elektronische Verschluß – – MOD E S E L E C T – – manuell oder automatisch geschaltet O F F AGC GA I N 1 8 d B werden soll. S U P E R AGC O F F >...
- Page 30 EINSTELLFUNKTIONEN (Fortsetzung) EDIT 1 Bereich für Anwendereinstellung EDIT 1 Diesen Bereich verwenden,wenn sich Meßbereich der Meßbereich in der Mitte des Gesichtsfelds befindet. • Knopf ... Bewegt den Meßbereich Den SET Knopf botätigen • Knopf ... Bewegt den Meßbereich EDIT 1 •...
- Page 31 MANUAL Einstellanzeige 1. Die Einstellanzeige erscheint,wenn der SET > R : – – – – – – – – – – + – – – – – – – : B M g : – – – – – – – – – – – – – + – – – – : G Knopf bei MANUAL Betrieb gedrückt wird.
-
Page 32: Anschlüsse
ANSCHLUSS Beispiel für Systemanschluß ● Keine anderen Geräte einschalten, bis alle Anschlüsse hergestellt sincl. ● Die Bedienungsanleitungen der anzuschließenden Geräte sollten sorgfältig durchgelesen werden. Automatisches Iris-Objektiv mit eingebautem EE Verstärker (oder automatisches Iris- Objektiv ohne EE Verstärker) Videoeingangsanschluß Y/C OUT VIDEO IRIS POWER VIDEO... -
Page 33: Objektive
OBJEKTIV Anbringen des Objektivs Vor Anbringung an der Kamera das Befstigungsverfahren Ihres Objektivs prüfen.Die Kamera wurde vor Versand für eine C- Fassung eingestellt (Abbildung 1-1).Bei Anbringung eines Objektivs mit CS-Fassung, die BF LOCK Schraube ( 4) durch Drehen im Gegenuhrzeigersinn lösen und den Einstellring für hinteren Brennpunkt ( Pfeilrichtung der Abbildung 1-1 drehen, um das Anbring- ungsverfahren zu ändern. - Page 34 OBJEKTIV (Fortsetzung) • Nach Ausführung der Anschlüsse entsprechend “Anschluß” auf Seite 31, die Kamera einschalten, ein Bild auf dem Monitor einstellen und das Bild prüfen. Objektive mit automatischer Iris wurden vor Versand für einen breiten Anwendungsbereich eingestellt.Jedoch ist manchmal eine Neueinstellung erforderlich,abhängig vom Aufnahmeobjekt und der Objektivkombination.
-
Page 35: Anbringung Der Kamera
ANBRINGUNG DER KAMERA • Anbringung von der Unterseite Diese Kamera wurde ursprünglich für die Anbringung von der Unterseiteentwickelt, wie bei 1 gezeigt. Die Bohrung weist die Standardgröße fürdie Fotokegelkopfschraube (1/4" -20) auf. Beispiel: Befestigungs oder Schwenk/Kippeinheit. • Anbringung von der Oberseite Wie in 2 gezeigt,durch Entfernung der beiden Befestigungsschrauben, die Kamerabefestigungsplatte von der Unterseite der Kamera entfernen.Die Kamerabefestigungsplatte an der Oberseite montieren... -
Page 36: Anwendung Des Ferritkerns
Anwendung des Ferritkerns Um für die Anschlußverbindung des Objektiv- bzw. Spannungs- versorgungskabels elektromagnetische Kompatibilität zu gewährleisten, müssen die mitgelieferten Ferritkern-Hülsen verwendet werden. Y/C OUT VIDEO IRIS POWER VIDEO CAMERA VIDEO GND + 9 V SET UP SYNC AC 24V SEE INSTRUCTION DC 12V MANUAL CLASS 2 ONLY (For U.S.A use) -
Page 37: Spezifikationen
SPEZIFIKATIONEN Bildaufnahmegerät : 1/2 Zoll,Zeilenübertragung CCD Effektive Bildpunkte : E type : 440.000 Bildpunkte (752(H)×582(V)) U type : 380,000 Bildpunkte [768(H)×494(V)] Synchronsystem : Intern,extern,Stromsynchronisation (E type : nur in 50 Hz Gebieten U type : 60 Hz area only) Abtastfrequenz : E type : 15,625 kHz (H), 50,0 Hz (V) U type : 15,734 kHz (H), 59,94 Hz (V) Horizontalauflösung... -
Page 38: Caractéristiques
Vous venez d’acheter une caméra vidéo couleur et nous vous en remercions. Avant la mise en service de cet appareil, lire attentivement ce mode d’emploi pour être sûr d’obtenir les meilleures performances. AWERTISSEMENT : POUR EVITER LES RISQUES D'INCENDIE OU D'ELECTROCUTION, NE PAS EXPOSER L'APPAREIL A L'HUMIDITE OU A LA PLUIE. -
Page 39: Précautions
Précautions • Eviter d’installer l’appareil aux emplacements suivants. • Endroits exposés à la pluie ou à l’humidité • Endroits à température ambiante en dehors de la plage de -10 à 50 °C (fonctionnement) ou de 0 à 40 °C (recommandé). •... -
Page 40: Commandes, Connecteurs Et Indicateurs
Commandes, connecteurs et indicateurs Trous de montage de caméra [1/4 pouce] Ce trou à vis s’utilise pour installer la caméra sur une monture ou une unité PAN/TILT. Vis de fixation du support de montage de caméra [ ×2 : M2, 6 × 5 mm ] Ne pas utiliser de tournevis de plus de 5 mm de longueur. - Page 41 Y/C OUT VIDEO IRIS POWER VIDEO CAMERA VIDEO GND + 9 V SET UP SYNC AC 24V SEE INSTRUCTION DC 12V MANUAL CLASS 2 ONLY (For U.S.A use) ISOLATED POWER ONLY (For EUROPEAN use) [SYNC IN] Connecteur d’entrée de signal de synchro Ce connecteur BNC accepte l’entrée d’un signal de synchro extérieure tel que signal vidéo composite (VBS) ou de salve du noir (BB).
-
Page 42: Fonctions D'implantation
Commandes, connecteurs et indicateurs (suite) [CAMERA SET UP] Touches d’implantation de la caméra Ces touches sont utilisées pour les opérations d’implantation. Voir les détails sous “Fonctions d’implantation” à la page 41. [VIDEO IRIS] Connecteur iris vidéo A raccorder à un objectif à diaphragme automatique avec amplificateur EE. - Page 43 Menu SYNC ADJUST Pour les réglages liés aux signaux de synchro. 1. Amener le curseur sur “SYNC AD- – – S Y NC A D J U S T – – JUST”. > T E RM . H P H A S E 2.
- Page 44 Fonctions d’implantation (suite) SC FINE [Ajustement fin de phase de sous-porteuse] Ajustement fin de la phase SC en – – S Y NC A D J U S T – – fonctionnement genlock. T E RM . H P H A S E Plage de variation S C COA R S E >...
-
Page 45: Menu Video Adjust
Menu VIDEO ADJUST IRIS [Niveau iris] Ajustement du niveau de luminance du – – V I D EO A D J U S T – – signal vidéo. > I R I S Plage de variation: –5 à 5 CO L OUR P E D E S T A L Réglage initial: 0 E NH A NC E... -
Page 46: Menu Mode Select
Fonctions d’implantation (suite) Menu MODE SELECT ID [Nom/numéro ID de caméra] – – MOD E S E L E C T – – Le nom/numéro ID de la caméra peut avoir > I D O F F un maximum de 24 caractères. AGC GA I N 1 8 d B S U P E R AGC... - Page 47 Remarques : • Quand MAX GAIN est réglé à 9 ou 18 dB ou quand SUPER AGC est réglé à ON, les parties sombres de l’image peuvent sembler parasitées. Cela est dû à une augmentation de la sensibilité, il ne s’agit pas d’un signe de mauvais fonctionnement.
- Page 48 Fonctionsd'mplantation (suite) Zone de réglage utilisateur EDIT 1 EDIT1 Utiliser cette zone quand la zone de détection est située au centre du champ Zone de détection de vision. • Touche Aoouyer sur la touche SET • Touche EDIT 1 • Touche Zone de •...
- Page 49 Ecran d'ajustment MANUAL 1. L’écran d’ajustement apparaît à la > R : – – – – – – – – – – + – – – – – – – : B pression de la touche SET en mode M g : – – – – – – – – – – – – – + – – – – : G E ND MANUAL.
-
Page 50: Raccordements
Raccordements Exemple de raccordement de système ● Ne mettre aucun appareil sous tension avant d’avoir terminé tous les raccordements. ● Lire attentivement les 3.Appuyer sur la touche SET pour passer en MODE SET, et revenir à l’écran de réglage initial.d’emploi des appareils à... -
Page 51: Objectif
Objectif Procédure de montage de l’objectif Vérifier la méthode de montage de l’objectif avant de le fixer à la caméra. La caméra a été réglée pour la monture C avant l’expédition (Figure 1-1). Pour monter un objectif à monture C, desserrer la vis BF LOCK ( à... - Page 52 Objectif (suite) • Après l’achèvement des raccordements comme indiqué sous “Raccordements” à la page 49, mettre la caméra sous tension, afficher une image au moniteur et la vérifier. Les objectifs à diaphragme automatique ont généralement été ajustés pour l’applicabilité la plus large avant l’expédition, mais un réajustement peut parfois être nécessaire selon l’état des sujets à...
-
Page 53: Installation De La Caméra
Installation de la caméra • Montage par le dessous Cette caméra est à l’origine conçue pour un montage par le dessous, comme le montre la vue 1. Le trou à vis est prévu pour une vis ber photographique standard (1/4"-20). Exemple: unité de fixation ou unité... -
Page 54: Utilisation Du Noyau Ferrite
Utilisation du noyau ferrite Utilisation du noyau ferrite Pour maintenir la compatibilité électromagnétique, utiliser, les noyaux ferrite fournis en raccordant l'objectif ou la source d'alimentation. Y/C OUT VIDEO IRIS POWER VIDEO CAMERA VIDEO GND + 9 V SET UP SYNC AC 24V SEE INSTRUCTION DC 12V... -
Page 55: Caractéristiques Techniques
Caractéristiques techniques Dispositif capteur d’image : CCD à transfert d’interligne 1/2 pouce : E type : 440.000 pixels [752 (H) × 582 (V)] Pixels efficaces U type : 380,000 pixels [768 (H) × 494 (V)] Systèmes synchro : interne, externe, synchro d’alimentation (E type : zones de 50 Hz seulement U type : 60Hz area only) -
Page 56: Funciones
Le agradecemos la confianza que nos ha demostrado al adquirir la camara de video a color. Antes de utilizar esta unidad asegúrese de leer las instrucciones en detalle para obtener las mejores prestaciones posibles. ADVERTENCIA: PARA EVITAR INCENDIOS O PELIGRO DE CHOQUE ELECTRICO, NO EXPONGA ESTA UNIDAD A LA LLUVIA O A LA HUMEDAD. -
Page 57: Precauciones
PRECAUCIONES • Evite instalar la unidad en los siguientes lugares. • Lugares expuestos a la lluvia o a la humedad. • Lugares con una temperatura ambiente fuera de los límites entre -10 y 50°C (funcionamiento) o de 0 a 40°C (recomendado). •... -
Page 58: Controles, Conectores E Indicadores
Controles, conectores e indicadores Orificios de montaje de la cámara (1/4 de pulgada) Este orificio para tornillo es empleado para instalar la cámara en un montante o PAN/TILT UNIT (unidad de cabeceo/inclinación). Tornillos de bloqueo del montante de la cámara (x 2: M2.6 x 5 mm) No emplee ningún tornillo con más de 5 mm de longitud. - Page 59 Y/C OUT VIDEO IRIS POWER VIDEO CAMERA VIDEO GND + 9 V SET UP SYNC AC 24V SEE INSTRUCTION DC 12V MANUAL CLASS 2 ONLY (For U.S.A use) ISOLATED POWER ONLY (For EUROPEAN use) [SYNC IN] Conector de entrada de señal de sincronización Este conector BNC acepta la entrada de una señal de sincronización externa tal como video compuesto (VBS) o señal de interferencia (BB) “black burst”.
-
Page 60: Funciones De Instalación
Controles, conectores e indicadores (continuación) [CAMERA SET UP] Botones de operación en pantalla para instalar la cámara Estos botones son empleados en la operación de instalación. Por detalles vea “Funciones de instalación” en la página 59. [VIDEO IRIS] Conector del iris de video Conéctelo a un objetivo con iris automático que tenga un amplificador EE incorporado. - Page 61 Menú SYNC ADJUST Para ajustar las señales de sincronización relacionadas. 1. Mueva el cursor hasta “SYNC AD- – – S Y NC A D J U S T – – JUST”. > T E RM . H P H A S E 2.
- Page 62 Funciones de instalación (continuación) SC FINE [Ajuste fino de fase de portadora auxiliar] Ajuste aproximado de fase SC en la – – S Y NC A D J U S T – – operación de bloqueo de generador. T E RM . H P H A S E Límites de variación: 0 a 255 S C COA R S E...
-
Page 63: Menú Video Adjust
Menú VIDEO ADJUST IRIS [Nivel del iris] Ajuste del nivel de luminancia de la señal – – V I D EO A D J U S T – – de video. > I R I S Límites de variación : –5 a 5 CO L OUR P E D E S T A L Ajuste inicial... - Page 64 Funciones de instalación (continuación) Menú MODE SELECT ID [Nombre/número de ID de la cámara] – – MOD E S E L E C T – – La ID de la cámara puede tener un máximo > I D O F F de 24 caracteres.
- Page 65 Notas : • Cuando se ajusta AGC GAIN en 9 o en 18 dB, o cuando se ajusta SUPER AGC en ON, las porciones oscuras de la imagen pueden mostrar interferencia. Esto es debido a que la sensibilidad aumentó y no es una falla. •...
- Page 66 Funciones de instalación (continuación) EDIT 1 Area ajustada por el usuario EDIT1 Emplee esta área cuando el área Detección medida esté ubicada en el centro del de área campo de visión. • Botón Presione el botón SET • Botón EDIT 1 •...
- Page 67 Pantalla de ajuste MANUAL 1. La pantalla de ajuste aparece cuando > R : – – – – – – – – – – + – – – – – – – : B M g : – – – – – – – – – – – – – + – – – – : G presiona el botón SET en el modo E ND “MANUAL”.
-
Page 68: Conexión
Conexión Ejemplo de conexión del sistema ● No conecte la alimentación de ningún componente antes de haber efectuado todas las conexiones. ● Lea detenidamente los manuales de instrucción de los componentes a ser conectados. Objetivo de iris automático con amplificador EE incorporado (u objetivo iris automático sin amplificador EE) Hacia el conector de entrada de video... -
Page 69: Objetivo
Objetivo Procedimiento para montar el objetivo Inspeccione el montante del objetivo antes de colocarlo en la cámara. La cámara ha sido ajustada para montaje C antes del embarque (Figura 1-1). Para colocar el objetivo con montante CS, afloje el tornillo BF LOCK en la página 4) girándolo hacia la izquierda y girando el anillo de ajuste de la distancia focal posterior... - Page 70 Objetivo (continuación) • Después de completar las conexiones como se muestra en “Conexiones” en la página 67, conecte la alimentación de la cámara, llame al monitor una imagen e inspecciónela. El objetivo con iris automático es generalmente ajustado para la aplicación más amplia antes del embarque, pero puede ser necesario reajustarlo dependiendo de la condición de los objetos a ser filmados y de la combinación del objetivo.
-
Page 71: Instalación De La Cámara
Instalación de la cámara • Montaje sobre la parte inferior Esta cámara fue originalmente diseñada para ser montada sobre la parte inferior como se muestra en 1. El orificio es para un tornillo tamaño (1/4" - 20) estándar para basculación fotográfica. Ejemplo: unidad de fijación o unidad de cabeceo/inclinación. -
Page 72: Empleo Del Núcleo De Ferrita
Empleo del núcleo de ferrita Para conservar la compatibilidad electromagnética, emplee los núcleos de ferrita suministrados para conectarlos al objetivo o a la fuente de alimentación. Y/C OUT VIDEO IRIS POWER VIDEO CAMERA VIDEO GND + 9 V SET UP SYNC AC 24V SEE INSTRUCTION... -
Page 73: Especificaciones
Especificaciones Dispositivo de captación : CCD transferencia interlínea, 1/2 de imagen pulgada Pixels efectivos : E type : 440.000 pixels [752(H)x582(V)] U type : 380,000 pixels [768(H)x494(V)] Sistema de sincronización : interna y externa Sincronización de alimentación (E type : áreas con 50 Hz exclusivamente U type : 60 Hz area only) Frecuencia de barrido : E type : 15,625 kHz (H), 50.0 Hz (V) -
Page 74: Caratteristiche
Grazie per aver acquistato questa telecamera a colori. Prima di passare all’uso dell’apparecchio, leggere attentamente queste istruzioni allo scopo di ottenere il massimo delle prestazioni. ATTENZIONE: PER PREVENIRE IL RISCHIO DI INCENDI O DI FOLGORAZIONI, ESPORRE APPARECCHIO ALLA PIOGGIA O ALL’UMIDITA‘. L’aspetto esterno ed i dati tecnici dell’apparecchio forniti in questo manuale di istruzioni possono subire modifiche senza preavviso. -
Page 75: Precauzioni
Precauzioni • Evitare di installare l’apparecchio nei luoghi seguenti: • In luoghi esposti a pioggia o umidità. • In luoghi la cui temperatura ambiente sia al di fuori della gamma di temperature utili per il funzionamento (da -10° a +50° C). Si consiglia comunque di utilizzare l’apparecchio entro la gamma di temperature da 0°... -
Page 76: Comandi, Connettori E Indicazioni
Comandi, connettori e indicazioni Foro (da 1/4 di pollice) di montaggio della telecamera Questo foro a vite viene usato per l’installazione della telecamera su una apposita montatura, o sul dispositivo per movimento in orizzontale e in verticale. Viti (2 di dimensioni M2.6 x 5 mm) di fissaggio della staffa di montaggio della telecamera Non usare viti di lunghezza superiore a 5 mm. - Page 77 Y/C OUT VIDEO IRIS POWER VIDEO CAMERA VIDEO GND + 9 V SET UP SYNC AC 24V SEE INSTRUCTION DC 12V MANUAL CLASS 2 ONLY (For U.S.A use) ISOLATED POWER ONLY (For EUROPEAN use) Connettore di ingresso del segnale di sincronizzazione [SYNC IN] Questo connettore di tipo BNC riceve l’ingresso di un segnale di sincronizzazione esterno, quale un segnale di video composito (VBS) o di nero colore (BB).
-
Page 78: Funzioni Di Predisposizione
Comandi, connettori e indicazioni (continuazione) Tasto di funzionamento dello schermo per la predisposizione della telecamera [CAMERA SET UP] Questi tasti vengono utilizzati nel corso delle operazioni di predisposizione. Per dettagli, vedere a partire da pag. 77, “Predisposizione delle funzioni”. Connettore del diaframma del video [IDEO IRIS] Collegarvi un obiettivo a diaframma automatico comprendente un amplificatore EE. - Page 79 Menù di regolazione della sincronizzazione (SYNC ADJUST) Per le predisposizioni relative ai segnali di sincronizzazione. 1. 1. Portare il cursore sulla voce – – S Y NC A D J U S T – – “SYNC ADJUST”. > T E RM . H P H A S E 2.
- Page 80 Funzioni di predisposizione (continuazione) Nota : Solamente il tasto è operativo. Il tasto Eseguendo l’operazione di cancellazione della fine (END CLEAR) dopo la regolazione di massima della sottoportante, possono prodursi delle interferenze. In questo caso effettuare di nuovo la regolazione di massima della sottoportante.
- Page 81 Menù di regolazione del video (VIDEO ADJUST) IRIS [Livello del diaframma] Regolazione del livello di luminanza del – – V I D EO A D J U S T – – segnale video. > I R I S CO L OUR Gamma di variabilità: P E D E S T A L E NH A NC E...
- Page 82 Funzioni di predisposizione (continuazione) Menù di selezione della modalità (MODE SELECT) ID [Nome e numero di identificazione della telecamera] – – MOD E S E L E C T – – Il numero di identificazione (ID) della > I D O F F telecamera può...
-
Page 83: Shutter [Otturatore Elettronico]
Nota : • Con la funzione AGC GAIN sui valori 9 o 18 dB, o se la funzione SUPER AGC viene posta su ON, le parti oscure dell’immagine possono apparire disturbate. Ciò è dovuto all’aumento della sensibilit à e non si tratta di una disfunzione della telecamera. •... - Page 84 Funzioni di predisposizione (continuazione) EDIT 1 Area predisponibile da parte dell’utente EDIT1 Usare questo sistema quando la zona Zona di misurata si trova al centro del campo individuazione visivo. • Tasto Premere il tasto SET • Tasto EDIT 1 • Tasto Zona di •...
- Page 85 Schermo di regolazione MANUAL 1. Lo schermo di regolazione compare > R : – – – – – – – – – – + – – – – – – – : B M g : – – – – – – – – – – – – – + – – – – : G premendo il tasto SET in modalit à...
-
Page 86: Collegamenti
Collegamenti Esempio di collegamenti del sistema ● Non accendere alcuno dei componenti prima di aver terminato tutti i collegamenti. ● Leggere attentamente i manuali di istruzione di tutti gli altri componenti che vengono collegati al sistema. Obiettivo a diaframma automatico con amplificatore EE incorporato (o obiettivo con diaframma automatico senza amplificatore EE) Al connettore di... -
Page 87: Obiettivo
Obiettivo Procedura di montaggio dell’obiettivo Controllare la montatura dell’obiettivo prima di procedere al montaggio sulla telecamera. La telecamera è stata predisposta in fabbrica per la montatura di tipo C (fig. 1-1). Se si intende montare un obiettivo con montatura di tipo CS, allentare la vite BF LOCK di pag. - Page 88 Obiettivo (continuazione) • Terminati i collegamenti come indicato al precedente paragrafo “Collegamenti” a pag. 83, alimentare la telecamera, visualizzare una immagine sul monitor e controllarla. Gli obiettivi con diaframma automatico, in generale sono stati regolati in fabbrica per potersi adattare ad una vasta gamma di applicazioni, ma talvolta può...
-
Page 89: Installazione Della Telecamera
Installazione della telecamera • Montaggio sulla parte inferiore La telecamera è stata originariamente studiata per essere montata appoggiata sul lato inferiore, come indicato in fig. 1. Il foro di montaggio è un foro fotografico a vite di dimensioni standard (1/4" -20). Esempio di uso: sul dispositivo per movimento ad inclinazione in verticale, o sul dispositivo per spostamento in orizzontale. -
Page 90: Uso Del Nucleo Di Ferrite
Uso del nucleo di ferrite Per conservare la compatibilit à elettromagnetica, utilizzare il nucleo di ferrite in dotazione per i collegamenti dell’obiettivo alla telecamera, o della telecamera alla sorgente di alimentazione. Y/C OUT VIDEO IRIS POWER VIDEO CAMERA VIDEO GND + 9 V SET UP SYNC AC 24V... -
Page 91: Dati Tecnici
Dati tecnici Dispositivo di ripresa dell’immagine : CCD da 1/2 pollice, a trasferimento interlineare Pixel effettivi: : E type : 440.000 pixel [752 orizz x 582 vert.] : U type : 380,000 pixels [768 orizz x 494 vert.] Sistemi di sincronizzazione : interna, esterna sincronizzazione con corrente di rete (E type : solo per le aree a 50 Hz,... - Page 92 SC96792-002...
Need help?
Do you have a question about the ADC860 and is the answer not in the manual?
Questions and answers