Advertisement
Quick Links
TL3
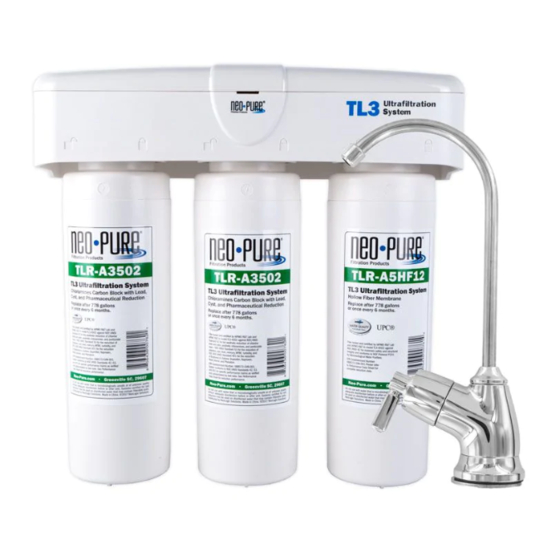
3-Stage Twist-Lock Ultrafi ltration - Model TL3-A502
Package Contents:
• (A) Triple Stage Head
• (B) Twist-Lock Cartridges
- (B1) Chloramines, Carbon Block with Lead, Cyst and Pharmaceutical Reduction Model: TLR-A3502
- (B2) One Hollow Fiber Membrane Model: TLR-A5HF12
• (C1) Faucet
• (C2) 1/4" Tubing 6 ft.
• (C3) Angle Stop Valve Adapter (ASVA)
• (C4) Faucet Connector
- (C4) Insert
- (C5) Ferrule
- (C6) Compression Nut
Required Tools And Materials:
• Two Phillips screws at least 7/8" to 1" long
• Phillips Screwdriver
• 1/8" Drill Bit
• Center Punch
• Adjustable Wrench
• Utility Knife
• File
• Tape Measure
• Safety Glasses
• Masking Tape
• Newspaper or Towels
• Pencil
• Bucket or Pan
Optional Materials:
• Plumber's Tape
• Drill with 1/4" & 9/16", or 5/8" Drill Bits
• Hacksaw
• Hollow-Wall Anchor Bolts or Toggle Bolts
Ultrafi ltration
System
A A
B1
C2
B1
B2
C4
C5
C6
C1
C3
Advertisement

Summary of Contents for Neo-Pure TL3-A502
- Page 1 Ultrafi ltration System 3-Stage Twist-Lock Ultrafi ltration - Model TL3-A502 Package Contents: • (A) Triple Stage Head • (B) Twist-Lock Cartridges - (B1) Chloramines, Carbon Block with Lead, Cyst and Pharmaceutical Reduction Model: TLR-A3502 - (B2) One Hollow Fiber Membrane Model: TLR-A5HF12 •...
- Page 2 STEP 1: Mount Auxiliary Faucet Note: This faucet is designed to fit a 5/8" clearance hole 3. Mark the drill hole using a center punch. and should clear a 9/16" hole. Most standard sinks come 4. Make a pilot hole using the 1/4" drill bit. Use the 9/16" with 1-3/8"...
- Page 3 STEP 5: Install Plastic Tubing for Water Supply Line From System Head Outlet to Faucet 1. Determine the length of tubing necessary to connect the system head outlet to the threaded faucet stem making sure to allow enough tubing to prevent kinking in the line. 2.
- Page 4 STEP 7: Full System Flush And Operational Test 1. Turn on the new faucet for filtered water. Allow the water to run for approximately 10 minutes. 2. Check for any leaks between the system head assembly and filters, on kitchen faucet adaptor connection, around all fittings and on faucet/tubing connection.
- Page 5 Installation Instructions: Please read all instructions and precautions prior to installation and use. CAUTION Before working in the cabinet area, be sure all electrical appliances and outlets are turned off at the circuit breaker. It is recommended you wear safety glasses to protect eyes when drilling. Protect the filter system from freezing which CAUTION can cause cracking and water leakage.
- Page 6 • Stage 3 Replacement: Part# TLR-A5HF12, Hollow Fiber Membrane TL3-A502 system tested and certified by IAPMO R&T Lab and IAPMO R&T against NSF/ANSI Standard 42 for the aesthetic reduction of chlorine taste and odor, aesthetic chloramines, and particulate class I. NSF/ANSI Standard 53 for the reduction of asbestos, cyst, lead, mercury, MTBE, turbidity, and VOC.

Need help?
Do you have a question about the TL3-A502 and is the answer not in the manual?
Questions and answers