
Related Manuals for voxicon VXA-284


Summary of Contents for voxicon VXA-284
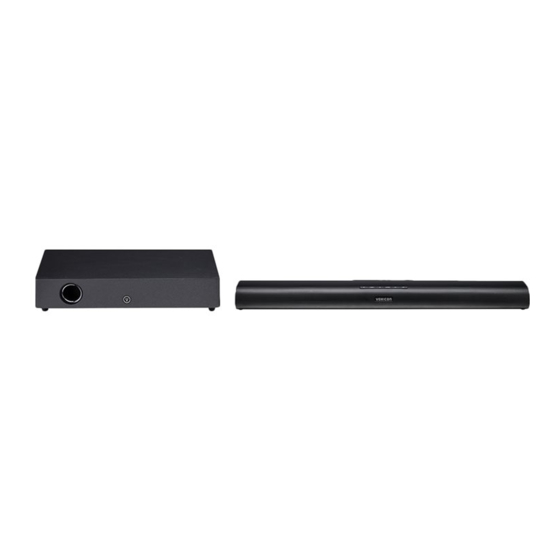
- Page 1 User Manual SOUNDBAR DOLBY DIGITAL 2.1 VXA-284 Please read this manual carefully for proper usage before lnstallatlon and use. It is recommended to keep this manual for future check. The pictures in this manual are only for reference.
-
Page 2: Table Of Contents
Contents 1. Important Safety Instructions ..................3 1.1 Safety..............................3 1.2 Caution .............................4 1.3 Warning ............................4 2. What’s in the Box ......................5 3. Identifying the parts ....................... 6 3.1 Main Unit ............................6 3.2 Wireless Subwoofer .........................7 3.3 Wireless Subwoofer........................7 4. Preparations ........................7 4.1 Prepare the Remote Control ....................7 4.2 Replace the remote control battery .................8 4.3 Precautions concerning batteries ..................8... - Page 3 10. Play for external audio devices ................... 14 11. Bluetooth Operation ...................... 14 11.1 Connect to a Bluetooth device ....................14 11.2 Disconnect the Bluetooth function ..................15 11.3 Listen to Music from Bluetooth Device .................15 12. Troubleshooting ......................16 13. Technical specifications ....................17 13.1 Soundbar ............................17 13.2 Wireless subwoofer ........................17 13.3 Bluetooth ............................18...
-
Page 4: Important Safety Instructions
1. Important Safety Instructions The lightning flash with 8. Do not install near any heat sources arrowhead symbol, within an such as radiators, heaters, stoves, or equilateral triangle, is intended other apparatus (including amplifiers) to alert the user to the presence of that produce heat. -
Page 5: Caution
15. This equipment is a Class II or double • Danger of explosion if battery is insulated electrical appliance. It has incorrectly replaced. been designed in such a way that it • Replace only with the same or does not require a safety connection equivalent type. -
Page 6: What's In The Box
DO NOT INGEST BATTERY, CHEMICAL RISK OF ELECTRIC SHOCK BURN HAZARD DO NOT OPEN The remote control supplied with this To reduce te risk of electric shock, do product contains a coin/button cell not remove cover or back. No user- battery. -
Page 7: Identifying The Parts
3. Identifying the parts 3.1 Main Unit 1. Power button. Switch the unit between on and standby mode. 2. Select the play function. 3. Select Equaliser (EQ) Effect. 4. Play/pause in Bluetooth mode/Pair. Press and hold to activate the 9. AC~ socket. Connect power cord. pairing function in Bluetooth mode and disconnect the existing paired 10. -
Page 8: Wireless Subwoofer
3.2 Wireless Subwoofer 1. AC~ Socket. Connect to power. 2. Pair button 3. Pair Indicator 3.3 Wireless Subwoofer 1. Power button. Switch the unit between on and standby mode. 2. Select the play function. 3. Increase/decrease the volume level. 4. Select equaliser (EQ) effect. 5. -
Page 9: Replace The Remote Control Battery
4.2 Replace the remote control battery The remote control requires a CR2025, 3V Lithium battery. 1. Push the tab on the side of the battery tray towards the tray. 2. Now slide the battery tray out of the remote control. 3. -
Page 10: Wall Mounting
5.2 Wall Mounting • Installation must be carried out by • Additional tools (not included) are qualified personnel only. Incorrect required for the installation. assembly can result in severe personal • Do not overtighten screws. injury and property damage (if you •... -
Page 11: Connections
6. Connections 6.1 Use the HDMI (ARC) Socket ARC (Audio Return Channel) The ARC (Audio Return Channel) function allows you to send audio from your ARC- compliant TV to your sound bar through a single HDMI connection. To enjoy the ARC function, please ensure your TV is both HDMI-CEC and ARC compliant and HDMI... -
Page 12: Use The Optical Socket
6.3 Use the optical socket Remove the protective cap of the optical socket, then connect an optical cable to the TV’s “optical out” socket and the optical socket on the unit. OPTICAL OPTICAL Picture 6.3 6.4 Use the AUX socket a. -
Page 13: Connect To Power
7. Connect to power • Before connecting the AC power cord, ensure you have completed all other connections. • Risk of product damage! Ensure that the power supply voltage corresponds to the voltage printed on the back or the underside of the unit. 1. -
Page 14: Tip About Wireless Pairing
8.3 Tip about wireless pairing input signal) in Bluetooth, Optical, Coaxial, AUX, HDMI ARC for over 15 • After connecting the power, you must minutes, the unit will automatically press PAIR switch on the subwoofer switch to standby mode. within 20 seconds to be effective. •... -
Page 15: Select Equaliser (Eq) Effect
Blue indicator will flash rapidly and prompt “Pairing“. 10. Play for external 3. Select “VXA-284” enter “0000” for the password if necessary. The unit will audio devices voice “Paired” and the Blue indicator Ensure that the unit is connected to the will light up solidly. -
Page 16: Disconnect The Bluetooth Function
11.2 Disconnect the Bluetooth function 11.3 Listen to Music from Bluetooth Device • Switch to another function on the If the connected Bluetooth device unit. supports Advanced Audio Distribution Profile (A2DP), you can listen to the music • Disable the function from your stored on the device through the player. -
Page 17: Troubleshooting
12. Troubleshooting To keep the warranty valid, never try to repair the system yourself. If you encounter problems when using this unit, check the following points before requesting service. No power • Ensure that the AC cord of the apparatus is properly connected . -
Page 18: Technical Specifications
• I can’t find the Bluetooth Ensure the Bluetooth function is activated on your Bluetooth device. name of this unit on my Bluetooth device for • Ensure you have paired the unit with your Bluetooth Bluetooth pairing device. When the unit’s external input signal level is too low, This is a 15 mins power off function, one of the unit will be turned off automatically in 15 minutes. -
Page 19: Bluetooth
13.3 Bluetooth Version V4.2 Maximum power transmitted <5 dbm Frequency bands 2402MHz ~ 2480MHz 13.4 Wireless subwoofer 2.4GHz Distance Angle 30° Battery type CR2025 14. Marking Declares that the design and We hereby declares that this manufactureing of this product complies product is in compliance with the with the european directives for CE- essential requirements and other relevant...
Need help?
Do you have a question about the VXA-284 and is the answer not in the manual?
Questions and answers