Table of Contents
Advertisement
Quick Links
Advertisement
Table of Contents

Related Manuals for Samsung PRONTA1200


Summary of Contents for Samsung PRONTA1200
- Page 1 ENGLISH/ESPAÑOL...
- Page 2 NOTE/NOTAS • This camera will not function without a battery. • Use one 3V lithium battery(CR-2). • The lens cap automatically opens when the Power button is turned on. • Do not open the lens cap with your fingers. The shutter does not operate in the following circumstances: •...
- Page 3 • Esta cámara no funciona sin pila. • Utilice una pila de litio de 3 V. (CR-2) • La tapa del objetivo se abrirá automáticamente cuando se conecte la cámara. • No abra la tapa del objetivo con los dedos. El disparador no se accionará...
-
Page 4: Table Of Contents
CONTENTS/ÍNDICE Thank you for purchasing a SAMSUNG camera. Please read this manual before using your camera. TABLE OF CONTENTS Auto red-eye reduction .............34 PREPARATION Auto flash ..................35 Part names ..................6 Fill-in flash .................37 LCD panel ...................9 Fill-in flash and back-light control ..........38 Viewfinder and Indicators ............11... - Page 5 Gracias por comprar una cámara SAMSUNG. Por favor, lea este manual de instrucciones antes de utilizar su cámara. ÍNDICE Reducción de ojos rojos automática.........34 PREPARATIVOS Flash automático ...............36 Nomenclatura................6 Flash de relleno ................37 Panel informativo LCD..............9 Flash de relleno y control del contraluz ........38 Visor e indicadores ..............11...
-
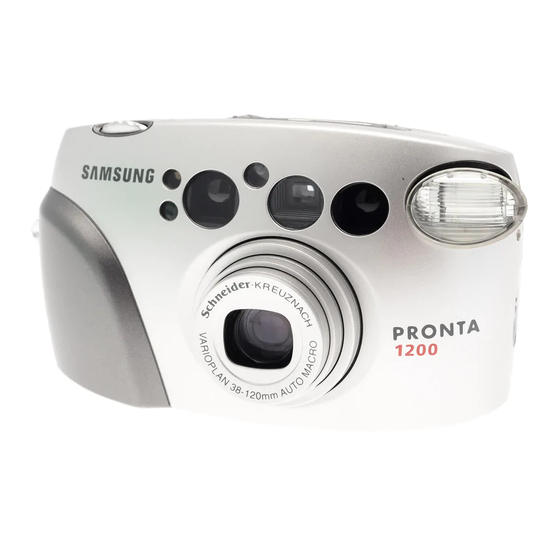
Page 6: Preparation Part Names
PART NAMES / NOMENCLATURA Front / Top De frente/Parte superior Exposure sensor Sensor de exposición Shutter button Flash button (Flash mode selection button) Disparador Botón del flash (botón de selección del modo de flash) Zoom lever ( / ) Buzzer ON/OFF button Palanca del zoom ( / ) Botón de avisador(Buzzer) ON/OFF panel/Panel LCD... - Page 7 Rear / Bottom Parte posterior/inferior Flash indicator(Red LED) Power button Indicador del flash (diodo rojo) Botón de conexión /desconexión Autofocus indicator(Green LED) Indicador del autofoco (diodo verde) Diopter adjustment dial Dial de ajuste dióptrico Strap eyelet Enganche de la correa Viewfinder Film check window Visor...
- Page 8 Interior Interior Back cover Respaldo Film pressure roller Rodillo de presión de la película Film pressure plate Placa de presión de la película Spool Bobina Film sensor Sensor de la película...
-
Page 9: Lcd Panel
PANEL/PANEL INFORMATIVO LCD Month 1 13 Self-timer Year 2 14 Flash mode Remote control shooting 3 15 Exposure unit (EX) 16 Back-light control Snap shooting 4 17 Slow shutter sync 18 Buzzer indicator Portrait zoom 5 19 Film present indicator Landscape shooting 6 20 Film rewinding indicator Focal length 7... - Page 10 Modos del flash Unidad de exposición (EX) Año Control de contraluz Exposición con mando a distancia Sincronización lenta Instantáneas Indicador del avisador Modo zoom para retratos Indicador de película cargada Modo paisajes Indicador de rebobinado de la película Longitud focal Indicador de la carga de la pila Contador de exposiciones Indicador de carga de la película...
-
Page 11: Viewfinder And Indicators
VIEWFINDER AND INDICATORS / VISOR E INDICADORES Close range picture area mark Viewfinder/Visor - WIDE : Optimum picture area when shooting within 0.8m~1.5m - TELE : Optimum picture area when shooting within 0.8m~3.0m Marca del área de imagen para tomas de cerca - WIDE : Área de imagen óptima cuando se dispara entre 0.8m~1.5m - TELE : Área de imagen óptima cuando se dispara entre 0.8m~3.0m Picture area frame... -
Page 12: Attaching The Strap
1. Indicador del autofoco (piloto verde) Cuando se ilumina confirma que las condiciones son adecuadas para tomar fotografías. Cuando el sujeto esté a corta distancia (inferior a 0.8m (2.62 pies)), el diodo parpadeará rápidamente y se bloqueará el disparador.(Ver página 26 para información sobre el funcionamiento del avisador) 2. -
Page 13: Loading The Battery
LOADING THE BATTERY/COLOCACIÓN DE LA PILA 1. Rotate the battery chamber cover lock in the direction of the arrow to open. 2. Insert a new battery and ensure it is placed in the correct position. 3. Rotate the battery chamber cover lock in the opposite direction to the arrow( step 1) to close. 1. - Page 14 NOTE Use one CR-2 battery. The camera will automatically turn the power off when not used after 3 minutes. Remove the battery from the camera when the camera is not used for an extended period. Be sure to check the date and shooting mode when you load a new battery. If the date or time is incorrect, please refer to page (29) and adjust accordingly.
-
Page 15: Checking The Battery
CHECKING THE BATTERY/COMPROBACIÓN DE LA PILA You can check the battery life on the LCD panel. Es posible comprobar la carga de la pila en el panel informativo LCD. 1. Normal operation 1. Funcionamiento normal - The battery condition indicator does not appear. - No aparece el indicador de carga de la pila. -
Page 16: Loading The Film
LOADING THE FILM/COLOCACIÓN DE LA PELÍCULA 1. Open the back cover by sliding the release knob as shown above. 2. Insert a roll of film in the chamber. Do not force the film into position. 3. The film should lie flat. 4. - Page 17 1. Deslice la palanca de apertura del respaldo para abrirlo tal y como se muestra en el dibujo sobre estas líneas. 2. Inserte un rollo de película en el compartimento de la película. No fuerce la película al introducirla. 3. La película deberá permanecer plana, tal y como aparece en los dibujos de más abajo. 4.
-
Page 18: Using The Camera
USING THE CAMERA/CÓMO UTILIZAR LA CÁMARA Press the Power button to turn the power on. The indicators will appear on the LCD panel. If the camera is not used for 3 minutes, the power will be turned off automatically. While looking through the viewfinder, aim the camera at the subject and operate the zoom buttons. Press the Zoom lever “... - Page 19 Pulse el botón de conexión/desconexión para conectar la cámara. Se activará el panel informativo LCD. Si no utiliza la cámara durante 3 minutos, ésta se desconectará automáticamente. Mientras mira por el visor, apunte la cámara al sujeto y haga funcionar los botones del zoom. Presione la Palanca del zoom “...
-
Page 20: Holding The Camera
HOLDING THE CAMERA/CÓMO SUJETAR LA CÁMARA In order to avoid camera shake, hold the camera steady, especially when using longer focal lengths (Tele). Place the camera strap over your wrist. Both elbows (horizontal picture) or one elbow (vertical picture) should be held close to your body. Keep your eye close to the viewfinder when using the camera. -
Page 21: Taking Pictures
TAKING PICTURES/CÓMO FOTOGRAFIAR Aim the Autofocus frame at a subject.(Refer to page 12) Press the Shutter button half way down. The lens is focused when the green lamp turns on. Press the Shutter button all the way down to take a picture. The film will automatically advance after shooting and the frame counter will advance. - Page 22 Sitúe el recuadro del autofoco sobre el sujeto (consulte la página 12). Pulse el disparador hasta la mitad. Cuando el motivo se encuentre correctamente enfocado, la lámpara verde se iluminará. Presione el disparador hasta el fondo para tomar la fotografía. La película avanzará...
-
Page 23: Though It Is Dark, You Can Check The Lcd Panel
THOUGH IT IS DARK, YOU CAN CHECK THE LCD PANEL / AUNQUE ESTE OSCURO, SIEMPRE PODRA VISUALIZAR EL PANEL LCD The LCD panel light will be turned on for about 6 seconds by Zoom lever/Palanca del zoom pressing the power button, shutter button halfway, function buttons Shutter button/Disparador Function buttons... -
Page 24: Adjusting The Diopter
ADJUSTING THE DIOPTER/AJUSTE DIÓPTRICO Select the maximum zoom setting and turn the diopter adjustment dial until the viewfinder display becomes clear. Seleccione la posición máxima del zoom y gire el dial de ajuste dióptrico hasta ver con total claridad y nitidez la pantalla del visor. -
Page 25: Buzzer Operation
BUZZER OPERATION The buzzer function can be selected by the Buzzer ON/OFF button and it will operate only if the buzzer mark appears on the LCD panel. According to the function, the buzzer sound is as follows. Buzzer sound Function Application 1 short beep Selection... -
Page 26: Funcionamiento Del Avisador (Buzzer)
FUNCIONAMIENTO DEL AVISADOR (BUZZER) La función del avisador se selecciona con el botón del avisador (Buzzer) ON/OFF y solo funcionará si la señal del avisador aparece en el panel LCD. De acuerdo con la función,el sonido del avisador (buzzer) es como sigue. Sonido avisador (buzzer) Función Aplicación... -
Page 27: Taking Photo Rewinding The Film
REWINDING THE FILM/CÓMO REBOBINAR LA PELÍCULA 1. Automatic rewinding After taking all the pictures on a roll of film, the camera will automatically rewind the film. The motor stops when the rewinding is completed. When the rewinding is completed, the icon ( ) will blink. - Page 28 2. Mid-roll rewinding To rewind the film in the middle of a roll, press the Mid-roll rewind button. The film will be completely rewound, ready for processing. You will not be able to reload the film. Rewind button NOTE If you press the Power button during film rewinding, the rewinding is interrupted until the Power button is released.
-
Page 29: Date And Caption (Q.d. Model Only)
DATE AND CAPTION (Q.D. MODEL ONLY)/ FECHA Y TÍTULO (SOLO MODELO Q.D.) Use the DATE button to control "Date" and "Caption" Utilice el botón DATE para controlar la fecha y el título. 1. Changing "Date" format or selecting the caption/ Cómo cambiar el formato de la fecha o seleccionar el título <No print/Sin... - Page 30 3. Changing the date setting / Cómo cambiar el ajuste de la fecha To change the date or time, press and hold down the DATE button for 2 seconds. The first sector of the date format will blink. To select the sector that you want to change, press the DATE button. Change the date setting by operating Zoom lever.
- Page 31 4. Selecting the caption print/Cómo seleccionar el título When the LCD panel shows "CP-1"(refer to the previous picture ), you can select one of seven captions as follows : To change the captions, operate the zoom lever. ("T" or "W") When caption Mode is selected, message caption will appear on the LCD panel in order.
-
Page 32: Using The Flash Mode
USING THE FLASH MODE/ UTILIZACIÓN DE LOS MODOS DEL FLASH You can select the flash mode by pressing the FLASH button. Podrá seleccionar el modo del flash que desee presionando el botón FLASH. NOTE / NOTAS In case of the "Auto Flash" function, the camera will retain the mode even though the camera is turned off. -
Page 33: Using The Shooting Mode
USING THE SHOOTING MODE/UTILIZACIÓN DEL MODO DE EXPOSICIÓN You can select the shooting mode by pressing the mode button. Usted puede seleccionar el modo de la toma presionando el botón de modos. <Remote control Shooting> <Normalphotography> <Exposición con mando a distancia> <Fotografía norma>... -
Page 34: Auto Red-Eye Reduction
AUTO RED-EYE REDUCTION/ REDUCCIÓN DE OJOS ROJOS AUTOMÁTICA In low light conditions, the flash will automatically fire to obtain a suitable exposure. You can decrease the red-eye phenomenon automatically when taking a portrait picture in low light. NOTE The red-eye reduction mode dramatically reduces the possible red-eye effect by emitting rapid pre- flash to shrink the subject s pupils before the main flash fires. -
Page 35: Auto Flash
AUTO FLASH Select the Auto flash Mode by pressing the FLASH button once. Auto flash mode activates the flash by measuring the brightness of the subject. The Flash will not engage when the subject is too bright. NOTE Once the Auto Flash Mode is selected, it will remain active even when the camera is turned off. -
Page 36: Flash Automático
FLASH AUTOMÁTICO Seleccione el modo Flash automático presionando el botón FLASH una vez. La Función Flash Automático activa el flash midiendo la luminosidad del objeto. El flash no se disparará cuando el objeto a fotografiar sea demasiado luminoso. NOTAS Una vez que se selecciona la función flash automático, esta permanecerá activa incluso cuando se apaga el equipo. -
Page 37: Fill-In Flash
FILL-IN FLASH/FLASH DE RELLENO Select this mode by pressing the FLASH button twice. When the main subject is in shadow and the surrounding light conditions are too strong for the auto-flash to engage, the fill-in flash allows you to expose the subject correctly. -
Page 38: Fill-In Flash And Back-Light Control
FILL-IN FLASH and BACK-LIGHT CONTROL FLASH DE RELLENO y CONTROL DE CONTRALUZ You can select this mode by pressing the FLASH button 3 times. Use this mode when you take a picture of a subject in back-light conditions. NOTE Be careful to avoid direct sunlight on the lens. Shooting beyond the scope of the flash range will induce the activation of the buzzer and the zoom lens;(applied to the cases of Normal, Self, Remote control shot mode). -
Page 39: Fill-In Flash And Red-Eye Reduction
FILL-IN FLASH AND RED-EYE REDUCTION/ FLASH DE RELLENO Y REDUCCIÓN DE OJOS ROJOS Select this mode by pressing the FLASH button 4 times. Use this mode when you take a picture of a person in low light conditions. NOTE Use a tripod to avoid camera shake. Usted puede seleccionar este modo al presionar el botón FLASH 4 veces. -
Page 40: Flash Off
FLASH OFF/FLASH DESCONECTADO Select this mode by pressing the FLASH button 5 times. Use this mode when you want to take pictures without flash. NOTE When using the Flash Off function, you may need to use a tripod to avoid camera shake. -
Page 41: Self-Timer
SELF-TIMER/AUTODISPARADOR Select this mode by pressing the mode button. You can take a picture of yourself by using this mode. When pressing the shutter button, the self-timer lamp illuminates for 7 seconds. Then the lamp blinks rapidly for 3 seconds and the picture is taken. Seleccione este modo presionando el botón de modos. -
Page 42: Remote Control Shooting
REMOTE CONTROL SHOOTING/ EXPOSICIÓN CON MANDO A DISTANCIA Select this mode by pressing the mode button. (You can only use this function with the Q.D. model camera) When you select this mode, the self-timer lamp will blink every 2 seconds. To take a picture using a remote control, press the Remote Control shooting button. -
Page 43: Replacing The Battery Of The Remote Control
REPLACING THE BATTERY OF THE REMOTE CONTROL CÓMO CAMBIAR LA PILA DEL MANDO A DISTANCIA Replacing the battery Refer to the illustrations above. NOTE Use one lithium battery (JIS CR2025) Be sure to place a battery in the correct position. The positive contact (+) must be facing up. Cómo cambiar la pila. -
Page 44: Snap Shooting
SNAP SHOOTING/INSTANTÁNEAS Select this mode by pressing the mode button. Use this mode when taking a picture of active subjects such as children or pets (They are difficult to focus on). When you select this mode, the camera will set the wide position (38mm) and the focus is fixed. -
Page 45: Portrait Zoom
PORTRAIT ZOOM/MODO ZOOM PARA RETRATOS Select this mode by pressing the mode button. Use this mode to maintain a constant subject size within the frame, even though the distance to a subject may vary. Position your subject in the centre of the viewfinder and press the shutter button half- way. -
Page 46: Landscape Shooting
LANDSCAPE SHOOTING/MODO PAISAJES If you can t shoot clearly distant subjects through a window, use this mode by pressing the mode button. NOTE With this mode, the flash does not fire. Use a tripod to avoid camera shake in low light conditions. When LANDSCAPE mode is not in use change this mode into normal mode. -
Page 47: Bulb Shooting (B Shutter)
BULB SHOOTING(B SHUTTER)/ BULB POSICIÓN B (EXPOSICIÓN LARGA) To shoot subjects that require an extended shutter speed shooting such as Portrait in fireworks and night scenes, select this mode by pressing the mode button. The shutter remains open as long as the shutter button is depressed. The time selected is shown on the LCD panel and the maximum time is 60 seconds. -
Page 48: Using The Focus Lock
USING THE FOCUS LOCK/ UTILIZACIÓN DEL BLOQUEO DEL ENFOQUE If you want to focus on a subject that is not in the centre of your picture, use the Focus Lock function described below. 1. Aim the camera with the autofocus frame superimposed over the subject. 2. - Page 49 Si desea enfocar un sujeto que no se encuentra en el centro de la foto, utilice la función de bloqueo del enfoque tal y como se describe a continuación. 1. Apunte la cámara con el recuadro del autofoco sobre el sujeto. 2.
-
Page 50: Important Notes Care And Storage
CARE AND STORAGE/CUIDADOS Y ALMACENAMIENTO If your camera needs cleaning, wipe it with a soft, lintless cloth. The lens should be cleaned only with special lens cleaning tissue and fluid.(Consult your camera retailer.) Do not allow your camera to come into contact with sand or water. Keep your camera in a dry, cool place that is free from high humidity and dust. - Page 51 Si la cámara necesita limpiarse, hágalo con un paño suave. El objetivo sólo puede limpiarse con un papel limpiaobjetivos empapado con líquido limpiaobjetivos especiales (acuda al establecimiento donde adquirió su cámara). No permita que la cámara entre en contacto con arena o agua. Guarde la cámara en un lugar seco y fresco, libre de humedades y polvo.
-
Page 52: Trouble Shooting
TROUBLE SHOOTING/PROBLEMAS Y SOLUCIONES • If the shutter does not operate after pressing the shutter button. • Si el obturador no se acciona al apretar el disparador. Check point / Problema Remedy / Solución Page / Página Press the Power button again. Is the lens cover completely open? Está... - Page 53 SPECIFICATIONS/ESPECIFICACIONES TYPE 35mm fully automatic lens shutter camera. Format 35mm DX-coded film, 24x36mm Speed Automatic setting with DX-coded film, ISO 50~3200 FILM Loading Automatic advance to the first frame when the back cover is closed. Winding Automatic advance, Single or Continuous shooting Rewinding Automatic rewinding, Mid-roll rewinding Schneider lens F4.62 ~ 11.70 / 38 - 120mm...
- Page 54 One 3V lithium battery (CR-2) POWER SOURCE 116.5 x 68.5 x 46.5mm / 4.59 x 2.69 x 1.81in DIMENSIONS(WxHxD) WEIGHT 210g / 7.4oz (without battery) Specifications are subject to change without prior notice. All data are based on SAMSUNG’S standard test methods.
- Page 55 Cámara de 35 mm totalmente automática con obturador central. TIPO película de 35 mm con códigos DX, 24 x 36 mm Formato Sensibilidad ajuste automático con película con códigos DX, 50~3200 ISO. PELÍCULA Carga avance automático de la película hasta el primer fotograma al cerrar el respaldo de la cámara. Avance avance automático, disparos foto a foto o en serie.
- Page 56 116.5 x 68.5 x 46.5 mm / 4.59 x 2.69 x 1.81 in. DIMENSIONES (ancho x alto x fondo) 210 g / 7.4 onz. (sin pila) PESO Las especificaciones están sujetas a cambios sin previo aviso. Todos los datos están basados en los métodos de ensayo standard de SAMSUNG.
-
Page 57: Checking The Camera
CHECKING THE CAMERA Checking the shutter condition - You can check the condition of the shutter by pressing it. There will be a short “click” sound. Checking the irises - After removing the back cover of the camera, it is normal to see the closed lens opening up when you press the shutter. -
Page 58: Control Del Equipo Fotográfico
CONTROL DEL EQUIPO FOTOGRÁFICO Comprobar las condiciones del obturador - Puede comprobar las condiciones del obturador apretándolo. Se deberá oír un breve click . Control de los iris - Después de quitar la tapa posterior de la cámara, es normal ver que el objetivo cerrado se abre cuando aprieta el obturador. - Page 60 SAMSUNG TECHWIN CO., LTD. SAMSUNG OPTO-ELECTRONICS UK LTD. SAMSUNG TECHWIN MOSCOW OFFICE OPTICS & DIGITAL IMAGING DIVISION SAMSUNG HOUSE, 3 RIVERBANK WAY, KORP. 14 37-A LENNINGRADSKY PRO-KT 145-3, SANGDAEWON 1-DONG, JUNGWON- GREAT WEST ROAD, BRENTFORD, MOSCOW, 125167, RUSSIA GU,SUNGNAM-CITY, KYUNGKI-DO, KOREA 462-121 MIDDLESEX,TW8 9RE, U.K.
Need help?
Do you have a question about the PRONTA1200 and is the answer not in the manual?
Questions and answers