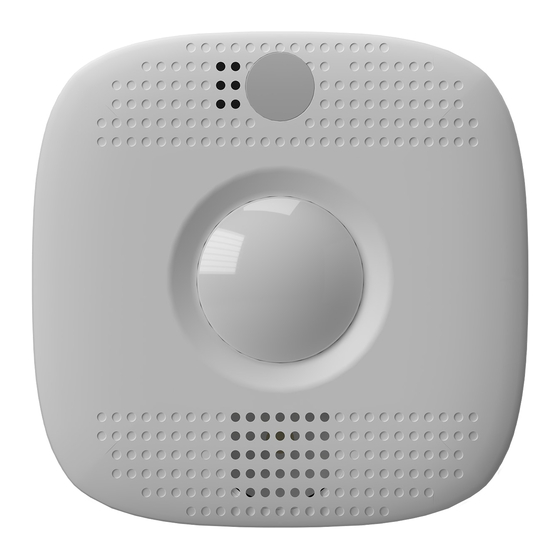
Heatit Z-Smoke Manual
230v
Hide thumbs
Also See for Z-Smoke:
- Quick manual (2 pages) ,
- Quick start manual (7 pages) ,
- Installer manual (5 pages)
Table of Contents
Advertisement
Quick Links
H
e
a
t
i
t
Z
-
S
m
o
k
H
e
a
t
i
t
Z
-
S
m
o
k
Z-Smoke Detector 230V is a mini-sized wireless smoke detector with built-in PIR motion sensor, temperature sensor and emergency light
(optional). Designed to protect your family against potential fire hazards, the Smoke detector is also capable of detecting movements and
reporting temperature to users. The Z-Wave Smoke Detector allows access to the "S2 Unauthenticated" class.
The Z-Smoke Detector is a wirelessly operated photo-electronic Smoke Detector designed to operate with any Z-Wave enabled controller
devices; it also features smoke detecting, temperature sensing and IR detection. The Smoke Detector's alarm situations, battery condition,
operating conditions, supervisory data and general fault information are sent to the Z-Wave Gateway/Control Panel wirelessly. The device is
also serially connected with other sensors in the Z-Wave gateway to serve as an extra siren. When any other sensor in the Z-Wave network is
activated and sends an alarm signal, the Smoke Detector will also raise alarm with its built-in buzzer as a siren to help sound warning.
The Z-Smoke Detector is a Z-Wave enabled device and is fully compatible with any Z-Wave enabled network. Z-Wave is a wireless
communication protocol that uses a low-power RF radio
The Smoke Detector calibrates for the air contents after warming up to determine a standard condition for the environment. It can also be
manually instructed to calibrate for air content. It is also pre-programmed to automatically calibrate once a month.
P
P
a
a
r
r
t
t
s
s
I
I
d
d
e
e
n
n
t
t
i
i
f
f
i
i
c
c
a
a
t
t
i
i
o
o
1. LED Indicator /Function Button / Emergency Light
Red LED
Turns ON briefly: Transmitting signal.
Quick flash: Alarming.
Flashes every 1 second: Smoke Detector under Sleep Mode
Flashes every 2 seconds: Smoke Detector under warmup and calibration process.
Flashes every 4 seconds: battery exhausted.
Orange LED
Flash every second: Device power on/Calibration failed.
Flashes every 5 seconds: Detecting smoke failed or device malfunctioning.
Flashes every 4 seconds: battery exhausted.
Flashes every 45 seconds: Low battery condition
Function Button
Press the button once to send temperature signal to the gateway.
Press the button once during alarm to silence the alarm.
Press the button twice to discharge before inserting new batteries.
Press the button 3 times within 1.5 seconds to send a learn code.
Press and hold the button for 10 seconds to enter calibration process.
Press and hold the button for 20 seconds to perform factory reset.
White LED (Emergency Light)
The emergency light will begin to flash slowly to alert uses that the system is alarming.
2. IR Lens
3. Buzzer
4. Battery Compartment Fixing Screw
5. Tamper Switch
6. Battery Switch
Use a pair of tweezers to slide the Battery Switch to ON Position (left).
e
D
e
t
e
c
t
o
r
2
3
0
e
D
e
t
e
c
t
o
r
2
3
0
.
n
n
V
V
1
Advertisement
Table of Contents

Summary of Contents for Heatit Z-Smoke
- Page 1 Smoke Detector will also raise alarm with its built-in buzzer as a siren to help sound warning. The Z-Smoke Detector is a Z-Wave enabled device and is fully compatible with any Z-Wave enabled network. Z-Wave is a wireless communication protocol that uses a low-power RF radio The Smoke Detector calibrates for the air contents after warming up to determine a standard condition for the environment.
- Page 2 Z-Smoke Detector will send a tamper open signal to the system control panel to remind the user of this condition. The Z-Smoke Detector will send a tamper close signal to the Control Panel after the device is hooked onto the mounting bracket.
- Page 3 All non-battery operated nodes within the network will act as repeaters regardless of vendor to increase reliability of the network. To include the Z-Smoke Detector into the gateway or control panel, you have to connect it to AC (mains) power first.
- Page 4 Step 5. Repeat Step 3 and Step 4 to insert the black wire. Inserting the two wires to the same side (right), as shown below, of the two connectors provides an easier installation in the following steps. Step 6. Insert the AC wires to the two connectors respectively, as shown below. Use a pair of tweezers to turn the Battery Switch to ON position (left side), the rechargeable battery will begin to charge.
- Page 5 It is recommended to install the Smoke Detector in the following locations. In a ceiling area with full view of its detection coverage unobstructed by appliances and furniture. Near the entrance of a room or house to monitor entry activity. ...
- Page 6 When mounted on the ceiling, the PIR has better detection performance against horizontal movement. Device Type: Sensor – Notification Smoke Alarm Role Type: Always on Slave (AOS) Max Association Group: 2 Command Class Support/Control Mandatory CC Support: Command Class Version Required Security Class...
- Page 7 Group 2 for “Basic set”: (maximum node: one) Basic CC (COMMAND_CLASS_BASIC) When the Smoke Detector is active, it will send Basic Set (0xFF) in Group 2. When the Smoke Detector is restored, it will send Basic Set (0x00) in Group 2. ...


Need help?
Do you have a question about the Z-Smoke and is the answer not in the manual?
Questions and answers