
Related Manuals for Lasermet LEDS-1WB

Summary of Contents for Lasermet LEDS-1WB
- Page 1 LEDS Mini Sign Instruction Manual LASERMET MINIATURE WARNING SIGN INSTRUCTION MANUAL TWO-WAY ILLUMINATED SIGN and ONE-WAY ILLUMINATED SIGN 00519-53-000 Issue 6.3 22 January 2021...
-
Page 2: Table Of Contents
LEDS Mini Sign Instruction Manual LASERMET Miniature Warning Sign Instruction Manual Contents Declaration of Conformity ....................3 Safety Warnings ........................4 Concept ..........................5 Installation .......................... 6 Positioning ........................6 Wiring ..........................8 Connecting to ICS-6 ..................... 9 Attaching the Sign to the Backplate ................12 Removing the Sign from the Wall ................ -
Page 3: Declaration Of Conformity
LEDS-2WRG 00563-00-000 DECLARATION OF CONFORMITY This is to certify that the Miniature Illuminated Signs designated by the listed Lasermet Part Numbers have been tested in accordance with the following directives and standards and found to comply. Lasermet certifies that this product complies with the basic requirements for health... -
Page 4: Safety Warnings
LEDS Mini Sign Instruction Manual Safety Warnings This device is intended to be used as part of a safety system which may be used to protect personnel and equipment from possible injury, damage, or loss. As such it must be installed and wired according to these instructions and tested by suitably qualified persons. -
Page 5: Concept
Full support, design and installation is available from Lasermet, please contact us for any queries. Contact details are given at the end of this manual. -
Page 6: Installation
70mm above and 110mm below the mounting centre to allow fitment and removal. If a Lasermet ICS-KP12 or ICS-KP14 keypad is being fitted below the sign the centres should be at least 140mm apart vertically. - Page 7 LEDS Mini Sign Instruction Manual Figure 1. Wall Drilling Details 00519-53-000 Issue 6.3 22 January 2021 Page 7 of 15...
-
Page 8: Wiring
The sign typically draws less than 0.2A per colour. To protect the wiring and terminals the supply should have an overcurrent protection device rated at 1A maximum. Wiring diagrams are given below for connecting the sign to Lasermet’s ICS-6 Interlock Controller. Connecting to a 48VDC Supply When fitted with a voltage converter, the sign can accept a 48VDC supply voltage. -
Page 9: Connecting To Ics-6
LEDS Mini Sign Instruction Manual 5.1 Connecting to ICS-6 Option 1 – One Way Illuminated Sign The red warning sign will come on as soon as the mains switch of the ICS-6 is turned on. 24V Power Supply 48V Power Supply 00519-53-000 Issue 6.3 22 January 2021... - Page 10 LEDS Mini Sign Instruction Manual Option 2 – One Way Illuminated Sign The red warning sign will come on when the ‘Arm Laser’ button is pressed. 24V Power Supply 48V Power Supply 00519-53-000 Issue 6.3 22 January 2021 Page 10 of 15...
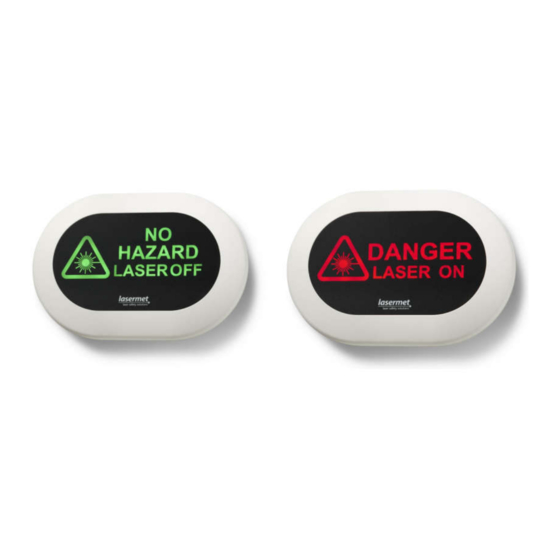
- Page 11 LEDS Mini Sign Instruction Manual Option 3 – Two Way Illuminated Sign The green sign will come on when the ICS-6 mains switch is turned on. The green indication will go off and the red warning sign will illuminate when the ‘Arm Laser’ button is pressed. 24V Power Supply 48V Power Supply Once the wiring connections have been made, attach the sign to the backplate as described below.
-
Page 12: Attaching The Sign To The Backplate
LEDS Mini Sign Instruction Manual 5.2 Attaching the Sign to the Backplate Once all the wiring connections have been made, attach the sign to the backplate by hooking the top of the sign onto the backplate and swinging the bottom against the wall. -
Page 13: Indicators
To help protect the environment do not dispose of this product with landfill waste. Take it to a waste recycling facility that processes electrical and electronic items or return it to Lasermet or your local distributor for proper disposal. 00519-53-000 Issue 6.3... -
Page 14: Specifications
Weight 145g Dimensions are approximate. Values given as ‘typical’ are average values measured across a number of samples and are not guaranteed. Lasermet reserve the right to alter any specification without prior notice. Warranty Lasermet provide a 12-month warranty for defects in materials and manufacture, from the date of installation or delivery. -
Page 15: Contact Details
LEDS Mini Sign Instruction Manual Contact Details Lasermet provide a full range of laser interlock equipment including interlock switches, illuminated warning signs, laser shutters, entry keypads with built-in fail-safe override timer, door locks, external power supplies etc. which can be interconnected to provide a complete system. We also supply equipment and consultancy covering all aspects of laser safety.