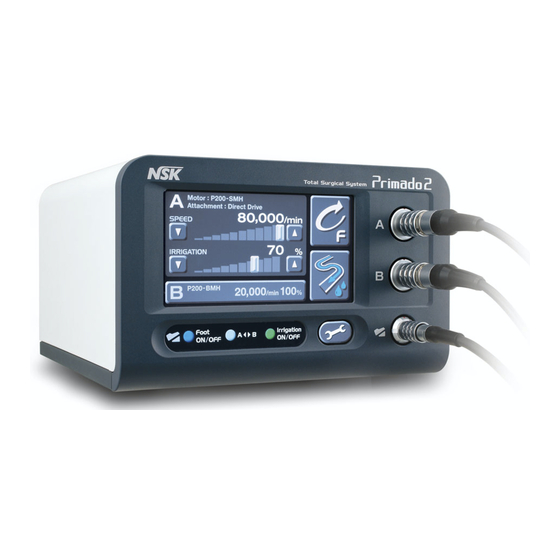
NSK Primado2 Operation Manual
Surgical drill handpiece
Hide thumbs
Also See for Primado2:
- Operation manual (301 pages) ,
- Reprocessing manual (152 pages) ,
- Operation manual (36 pages)
Table of Contents
Advertisement
Quick Links
Advertisement
Table of Contents

Related Manuals for NSK Primado2


Summary of Contents for NSK Primado2
-
Page 3: Cautions For Handling And Operation
These Attachments/Handpieces are to be used exclusively with Primado2, our surgical operation control units. We recommend that prior to use, you carefully read this document regarding instructions for use, handling method, or maintenance check so that you can carry on using the Attachments/Handpieces in the future. In addition, keep this operation manual in a place where a user can refer to it at any given time. - Page 4 Intended to use ● Only qualified persons are allowed to use these Attachments/Handpieces for bone operations (bone removal, cutting, perforation and formation). Danger ● Do not use this product in a room where there is a danger of explosion or in the vicinity of flammable substances. It is especially important not to use this product on a patient to whom a flammable anesthetic agent (dinitrogen monoxide) has been administered.
- Page 5 Caution ● The Attachments/Handpieces are not sterilized before delivery. Therefore, be sure to sterilize them prior to use. ● Prior to use, always operate and inspect the device with care for vibration, noise, and heat. If anything unusual is found, do not use. Contact your dealer. ●...
-
Page 6: Parts Names
Parts Names <Contra Angle Handpiece> <Drill Handpiece> Latch Twist Collet Irrigation Nozzle * The figure shows type PD-CA-16. * The figure shows type PD-2ADM. - Page 7 Check before treatment Conduct pre-use checks by the following procedure to confirm that there are no abnormalities. 1) Mount a bur or drill. 2) Operate the Attachment/Handpiece at the rotational speed permissible for bur or drill mounted and confirm that there is no looseness, abnormal vibration, abnormal heating or abnormal noise.
- Page 8 Connecting / Disconnecting Motor and Attachment / Handpiece ● When mounting or removing the Attachment/Handpiece, set the Safety Lock to “OFF” on the Hand Switch of the Micromotor (Micromotor CAUTION with Hand Control). ● Refer to the Operation Manual of Micromotor. ●...
- Page 9 Mounting and Removing Burs and Drills ● Use only burs and drills specified by NSK. The use of other burs and drills may cause a fault or an accident. CAUTION ● Use burs and drills that are suitable for the Attachment/Handpiece. The use of unsuitable burs and drills may cause a fault or an accident.
- Page 10 Contra Angle Handpiece For the bur, use a commercially available Ø2.35mm contra bur. OPEN <Mounting> 1) Slide the Latch in the direction of “OPEN” (Fig. 2). CLOSE Fig. 2 2) Match the notch of the bur to the corresponding part of the shaft and push the bur all the way through (Fig.
- Page 11 Drill Handpiece <Mounting> 1) Turn the Twist Collet in the direction of ‘ ’ until it clicks (Fig. 4). Chuck Closed Chuck Open CLOSE OPEN 2) Insert the Bur or Drill through the tip of the Attachment/Handpiece all the way, twisting it slightly Fig.
- Page 12 Mounting Irrigation Nozzle ● Mount the Irrigation Nozzle to the Attachment/Handpiece after removing the Bur/Drill. CAUTION ● Do not use irrigation nozzles other than those specified by NSK. ● Also see the Operation Manuals of Primado2 Control Unit. Contra Angle Handpiece 1) Insert the Irrigation Tube onto the Irrigation Nozzle (Fig.
- Page 13 Irrigation Nozzle goes in (Fig. 7). Irrigation Nozzle Fig. 7 2) Insert the Irrigation Tube onto the Irrigation Nozzle (Fig. 8). Irrigation Nozzle Irrigation Tube 3) For the related connection and the setting of the Control Unit, see the Operation Manual of Primado2. Fig. 8...
-
Page 14: Cleaning / Sterilization
Cleaning / Sterilization ● Perform cleansing and sterilization after every use. CAUTION ● Clean and lubricate the Attachment/Handpiece before autoclaving. Autoclaving the Attachment/Handpiece stained with blood or debris could cause damage to the Attachment/Handpiece. ● In order to prevent infection, wear a mask, rubber gloves and glasses. 6-1 Preparation before cleaning 1) Remove the Bur/Drill from the Attachment/Handpiece. - Page 15 6-3 Washing The Attachment/Handpiece can be washed via Thermo Disinfector. Disinfect either by using a Thermo-Disinfector or by soaking. 6-3-1 Auto disinfection (It is recommended to use a thermo disinfector compatible with ISO 15883) The following conditions are recommended for Thermo Disinfector ; a.
- Page 16 6-3-2 Manual disinfection 1) Soaking : Soak the Attachment/Handpiece in a neutral enzymatic detergent. Example : For 20 to 30 minutes at 40 to 50°C. (Follow the time and temperature recommended by the manufacturer of the neutral enzymatic detergent) 2) Rinse : Remove debris and detergent from the Attachment/Handpiece by rinsing with distilled, deionized or demineralized water. 3) Drying : Wipe the Attachment/Handpiece dry with a lint-free cloth.
- Page 17 3) Remove the Attachment/Handpiece by depressing the Release Button on the EZ Spray Grip (when using EZ Spray). ● Continue spraying PANA SPRAY Plus until it comes out clear at the tip of the Attachment/Handpiece. Due to its structure, PANA SPRAY CAUTION Plus comes out from the tip of the Attachment/Handpiece and the Twist Collet part.
- Page 18 ● Do not clean Attachments/Handpieces by an ultrasonic cleaning apparatus. ● Do not clean Attachments/Handpieces by a washer sterilizer. ● For detailed information for washing and sterilizing the Micromotor, refer to the Primado2 Micromotor Operation Manual. 6-6 Storage Store the sterilized Attachment/Handpiece in a place where it can be kept sterile until the next use.
-
Page 19: Troubleshooting
Troubleshooting If you are suspecting any faults, check the following once again prior to asking for repair work. If none of these cases is applicable or if the situation does not improve despite your efforts or measures, the damage could be serious ; call your dealer to fix the problem. Symptoms Causes/Points of checking Countermeasures... - Page 20 Symptoms Causes/Points of checking Countermeasures Overheating (during operation). Continuous operation for a long period of time. Wait until handpiece cools down. · The bearing has overheated. Contact your dealer. · Foreign materials inside. · The bearing has worn out. Abnormal vibration and noise. ·...
-
Page 21: Specification
Specification Contra Angle Handpiece Model PD-CA-16 PD-CA-64 Gear Ratio 16 : 1 64 : 1 Suitable Burs Commercially available Commercially available Ø2.35mm Contra Burs Ø2.35mm Contra Burs Drill Handpiece Model PD-2SD PD-2SDM PD-2AD PD-2ADM Rotational Speed 60,000min 60,000min 60,000min 60,000min Handpiece Type Straight Straight... - Page 22 Adapted Motor (Optional) Model Product Name P200-HMH Primado2 High Torque Motor P200-HMH-HS Primado2 High Torque Motor (with hand control) Temperature Humidity Atmospheric pressure Use environment 0-40°C (no condensation) 30-75%RH 700-1,060hPa Store and transportation environment -10-50°C 10-85%RH 500-1,060hPa Disposal To avoid health risks of operators handling the disposal of medical equipment and its effect on the environment, ask specialist firms licensed to dispose of...
-
Page 23: Warranty
Warranty Our products are subjected to rigorous quality control and inspections. In the unlikely event of a product proving to be faulty within the guarantee period when it has been used normally, it will be repaired free of charge subject to the terms and conditions below. For such repair requests, please contact your dealer from whom the product was purchased. - Page 24 Symbols Manufacturer. This conforms to CE European Directive of “Medical equipment directive 93/42/EEC.” Autoclavable up to Max.135°C. *for detail see Step “6. Cleaning / Sterilization”. This product can be cleaned and disinfected with a Thermo-Disinfector. Rx Only Caution : U.S. Federal law restricts this device to sale by or on the order of a licensed physician.
Need help?
Do you have a question about the Primado2 and is the answer not in the manual?
Questions and answers
I can’t remove the burr attachment from the Handpiece. It simply will not pull off. How do I do this? It’s not the burr itself but the extension that attaches to the handpiece.