GENERAL INFORMATION. Sincerely, SCHWIND eye-tech-solutions GmbH IMPORTANT NOTE Until February 2017, the SCHWIND AMARIS (and likewise all other products mentioned herein) has been placed on the market under the company name SCHWIND eye-tech-solutions GmbH & Co.KG” “...
USER MANUAL (Instruction for Use) SW 6.1 General Information Content Dear Customer ........................2 Content 3 List of Figures ........................10 List of Tables ........................13 GENERAL INFORMATION ................14 System Identification Data ................ 14 Symbols for Warnings, Precautionary Measures and Notes ....15 Notes on the User Manual .................
Page 4
Mains Input Label of the Device ................40 2.9.4 Laser Warning Labels .................... 40 INTRODUCTION ....................42 Intended Use ....................42 Disclaimer SCHWIND AMARIS Excimer Laser (initial model) ....42 Contraindications and Side Effects ............43 3.3.1 Absolute Contraindications for Refractive Photo Ablation ......... 43 3.3.2 Relative Contraindications ..................
Page 5
USER MANUAL (Instruction for Use) SW 6.1 General Information System Description ..................49 Laser Classification ..................51 4.5.1 Excimer Laser ......................52 4.5.2 Aiming Laser and Cross Laser ................52 4.5.3 OCP Laser ......................52 Laser Description ..................53 4.6.1 The Main Principle of the Excimer Laser .............
Page 6
Scope of Delivery ....................87 5.4.2 Packing of the Shipping Units ................87 5.4.3 Transport Configuration SCHWIND AMARIS / AMARIS 750S / AMARIS 1050RS 5.4.4 Transport Configuration SCHWIND AMARIS 500E ..........89 5.4.5 Unpacking and Checking the Delivery ..............90 5.4.6...
Page 7
6.12.2 Password Input ....................104 6.12.3 Main Menu ......................105 6.12.4 Movement of the Swivel Laser Arm – AMARIS / AMARIS 750S / AMARIS 1050RS 6.12.5 Troubleshooting ....................107 SERVICE PROCEDURES AND FUNCTIONS ..........108 Functions Menu ..................108 Registration / User Accounts..............109 Settings Menu ...................
Page 8
General ...................... 140 Planning SCHWIND CAM Treatments ............. 141 8.2.1 Planning of new Treatments ................141 8.2.2 Import of SCHWIND CAM Treatments ............... 141 Performing SCHWIND CAM Treatments ..........146 Recovery Function ..................149 Eye Tracking ....................150 8.5.1 Eye Tracking Coordinates Orientation ............... 154 8.5.2...
Page 9
Nomogram ....................190 12.2.1 Customized Ablations ..................192 12.2.2 Surface and Stromal Treatments ............... 192 12.3 Electrical Safety Parts Inside the SCHWIND AMARIS ......193 12.4 EMC Guidance and Manufacturer’s Declaration ........194 12.4.1 Electromagnetic Interference ................194 12.4.2 Essential Performance ..................199 12.4.3...
USER MANUAL (Instruction for Use) SW 6.1 General Information List of Tables Table 1: MAXIMAL LOAD AT POWER OUTLET X1 ................34 Table 2: ELECTROMAGNETIC EMISSIONS ..................195 Table 3: ELECTROMAGNETIC IMMUNITY (1) ................. 196 Table 4: ELECTROMAGNETIC IMMUNITY (2) ................. 197 Table 5: ESSENTIAL PERFORMANCE ACCORDING TO IEC 60601-1-2 (2014) clause 5.2.1.1 b) .
USER MANUAL (Instruction for Use) SW 6.1 General Information GENERAL INFORMATION System Identification Data Product name: SCHWIND AMARIS 1050RS SCHWIND AMARIS 750S SCHWIND AMARIS 500E SCHWIND AMARIS Device description: Ophthalmologic laser equipment for corneal tissue ablation, refractive surgery (refer to chapter Intended Use).
This symbol provides the user with useful or additional information. Notes on the User Manual The purpose of the user manual is to familiarize the operator(s) of the SCHWIND AMARIS lasers with the design, operating principle, transport, installation, set-up, safe operation, safety notes and the care and maintenance of the medical laser device.
Translations of these must bear the words “Translation of the Original Instructions”. Scope of Documentation The scope of documentation of the SCHWIND AMARIS includes the “Product Accompanying Documentation “SCHWIND MEDICAL PRODUCTS”; art.no. 202160x-01 (EN), 202160x-02 (DE), consisting of: Medical Apparatus Book “SCHWIND MEDICAL PRODUCTS”...
(Instruction for Use) SW 6.1 General Information IMPORTANT NOTE The Declarations of Conformity for SCHWIND AMARIS excimer laser can be found on the CD-ROM/DVD No. 163160x SCHWIND Product Documentation. Liability of the Manufacturer SCHWIND eye-tech-solutions does not assume any liability for: ...
Malfunctions that are not caused by improper use are repaired under warranty. Damage caused by abuse or improper use is not repaired under warranty. The legal warranty applies only to parts that are replaced or repaired by SCHWIND eye- tech-solutions.
Quoting of product names is for information only and does not represent any trade mark misuse. SCHWIND eye-tech-solutions is not liable for the performance or the use of these products. Version 6.1.6 dated 2020-01-31 EN Page 19 of 201...
Regulations for Medical Devices IMPORTANT NOTE For safe use of the SCHWIND medical device the operator must consider the applicable, normative regulations and directives. The most important of these are: 1. Council Directives concerning Medical Devices MDD 93/42/EEC, as amended (Regulation valid for EEC countries;...
Device use by trained personnel only! The use and operation of the AMARIS laser is allowed to persons only, who are authorized representatives of the operator trained by SCHWIND eye tech solutions or by SCHWIND eye-tech-solutions certified representatives, or those persons that received a training from the operator authorized and trained representative.
IMPORTANT NOTE The SCHWIND AMARIS excimer laser may only be operated by specially trained physicians or surgeons who have mastered the functions of the laser and who possess the necessary skills to use it in accordance with the instructions in this User Manual.
2.4.3 Conformity with Safety Standards). 2.4.3 Conformity with Safety Standards Laser Safety The SCHWIND AMARIS excimer laser, as a medical laser device, corresponds with the safety requirements of IEC 60601-2-22, "Standard for Medical Lasers" and IEC 60825-1 ”General Standard for Laser Safety".
Page 24
Electromagnetic Compatibility (EMC) The SCHWIND AMARIS excimer laser has been tested and found to be compliant with the Standard IEC 60601-1-2 regarding electromagnetic compatibility. Further information on electromagnetic compatibility (EMC) Despite adherence to all applicable EMC requirements, malfunctioning cannot be ruled out entirely.
USER MANUAL (Instruction for Use) SW 6.1 Safety Operator’s Responsibility In order to ensure the safety of patients and user’s personnel as well as the proper function of the device, the operator / user must undertake certain measures as listed in the chapters below. Consider also the Instructions and notes given in chapter 2.3 Restrictions of Use and Safety Precautions.
WARNING Risk of injury! Persons with pacemakers! The SCHWIND AMARIS fulfils the requirements of IEC 60601-1 and IEC 60601- 1-2 for safety and electromagnetic compatibility of medical electrical devices. Accordingly, the laser should have no influence on heart pacemakers that comply with a device standard compatible with the above-mentioned standards.
Warning lamps and door interlock contacts are not included in the scope of delivery of the AMARIS laser. Please contact the SCHWIND eye-tech-solutions service department for the electrical specifications and installation notes if you want to connect a laser warning lamp to the laser or to use the door interlock.
All persons inside the laser area (except the patient) must wear protective glasses, according to EN 207. Considering the I/R mode the protective glasses for use with the SCHWIND AMARIS laser systems must meet the following minimum standards: 180-315 IR LB3 (according to EN 207)
2.5.10 Protection from Data Loss SCHWIND eye-tech-solutions GmbH does not assume any liability for a data loss due to non- compliance with the points described in this chapter. The user can protect their systems from data loss as stated in the following: ...
(Instruction for Use) SW 6.1 Safety Do not install any additional software or non- SCHWIND approved hardware on SCHWIND systems. IMPORTANT NOTE The user is obliged to ensure the data storage! Work with an updated anti-virus software package and ensure that all incoming data are free of virus.
USER MANUAL (Instruction for Use) SW 6.1 Safety The NOHD-Value is determined regarding the limits of the IEC 60825-1:2014 The NOHD-value is determined to be 45 centimeters for all AMARIS variants. Figure 2-1: Accessible beam area (example AMARIS 750S) 2.6.2 Mirrored Reflection Ensure that there are no reflective objects in the area of the laser beam, because this may lead to dangerous mirrored reflections.
If a fluorine gas leak is detected, open the window, leave the room and call the service department of SCHWIND eye-tech-solutions or the service of your nearest distributor.
Laser Power cord Figure 2-2: Samples of printer connection Potential Free Power Supply Output The SCHWIND AMARIS provides a potential free power supply output with 230 VAC, 50/60Hz at three power outlet sockets at the connection plate. Version 6.1.6 dated 2020-01-31 EN...
20VA only. No connection of other devices to AMARIS 1050RS the power outlet socket. For use of SCHWIND Patient Bed, the interlock cable must be installed and Patient Bed must be locked during treatment. 20VA is the standby power supply of the Patient Bed.
An accident notice is to be submitted to the responsible supervisory authority. A copy of this message is to be sent to SCHWIND eye-tech-solutions GmbH. You will find a sample of the damage report in your Medical Apparatus Book in chapter 9.
The AMARIS excimer laser is labelled according IEC 60825-1 (Size of labels not actual) SCHWIND AMARIS 750S SCHWIND AMARIS 1050RS Figure 2-3: Identification labels AMARIS 750S / 1050RS The identification label for AMARIS 750S / 1050RS is placed outside the housing of the compartment door.
SW 6.1 Safety Explanation of Symbols The following symbols are shown in the identification label: Explanation Symbol SCHWIND Logo CE sign, confirms the observance the Regulation for Medical Devices 0483 MDD 93/42/EEC. Das Bild kann nicht angezeigt werden. Consider accompanying documents...
USER MANUAL (Instruction for Use) SW 6.1 Safety SCHWIND AMARIS / AMARIS 750S / AMARIS 1050RS Spare for label “Plume Evacuator ” (option) The label is placed inside the compartment door, see figure to the right. Figure 2-5: Position of ”Connection Terminal”...
Page 39
Door interlock and warning light acc. IEC 60601-2-22 for laser safety. Foot switch laser Connection of the foot switch to the device. Interlock connection for SCHWIND Patient Bed Power outlet socket for components 230 VAC / 50/60Hz RJ45 LAN connection Safe and efficient operation of the system is required.
Internally changing the mains supply voltage to other values than the recommended can cause malfunctions of the device. 2.9.4 Laser Warning Labels The SCHWIND AMARIS excimer laser is marked with appropriate labels: Laser Warning Labels (alternatively as symbol) Label is placed on front and back side of the microscope lens.
Safety The laser labels are placed on the protective laser housing, outside on the compartment door. Laser Data Labels SCHWIND AMARIS 750S SCHWIND AMARIS 1050RS SCHWIND AMARIS / SCHWIND AMARIS Cross laser (optional) 500E Figure 2-8: Laser data labels Version 6.1.6 dated 2020-01-31 EN...
August 2010 is equivalent to the SCHWIND AMARIS 750S model but has a repetition rate of 500Hz. All parts within this user manual referring to the SCHWIND AMARIS 750S / 1050RS are valid for the SCHWIND AMARIS excimer laser as well.
USER MANUAL (Instruction for Use) SW 6.1 Introduction Contraindications and Side Effects Below you will find the list of contraindications and possible side effects for refractive photo ablation. However, this list does not release you from the duty to update your own expertise with the latest results from general research in the area of refractive surgery.
USER MANUAL (Instruction for Use) SW 6.1 Introduction 3.3.3 Direct Side Effects (caused by the laser surgery) Infection and Delayed Healing: There is about a 0.1 percent chance of the cornea becoming infected after PRK/TransPRK, and a somewhat smaller chance after LASIK. Generally, this means added discomfort and delay in healing, with no long-term effects within a period of four years.
Technical design and safety measures reduce any potential risk to an acceptable level and reduce as far as possible following residual risks associated with potential harms and complications caused by treatments using SCHWIND AMARIS product family lasers: Risk of a disturbance of the fertility ...
3.3.6 Biocompatibility of Touchable Parts All touchable materials of the SCHWIND AMARIS are rated as biocompatible. There are no known problems, such as allergic reactions, which might occur by using the product. If you recognize any effects, please contact the SCHWIND eye-tech-solutions service department or customer support.
This chapter gives an overview of the SCHWIND AMARIS components and describes in short form the main function units of the SCHWIND AMARIS, the operation and control elements and the available components for all models, the AMARIS 1050RS, the AMARIS 750S and the AMARIS 500E, respectively.
Plume Evacuation System, external version for AMARIS 500E/750S/1050RS (chapter 4.14.9) Video extender HDMI (chapter 4.14.10) Refer additionally to chapter 10.7 Components and Consumables 
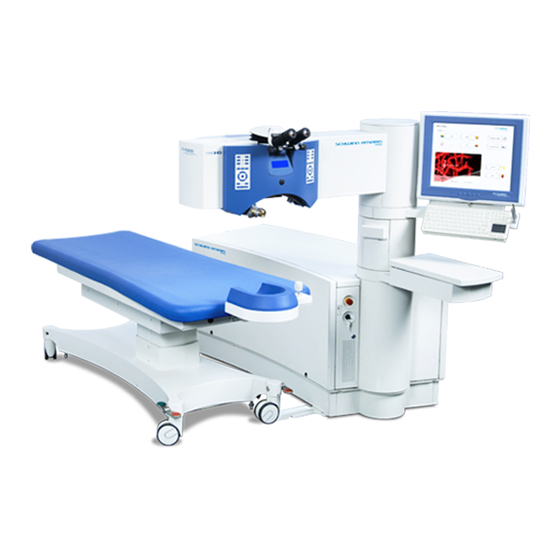
Figure 4-1: View of AMARIS 750S / AMARIS 1050RS / AMARIS excimer laser with patient bed Version 6.1.6 dated 2020-01-31 EN Page 48 of 201...
Figure 4-2: View of AMARIS 500E excimer laser with patient bed System Description The overall design of the SCHWIND AMARIS 750S and AMARIS 1050RS provides low height of the basic unit with a tower and laser arm for the beam delivery system, which doesn't give the patient the feeling of being crowded by a big machine.
Page 50
AMARIS systems equipped with a 6D- eye tracker will actively measure eye rolling movements which can be visualized in the treatment screen. Additionally, the model AMARIS 1050RS offers the option of a Latency Free Eye tracking feature as 7 dimension.
Integrated Online Pachymetry (OCP) for measuring the central corneal thickness before, during and after the surgery. Laser Classification The SCHWIND AMARIS, AMARIS 500E, AMARIS 750S and AMARIS 1050RS operate with the following lasers: One excimer laser Class 4 ...
USER MANUAL (Instruction for Use) SW 6.1 Device / System Description 4.5.1 Excimer Laser The wavelength of the excimer laser is 193 nm and is therefore not visible for the human eye. WARNING! Risk of injury! Laser radiation! LASER CLASS 4. Avoid irradiation of eye or skin by direct or stray radiation.
USER MANUAL (Instruction for Use) SW 6.1 Device / System Description Laser Description 4.6.1 The Main Principle of the Excimer Laser The high-performance excimer laser is designed for the ablation of human eye tissue. Excimer gas lasers are stimulated with an electric pulse in a mixture of noble gases and halogens. The output lifts the noble gas atoms to a higher energy level so that they react with the halogen molecules and bond to them, as ArF.
SCHWIND eye-tech solutions service engineer/technician or a trained service technician of a SCHWIND dealer. The noble gas mixture must be ordered directly from SCHWIND eye-tech solutions or the responsible SCHWIND dealer to guarantee purity levels and strict check criteria. Otherwise, damage to the system can occur. This is part of the Service and Maintenance Agreement.
IMPORTANT NOTE The halogen filter has to be exchanged with every two changes of the premix gas bottle. This is done by a SCHWIND Service technician or other trained personnel only. The used halogen filter contains toxic agents and should only be disposed of in a professional way in accordance with directives of your location.
USER MANUAL (Instruction for Use) SW 6.1 Device / System Description Microscope and Illumination A coaxial stereo microscope is used for exact control and focusing of the corneal surface. It allows coaxial stereoscopic inspection of the eye without the control beam path being guided through the working optic of the device.
USER MANUAL (Instruction for Use) SW 6.1 Device / System Description 4.9.3 Microscope Binocular Tube As a standard, the operating microscope is equipped with a 10° to 50° binocular tube (1). Each ocular (2) provides a diopter setting of +5 to -5 D, which can be adapted to the ametropia of the user.
USER MANUAL (Instruction for Use) SW 6.1 Device / System Description 4.10.2 Replacing the Partical Aspiration Nozzles For replacing the double-channel nozzle for particle aspiration, pull up two metal latches holding the nozzle and drag the nozzle out, than replace it with a new one, refer to chapter 10.3, Maintenance of the Particle Aspiration System.
AMARIS, a high efficacy Plume Evacuation System that is a default system in the AMARIS 750S and AMARIS 1050RS models since July 2017. It will remove particles from the ablation area and reduce the smell during surgery to a minimum and is mounted in two...
The single-channel nozzle of Plume Evacution Sytem is not available for AMARIS 500E when purchasing the laser model. The external version of the plume evacuation system is only optionally available. Ask your Schwind distributor for additional information. Version 6.1.6 dated 2020-01-31 EN Page 60 of 201...
USER MANUAL (Instruction for Use) SW 6.1 Device / System Description CAUTION Before starting a treatment, make sure that the PLUME EVACUATOR is connected properly to the AMARIS and that the louver is not covered. Pay attention to the sound of the PLUME EVACUATOR to be sure that the blower inside is working during treatment.
4.12 Patient Bed For correct positioning of the patient, a SCHWIND Patient Bed is supplied with the laser system. The patient bed can be operated in combination with a SCHWIND excimer laser as: Manually traversable (swivelling) bed (available since May 2011)
The patient bed is designed for patients with a maximum weight of 150 kg! IMPORTANT NOTE Use only patient beds approved by SCHWIND eye-tech-solutions. For detailed information concerning the patient bed operation refer to the User Manual of the SCHWIND Patient Bed.
4.14.2 Printer IMPORTANT NOTE If a printer is used with the SCHWIND AMARIS via WLAN or USB connection, respectively, the printer must be placed outside the patient area. 4.14.3 Slit Lamp of the Excimer Laser The integrated slit lamp can be used to check the correct position of the flap after the LASIK surgery.
USER MANUAL (Instruction for Use) SW 6.1 Device / System Description IMPORTANT NOTE The slit lamp will be automatically switched off by the system after 3 minutes. There are four types of apertures available which can project different slit sizes, as well as diffuse illumination towards the patient’s eye.
4.14.5 6D-/7D-Eye Tracking As an additional option for the SCHWIND AMARIS 750Sand 1050RS model Z- movements (6 dimension) can be measured and actively compensated during the ablation process. Moreover AMARIS systems equipped with a 6D- eye tracker will actively measure eye rolling movements which can be visualized in the treatment screen.
USER MANUAL (Instruction for Use) SW 6.1 Device / System Description y-position x-position Figure 4-14: Cross laser projected on patient’s head Press the button firmly for at least 0.5 second to switch the cross laser ON or OFF. Figure 4-15: Cross laser ON/OFF button The patient’s head should be aligned in such a way that both eyes match with the horizontal line (x-position) of the cross laser module and forehead, nose and chin should match with the vertical line (y-position).
The SCHWIND CXL-365 vario (cross linking) system is a medical device that emits UV light with a wavelength of 365 nm. It can be optionally attached to a SCHWIND AMARIS excimer laser and is used for the treatment of Keratoconus with corneal collagen cross linking or other UV- crosslinking related applications.
USER MANUAL (Instruction for Use) SW 6.1 Device / System Description Figure 4-17: SCHWIND CXL-365 vario in treatment position 4.14.8 Uninterruptable Power Supply (UPS) CAUTION The AMARIS should be operated with an UPS (uninterruptible power supply) to avoid treatment interruption in case of power loss.
USER MANUAL (Instruction for Use) SW 6.1 Device / System Description 4.14.9 Plume Evacuation System - External option As an , the aforementioned external Plume Evacuation System can be installed in all AMARIS models instead of the previous default system containing the particle aspiration nozzle (for a detailed description of the external plume evacuation system refer to chapter 4.11 Plume Evacuation System).
Approved System Combinations and Optional Accessories / Features IMPORTANT NOTE When combining the AMARIS 500E / AMARIS 750S / AMARIS 1050RS excimer laser with a patient bed or with other medical products, take care to ensure that the combination complies with the requirements of the European Medical Device Directive (93/42/EEC), of the standard IEC 60601-1 and any other local regulations that may apply.
Page 72
System Optional combination features OCP Online Pachymetry Slit lamp 6D-tracking (AMARIS 750S and AMARIS 1050RS only) Latency-free tracking (AMARIS 1050RS only) Cross laser Advanced Cyclotorsion Control for corneal Wavefront guided treatments (SCC) Advanced Cyclotorsion Control for ocular Wavefront guided treatments (SCC)
There are no activities by the user necessary regarding the installation of the medical device or software. Trained service personnel of the SCHWIND eye-tech-solutions or of an authorized distributor perform the installation of the SCHWIND AMARIS and the SCHWIND patient bed.
The detailed room and installation requirements for SCHWIND AMARIS excimer laser systems and further technical requirements are listed in the document: “Room and Installation Requirements for SCHWIND AMARIS Excimer Lasers 750S / 500E / 1050RS”, which is provided by SCHWIND eye- tech-solutions. 5.2.1 General Requirements Avoid direct sunlight, use darkening curtain if necessary.
Keep a distance to wall for service works as specified in the following drawings. Device Dimensions - AMARIS / AMARIS 750S / AMARIS 1050RS Figure 5-1: AMARIS / AMARIS 750S/ AMARIS 1050RS with swivelling patient bed - front view Figure 5-2: AMARIS / AMARIS 750S/AMARIS 1050RS with swivelling patient bed - side view Version 6.1.6 dated 2020-01-31 EN...
2300 mm x 3500 mm (approx. 8.0 m²) Recommended room size: 2900 mm x 3500 mm (approx.10.15 m² Figure 5-3: AMARIS / AMARIS 750S / AMARIS 1050RS with swivelling patient bed– standard position Drawing is not shown in actual size Version 6.1.6 dated 2020-01-31 EN...
2500 mm x 3500 mm (approx. 8.75 m²) Recommended room size: 3300 mm x 3500 mm (approx.11.55 m²) Figure 5-4: AMARIS / AMARIS 750S / AMARIS 1050RS with swivelling patient bed - 30° position Drawing is not shown in actual size Version 6.1.6 dated 2020-01-31 EN...
2800 mm x 3500 mm (approx. 9.8 m²), Recommended room size: 3600 mm x 3500 mm (approx.14.0 m²) Figure 5-5: AMARIS / AMARIS 750S / AMARIS 1050RS with swivelling patient bed – 90° position Drawing is not shown in actual size Version 6.1.6 dated 2020-01-31 EN...
USER MANUAL (Instruction for Use) SW 6.1 Installation Device Dimensions - SCHWIND AMARIS 500E Figure 5-6: AMARIS 500E – front view Figure 5-7: AMARIS 500E – side view Drawing is not shown in actual size Version 6.1.6 dated 2020-01-31 EN...
USER MANUAL (Instruction for Use) SW 6.1 Installation Room Dimensions - SCHWIND AMARIS 500E IMPORTANT NOTE Keep a distance to wall for service works as specified in the following drawings. AMARIS Standard Position: Min. room size: 2300 mm x 3500 mm (approx. 8.0 m²) Recommended room size: 3300 mm x 3500 mm (approx.11.55 m²...
USER MANUAL (Instruction for Use) SW 6.1 Installation AMARIS Swivelled Position 30° Min.room size: 2300 mm x 3500 mm (approx. 8.0 m²) Recommended room size: 3300 mm x 3500 mm (approx.11.55 m²) Drawing is not shown in actual size Figure 5-9: AMARIS 500E with swivelling patient bed - 30° position Version 6.1.6 dated 2020-01-31 EN Page 81 of 201...
USER MANUAL (Instruction for Use) SW 6.1 Installation AMARIS Swivelled Position 90° Min. room size: 2400 x 3500 mm (approx. 9.5 m²), Recommended room size: 3400 x 3500 mm (approx.12.5 m²) Drawing is not shown in actual size Figure 5-10: AMARIS 500E with swivelling patient bed 90° position Version 6.1.6 dated 2020-01-31 EN Page 82 of 201...
Arrangement of the AMARIS Laser Feet AMARIS / AMARIS 750S / AMARIS 1050RS All dimensions in mm. Figure 5-11: Arrangement of AMARIS / AMARIS 750S / AMARIS 1050RS feet AMARIS 500E All dimensions in mm Figure 5-12: Arrangement of AMARIS 500E feet Version 6.1.6 dated 2020-01-31 EN...
Room Temperature Range: 10°C – 30 °C or 50°F – 86°F Avoid extreme temperature changes. 15% - 85% Relative Humidity: NONCONDENSING! Avoid extreme temperature changes! See User Information UI_A02-09 “Influence of humidity and condensation on SCHWIND products”. Version 6.1.6 dated 2020-01-31 EN Page 84 of 201...
±2°C is recognized in a shorter time period we recommend performing an additional fluence test. 5.2.5 Installation Requirements Input Requirements For the required performance data of power supply for SCHWIND AMARIS, please refer to the data in chapter 11 Technical Data. Version 6.1.6 dated 2020-01-31 EN Page 85 of 201...
IEC 60601-1 standard. Furthermore, the SCHWIND CAM software or any of its modules have to be installed and used only on computers officially approved by SCHWIND eye-tech-solutions. ...
5.4.1 Scope of Delivery Description Article Number 16500 (AMARIS) or SCHWIND AMARIS Excimer laser (incl. Panel PC and SW): 16800 (AMARIS 500E) or (AMARIS or AMARIS 500E or AMARIS 750S or AMARIS 18500 (AMARIS 750S) or 1050RS) 18600 (AMARIS 1050RS)
2.38 m, with a min. length of 3.50 m is necessary. 5.4.3 Transport Configuration SCHWIND AMARIS / AMARIS 750S / AMARIS 1050RS The following figures show the side and the top view of AMARIS / AMARIS 750S/ AMARIS 1050RS excimer laser in the transport configuration. Side view Top view Figure 5-14: Transport configuration of AMARIS / AMARIS 750S / AMARIS 1050RS Version 6.1.6 dated 2020-01-31 EN...
USER MANUAL (Instruction for Use) SW 6.1 Installation 5.4.4 Transport Configuration SCHWIND AMARIS 500E The following figures show the side and the top view of AMARIS 500E excimer laser in the transport configuration. Side view Top view Figure 5-15: Transport configuration of AMARIS 500E Version 6.1.6 dated 2020-01-31 EN...
After delivery of the device units, check immediately for outside damages to the boxes and its completeness. A service technician of SCHWIND eye-tech-solutions will carry out checking and inspection of the device and its components for damage and completeness according to delivery list.
Initial Installation / Start-Up Unpacking, initial installation/start-up and instruction in operating the device according to MPG will be performed by a service technician/engineer of SCHWIND eye-tech solutions or authorized Representative. The service technician inspects the room for necessary installations (dimensions, electrical connection, security regulations and air-condition refer to chapter 5.2, Room and Installation...
This chapter describes the function of each excimer laser component. General Operation Notes IMPORTANT NOTE The operation of the SCHWIND AMARIS excimer laser is only allowed by a trained medical personnel. Before operating the excimer laser, make yourself familiar with the safety regulations (refer to chapter Safety).
A dot-matrix display gives you additional information about the status of the device. Main Switch Emergency Stop Key Switch Control Panel Figure 6-1: AMARIS / AMARIS 750S/ AMARIS 1050RS with key switch and emergency stop Version 6.1.6 dated 2020-01-31 EN Page 93 of 201...
Figure 6-3: Keyboard with touch pad, two re-sterilisable pens and card reader The re-sterilisable pen can be used to operate the touch screen of the panel PC under sterile conditions. For instructions and parameters of sterilisation please refer to the SCHWIND document “Reprocessing Instructions for resterilisable SCHWIND Products”.
USER MANUAL (Instruction for Use) SW 6.1 Device Control and Operation 6.2.2 USB Connectors CAUTION Damage of device! Do not remove the cover from the USB port. Connector shall not be used (for service purposes only). Figure 6-4: Panel PC ONYX – USB Emergency Stop Switch The emergency stop switch is located left of the laser tower for easy accessibility.
USER MANUAL (Instruction for Use) SW 6.1 Device Control and Operation Switch ON the Device 6.4.1 Main Switch The main switch is located behind the door of the gas compartment at the backside of the AMARIS base unit. Open the door to gain access to the main switch. Be sure that the emergency stop button is not pressed.
Otherwise, the standby circuit continues to consume energy. Switching OFF of an uninterruptible power supply (UPS) is only allowed by a service technician from SCHWIND eye-tech-solutions or an authorized representative. Version 6.1.6 dated 2020-01-31 EN...
USER MANUAL (Instruction for Use) SW 6.1 Device Control and Operation 6.4.4 Disconnection from the Electronic Circuit Complete separation from the electronic circuit is only possible through: Disconnection of the net connection plug at the AMARIS device, Switching off of the main switch at the AMARIS (refer to chapter 6.4.1 Main Switch).
USER MANUAL (Instruction for Use) SW 6.1 Device Control and Operation Control Panel of the Excimer Laser Microscope Magnification Slit Lamp Illumination Control OP Illumination control Aiming laser ON/OFF Fixation LED ON/OFF Positioning Slits ON/OFF Treatent Offset Adjustment Particle Aspiration System Control <Enter>button Figure 6-9: Control panel of the excimer laser Explanation of control elements:...
USER MANUAL (Instruction for Use) SW 6.1 Device Control and Operation Fixation LED: On/Off switch for the patient fixation target. The patient's eye is offered a blinking target to align on as a “rest position.” Suction With the arrow- key the nozzle for particle aspiration or plume evacuation system can be brought into position.
USER MANUAL (Instruction for Use) SW 6.1 Device Control and Operation Operating of the Microscope The magnification of the microscope can be changed by pressing the accordant button on the AMARIS control panel (refer to Figure 6-9: Control panel of the excimer laser). Another possibility is to define a pre-selected magnification for each surgical step in the Treatment Assistant Manager (refer to chapter 7.5 Treatment Assistant Manager).
USER MANUAL (Instruction for Use) SW 6.1 Device Control and Operation Microscope Crosshair Depending of the adjusted magnification the circles displayed in the microscope crosshair have the following dimensions: The dimensions of the circles may differ approx. 10%, depending on the exact magnification. Figure 6-11: Microscope crosshair Magnification Step Inner Circle...
USER MANUAL (Instruction for Use) SW 6.1 Device Control and Operation 6.10 Positioning Slits To adjust the correct height of the patient’s eye during the treatment, the positioning slit lights are used. The lights consist of a slit and a cross which are generated by LED´s. If the slit lights are switched on they form two bow shaped patterns on the cornea (refer to Figure 6-12: Height adjustment of the excimer laser).
This password is managed by the administrator (for example, the medical director) and stored in Password Administration The first issue of the password will be accomplished by specialists / technicians of SCHWIND eye- tech-solutions or the local representative during the handover of the SCHWIND AMARIS. The...
6.12.4, Movement of the Swivel Laser Arm). This button is only active in an AMARIS / AMARIS 750S/ AMARIS 1050RS models. The button <Log off> will allow you to change the user. The button <Exit> will allow you to exit the user software and shut down the system.
750S / AMARIS 1050RS model. The SCHWIND AMARIS 500E has a fixed laser arm. Only for transportation purposes the laser arm can be swivelled manually by a service technician. To move the laser arm in AMARIS / AMARIS 750S / AMARIS 1050RS, the button <Swivel laser arm>in the Main menu (refer to Figure 6-14) has to be pressed on the touch screen.
Shut down the system, switch off and switch on again, start the program again. If the error arises again: Inform the service department of SCHWIND eye-tech-solutions or your local representative and describe the error message. Version 6.1.6 dated 2020-01-31 EN...
USER MANUAL (Instruction for Use) SW 6.1 Service Procedures and Functions SERVICE PROCEDURES AND FUNCTIONS Functions Menu Determined service procedures are essential for operation of the excimer laser. They can be chosen in the Functions menu and they contain the following individual functions: Figure 7-1: Functions menu ...
To export or print, display or export Treatment PDF or treatment videos at any time. Software Update To perform system software updates by loading update files provided by Schwind eye- tech-solutions. IMPORTANT NOTE Usually at the beginning of an operation day only the functions Fluence test and eventually gas exchange is necessary.
USER MANUAL (Instruction for Use) SW 6.1 Service Procedures and Functions During the creation of new users, settings from existing users can be copied using the settings drop down menu. Figure 7-3: Creation of new users Standard Users have the right to change their own password only.
USER MANUAL (Instruction for Use) SW 6.1 Service Procedures and Functions Settings Menu In the Settings menu several adjustments concerning different modules of the AMARIS Application software can be made. Figure 7-5: Settings menu of the AMARIS Application Software Section Treatment Printout In this section the user can define if the system shall print a hardcopy (paper form) for the treatment printout automatically, if the system should ask for a hardcopy printout or if there should be no hardcopy printout.
Page 112
USER MANUAL (Instruction for Use) SW 6.1 Service Procedures and Functions Section OCP Under Adjust OCP thickness the displayed value of the corneal thickness in the treatment screen can be decreased or increase in steps of 1% to adjust the value e.g.
USER MANUAL (Instruction for Use) SW 6.1 Service Procedures and Functions User can decide to enable or disable video recording. An Information overlay on the recorded video can be set visible which includes patient data (lastname, first name, treated eye, etc. shall be overlayed to the video.
SCHWIND eye-tech-solutions. If it should be necessary to import new credits for treatments with the excimer laser system the user has to contact SCHWIND eye-tech-solutions and order new credits via email using the email address codesystem@eye-tech.net.
USER MANUAL (Instruction for Use) SW 6.1 Service Procedures and Functions IMPORTANT NOTE The new imported credits will be added to the existing credits if the counter value was not zero. After possible software update at the laser existing credits will not be deleted. Figure 7-8: Credit code overview On the left side of the Credit Code overview menu the available treatment types and the number of available credits for each type are displayed.
USER MANUAL (Instruction for Use) SW 6.1 Service Procedures and Functions Figure 7-9: Credit system settings in the Settings Menu It is possible to define for which treatment type a warning message should be displayed, the number of residual credits from which a message should be displayed and the number of residual days from which a warning message should be displayed.
USER MANUAL (Instruction for Use) SW 6.1 Service Procedures and Functions Figure 7-10: Message because of decreasing time of credit activation Figure 7-11: Message because of decreasing number of available credits Version 6.1.6 dated 2020-01-31 EN Page 117 of 201...
USER MANUAL (Instruction for Use) SW 6.1 Service Procedures and Functions Treatment Assistant Manager The Treatment Assistant Manager (TAM) is a helpful tool to standardize the surgical procedures. It offers the possibility to pre-set several standard conditions for the treatment modes like timer settings, illumination, microscope magnification, etc.
USER MANUAL (Instruction for Use) SW 6.1 Service Procedures and Functions 7.5.1 Editing the List of Surgical Steps To edit the surgical steps for the treatment, select the Treatment Assistant Manager <TAM> in the Functions menu (please refer to 7.1 Functions Menu). Next, please select the treatment mode for the changes to be applied from the pull-down menu on the top of the menu page.
In case a software update is necessary, this can be performed by the user by pressing the button <Software Update> in the function menu. An update file which is provided by SCHWIND eye-tech-solutions can be loaded by pressing the button < Select update file and start…> and the software update process will start automatically.
The system determines the number of pulses required to completely perforate the foil. The ablation rate is calculated according to predetermined parameters. The fluence test is the same for all models: AMARIS, AMARIS 1050RS, AMARIS 750S and AMARIS 500E. IMPORTANT NOTE...
USER MANUAL (Instruction for Use) SW 6.1 Service Procedures and Functions IMPORTANT NOTE Before switching ON the laser, the fluence detector must be connected! Otherwise the laser has to be restarted to recognize the fluence detector. When the fluence detector is not in use, it can be parked at the appropriate holder at the housing of the AMARIS.
Page 123
USER MANUAL (Instruction for Use) SW 6.1 Service Procedures and Functions As long as the foil isn’t perforated, no laser beam can reach the detector through the glass plate. This means no signal will be transferred to the computer. Upon starting of the perforation, ablation of the entire diameter of the measured quantity of UV light increases continuously until reaching a maximum point.
USER MANUAL (Instruction for Use) SW 6.1 Service Procedures and Functions To perform the Fluence Test the following steps must be performed: Select the <Fluence Test>button in the Functions Menu and follow the messages on the monitor. Every 15 fluence tests a message will appear which asks to clean the fluence detector with a micro fibre tissue which is supplied with AMARIS.
USER MANUAL (Instruction for Use) SW 6.1 Service Procedures and Functions Figure 7-19: Start Screen of the fluence test IMPORTANT NOTE The four small pictures on the right side of the SW menu show a correct and incorrect positioning of the high stability foil. The position where the foil will be perforated is indicated by four small circles, which will rotate from fluence test to fluence test in steps of 90°...
Drift Offset measurement. Figure 7-20: Fluence test successfully completed The High Voltage Range to perform treatment with AMARIS / AMARIS 750S/ AMARIS 1050RS or AMARIS 500E is dependent on the laser source integrated in the system.
In case that the laser source pre-set energy adjustment is at the lower or upper adjustment limit, a message will be displayed explaining the situation and asking to call the service department of SCHWIND eye-tech-solutions to arrange a service visit. Figure 7-21: Fluence result message/borderline pre-set energy Version 6.1.6 dated 2020-01-31 EN...
2-3 gas changes). The fluence test is not successful despite repeated gas changes Please contact the service department of SCHWIND eye-tech-solutions or its local representative. The third measurement is still not successful ...
USER MANUAL (Instruction for Use) SW 6.1 Service Procedures and Functions Drift Test After the fluence test is complete, a drift test has to be performed to check and compensate any possible drifts of the complete optical system. Replace the fluence foil with black photo paper with not changing the horizontal position of the fluence detector.
USER MANUAL (Instruction for Use) SW 6.1 Service Procedures and Functions IMPORTANT NOTE After the circle with the spot in the center is ablated please do not touch the system, since the actual drift measurement is performed by the Eye Tracking system.
IMPORTANT NOTE A system message appears if the gas supply is running short in the gas bottle. In this case please contact the Service Department of SCHWIND eye-tech- solutions so that the bottle can be exchanged. The announcement of the possible numbers of gas changes may slightly vary due to small inaccuracies within the range of the sensors.
USER MANUAL (Instruction for Use) SW 6.1 Service Procedures and Functions Figure 7-24: Start of a gas change A new completely filled premix gas bottle is enough to perform around 60 gas exchanges with the integrated ESO and EXSO laser sources and around 30 gas exchanges with the ML laser sources.
USER MANUAL (Instruction for Use) SW 6.1 Service Procedures and Functions Figure 7-26: Gas change successful If the menu gas exchange is entered but no gas exchange is necessary an additional message will be displayed (Figure 7-27). Figure 7-27: No gas exchange needed Version 6.1.6 dated 2020-01-31 EN Page 133 of 201...
In case of system failure caused by a technical defect, it may be necessary to copy the log file and treatment data onto a storage medium and forward the same to SCHWIND eye-tech- solutions. Usually this is done in consultation with the Service Department of SCHWIND eye- tech-solutions or your distributor.
USER MANUAL (Instruction for Use) SW 6.1 Service Procedures and Functions 7.10.1 Export to External Data Analysis Software In addition to the possibility to export the log and treatments files for the treatments performed with AMARIS there is the possibility to export a file to an external data analysis software (e.g. Datagraph™...
USER MANUAL (Instruction for Use) SW 6.1 Service Procedures and Functions 7.11 Printout and Video (Export of Treatment PDF and Video) Under the sub menu Treatment Printout treatment PDF files of the performed treatments can printed or exported at any time. Figure 7-30: Printout and video The user can select if he wants to printout, export or display the treatment pdf files.
USER MANUAL (Instruction for Use) SW 6.1 Service Procedures and Functions Figure 7-31: Selecting a specific day for printout When the day is chosen click on the button <Go>. In the dialogue which opens now just highlight all treatment pdf and click on “open” for printout. Figure 7-32: Printing all treatment PDF from a specific day Version 6.1.6 dated 2020-01-31 EN Page 137 of 201...
USER MANUAL (Instruction for Use) SW 6.1 Service Procedures and Functions Under the sub menu Treatment Video treatment videos of the performed treatments can be viewed or exported at any time. Figure 7-33: Treatment video The user can select if he wants to play or export the treatment video files that have been captured. In case the video recording is not possible for your AMARIS or no videos are available, the Video export is not displayed.
In the section System Data relevant parameter regarding the laser system will be shown; In the section Comment the text comments which were inputted in the SCHWIND CAM or in AMARIS will be shown. On the second page of the treatment printout relevant OCP and 6D tracking data will be shown;...
Figure 8-1: Main menu AMARIS IMPORTANT NOTE All treatments are planned and calculated with the approved SCHWIND CAM software. Please refer to the user manual of the SCHWIND Custom Ablation Manager. Version 6.1.6 dated 2020-01-31 EN Page 140 of 201...
8.2.1 Planning of new Treatments By pressing the <New> button in the Main menu the SCHWIND CAM software will be opened and will allow you to enter all the patient data and type of treatment by selecting one of the modules, e.g ORK-CAM.
In the settings of the SCHWIND CAM software the user can define which part of the program the software shall jump to when a project file is opened. You may select “Patient data input menu”, “Main menu”...
There is the possibility to directly proceed to the treatment screen of the AMARIS software. By pressing the button <Cancel> the user can go back to the main menu of the concerned SCHWIND CAM module. Version 6.1.6 dated 2020-01-31 EN...
SW 6.1 Treatment Selection Figure 8-4: Summary page For more information, please refer to the User Manual of the SCHWIND-CAM software. IMPORTANT NOTE The “Summary Page” is only for information purpose and it is not possible to make further changes.
USER MANUAL (Instruction for Use) SW 6.1 Treatment Selection If the treatment file includes the ablation profiles for two eyes it is possible to always start the treatment with the same eye (OD or OS). The option for which eye the treatment can be started can be set in the settings of the AMARIS Application software.
Treatment Selection Performing SCHWIND CAM Treatments After a new SCHWIND CAM treatment is planned or imported from a diagnostic device to perform the treatment and the button <Start treatment> at the “Summary Page” was pressed, the AMARIS software will proceed to the treatment menu and the treatment can be initiated after the self-test of the laser has been performed.
Page 147
On the upper right side of the Menu there is a button <Surgery comment> with which free text comments can be input. The comment entered in the treatment screen will be shown on the treatment printout together with the comments which can also be entered in the SCHWIND CAM software.
USER MANUAL (Instruction for Use) SW 6.1 Treatment Selection IMPORTANT NOTE If a digital video recording system is available and activated with the latest Panel PC version, digital video files are stored on the hard disk of the AMARIS panel PC. The video file is initialised and the video starts to be recorded after the first laser pulse is triggered.
USER MANUAL (Instruction for Use) SW 6.1 Treatment Selection IMPORTANT NOTE Never remove the storage medium (SD-Card) while data is transferred or during treatment. This may lead to irreparable loss of data. For safety reasons, removal or input of storage media may only be performed in the Main menu. Recovery Function In case a treatment was aborted by a technical defect or other reason it can be recovered and continued with the help of the Recovery Function.
The scanner of the system is moved according to this rotation balance with the eye tracker. In the SCHWIND AMARIS 750S/1050RS models with 6D eye tracking, the rolling of the eye in x and y direction is measured by the tracking system and visualized in the tracking live image.
(not displayed) with regard to the pupil centre ( ) and the symmetric RED CROSS offset magnitude of the SCHWIND CAM treatment plan. Note: In both symmetric and asymmetric offsets the pupil center without Rolling and PCSC is visualized by the .
USER MANUAL (Instruction for Use) SW 6.1 Treatment Selection does not change its position independently on the offset selection. The offset strategy has an influence on TAZ display within the eye tracker live screen. The display of the follows the eye movements GREEN COLOURED CIRCLE GREEN CROSS RED CROSS...
USER MANUAL (Instruction for Use) SW 6.1 Treatment Selection After initial eye tracking initialisation and before starting the laser ablation by pressing the foot switch, please subjectively check the correct position of the green cross. It should be located at the pupil center. The hot zone is marked with a in the live video.
USER MANUAL (Instruction for Use) SW 6.1 Treatment Selection successful and correct eye tracking initialisation. Please check and confirm the correct initialisation subjectively and restart the tracker manually, if necessary. Please take into account that in this case the pupil center will be found as a new value and may differ from the previously measured value.
USER MANUAL (Instruction for Use) SW 6.1 Treatment Selection 8.5.2 Eye Tracking Quality To avoid problems with the eye tracking system during ablation there are some parameters the user should check before pressing the footswitch of the excimer laser. The infrared illumination for the AMARIS eye tracking system is provided by six (6) LEDs located at the bottom side of the laser arm (Figure 8-13).
USER MANUAL (Instruction for Use) SW 6.1 Treatment Selection An extended treatment time of more than 10 seconds (e.g. the center of ablation goes outside the hot zone) may cause dehydration and result in over-ablation. Shorter extended treatment times should not have relevant clinical effects as cornea thinning or overcorrection.
SCHWIND SIRIUS or SCHWIND PERAMIS, in order to acquire the cyclotorsional offset of the eye between the diagnosis and treatment. The pupil size shall not differ more than 30% compared to the diagnosis image.
USER MANUAL (Instruction for Use) SW 6.1 Treatment Selection Figure 8-16: Static Cyclotorsional Correction If the pupil size between reference image and eye tracking live image differ too much from each other, the Automatic Pupil Size Control of the AMARIS will adjust the surgery illumination of the laser automatically until the pupil size is equal.
USER MANUAL (Instruction for Use) SW 6.1 Treatment Selection If the measured static cyclotorsional angle is accepted the ablation profile will be rotated accordingly and the value of the angle is displayed in the SCC field above the eye tracker live image.
USER MANUAL (Instruction for Use) SW 6.1 Treatment Selection Figure 8-18: SCC result bigger 5° IMPORTANT NOTE If a new measurement is started and the patient's eye is no longer in the correct position, the algorithm will return to the treatment menu of the AMARIS Application software and will display a message above the eye tracking live image, indicating in which direction the patient should be moved to acquire a proper image.
USER MANUAL (Instruction for Use) SW 6.1 Treatment Selection Figure 8-19: Result – Static Cyclotorsional Correction IMPORTANT NOTE The measurement range for the Static Cyclotorsional Correction is ± 12.5 degrees. The SCC measurement is based on significant points in the upper part of the human eye, for example blood vessels or structures of the iris.
USER MANUAL (Instruction for Use) SW 6.1 Treatment Selection 8.5.4 Dynamic Cyclotorsion Correction The cyclotorsional movement of the eye during the surgery is corrected with the Dynamic Cyclotorsional Correction (DCC). A reference image is captured by the eye tracking system at the beginning of the ablation process.
8.5.5 6D Eye Tracking For the AMARIS / AMARIS 750S and AMARIS 1050RS a 6D Eye Tracking functionality is optionally available. In addition to the standard 5D Eye Tracking system which actively compensates for lateral movements (vertical and horizontal displacements, 1st and 2nd dimension), Rolling...
USER MANUAL (Instruction for Use) SW 6.1 Treatment Selection during treatment. Additionally rolling movements of the eye will be visualized optionally by white meridian lines inside the eye tracking live video. The hot zone in z-direction (altitude) is +/- 1,5mm. In case the altitude of the cornea is out of the hot zone range, the ablation will be interrupted and followed by a message informing about the position being out of the hot zone range.
8.5.6 7D Eye Tracking (Latency Free Tracking) As an unique feature of the SCHWIND AMARIS 1050RS the functionality of 7D Eye Tracking is implemented here to compensate for the eye tracking system latency. The AMARIS eye tracking system is a very fast image processing system with a camera frame rate of 1050Hz.
USER MANUAL (Instruction for Use) SW 6.1 Treatment Selection the system does not request an update of the scanner positions, and the scanners remain on the previously calculated position for this pulse. IMPORTANT NOTE The 7D tracking functionality will effect all other 6 dimensions in form of a real time offset.
USER MANUAL (Instruction for Use) SW 6.1 Treatment Selection Steps for pachymetric measurements during the treatment can be defined in the Treatment Assistant Manager. To save the pachymetric values during these steps, the <AquirePachy> button has to be pressed or the measurement will be saved automatically if the step is defined as auto under Auto Mode in the treatment Assistant Manager.
USER MANUAL (Instruction for Use) SW 6.1 Treatment Selection By default this value is set to +4% Printout OCP Data The user can define here whether the printout contains OCP information or not. Activate OCP Sound With option, a sound can be activated which helps the user to find the focus for the pachymetric measurement more quickly.
USER MANUAL (Instruction for Use) SW 6.1 Treatment Selection Figure 8-25: Timer function IMPORTANT NOTES With the Timer function it is only possible to start a count down. A Stopwatch function is not possible. The Timer will only be available if it was activated for this step in the Treatment Assistant Manager.
/ or to personal injury by a short circuit. CAUTION Energy impairment of the laser beam! Damage of device! To clean the SCHWIND AMARIS, its parts and components, the SCHWIND Patient Bed and the treatment room do not use any liquids containing ammoniac or alcohol.
Page 171
USER MANUAL (Instruction for Use) SW 6.1 Cleaning and Maintenance The parts and components are highly precise and sensitive instruments. They should be handled with special care. Never immerse the parts or components into a solution! During cleaning pay attention that no liquid cleaning agents or water enters into the system, part or unit.
USER MANUAL (Instruction for Use) SW 6.1 Cleaning and Maintenance Cleaning of Non-Sterile Parts The manual cleaning procedure will be applied for the following AMARIS parts, components and units for all models: AMARIS housing Patient bed Touch screen and keyboard with touch pad, control panel, control elements ...
USER MANUAL (Instruction for Use) SW 6.1 Cleaning and Maintenance IMPORTANT NOTE When using disinfection agents while cleaning please pay attention to spray on the tissue used for cleaning and not on the device itself. 9.2.1 Cleaning of Excimer Laser Housing The excimer laser housing does not come in contact with the patient.
USER MANUAL (Instruction for Use) SW 6.1 Cleaning and Maintenance 9.2.3 Cleaning of Touch Screen and Keyboard with Touch Pad, Control Panel, Control Elements If necessary, wipe all surfaces of the parts as listed below with a lint-free cloth dampened with disinfection solution.
Make sure that no water penetrates inside the microscope. The caps of the microscope and joystick are re-sterilisable parts and should be sterilised by special reprocessing method as described in the separate manual “Reprocessing Instruction for Re-sterilisable SCHWIND Products”. 9.2.5 Cleaning of the Fluence Detector ...
USER MANUAL (Instruction for Use) SW 6.1 Cleaning and Maintenance 9.2.6 Cleaning of the Laser Beam Aperture Area Contamination on the 6D eye tracking projection mirror and the area of the laser beam aperture (LED light sources, slit lamp, position light, microscope lens etc.) shall be regularly cleaned by the user.
PC touch screen under sterile conditions and caps for microscope and joystick Re-sterilisable pen Caps for microscope and joystick The special reprocessing method of re-sterilisable parts and components is described in the SCHWIND manual “Reprocessing Instruction for Re-sterilisable SCHWIND Products”. Version 6.1.6 dated 2020-01-31 EN Page 177 of 201...
GmbH as well as customer service technicians who have been authorized for this purpose and who are affiliated with an authorized SCHWIND eye-tech-solutions GmbH distributor which has finalized a valid and existing dealership agreement. If, for any reason, the dealership agreement is terminated, the authorization of the customer service technician is also automatically terminated.
USER MANUAL (Instruction for Use) SW 6.1 Maintenance 10.2 Troubleshooting and Remedies of Operating Microscope Failure Remedy Blurring when changing Check the ocular setting and re-adjust. magnification Re-adjust at maximum magnification Blurring image Re-focus the microscope 10.3 Maintenance of the Particle Aspiration System The nozzle with filter of the Particle Aspiration System is a consumable and has to be replaced after 4 weeks (28 days) by trained personnel.
USER MANUAL (Instruction for Use) SW 6.1 Maintenance The AMARIS Application software has an integrated test which checks if the current particle aspiration filter is older than 28 days. If this is the case a message will appear at login to remind the user to exchange the particle aspiration nozzle (see Figure 10-2).
USER MANUAL (Instruction for Use) SW 6.1 Maintenance Figure 10-3: Entering the serial number of the new particle aspiration filter To remove the used nozzle of the Particle Aspiration System, hold the part on both ends release the security clamp and pull it out of the tubes/openings. Insert a new nozzle, also holding with both hands.
Figure 10-5: Replacing a single-channel nozzle If the new nozzle you want to install is not of a similar type as the previous one, please contact the SCHWIND hotline or your local distributor. Version 6.1.6 dated 2020-01-31 EN Page 182 of 201...
(TSC) is performed. The Service Representatives of SCHWIND eye-tech-solutions or service technicians specifically authorized by SCHWIND eye-tech-solutions will carry out a technical safety inspections (TSC) in yearly intervals and document it in the Medical Device Logbook (Medical Apparatus Book).
The following components and features are and they are not included in the scope of delivery of AMARIS 1050RS / AMARIS 750S / AMARIS 500E / AMARIS. They can be optionally ordered at SCHWIND eye-tech-solutions. Description Article Number Video system consisting of observe camera with...
The treatment unit will be blocked from treatment if the calibration routine fails. With the purchase of the SCHWIND AMARIS, SCHWIND eye-tech-solutions guarantees continuing to provide wear parts for 5 years from date of purchase.
USER MANUAL (Instruction for Use) SW 6.1 Maintenance 10.9 Disposal Upon reaching the end of its lifetime, the AMARIS is considered to be metal and electronic scrap and should be appropriately disposed of according to European Directive 2012/19/EEC (Waste Electrical and Electronic Equipment – WEEE) (Regulation valid for EEC countries;...
SW 6.1 Technical Data TECHNICAL DATA In this chapter you will find all technical data of the AMARIS. Detailed technical data of patient bed are contained in a separate SCHWIND Patient Bed User Manual. Working Laser ArF-Excimer Laser Type ArF-Excimer laser...
Page 188
2 keypads for peripherial control at the laser arm Eye-Tracker: Frame rate 1050 Hz Response time <3 ms 0 ms with Latency Free (Option for AMARIS 1050RS only) Cooling: Cooling circulation Internal fan Air condition: heat load 1.5 kWh Input Requirements of laser/ Electrical Data...
Page 189
USER MANUAL (Instruction for Use) SW 6.1 Technical Data Dimensions and Weight AMARIS / AMARIS 750S / AMARIS 1050RS Dimensions of device Width1443 ( 50) mm, Height 1418 mm, Length 2634 mm (incl. patient bed) Floor space Refer to chapter 5.2.2 Device and Room Dimensions...
USER MANUAL (Instruction for Use) SW 6.1 AppendiXes APPENDIXES 12.1 Backup Batteries Default settings are stored by backup batteries located in Panel PC and embedded PC: Panel PC: Advantec Bios backup battery type CR 2032, 3V Panel PC ONYX Bios backup battery type CR 2032, 3V Panel PC ONYX Zeus...
Page 191
The age-based nomogram, or profile definition, that is incorporated in SCHWIND AMARIS laser systems progressively changes between 0 and 100 years of age while maintaining cornerstones from our previous approach using three age-groups only.
USER MANUAL (Instruction for Use) SW 6.1 AppendiXes 12.2.1 Customized Ablations In Zernike Factors, the profile definition considers the differences between the different devices that we are linking to the CAM software, therefore to AMARIS: a) CSO (Eye-Top) b) Scout (Corneal Wavefront Analyzer) c) WFS (Ocular Wavefront Analyzer) or irx3 Imagine Eyes (Ocular Wavefront Analyzer) d) CSO SIRIUS Scheimpflug Camera e) CSO Peramis...
USER MANUAL (Instruction for Use) SW 6.1 AppendiXes 12.3 Electrical Safety Parts Inside the SCHWIND AMARIS Location of Fuse installation Type Nominal value Trip characteristic Mainswitch MD2-B-24-612-1-A15-B-E 12A for 208-240V supply +MS-S1 Main supply unit MD2-B-24-620-1-A65-B-E 20A for 100-127V supply MEDIUM...
The SCHWIND AMARIS, SCHWIND AMARIS 500E, SCHWIND AMARIS 750S and SCHWIND AMARIS 1050RS have been tested and found to comply with the limits defined in the IEC 60601- 1-2 standard (version 2014) for devices classified as Group 1, Class A according to the CISPR 11 standard.
USER MANUAL (Instruction for Use) SW 6.1 AppendiXes class B is normally required) this equipment might not offer adequate protection to radio- frequency communication services. The user might need to take mitigation measures, such as relocating or re-orienting the equipment.” ERVICE RECOMMENDATION To prevent affect to the Emissions and Immunity of the equipment throughout the expected service life it is recommended to use the product always with its complete and original enclosure,...
USER MANUAL (Instruction for Use) SW 6.1 AppendiXes Table 3: ELECTROMAGNETIC IMMUNITY (1) Guidelines and declaration of conformity – electromagnetic immunity The AMARIS excimer lasers are intended to be used in a PROFESSIONAL HEALTHCARE FACILITY ENVIRONMENT. The electromagnetic environment is specified below. The customer or the user of the AMARIS excimer laser should assure that it is used in such an environment.
USER MANUAL (Instruction for Use) SW 6.1 AppendiXes Power frequency 30 A/m 30 A/m Power frequency magnetic (50 / 60Hz) fields should be that of a magnetic field typical commercial or hospital environment. IEC 61000-4-8 NOTE: is the a.c. mains voltage prior to application of the test level. Table 4: ELECTROMAGNETIC IMMUNITY (2) Guidelines and declaration of conformity –...
Page 198
USER MANUAL (Instruction for Use) SW 6.1 AppendiXes Note 3: Additional special test frequencies for Radiated RF: Version 6.1.6 dated 2020-01-31 EN Page 198 of 201...
USER MANUAL (Instruction for Use) SW 6.1 AppendiXes 12.4.2 Essential Performance Basic safety and essential performance: According to the intended use the purpose of the AMARIS EXCIMER LASER is to ablate corneal tissue using an excimer laser beam with defined energy and positioning. Table 5: ESSENTIAL PERFORMANCE ACCORDING TO IEC 60601-1-2 (2014) clause 5.2.1.1 b) Essential performance Protective Measure...
Manufacturer / Technical Assistance / Application Support MANUFACTURER / TECHNICAL ASSISTANCE / APPLICATION SUPPORT SCHWIND eye-tech-solutions offers a comprehensive warranty and service support. Highly qualified representatives from our SERVICE and CUSTOMER SUPPORT departments are available to support you and to solve any operational questions.
Need help?
Do you have a question about the Amaris 1050RS and is the answer not in the manual?
Questions and answers