Advertisement
Quick Links
Advertisement

Related Manuals for CARLO GAVAZZI SD2DUG24

Summary of Contents for CARLO GAVAZZI SD2DUG24
- Page 1 SD2DUG24 Dupline generator software manual rev. 0.4, Jun. ‘20...
- Page 2 Set an output channel when Modbus bus is faulty ................ 20 3.2.13 Split I/O ..........................21 3.2.14 Double scan ......................... 21 3.2.15 Connect the PC to the SD2DUG24 ..................22 3.2.16 Disconnect the PC from the SD2DUG24 ................23 3.2.17 Send a configuration to the SD2DUG24 ................23 3.2.18 Read a configuration from the SD2DUG24 ................
- Page 3 3.2.22 Set the communication parameters ..................26 3.2.23 Output status ........................26 3.2.24 Set the password ......................... 27 FORMULAS ............................. 28 ..........................28 ROCEDURES 4.1.1 Link a formula to an analogue value ..................28 4.1.2 Formula standard ........................29 4.1.3 Customised formula .........................
-
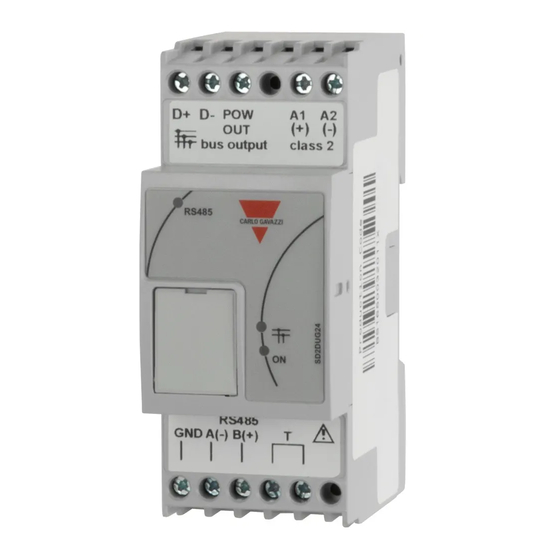
Page 4: General Description
To connect the PC to the SD2DUG any Micro-USB cable can be used (standard cable to connect to Android smart-devices). Important note: Out of the factory, the SD2DUG24 has the following settings: • It repeats the input channels onto the output ones •... -
Page 5: Hardware Requirements
Should these settings fit the ones of the system, no further configurations are needed and the SD2DUG24 can be directly powered and connected without any programming. 2.2 Hardware requirements • The program operates with Windows 7 or higher, with Microsoft .Net 4.6.2 or higher •... -
Page 6: User Interface
3 USER INTERFACE 3.1 Main page When the DUG software is started, the following window will open: SD2DUG software manual... - Page 7 Connection To connect the PC to an SD2DUG24 module Device To read a configuration from an SD2DUG24, to write a configuration into an SD2DUG24, to update the firmware of an SD2DUG24 Settings To set different parameters, to set customised formulas, to copy...
- Page 8 3.2 Procedures 3.2.1 Create a new configuration To create a new configuration, follow this procedure: Step Action Click on If a configuration is already open, a pop-up will appear in which is possible to choose an operation from: a) Save b) Do not save c) Cancel action “New configuration”...
- Page 9 3.2.4 Program Analink channel To program one or more channels as Analink, follow this procedure: Step Action Click on the channel to be programmed (from A1 to P8): if one or more channels are selected, the underline is marked with a thicker line Not selected channel Selected channel To select more channels,...
- Page 10 3.2.6 Program 8-bit binary protocol with multiplexer To program as 8-bit binary protocol with multiplexer, follow this procedure: Step Action Click on one of the channels belonging to the group to be programmed: Click on the red square on the right of 8-bit binary: the whole group will be marked in red inside a thin black frame: The output channel from A1 to A4 will be reserved for the multiplexer: Note: The Input channels from A1 to A4 are automatically set as split I/O.
- Page 11 3.2.7 Program 3 ½ digit BCD protocol To program as 3 ½ digit BCD protocol, follow this procedure: Step Action Click on one of the channels belonging to the first group to be programmed: Click on the pink circle on the right side of 3 ½ digit BCD: all the 16 channels belonging to the selected and following group will be marked in pink inside a thin black frame: SD2DUG software manual...
- Page 12 3.2.8 Program 3 ½ digit BCD protocol with multiplexer To program as 3 ½ digit BCD protocol with multiplexer, follow this procedure: Step Action Click on one of the channels belonging to the first group to be programmed: Click on the violet square on the right side of 3 ½...
- Page 13 3.2.8.1 Multiplexer settings for 3 ½ digit BCD and 8-bit binary To set the multiplexer parameters, follow this procedure: Step Action Click on To set how long the value of the multiplexer has to be maintained for, fill in field Keep multiplexer value for ...
- Page 14 3.2.10 EM24: multiplexer (transmission of analogue data) To program the channels to detect the analogue values sent by one or more EM24s, follow this procedure: Step Action Click on one of the channels belonging to the first group to be programmed from G to P: Click on the light-blue square on the right side of EM24: all the 16 channels...
- Page 15 3.2.10.1 Set A5 channel as DMD synchronization or tariff management The A5 output value can be set in two ways: a) Copying the status of any input channel (see the procedure below): Step Action Copying the status of any input channel a) Click on b) Select the input channel from the list, as shown below: The status of this input will be reproduced on the sync channel A5.
- Page 16 3.2.11 EM24: multiplexer (transmission of counter values) To program the channels to detect the counter values sent by one or more EM24s, follow this procedure: Step Action Click on one of the channels belonging the first group to be programmed from C to F: Click on the blue square on the right side of EM24: all the 32 channels...
- Page 17 3.2.11.1 Set B1 channel as reset of the EM24 counter The B1 output value can be set in two ways: a) Copying with the status of any input channel (see procedure below): Step Action Copying with the status of any input channel: a) Click on b) Select the input channel from the list, as shown below The status of this input channel will be reproduced on the reset channel B1.
- Page 18 3.2.11.2 Multiplexer settings for EM24 protocol To set the multiplexer parameters, follow this procedure: Step Action Click on To set how long the value of the multiplexer has to be maintained for, fill in the field Keep multiplexer value for ... in seconds The multiplexer values have to be defined in the Multiplexer values field: To add a new value, click on To switch between single value or more values, click on...
- Page 19 3.2.12 Clear output when bus is faulty If the Modbus bus is faulty, the relevant Dupline output channels can be kept OFF until the Modbus bus will be on again. To keep the Dupline output channels OFF when the bus is faulty, follow this procedure: Step Action To enable this function, click on the icon...
- Page 20 3.2.12.1 Set an output channel when Modbus bus is faulty To program an output channel so that it is set ON when the Modbus bus is faulty, follow this procedure: Step Action To enable this function, click on the icon Check Clear output..
- Page 21 3.2.13 Split I/O To program an input channel as split I/O, follow this procedure: Step Action Click on the input channel to be programmed (from A1 to P8): if one or more channels are selected, the underline is marked with a thicker line Not selected channel Selected channel To select more channels,...
- Page 22 • If the Micro-USB port is used, Modbus address 0 can be used as the default address • If the RS485 port is used, the Modbus address of the SD2DUG24 has to be used together with the proper connection parameters (the default address out...
- Page 23 The Dupline generator will disconnect from the PC and a red icon will be shown: 3.2.17 Send a configuration to the SD2DUG24 To send a configuration to the SD2DUG24 generator, follow this procedure: Step Action Connect the SD2DUG24 to your PC Click on 3.2.18...
- Page 24 3.2.19 Upgrade the SD2DUG24 firmware To upgrade the firmware of the SD2DUG24 generator, follow this procedure: Step Action Connect the SD2DUG24 to your PC Click on The following blue window will appear, showing the status of the update: Things to know While a firmware upgrade is in progress, no other operation can be carried out 3.2.20...
- Page 25 3.2.21 Set the number of Dupline channels To set this number, follow this procedure: Step Action Click on Select the number required in the Active channels field: Things to know By hovering over the channel field, the pop-up shows how many Active Channels the current configuration requires.
- Page 26 3.2.22 Set the communication parameters To set the communication parameters of the RS485 port, follow this procedure: Step Action Click on Select the proper setting in Modbus: Click on (Save) Things to know These settings are applied only to the RS485 port. The parameters are fixed and cannot be changed on the USB port.
- Page 27 Click on Enter and confirm the password Check Read configuration from file, if the password has to protect the configuration file Check Read configuration from SD2DUG24, if the password has to protect the reading from the SD2DUG24 SD2DUG software manual...
- Page 28 4 FORMULAS 4.1 Procedures 4.1.1 Link a formula to an analogue value To apply a formula to an analogue signal, follow this procedure: Step Action Select the channel or the group to which the formula has to be applied Click on the formula A small number will appear at the bottom right of the channel to indicate that a formula has been applied Things to know...
- Page 29 4.1.2 Formula standard Number and name Formula 1 – Lux type A Lux = (10 (3 * ANALINK) / 255)) * 5 (5 – 5000 lux) 2 – Lux type B Lux = (10 (2 * ANALINK) / 255)) * 3000 (3000-300000 lux) 3 –...
- Page 30 4.1.3 Customised formula To create a customised formula, follow this procedure: Step Action Click on Enable the formula to set and name it Set the formula Note: Click on to change the formula type from linear <-> to exponential Associate the formula to the relevant channel SD2DUG software manual...
-
Page 31: Modbus Map
5 MODBUS MAP In the Modbus map, all the Modbus variables related to the Dupline channels set in the configuration are reported. The list of entries is automatically updated every time the configuration is changed. The variable types shown are Holding registers, Input registers and Coils. - Page 32 5.1 Procedure 5.1.1 Access to the Modbus map To access the Modbus map, follow this procedure: Step Action Click on Click on to update the Modbus map with the saved configuration The Modbus map relevant to the programmed channel will be shown 5.1.2 Search entries in the Modbus map The table header of the Modbus map has a search box with additional search tools.
- Page 33 5.1.3 Export the Modbus map The Modbus map can be exported in PDF or in XLSX format. To generate the file, follow this procedure: Step Action Click on In the Export settings panel, select the entries type to be exported: ▪...
- Page 34 5.1.5 Change the output channels status To change the output channels status, follow this procedure: Step Action Enable the Live data Open the Output channels status a) Every channel can be individually activated by clicking on it: it will turn in red b) By clicking on the small square ( ) at the end of each group, the status of all the 8 channels will be as follows:...
- Page 35 6 XML DRIVER PANEL Note: all settings made in this section are saved only in the software configuration and not in the SD2DUG memory. The configuration file must be saved and it can be used as further reference. Reading the configuration from the SD2DUG will not import these settings.
-
Page 36: Things To Know
The different areas are as follows: Area Description Properties Set the driver Name, assign the GUID and Driver version number. Note: the GUID is a unique identifier number that is used by the UWP 3.0 Tool to recognize the driver versions, even if they have the same name. The Modbus variables are sorted by type. - Page 37 6.2 Procedures 6.2.1 Publish EM24 Analog data Important note: The EM24 analogue data and counter variables have to be set manually in the XML driver panel. The fields must be compiled according to the information on the EM24 display. Please refer to the EM24 Dupline documentation. To publish the EM24 analogue data variables in the XML driver, follow this procedure: Step Action...
- Page 38 6.2.2 Publish EM24 counter variables To publish the EM24 counter variables in the XML driver, follow this procedure: Step Action If at least 1 counter value is present in the current configuration, a row is shown in the EM24 Variables (see below): Enter the custom name in the EM24 Name field;...
- Page 39 6.2.3 Publish Analog Variables Follow the procedure below to configure and publish the Analogue Variables that have to be exported in the XML Driver: Step Action The Var Name field shows the Protocol and the Dupline channels used for the selected variable.
- Page 40 6.2.4 Publish Realtime word inputs / outputs To publish the Realtime word input or Realtime word outputs values that have to be exported in the XML Driver, follow the procedure below: Step Action In the XML Driver panel, click on the Realtime word inputs/ Realtime word outputs to see the entries: Enter the custom name in the Group X-Y name field;...
- Page 41 6.2.5 Publish Realtime bit inputs/outputs To publish the Realtime bit input or Realtime bit outputs values that have to be exported in the XML Driver, follow the procedure below: Step Action In the XML Driver panel, click on the Realtime bit inputs/ Realtime bit outputs to see the entries: a) Every channel can be individually published by clicking on it: it will turn in red.
- Page 42 6.2.6 Generating the XML driver Once all the required variables have been added (see the procedures above), to generate the driver file in XML format please refer to the following procedure: Step Action In the Name field, enter the driver name; otherwise, it will be used the configuration file name.
- Page 43 7 G34960005 OR G34900000 QUICK SUBSTITUTION 7.1 Procedures 7.1.1 Substitute a G34960005 To easily and quickly copy the settings of a G34960005 to be substitute by an SD2DUG24, follow this procedure: Step Action Click on Select the device by clicking on the relevant icon: Set the “virtual”...
- Page 44 Select the device by clicking on the relevant icon: Set the “virtual” rotary switch, copying that of the G34900000 Click on (done) and then, on the pop-up that will appear, click on (save) Click on to write the configuration into the SD2DUG24 SD2DUG software manual...
-
Page 45: Tips And Tricks
8 APENDIX 8.1 Tips and tricks 8.1.1 Select multiple channels To easily and quickly select multiple channels that are not consecutive, use the drag and drop, following this procedure: Step Action Hold down the Hold down the left mouse button With the left mouse button held down, move the pointer over the channels that have to be selected Release the left mouse button to complete the selection... - Page 46 8.2 BSI-TEMANA conversion table Temp. Temp. Temp. Temp. Analink Temp. (°C) Analink Analink Analink Analink (°C) (°C) (°C) (°C) -11,6 24,7 43,4 -11,2 25,4 43,7 -29,6 -10,9 25,7 44,4 -29,5 -10,5 26,1 44,4 -28,9 -10,2 26,4 45,1 -28,5 -9,8 26,8 45,5 -28,2 -9,5...
- Page 47 8.3 EM24 analog variables table In case more than one EM24 Dupline device is present in a configuration, consider the numbers in the following table in order to publish the EM24 variables: Dupline Groups EM24 Dupline SD2DUG software manual...
Need help?
Do you have a question about the SD2DUG24 and is the answer not in the manual?
Questions and answers