
Subscribe to Our Youtube Channel
Related Manuals for Labconco RapidVap Vacuum

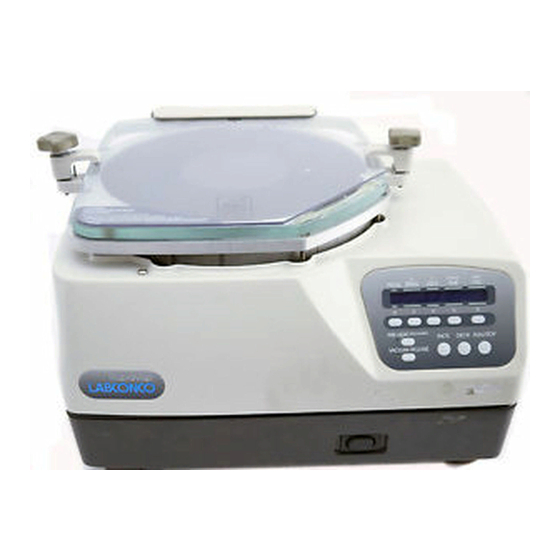
Summary of Contents for Labconco RapidVap Vacuum
- Page 1 RapidVap Vacuum, N & N Evaporation Systems Models 7900000 7900001 7900002 7900003 7900010 7900011 7900012 7900013 7910000 7910001 7910010 7910011 7910012 7910013 7910014 7910015...
- Page 2 Warranty Labconco Corporation provides a warranty to the original buyer for the repair or replacement of parts and reasonable labor as a result of normal and proper use of the equipment with compatible chemicals. Broken glassware and maintenance items, such as filters, gaskets, light bulbs, finishes and lubrication are not warranted.
-
Page 3: Table Of Contents
ORIGINAL INSTRUCTIONS CHAPTER 1: INTRODUCTION About This Manual Typographical Conventions Your Next Step CHAPTER 2: PREREQUISITES Electrical Requirements Location and Exhaust Requirements Vacuum Pump Requirements Vacuum Line Traps Nitrogen Supply Requirements Space Requirements Tools Required Your Next Step CHAPTER 3: GETTING STARTED Unpacking Your RapidVap RapidVap Components Setting Up Your RapidVap... - Page 4 APPENDIX B: RAPIDVAP DIMENSIONS APPENDIX C: RAPIDVAP SPECIFICATIONS Wiring Diagram (115V) Wiring Diagram (230V) Evaporation Rates RapidVap Vacuum Models RapidVap N Models RapidVap N /48 Models APPENDIX D: RAPIDVAP ACCESSORIES RapidVap Vacuum Model Accessories RapidVap N Model Accessories RapidVap N /48 Model Accessories...
- Page 5 Original instructions Congratulations on your purchase of a Labconco RapidVap. Labconco manufactures two types of RapidVaps - one utilizes vacuum and the other utilizes nitrogen as an aid to evaporation. Each model is available for operation on 115V or 230V.
-
Page 6: Chapter 1: Introduction
Original instructions Chapter 1: Introduction About This Manual This manual is designed to help you learn how to install, use, and maintain your RapidVap. Instructions for performing routine maintenance and making minor modifications to your RapidVap are also included. Chapter 1: Introduction provides a brief overview of the RapidVap, explains the organization of the manual, and defines the typographical conventions used in the manual. -
Page 7: Typographical Conventions
Original instructions Chapter 1: Introduction Typographical Conventions Recognizing the following typographical conventions will help you understand and use this manual: Book, chapter, and section titles are shown in italic type (e.g., Chapter 3: Getting Started). Steps required to perform a task are presented in a numbered format. ... - Page 8 Original instructions Chapter 1: Introduction For information on making modifications to the configuration of your RapidVap go to Chapter 6: Modifying Your RapidVap. Refer to Chapter 7: Troubleshooting if you are experiencing problems with your RapidVap. Product Service 1-800-522-7658...
-
Page 9: Chapter 2: Prerequisites
the electrical supply requirements. the exhaust requirements. the nitrogen supply requirements for the RapidVap N the vacuum pump requirements for the RapidVap Vacuum. Refer to Appendix C: RapidVap Specifications for complete RapidVap electrical and environmental conditions, specifications and requirements. -
Page 10: Location And Exhaust Requirements
Location and Exhaust Requirements The RapidVap Vacuum Evaporation System should be located within a fume hood if hazardous or flammable solvents are used. In all cases, regardless of the solvent used, it is strongly recommended that the vacuum pump is located and vented in a fume hood. -
Page 11: Vacuum Line Traps
Several components within the RapidVap are made from stainless steel and can be degraded if exposed to acids. Before evaporating acids, be sure to contact Labconco. Plusieurs composants du RapidVap sont en acier inoxydable et peuvent être dégradés s'ils sont exposés à des acides. Avant de s'évaporer acides, n'oubliez pas de contacter Labconco. -
Page 12: Nitrogen Supply Requirements
A tubing cutter or knife is needed to shorten exhaust hoses. If the sample block must be installed or exchanged, attaching nuts on the RapidVap Vacuum and RapidVap N require a 7/16" socket. -
Page 13: Chapter 3: Getting Started
DO NOT RETURN GOODS WITHOUT THE PRIOR within fifteen AUTHORIZATION OF LABCONCO. UNAUTHORIZED (15) days of delivery. RETURNS WILL NOT BE ACCEPTED. Product Service 1-800-522-7658... -
Page 14: Rapidvap Components
RapidVap Vacuum System – 115V with RS 232 Interface 79000-10 RapidVap Vacuum System – 230V with RS 232 Interface 79000-11 RapidVap Vacuum System – 115V with lid heater with RS 232 Interface 79000-12 RapidVap Vacuum System – 230V with lid heater with RS 232 Interface 79000-13... - Page 15 Chapter 3: Getting Started Since users’ preference of sample size varies, the sample holding block is not included with the RapidVap Vacuum System or the RapidVap N /48 Evaporation System. The correct size block must be selected and ordered separately. Refer to Appendix D: RapidVap Accessories for block selection.
-
Page 16: Setting Up Your Rapidvap
Original instructions Chapter 3: Getting Started Setting Up Your RapidVap After you verify the RapidVap components, move your RapidVap to the location where you want to install it. Then, follow the steps listed below. Vacuum Pump Connection Connect the pump inlet to the fitting at the right hand rear corner of the RapidVap using the hose and clamps provided. -
Page 17: Sample Block
Original instructions Chapter 3: Getting Started There is a switch on the back of the RapidVap Vacuum that is used to select the operation of an optional RapidVap Trapping Valve. When the RapidVap is used without the Trapping Valve as shown above, set the switch to the “Off” position. - Page 18 Original instructions Chapter 3: Getting Started Never lift the lid if the block is moving. Samples may splash out. Ne jamais soulever le couvercle si le bloc est en mouvement. Les échantillons peuvent gicler. Never operate the RapidVap without the sample block securely fastened in place.
-
Page 19: Nitrogen Gas Connection
Original instructions Chapter 3: Getting Started Nitrogen Gas Connection Turn the gas supply off. Install a barb fitting suitable for a 1/4" I.D. hose into the “out” port of the regulator. Clamp securely. Alternately, a compression fitting may be used that is suitable for a hose with a 3/8" O.D. and 1/4" I.D. ... - Page 20 Generally, a rotary vane pump is not suitable for use with the RapidVap. Diaphragm vacuum pumps sold by Labconco have wetted parts either made from PTFE or protected by PTFE coatings and are suitable for nearly all procedures.
-
Page 21: Solvent Safety Precautions
With prudent maintenance your RapidVap will provide years of service. Warranty on the effected parts will be void if maintenance has obviously been neglected. If you have questions about using specific compounds in your RapidVap, contact Labconco Technical Service at 1-800-821-5525 or 816-333-8811 or e-mail labconco@labconco.com. Solvent Safety Precautions ... -
Page 22: Your Next Step
Original instructions Chapter 3: Getting Started become familiar with any regulations that apply in the user’s area concerning the dumping of waste materials in or upon water, land or air and to comply with such regulations. AVERTISSEMENT: L'élimination des substances utilisées dans le cadre de ce matériel peut être régie par diverses réglementations fédérales, provinciales ou locales. -
Page 23: Chapter 4: Using Your Rapidvap
Planning Thoroughly understand procedures and the equipment operation prior to beginning work. The unique performance of the RapidVap Vacuum is dependent upon the proper balance of heat, vacuum and vortexing action. If the proper balance is not established, it is possible to damage or lose a portion of the sample. Therefore, if... -
Page 24: Glassware Selection And Speed Setting Guidelines
Original instructions Chapter 4: Using Your RapidVap The unique performance of the RapidVap N is dependent upon the proper balance of heat, gas flow and vortexing action. If the proper balance is not established, it is possible to damage or lose a portion of the sample. Therefore, if you are unfamiliar with the RapidVap N or are attempting a new protocol, it may me helpful to make a trial run that is void of the sample you are attempting to... - Page 25 Original instructions Chapter 4: Using Your RapidVap Several different size sample blocks are available for the RapidVap Vacuum model. The maximum recommended sample volumes and vortex speeds are as follows: TUBE SAMPLE VORTEX SIZE VOLUME SPEED 12 x 75 mm (6 ml)
-
Page 26: Loading Glassware Into The Rapidvap
Original instructions Chapter 4: Using Your RapidVap Four sample blocks are available for the RapidVap N /48. Recommended speeds are as follows: TUBE SAMPLE VORTEX SIZE VOLUME SPEED 12 mm (6 ml) 3 ml 100% 13 mm (10 ml) 5 ml 100% 16 mm (23 ml) 12 ml... -
Page 27: Heat Setting Guidelines
Because of the multiplicity of factors it is impossible to give “typical” performance data. By design, the RapidVap Vacuum model can be run at lower temperature settings than the RapidVap N model. This is because the decrease in pressure will cause the sample to evaporate at a lower temperature. - Page 28 Original instructions Chapter 4: Using Your RapidVap Calculating the boiling point: The operating pressure corresponding to the desired boiling point temperature may be calculated for any solvent using the following formula: log P = 2.8811 – Ta – T (b)(T) Where P = Vacuum (mm Hg) Ta = Boiling Point Temperature at Atmospheric Pressure (°K)
- Page 29 Original instructions Chapter 4: Using Your RapidVap Physical constants: HEAT OF VACUUM FOR BOILING DENSITY VAPORIZATION BOILING POINT SOLVENT PT (°C) (g/cm³) (Kcal/Kg) CONSTANT b AT 40°C (MBAR) Acetone .790 0.196 Acetonitrile .786 0.195 Acetylene tetrachloride 1.602 0.200 Benzene 0.879 0.202 Butyl alcohol 0.810...
- Page 30 Original instructions Chapter 4: Using Your RapidVap Determination of Operating Conditions Applied Vacuum/Boiling Point: = Boiling point at 1 bar (normal pressure) = Boiling point at P mbar (operating pressure) p = Operating pressure in mbar Example methyl alcohol: 1. Boiling point at normal (1 bar) atmospheric pressure = 65°C. 2.
-
Page 31: Time Setting Guidelines
Original instructions Chapter 4: Using Your RapidVap Constant b Groups 0.200 Aliphatic hydrocarbons Aliphatic halogenated hydrocarbons 0.195 Aromatic hydrocarbons Aromatic halogenated hydrocarbons Ketones Ethers Nitriles Heterocyclic compounds 0.190 Aldehydes Esters 0.185 Amines 0.180 Phenols 0.165 Acids 0.160 Alcohols Time Setting Guidelines It is often desirable to stop the concentration process before the solvent is entirely evaporated. - Page 32 Original instructions Chapter 4: Using Your RapidVap Cool-Zone When it is necessary to end the concentration process with the sample still dissolved in a small amount of solvent, the time function should be activated and the process time set to allow the solvent sufficient time to evaporate completely out of the large upper portion of the sample tube and into the small lower portion “Cool Zone.”...
-
Page 33: Rapidvap Controls
Original instructions Chapter 4: Using Your RapidVap RapidVap Controls The control panel for the RapidVap vacuum model and the RapidVap N shown below with a description about their function. RapidVap Vacuum Model RapidVap N Model 1. Display – The liquid crystal display (LCD) shows set point parameters and actual measured conditions. -
Page 34: Operating The Rapidvap Controls
Original instructions Chapter 4: Using Your RapidVap 2. Set Point Select Button – To select a parameter to change, press the set point select button directly below the parameter. 3. Run/Stop Button – Used to start or stop a run. 4. - Page 35 Original instructions Chapter 4: Using Your RapidVap It is suggested that the user set the vortex speed at a low percentage and gradually increase it after the run is started. This will minimize the possibility of samples sloshing out of the tubes. Reruns of the same protocol may start at the speed determined by previous runs.
-
Page 36: Operating The Rapidvap
Original instructions Chapter 4: Using Your RapidVap Operating The RapidVap Never lift the lid if the block is moving. Samples may splash out. Ne jamais soulever le couvercle si le bloc est en mouvement. Les échantillons peuvent éclabousser. Never attempt to reach into the chamber if the block is moving. Ne jamais tenter de mettre la main dans la chambre si le bloc est en mouvement. -
Page 37: Operational Notes
Original instructions Chapter 4: Using Your RapidVap 14. Any time the RapidVap is not in operation, the power switch should be turned OFF. This will prolong the life of the cooling fan and the blower in the RapidVap N Operational Notes The LCD display conveys various pieces of information. -
Page 38: Rs-232 Communications
Original instructions Chapter 4: Using Your RapidVap RS-232 Communications Some RapidVaps are equipped with RS-232 communications capabilities. This hardware and software allows a user to perform all the front panel functions from a standard RS-232 link. Communications will be at 4800 baud, no parity, 8 bit word, 1 stop bit, and a 3-wire interface (TXD, RXD and circuit common). - Page 39 Original instructions Chapter 4: Using Your RapidVap #t[xxxx] Selects the TIME SET POINT of program 9 from 1 to 999 minutes, and 1000 for no stopping (will run continuously), will get a xxxx;yyyy’\n’ response for confirmation. (xxxx:time setpoint, yyyy:time left) #V[xxxx];...
-
Page 40: Rs-232 Hardware Required
Original instructions Chapter 4: Using Your RapidVap RS-232 Hardware Required The connecting cable, Labconco #7484800 is supplied with the unit and is wired as shown below. Product Service 1-800-522-7658... - Page 41 Original instructions Under normal operation, the RapidVap requires little maintenance. The following maintenance schedule is recommended: As needed: 1. Clean up all spills; remove liquids from chamber. 2. Clean lid and gasket using soft cloth, sponge or chamois and a mild, non- abrasive soap or detergent.
-
Page 42: Chapter 5: Maintaining Your Rapidvap
Original instructions Chapter 5: Maintaining Your RapidVap 3. Using a soft cloth, sponge, or chamois and a mild, non-abrasive soap or detergent, clean the exterior surfaces of the unit. Liquid spray cleaners and polishes may be used on the exterior surfaces. Do not use solvents to remove stains from the exterior surfaces as they may damage the finish. -
Page 43: Chapter 6: Modifying Your Rapidvap
Refer to Appendix D: RapidVap Accessories for available sample blocks. First, using a 7/16" socket (RapidVap Vacuum and RapidVap N ), remove the three nuts and washers on the top of the existing block. The RapidVap N requires a 9/16"... -
Page 44: Installing The Optional Lid Heater
Original instructions Chapter 6: Modifying Your RapidVap Installing the Optional Lid Heater If a Lid Heater is to be added by the user, first disconnect the main power cord to the RapidVap. Then remove the existing lid by removing the two screws that hold either the RH or LH hinge pivot support bracket. - Page 45 Original instructions Refer to the following if your RapidVap fails to operate properly. If the suggested corrective actions do not solve your problem, contact Labconco for additional assistance. The following failure codes may appear on the display when problems are sensed by the internal self check routine.
-
Page 46: Chapter 7: Troubleshooting
Mem Fail – Push Memory failure Push program button. Prog New memory IC Push program button. chip Call Labconco – Replace IC chip or control Bad memory IC chip PCB. Stalled condition Turn power off. Try to restart after one Motor Error minute. - Page 47 Evaporation Gas supply depleted Replenish gas. (RapidVap N rate is reduced Heater inoperable Contact Labconco. Vacuum pump failure Check pump. (RapidVap Vacuum) No vacuum Pump not on Turn on pump. poor vacuum (RapidVap Vacuum) Control valve open Check control valve.
- Page 48 Install new supply of gas. (RapidVap N Sample position not Activate position per page 30. activated Nozzle clogged Unplug nozzle with fine wire. Valve inoperable Contact Labconco Gas flows Valve inoperable Contact Labconco continuously Control inoperable Contact Labconco Product Service 1-800-522-7658...
-
Page 49: Components
Original instructions The following pages list components that are available for your RapidVap. The parts shown are the most common replacement parts. If other parts are required, contact Product Service. Product Service 1-800-522-7658... - Page 50 Original instructions Appendix A: RapidVap Vacuum & RapidVap N Components RapidVap Vacuum and RapidVap N Components Item Quantity Part No. Description 13023-00 Switch, Power 74953-00 Foot 79167-00 Fan Cooling 74838-00 PCB, Main (RapidVap Vacuum) 74838-03 PCB, Main (RapidVap N & RapidVap N...
- Page 51 Original instructions Appendix A: RapidVap Vacuum & RapidVap N Components Product Service 1-800-522-7658...
- Page 52 Original instructions Appendix A: RapidVap Vacuum & RapidVap N Components RapidVap Vacuum Components Item Quantity Part No. Description 74917-00 Temperature Sensor, Lower 74870-00 Temperature Sensor, Upper 74916-00 Vacuum Sensor 74882-00 Spring, Latch 74880-00 Latch 19271-05 Washer, Latch 74883-00 Knob, Latch...
- Page 53 Original instructions Appendix A: RapidVap Vacuum & RapidVap N Components Product Service 1-800-522-7658...
- Page 54 Original instructions Appendix A: RapidVap Vacuum & RapidVap N Components RapidVap N and RapidVap N /48 Components Item Quantity Part No. Description 74917-00 Temperature Sensor, Lower 74870-00 Temperature Sensor, Upper 74882-00 Spring, Latch 74880-00 Latch 19271-05 Washer, Latch 74883-00 Knob, Latch...
- Page 55 Original instructions Appendix A: RapidVap Vacuum & RapidVap N Components Product Service 1-800-522-7658...
-
Page 56: Appendix B: Rapidvap Dimensions
Original instructions RapidVap Vacuum Product Service 1-800-522-7658... - Page 57 Original instructions Appendix A: RapidVap Vacuum & RapidVap N Components RapidVap N Product Service 1-800-522-7658...
-
Page 58: Appendix C: Rapidvap Specifications
Electrical Specifications Nominal amperage for 115V RapidVap Vacuum (model 79000-00 & 79000-10) excluding vacuum pumps: 8A Maximum amperage with vacuum pump: 16A Nominal amperage for 230V RapidVap Vacuum (model 79000-01 &... - Page 59 Original instructions Appendix C: RapidVap Specifications Transient overvoltages according to Installation Categories II (Overvoltage Categories per IEC 1010). Temporary voltage spikes on the AC input line that may be as high as 1500V for 115V models and 2500V for 230V models are allowed.
-
Page 60: Wiring Diagram (115V)
Original instructions Appendix C: RapidVap Specifications Wiring Diagram (115V Models) Product Service 1-800-522-7658... -
Page 61: Wiring Diagram (230V)
Original instructions Appendix C: RapidVap Specifications Wiring Diagram (230V Models) Product Service 1-800-522-7658... -
Page 62: Evaporation Rates
250 mbar 133 mbar 167 mbar 133 mbar Vacuum: Starting Volume 300ml Number of samples: 8 Vortex speed: 28% Vacuum pump: Labconco model – 79249-00 Rated free air flow – 88 L/min Max. attainable vacuum – 31 mbar Product Service 1-800-522-7658... -
Page 63: Rapidvap N Models
133 mbar Starting Volume 10 ml Number of samples: 69 Vortex speed: 95% Vacuum pump: Labconco model – 79249-00 Rated free air flow – 88 L/min Max. attainable vacuum – 31 mbar RapidVap N Models The following tables indicate the approximate time required to evaporate various common solvents. - Page 64 Original instructions Appendix C: RapidVap Specifications Table A Evaporation Time in Upper Portion of Sample Vial (600 ml Sample Tubes) (Time in Minutes) Methylene Ethyl Chloride Acetate Hexanes Acetone Toluene Water Solvent: Block Preheat & Block Set Point Temperature: 40°C 75°C 70°C 55°C...
- Page 65 Original instructions Appendix C: RapidVap Specifications Table B Evaporation Time in Upper Portion of Sample Vial (600 ml Sample Tubes) (Time in Minutes) Methylene Ethyl Chloride Acetate Hexanes Acetone Toluene Water Solvent: Block Preheat & Block Set Point Temperature: 40°C 75°C 70°C 55°C...
- Page 66 Original instructions Appendix C: RapidVap Specifications Table C Evaporation Rate in Cool-Zone Stem (600 ml Sample Tubes) (Time in Minutes) Methylene Ethyl Chloride Acetate Hexanes Acetone Toluene Water Solvent: Block Preheat & Block Set Point Temp: 40°C 75°C 70°C 55°C 100°C 95°C Ending...
-
Page 67: Rapidvap N /48 Models
Original instructions Appendix C: RapidVap Specifications RapidVap N /48 Models The following tables show the approximate time to evaporate various solvents in 12mm and 20mm sample tubes when the sample block is fully loaded. Other sample blocks are available for different size tubes. If they are used or if a different number of samples is run at one time, the evaporation times can be estimated from these charts or determined experimentally. - Page 68 Original instructions Appendix C: RapidVap Specifications Evaporation Time RapidVap N /48 Models (20 ml Sample Tubes) (Time in Minutes) Methylene Toluene Acetonitrile Methanol Hexane/ Hexane/ Solvent: Chloride Ethyl Acetate Ethyl Acetate 75:25 50:50 Block Preheat & Block Set Point Temp: 50°C 80°C 75°C...
-
Page 69: Appendix D: Rapidvap Accessories
Original instructions This following accessories are available for the RapidVap Vacuum model. PART # DESCRIPTION 7491300 Block. 110-12 mm dia. tubes. 7485800 Block. 110-13 mm dia. tubes. 7491400 Block. 69-16 mm dia. tubes. 7496300 Block. 69-15 ml centrifuge tubes. 7496400 Block. - Page 70 Original instructions Appendix D: RapidVap Accessories PART # DESCRIPTION Sample Tube – Flat Bottom. Borosilicate glass. 170 ml capacity. 7927000 Package of one (1). Sample Tube – Flat Bottom. Borosilicate glass. 170 ml capacity. 7927108 Package of eight (8). 7393000 Vacuum Pump.
- Page 71 Original instructions Appendix D: RapidVap Accessories PART # DESCRIPTION 7814900 Moisture Trap Insert. Installs inside secondary trap canister. Contains desiccant. 7815000 Radioisotope Trap Insert. Installs inside secondary trap canister. Contains activated charcoal. 7815200 Solvent Trap Insert. Installs inside secondary trap canister. Contains molecular sieve.
-
Page 72: Rapidvap N 2 Model Accessories
The following accessories are available for the RapidVap N PART # DESCRIPTION 7486400 Block. 8–170 ml tubes. Order tubes from Labconco. Sample Tube – Flat Bottom. Borosilicate glass. 170 ml capacity. 7927000 Package of one (1). Sample Tube – Flat Bottom. Borosilicate glass. 170 ml capacity. - Page 73 Original instructions Appendix D: RapidVap Accessories PART # DESCRIPTION Sample Tube – End Point Volume 2 ml. Borosilicate glass. 600 ml 7913700 capacity. Package of one (1). Sample Tube – End Point Volume 2 ml. Borosilicate glass. 600 ml 7913808 capacity.
-
Page 74: Rapidvap N 2 /48 Model Accessories
Original instructions Appendix D: RapidVap Accessories The following accessories are available for the RapidVap N /48. PART # DESCRIPTION Block. 48 – 12 x 75 mm tubes. 7482100 Block. 48 – 13 x 100 mm tubes. 7482200 Block. 48 – 16 x 150 mm tubes. 7482300 Block.
Need help?
Do you have a question about the RapidVap Vacuum and is the answer not in the manual?
Questions and answers