Advertisement
Quick Links
Advertisement

Related Manuals for Crye Precision LVS BASE VEST

Summary of Contents for Crye Precision LVS BASE VEST
- Page 1 BASE VEST ™ OPERATOR’S MANUAL...
-
Page 3: Table Of Contents
CONTENTS INTRO FITTING ADJUSTING SIDE-STRAPS STORAGE CARE OPTIONAL SIDE ARMOR COVERS AND ACCESSORIES... - Page 4 Any warranties made by Crye Precision LLC with respect to this product are voided if the product is not used and maintained in accordance with the instructions in this manual. For any questions relative to the use or repair of this product, please write Crye Precision LLC or call 1-718-246-3838 during regular business hours.
-
Page 5: 02 Intro
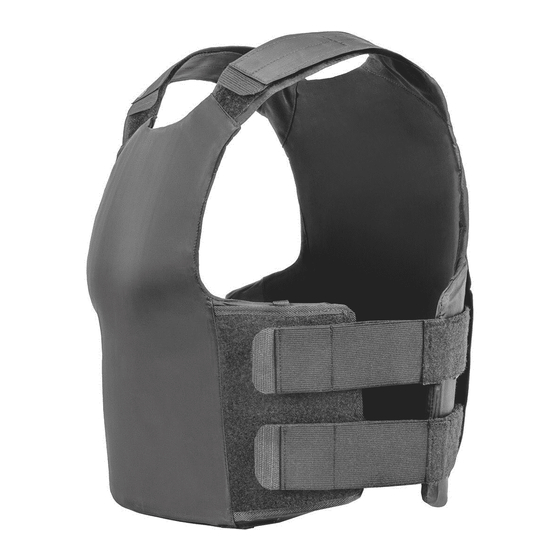
The LVS sets a new standard for concealable ™ body armor. Our proprietary 3 dimensional forming technology allows us to shape the vest to directly match the contours of the human body delivering an unprecedented level of concealment and comfort that only this production process can deliver. -
Page 6: Fitting
FITTING... - Page 7 Place vest on body and adjust the shoulder The front and back of the vest sides should straps to a comfortable position. sit at the same height. When side straps are secured, the fit should be snug. The side straps come positioned at mid-length and may require adjusting to fit properly.
-
Page 8: Adjusting Side-Straps
ADJUSTING SIDE-STRAPS... - Page 9 To adjust the length of the side straps, they Don the LVS with side straps attached to the must first be removed from the vest. front panel only. Determine the appropriate To remove, lift up the back channel. Wedge strap length by seeing where the straps your hand or a flat object between loop naturally align with the rear channel.
- Page 10 Lift back channel and insert folded strap in Roll the strap into the channel to secure it position. in place. Begin by partially installing straps and confirming fit. 07 ADJUSTING SIDE-STRAPS...
- Page 11 Ends of straps (loop portion) can be Once fit is confirmed, fully push loop-end of trimmed if straps are too long, causing straps into channel and press down to fully overlap at the center of the back channel. seat them. Overlapping straps can create a lump that is visible through clothing.
-
Page 12: Storage
STORAGE When storing or transporting the vest it is recommended that the vest be PLACED IN THE STORAGE SYSTEM that came with the vest. This will help the vest keep its form. DO NOT LEAVE THE LVS OUT IN DIRECT SUNLIGHT OR ENCLOSED IN A HOT VEHICLE. - Page 13 10 STORAGE...
- Page 14 The LVS can be folded to fit in the storage system. (note: one side of strap may need to be adjusted) To fold the vest, lay the armor on the back panel and twist the front panel to sit inside the rear panel. 11 STORAGE...
- Page 15 Place LVS in storage system and connect vertical velcro strap. It does not need to be overly tight. Connect horizontal velcro strap and tighten until the storage system is in a curved position. 12 STORAGE...
-
Page 16: Care
CARE To clean the vest, remove any dirt with a soft brush. Wipe down vest with a damp cloth soaked in warm water and air dry in a shaded space. DO NOT MACHINE WASH OR DRY CLEAN. DO NOT APPLY IRON OR ANY HEAT TO THE VEST... - Page 17 14 CARE...
-
Page 18: Optional Side Armor
OPTIONAL SIDE ARMOR If additional side protection is needed, optional 6x6 and 6x9 side armor panels are offered for sale at cryeprecision.com. - Page 19 16 OPTIONAL SIDE ARMOR...
- Page 20 To attach side armor, slide the straps through the appropriate slots on the side armor. 17 OPTIONAL SIDE ARMOR...
- Page 21 If more overlap is desired the front or rear slot on the side armor can be skipped. Side armor should overlap UNDER the FRONT vest panel and OVER the REAR vest panel. 18 OPTIONAL SIDE ARMOR...
-
Page 22: Covers And Accessories
COVERS AND ACCESSORIES A wide range of optional covers allow the same armor panels to be quickly swapped between vest configurations. For instance a patrol vest can instantly become a tactical entry vest.. or anything in between. VISIT WWW.CRYEPRECISION.COM TO LEARN MORE. - Page 23 20 COVERS AND ACCESSORIES...
- Page 24 NOTES...
- Page 26 (i) are indebted to them for their you have no felony convictions, © 2019 Crye Precision LLC. service and their sacrifice. We (ii) you have not been convicted LVS™, Crye Precision™, and...
Need help?
Do you have a question about the LVS BASE VEST and is the answer not in the manual?
Questions and answers