
Related Manuals for Urban MilkShuttle

Summary of Contents for Urban MilkShuttle
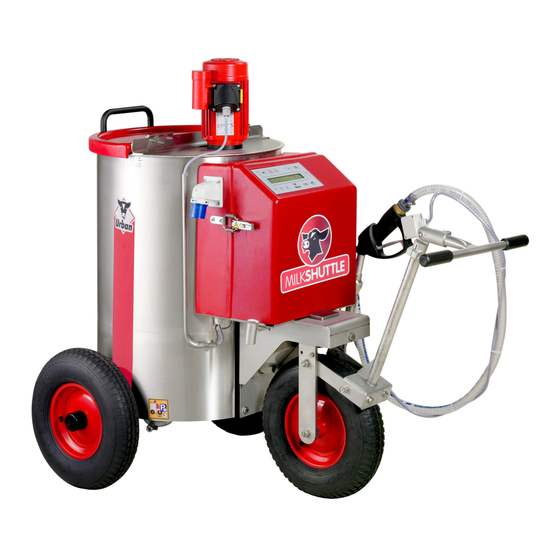
- Page 1 Operating instructions Urban MilkShuttle Calf milk mixer http://manual.milkshuttle.com 100.166_EN Operating instructions MilkShuttle without propelling drive English (Edition F/01-2015, Rev. 1)
- Page 2 Preface Thank you for choosing the Urban "Milk Shuttle". We put our practice into practice when we design our product. All devices are extensively tested at our plant and at additional, selected farms with whom we work closely. These operating instructions will answer all important questions about your "MilkShuttle"...
-
Page 3: Table Of Contents
Table of Contents About these operating instructions ..............5 Summary......................... 5 Abbreviations and terms used in these operating instructions........5 For your safety....................7 Symbols used in these operating instructions..............7 Warning symbols on the device ..................8 Possible dangers ......................10 Recommended personnel..................... - Page 4 6.4.2 Milk Shuttle with dosing pump (optional) ....................38 Moving the MilkShuttle....................39 6.5.1 Moving on level ground ..........................39 6.5.2 Moving the MilkShuttle on sloping terrain ....................40 Programming and calibrating.................43 General settings......................43 7.1.1 Setting the time and date ..........................43 7.1.2 Setting the user language ...........................
-
Page 5: About These Operating Instructions
About these operating instructions About these operating instructions These operating instructions will enable the proper and safe use of the Urban "Milk Shuttle" calf milk mixer. Make sure that • all employees who work with the device have completely read and understood these operating instructions, •... - Page 6 About these operating instructions...
-
Page 7: For Your Safety
For your safety For your safety Symbols used in these operating instructions DANGER Identifies a danger that will cause death or serious injuries if not avoided.. DANGER WARNING Identifies a danger that can cause death or serious injuries if not avoided. WARNING CAUTION Identifies a danger that can cause light or medium injuries or material damage if... -
Page 8: Warning Symbols On The Device
For your safety Warning symbols on the device Figure 2/1: Position of the warning symbols and the name plate... - Page 9 N DOIT PAS MARCHER A SEC Warning sign above the drain valve of the dosing pump: („If the MilkShuttle is taken temporarily out of operation, open the drain valve in order to drain the dosing pump so that no harm will...
-
Page 10: Possible Dangers
For your safety °C/F INFO Error 60 START START STOP STOP Indicating label at the connecting cable (400 V) Possible dangers The "Milk Shuttle" has been constructed and manufactured using the state-of-the- art technology and according to the rules, standards and directives stated in chap- ter 2.7. -
Page 11: Recommended Personnel
The device poses no danger when the safety instructions given in these operating instructions are applied. Recommended personnel CAUTION The Urban "Milk Shuttle" has a considerable mass, especially with a full load. It may therefore only be operated by persons with the appropriate physical, men- ATTENTION tal and technical capabilities. -
Page 12: Instructed Personnel
Intended use The "MilkShuttle" is used to mix and transport liquid nutrition for livestock. Any other use, such as: • transporting persons and animals •... -
Page 13: Technical Data
Technical data Technical data Type 100 Type 150 Type 200 Type 250 Dimensions Length (without drawbar) [cm] Length (with drawbar) [cm] Width [cm] 78-93 79-100 Height [cm] Weight fully equipped [kg] Power supply [V~] 230/400 Power consumption max. [VA] 3000 3.000/6.000 Current consumption max. -
Page 14: Identification Of The Product
Typ 150, 200, 250: 72 cm (2.36 ft) MilkShuttle 100: max. 106 cm (3.47 ft) Typ 100: 78 cm (2.56 ft) MilkShuttle 150, 200, 250: max. 117 cm (3.84 ft) Typ 150, 200, 250: 82 cm (2.69 ft) MilkShuttle 100: max. 142 cm (4.65 ft) MilkShuttle 150, 200, 250: max. -
Page 15: Overview Of Milk Shuttle
Propelling drive (battery, 24 V) Flow rate sensor (only in conjunction with pump nozzle/pump) optional Structure Figure 4/1: Schematic structure of the MilkShuttle Designation Designation Container lid with seal Pump nozzle Agitator motor Drain valve 1,5‘‘ Drawbar... -
Page 16: Available Languages
Overview of Milk Shuttle Available languages The user interface for the operation of the MilkShuttle can be set to a variety of dif- ferent languages. The number of available user languages is constantly increas- ing. As of version 1.20 of the MilkShuttle firmware, not all available user languages can be included in the firmware any more due to storage limitations. -
Page 17: Operating And Display Elements
Overview of Milk Shuttle Operating and display elements Figure 4/2: Overview of operating elements Designation Agitator motor switch Operating panel Pump nozzle Drawbar handle... -
Page 18: Operating Panel
Overview of Milk Shuttle 4.4.1 Operating panel °C/F INFO START START STOP STOP Figure 4/3: Operating panel Briefly pressing a key switches on the display lighting. Function Explanation Display Text display of functions Cleaning Cleaning program selection Feeding Feeding program selection Display temperature Press briefly: temperature display Heating/Agitating... -
Page 19: Agitator Motor Switch
Overview of Milk Shuttle 4.4.2 Agitator motor switch Agitate quickly (fast mode) Agitator off Agitate slowly (slow mode) Figure 4/4: Agitator master switch 4.4.3 Housing closures Figure 4/5: Housing closure in detail The lid of the feed container and that of the control casing are equipped with self- locking snap closures. -
Page 20: Drawbar Handle
Overview of Milk Shuttle Information To extract the feed, the lid closures of the feed container must be opened. Otherwise, negative pressure could develop in the feed container which would hamper the extraction. INFO To open the closures for the control housing you must first remove the cotter pins. -
Page 21: Start-Up
• Blade-type fuse 10 A • Blade-type fuse 1 A • Puller screw for changing the wheels (optional) • Quick guide "MilkShuttle" (2 pages, laminated) • These operating instructions Transportation The "Milk Shuttle" calf milk mixer may only be transported (in addition to moving on its own wheels) in an upright position on a stable support, such as a pallet. -
Page 22: Unpacking
Start-up Unpacking Required tools: Knife / cutter CAUTION The "Milk Shuttle" must be lifted to be unpacked. Therefore, always include a second person to help unpack. CAUTION Figure 5/1: Unpacking Carry out the following steps to unpack: 1. Carefully cut the packaging foil and remove it. 2. -
Page 23: Adjust The Drawbar Handle
Start-up ➊ 6. Lift the "Milk Shuttle" by the drawbar so that the transport block under the ➋ feed container can be removed. 7. Adjust the drawbar handle as described in chapter 5.4. CAUTION Before moving the Milk Shuttle, familiarize yourself with the operation of the con- trollers (chapter 6.5). -
Page 24: Electrical Connection
Start-up Electrical connection 5.5.1 Requirements The electrical connection must be • secured by a separate fuse (16 A), • protected by a residual current circuit breaker (Fl, 30 mA), • and be wired as per IEC 60364-7-705. In case of an operating voltage of 400 V, assure the clockwise phase sequence of your rotary field (see chapter 5.5.2, page 25). -
Page 25: Connecting To The Power Supply
Start-up 5.5.2 Connecting to the power supply To connect the device, you will need a connecting cable with the appropriate plug connectors (CEE blue or red, not included). CAUTION There may be no rolled-up cable reel in the supply lead. Fire hazard! CAUTION 1. - Page 26 MilkShuttle‘s display (Fault 60 - No mains voltage). Figure 5/4: Neutral line warning sign on connecting cable Information The protective mechanism also prevents the start up of the MilkShuttle in case of an anti-clockwise phase sequence of the rotary field. Therefore, the fault mess- INFO sage No Mains voltage (fault code 60) may be caused either by a missing neutral wire (N) or by the anti-clockwise phase sequence of the rotary field.
-
Page 27: Wash For First Start-Up
Start-up Figure 5/5: Phase changing switch of the connecting cable (CEE) Wash for first start-up When delivered, there is a small amount of antifreeze agent in the pump. Before filling the Milk Shuttle with calf milk replacer (CMR) or whole milk for the first time, the device must be washed with approx. - Page 28 Start-up...
-
Page 29: Operation
Operation Operation WARNING Shutting down the device in case of frost. • Devices without dosing unit WARNING It is permitted to shut down the device when temperatures drop below 0°C. The drain valve (see figure 6/2 on page 34) must be open. Devices with dosing unit It is not permitted to shut down the device when temperatures drop below 0°C. -
Page 30: Heating/Agitating
How to adjust these values to your requirements is given in chapter 7.3, page 49. The function Heating/Agitating only works on mains operation. If your MilkShuttle is running on battery power only (no mains supply), this function is not available. - Page 31 After switching on, the control for the heater and the agitator is in standby mode at first. The 16.07.14 10:30:32 start display is shown: MilkShuttle 105A31 This prevents the heater and agitator from running when the feed container is empty. °C/F After filling with whole milk or water, press the key (approx.
-
Page 32: Filling/Mixing The Feed
Comply with the specifications of your CMR manufacturer for the optimal mixing temperature. INFO Fill 3/4 of the required water amount in the container. Press the key on the operating panel for approx. 2 seconds to switch on the control. The displays shows the 16.07.14 10:30:32 start window: MilkShuttle 105A31... - Page 33 2 seconds to switch on the control. The displays shows the 16.07.14 10:30:32 start window: MilkShuttle 105A31 °C/F Press the key for approx. 2 seconds. Start the agitator in interval mode at Level I (slow mode).
-
Page 34: Feeding
Operation Feeding Information The container lid is well sealed. This prevents the feed from spilling during transport. INFO Before feeding, open the snap closures of the container lid to prevent negative pressure from developing in the container during feeding. Information After starting up, the feeding function must be first calibrated to the required unit (litre or kilogram) (see chapter 7.2.1, page 46 or chapter 7.2.2, page 47). - Page 35 Press the key on the operating panel for approx. 2 seconds to switch on the control. The displays shows the 16.07.14 10:30:32 start window: MilkShuttle 105A31 Press and hold the key (approx. 2 seconds). Feeding █████ The Milk Shuttle selects the dosing amount last used 1: 04,0 █████...
- Page 36 Operation 11. The locking device 2 can be used to fix the trigger in an opened position. Pulling on the trigger again releases the locking device. The dosing will not be triggered if the battery voltage is too low (protection against exhaustive discharge, see figure 6/4).
-
Page 37: Cleaning
Operation CAUTION The device may not be operated if the charge condition is insufficient (battery voltage less than 12 V). This could otherwise damage the battery! CAUTION For temperatures below 0°C, charge the battery sooner (at 12.2 V and less). Cleaning The Milk Shuttle must be cleaned after every use in order to clean the container and the conveying system:... -
Page 38: Milk Shuttle With Dosing Pump (Optional)
2 seconds to switch on the control. The displays shows the 16.07.14 10:30:32 start window: MilkShuttle 105A31 Press the key for approx. 2 seconds to switch to the cleaning program. The display image changes:... -
Page 39: Moving The Milkshuttle
13. If you want to stop the cleaning program prematurely, you can press the key again. The cleaning process will be interrupted and you are brought back to the "Cleaning" menu window. Moving the MilkShuttle 6.5.1 Moving on level ground Before moving, disconnect the power supply from the device side . -
Page 40: Moving The Milkshuttle On Sloping Terrain
Description Activated brake Brake released 6.5.2 Moving the MilkShuttle on sloping terrain On sloping ground, the Milk Shuttle may only be pushed, but never pulled! WARNING Danger of injuries caused by uncontrolled driving movements. • Park the Milk Shuttle only at locations with a maximum slope of 3%. - Page 41 Operation Figure 6/7: Moving on slopes...
- Page 42 Operation...
-
Page 43: Programming And Calibrating
(approx. 2 seconds). The device is in standby mode and shows 16.07.14 10:30:32 the start display: MilkShuttle 105A31 The functions described in this chapter are accessed by pressing and holding the key. In this menu you can change the settings for the •... -
Page 44: Setting The User Language
You may change the user language at any time. However, your choice of languages is restricted to the languages that are available inside the language pack of your MilkShuttle (see chapter 4.3, page 16). In order to switch to a different language, carry out the following steps: 1. -
Page 45: Setting The Warning Levels For Minimum And Maximum Temperature
Programming and calibrating 4. Press to select the required unit, Temperature >Fahrenheit< e.g. Fahrenheit: 5. Confirm with . The temperature values are now shown in the respectively other unit. 7.1.4 Setting the warning levels for minimum and maximum temperature The following settings enable you to set two warning levels when exceeding or dropping below certain temperature levels. -
Page 46: Calibration
Switch on the Milk Shuttle with the (approx. 2 seconds). 16.07.14 10:30:32 The "Calibrate" menu is accessed from the main menu: MilkShuttle 105A31 Hold down the key for approx. 2 seconds. This menu lets you adjust the pump and the temperature. The Milk Shuttle can be calibrated either in mains or in battery mode. -
Page 47: Calibrate The Pump With The Flow Rate Controller (Optional)
• Fill level of feed container • Height of pump nozzle • Ambient temperature An even greater precision is achieved if the MilkShuttle will be equipped with an (optionally available) flow rate meter (hardware). 7.2.2 Calibrate the pump with the flow rate controller (optional) When calibrating the "SET pump"... -
Page 48: Temperature Calibration
Programming and calibrating To do so, carry out the following steps: 1:Pump 03.200 1. Hold down the key for approx. 2 seconds: 2. Actuate the pump nozzle over a collecting tray until the feed pump stops automatically. Hold the pump nozzle at the same height as when dosing later on to achieve the greatest possible precision. -
Page 49: Programming Heating And Agitating
Programming and calibrating SET Temperature 4. Hold down the key for approx. 2 seconds: 14.5 C >+0.0< 5. Press to change the displayed correction value by the measured deviation. 6. Briefly press to exit the programming mode. INFO Use the key to exit the temperature calibration. -
Page 50: Operating Values
Programming and calibrating Switch on the Milk Shuttle with the key (approx. 2 seconds). The "Heating and Agitating" menu is accessed 16.07.14 10:30:32 from the main menu: MilkShuttle 105A31 °C/F Hold down the key for approx. 2 seconds. 7.3.2 Operating values Three values can be programmed in the heater control: •... -
Page 51: Programming The Start Times
The device is in standby mode and 08.04.16 10:30:32 the start display is shown: MilkShuttle 105A31 °C/F 2. Press the key for approx. 2 seconds. If no start time is programmed, the device automatically begins with heating and agitating. -
Page 52: Deleting The Start Times
Programming and calibrating 3. Press (approx. 2 seconds) to switch to the programming mode. SET Start time 1 4. Press to switch to the "SET Start time 1" display: --:-- --:-- SET Start time 1 5. Briefly press the key again: >--<-- --:-- 6. -
Page 53: Programming Feeding
Switch on the Milk Shuttle with the (approx. 2 seconds). 15.07.14 10:30:32 The "Feeding" menu is accessed from the main menu: MilkShuttle 105A31 Hold down the key for approx. 2 seconds. After pressing the key (approx. 2 seconds), the LED of this key flashes. The last used feeding menu is called up. -
Page 54: Programming The Cleaning Programs
Switch on the Milk Shuttle with the (approx. 2 seconds). 15.07.14 10:30:32 The "Cleaning" menu is accessed from the main menu: MilkShuttle 105A31 Hold down the key for approx. 2 seconds. After pressing the key, the LED of this key flashes. The last used cleaning menu is called up. - Page 55 Programming and calibrating 3. Press (approx. 1 second) to switch to the SET Cleaning programming mode: 1:>02:00< ---.- C 4. Press to set the required duration SET Cleaning 1:>04:00< ---.- C of the cleaning program (here: 4 minutes): 5. Briefly press the key and use SET Cleaning 1: 04:00...
- Page 56 Programming and calibrating...
-
Page 57: What If
What if... What if... General errors Description Possible causes Remedy Replace wearing part set (Order No. Agitator runs untrue/rattles Bearing bushing worn out 230.201) (see chapter 10) Device not switched on/in Press "ON" button at operating panel Nothing in the display power saving mode for 2 seconds. -
Page 58: Display Messages
What if... Display messages In order to more quickly recognise and remedy occurring Milk Shuttle II faults, the electronics have been equipped with monitoring units. There are three types of fault messages: 1. The red LED INFO flashes: The red LED in the key flashes for messages that affect the system. These INFO messages affect the functions of the Milk Shuttle II, but the device can still execute the function in general. - Page 59 What if...
- Page 60 What if...
- Page 61 What if...
- Page 62 What if...
- Page 63 What if...
- Page 64 What if...
- Page 65 What if...
- Page 66 What if...
- Page 67 What if...
-
Page 68: Determining The Operating Code
Language package Figure 8/1: Operating code You may determine the version of the language package of your MilkShuttle (see chapter 4.3, page 16) via the operating code: the fourth character of the operating code equals the version of the language package of your MilkShuttle firmware. In... -
Page 69: Maintenance/Repairs
Maintenance/Repairs Maintenance/Repairs Replace wearing part set Required tools: Hexagon spanner 10 mm, sharp knife ➊ Slip clutch ➋ 2-ear clamp ➌ Trunnion ➍ Bearing bushing Figure 9/1: Wearing part set (Order No. 230.201) You must replace the wearing part set if the agitator emits unusual noises or vibrates during operation. - Page 70 Maintenance/Repairs Figure 9/3: Remove slip clutch; remove motor 4. Cut open the slip clutch along the marked line (see figure 9/3) with a sharp knife. 5. Pull off the motor from the slip clutch and lay it down. 6. Pull off the slip clutch from the shaft of the agitator. 7.
- Page 71 Maintenance/Repairs 10. Degrease the other end of the motor shaft with an appropriate solvent. 11. Pull on a new slip clutch over the top end of the shaft. Do not use any lubricant! The slip clutch fits very tightly on the shaft. Hitting the end of the shaft with the slip clutch on solid ground firmly several times will help push on the slip clutch.
-
Page 72: Replacing Fuses
Maintenance/Repairs Replacing fuses CAUTION Always replace defective fuses with the same type of fuse (configuration and value). CAUTION Never repair or replace them provisionally! The fusible cutouts can only be accessed after the protective hood has been removed. Figure 9/6: Position of fuses WARNING Danger of injury due to electric shock De-energise the device before opening the control housing. -
Page 73: Replace Batteries
Maintenance/Repairs No. Designation Value Fused circuit Configuration 6.3 A Agitator, glass fuse 230 V 5 x 20 mm Main fuse battery current 12 V 10 A Blade-type fuse Replace batteries 9.3.1 Replace main batteries Required tools: Hexagon spanner 8 mm, hexagon spanner 10 mm Allen key 6 mm Figure 9/7: Position of battery In order to replace batteries, carry out the following steps:... -
Page 74: Replace Batteries For Date/Time
Maintenance/Repairs ➋ 2. Release the cap nut land unscrew the threaded rod with the cap nut from the threaded bushing. ➌ 3. rRelease the screw connection at the positive pole 4. Slightly pull out the battery and release the screw connection at the negative pole. - Page 75 Maintenance/Repairs ➋ ➌ Correctly insert new battery (negative pole of battery at spring bracket of the battery holder). First position the battery at a slight angle up to the bottom stop of the battery holder and then press into the final position. Figure 9/9: Insert battery for date/time 4.
-
Page 76: Changing The Wheels
Maintenance/Repairs Changing the wheels 9.4.1 Changing the front wheel Required tool: Ring / open-end spanner size 19 mm Figure 9/10: Changing the front wheel CAUTION Danger of injury Before demounting the front wheel, secure the drawbar against falling down! CAUTION 1. -
Page 77: Changing The Rear Wheel
Maintenance/Repairs 9.4.2 Changing the rear wheel Required tool: Allen key 4 mm Figure 9/11: Changing the rear wheel 1. Securely jack up the Milk Shuttle 2. Remove the protective cap. ➊ 3. Release the Allen screw 4. Pull off the adjusting collar. 5. - Page 78 Maintenance/Repairs...
-
Page 79: Spare Parts
Spare parts Spare parts Article Designation Complete set of wearing parts consisting of: - Bearing bushing 230.201 - Coupling piece - Agitator shaft wearing part - 2-ear clamp 982.357 Pneumatic tyre 400 rear axle 982.358 Pneumatic tyre 400 front axle (symmetrical) 982.399 Pneumatic tyre 400 rear axle drive 982.362... - Page 80 Spare parts...
-
Page 81: Mixing Tables
Mixing tables Mixing tables 11.1 Variant I: water volume given in litres, CMR weight given in kilograms... -
Page 82: Variant Ii: Water Volume Given In Litres, Cmr Weight Given In Pounds
Mixing tables 11.2 Variant II: water volume given in litres, CMR weight given in pounds... -
Page 83: Variant Iii: Water Volume Given In Gallons, Cmr Weight Given In Pounds
Mixing tables 11.3 Variant III: water volume given in gallons, CMR weight given in pounds... - Page 84 Mixing tables...
-
Page 85: Index
Index Index Mixing CMR..........32 Mixing tables ....... 32, 81–83 Adjusting the Mixing temperature........32 track width ......... 24 Mixing the feed ........32 Agitate ............. 30 Agitator Name plate ..........14 Motor switch ........19 National language ....see Language Select speed........ - Page 86 Index...
- Page 87 Notes...
- Page 88 Urban GmbH & Co. KG Auf der Striepe 9 D-27798 Wuesting, Germany Telephone: +49/(0) 44 84/93 80-0 Fax: +49/(0) 44 84/93 80-10 info@urbanonline.de www.urbanonline.de...
Need help?
Do you have a question about the MilkShuttle and is the answer not in the manual?
Questions and answers
Hello, Please could you send me the instruction /100.164_EN/ in pdf format. The one that is uploaded on the site has a different handle. Thank you in advance for your time. Best regards