
Related Manuals for Wahsega Labs Carina WL-IC-SMT-SIP-I-W-R-CAR

Summary of Contents for Wahsega Labs Carina WL-IC-SMT-SIP-I-W-R-CAR
- Page 1 Carina Indoor Surface Mount IP Intercom User’s Guide Getting Started This step-by-step guide will help you configure your Wahsega Indoor Surface Mount IP Intercom. www.wahsega.com...
-
Page 2: Copyright Notice
Wahsega Labs Company, except as allowed under the copyright laws. Trademarks Wahsega and the Wahsega logo are trademarks of Wahsega Labs, LLC. All other brand and product names are trademarks, service marks, registered trademarks, or registered service marks of their respective companies. -
Page 3: Table Of Contents
T able of Contents ....................... REFACE Important Notice ......................i Copyright Notice ......................i Trademarks ........................i 1: O ................... 3 HAPTER VERVIEW Carina Indoor Surface Mount IP Intercom Functionality ........4 Quality Standards ......................5 2: U ...............6 HAPTER XPERIENCE Software Capabilities .................... -
Page 4: Chapter 1 Overview
Chapter 1 Overview The Wahsega product line offers the highest quality two-way audio and durability in the industry today. Each and every Wahsega product is designed, developed and manufactured in the USA, ensuring a superior product at the best price available in the market. Carina Indoor Surface Mount IP Intercom User’s Guide Page 3 v 3.0.0.20201022... -
Page 5: Carina Indoor Surface Mount Ip Intercom Functionality
Carina Indoor Surface Mount IP Intercom Functionality The initial functions of Wahsega’s Carina Indoor Surface Mount IP Intercom include: Centralized Event Manager configuration Event Manager auto-detects each Carina IP intercom on the network All configuration options accessible via Carina Event Manager’s centralized HTTP Web interface ... -
Page 6: Quality Standards
Quality Standards Wahsega products achieve the highest standards of performance in the market by utilizing our complete quality assurance program encompassing software testing, product design and a multistage automated factory test program. Wahsega’s ultimate goal is to provide a solution that is both cost ... -
Page 7: Chapter 2 User Experience
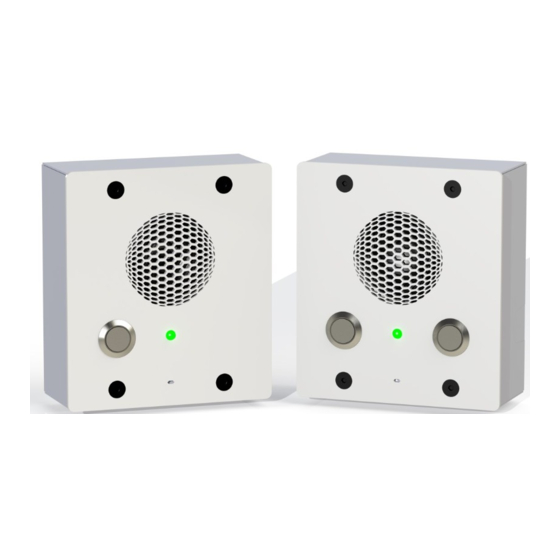
Chapter 2 User Experience All Carina IP Intercoms receive and play audio broadcasts from the Carina Event Manager via multicast and can also place and answer two-way SIP calls using an IP PBX such as Wahsega’s Paging Intercom Server (PICS). The Indoor Surface Mount IP Intercom is a low-cost, small, surface mount IP intercom with one or two buttons, powered via Power-over-Ethernet (PoE). -
Page 8: Software Capabilities
Software Capabilities Wahsega’s Indoor Surface Mount IP Intercom is configured centrally at the Carina Event Manager, which allows bulk configuration as well as individual customization. This allows access to various settings such as network/IP address, SIP account and Event Manager configuration, intercom/speaker behavior, button functionality, and administrative functions such as firmware upgrade and configuration backup/restore. -
Page 9: Getting Started
Getting Started 1. All Carina devices should be configured within the Carina Event Manager’s configuration webpages. While it is possible to make changes at the device’s own webpages, any configuration changes to the device’s webpages will be overwritten by the Event Manager. 2. -
Page 10: Endpoint Configuration Without Carina Event Manager
Endpoint Configuration Without Carina Event Manager If needed, individual endpoint configuration is available via the Carina Indoor Surface Mount IP Intercom’s individual webpages. However, if users choose to make configuration changes in the intercom’s webpages, those changes will not be recognized by the Event Manager and will be overwritten by any configuration changes made to the endpoint in the Event Manager. - Page 11 4. To change the IP address settings, go to the Network page and modify settings in the WAN section. To set the network for DHCP, click the Dynamic IP radio button. For static IP addressing, click the Static IP radio button and fill in the relevant IP address fields with values from your network administrator.
-
Page 12: Chapter 3: Configuration In Event Manager
Chapter 3 Configuration in Event Manager The Carina Indoor Surface Mount IP Intercom should be configured within the Carina Event Manager’s configuration webpages. Event Manager automatically detects each Carina endpoint on the same network, and it provides bulk or individual configuration options. Wahsega recommends using a Chrome or Firefox browser for best results. -
Page 13: Individual Device Configuration
Individual Device Configuration Navigate to the Devices page on your Event Manager and click the button next to the device you’d like to configure. Carina Indoor Surface Mount IP Intercom User’s Guide Page 12 v 3.0.0.20201022... -
Page 14: Details
Details Name – Give this Indoor Surface Mount IP Intercom a unique name for your reference. Location – Physical location of intercom, for user reference. Firmware Current Version – Firmware version this intercom is currently running ... -
Page 15: Sip
Configure registration and for two-way SIP calls. General Register with SIP server – Enable this to register this intercom’s SIP extension with your SIP server. Display name – Name to be displayed as the caller ID. Username/Number – Username, phone number or extension of the SIP account. - Page 16 Codecs – The Codec List is shown in preferred order from top to bottom. This list may be rearranged by dragging and dropping the codecs within the list. Available codecs are: G.722 HD, DVI4 HD, G.726 fixed payload, DVI4 Narrowband, G.711 uLaw, G.711 aLaw, G.729, OPUS.
- Page 17 Incoming Call Timeout – An unanswered inbound call attempt will be automatically cancelled when this timer expires. Call Active Timeout – An active call will be automatically terminated when this timer expires. Topology SIP transport mode – Select mode to match your SIP server’s SIP transport mode.
-
Page 18: Logging
Logging Syslog – Syslog is a network protocol to enable system logging from a device to a network server. This may be used to aid in diagnosing the behavior of a device. Report to server – Enable to begin logging to a network server. Default value: Disabled. -
Page 19: Network
Network Basic Settings Connection Type – Choose DHCP or Static IP. Carina Indoor Surface Mount IP Intercom User’s Guide Page 18 v 3.0.0.20201022... - Page 20 Dynamic IP Options – If you choose to use DHCP to assign an address automatically. Note that when using DHCP, the IP address for your IP intercom may change. However, a new IP address will not affect configuration settings made through your Event Manager.
-
Page 21: System
System Web Authentication Username – Change username for this IP intercom, if desired. Default username is admin. Password – Change password for this IP intercom, if desired. Default password is admin. Time NTP Enabled – When enabled, the system will query the NTP (network time protocol) server for the current time. - Page 22 Automatic Daylight saving time – Select this only if daylight saving time is currently in effect in your location. For more information about DST rules and dates, see http://www.nist.gov/pml/div688/dst.cfm. Time zone – Select the region that most closely matches your time zone.
-
Page 23: Config File
Config File Users may choose the advanced option to manually edit or load a JSON configuration file here. Upload to Server – Loads changes made here to the Event Manager server, to take effect immediately. Revert Changes – Delete any changes made in this session and revert to currently loaded configuration file. -
Page 24: Appendix A: Software-Based Factory Reset
Appendix A Software-based Factory Reset Pin 7 Pin 1 As a “reset to factory defaults” function, two pins on the 7-pin connector can be jumpered together using a standard 2mm electrical jumper. When the intercom boots up, it will check to see if these pins are jumpered, and if so, it will perform a “factory reset”. - Page 25 Steps for activating the factory reset: 1. Unplug the Indoor Surface Mount IP Intercom from power. 2. Install a 2mm jumper on the two pins according to which type of factory reset you want. (For example, to erase configuration and revert to default settings, install a jumper across pins 2 and 3.) 3.
- Page 26 Carina Indoor Surface Mount IP Intercom WL-IC-SMT-SIP-I-W-R-CAR User’s Guide Version 3.0.0.20201022 Carina Indoor Surface Mount IP Intercom User’s Guide Page 25 v 3.0.0.20201022...
Need help?
Do you have a question about the Carina WL-IC-SMT-SIP-I-W-R-CAR and is the answer not in the manual?
Questions and answers