Table of Contents
Advertisement
Quick Links
Instruction Manual
Ultrasonic Generator
Genesis™
Advanced Ceramics Technology (M) Sdn. Bhd
A Crest Group Inc. Company
|No 1536, Jalan Perusahaan, Kawasan Perusahaan Bukit Tengah, 13600 Perai, Penang, Malaysia.|
|Tel: +60(4)-507 0018 | Fax: +60(4)-507 0020 |
|
www.crest-ultrasonics.com
|
www.act.crestm.com
|
Advertisement
Table of Contents

Subscribe to Our Youtube Channel
Summary of Contents for Crest Audio Crest Ultrasonics Genesis
- Page 1 Instruction Manual Ultrasonic Generator Genesis™ Advanced Ceramics Technology (M) Sdn. Bhd A Crest Group Inc. Company |No 1536, Jalan Perusahaan, Kawasan Perusahaan Bukit Tengah, 13600 Perai, Penang, Malaysia.| |Tel: +60(4)-507 0018 | Fax: +60(4)-507 0020 | www.crest-ultrasonics.com www.act.crestm.com...
-
Page 2: Table Of Contents
Genesis Ultrasonic Generator-IM-1.1 Table of Contents ............................... ABLE OF ONTENTS ULTRASONIC CLEANING ........................1-1 ............................1-1 NTRODUCTION ....................1-2 MPORTANT AFETY OTIFICATIONS PRODUCT DESCRIPTION........................2-1 ............................2-1 NTRODUCTION ..................... 2-2 OWER AND ROUNDING EQUIREMENT ........................... 2-2 OTENTIOMETERS ........................... 2-3 TANDARD ONTROLS OPERATING INSTRUCTIONS ........................ -
Page 3: Ultrasonic Cleaning
Genesis Ultrasonic Generator-IM-1.1 Ultrasonic Cleaning 1. Ultrasonic Cleaning Introduction Operating the generator with any portion of the safety systems or procedures bypassed can result in severe system damage and human injury. This manual provides product descriptions, operating instructions, maintenance recommendations and troubleshooting procedures. Due to our constant efforts to build a better product, changes are made from time to time to our generators. -
Page 4: Important Safety Notifications
Genesis Ultrasonic Generator-IM-1.1 Ultrasonic Cleaning Important Safety Notifications Never place your hands, arms, or any body part in the cleaning or rinse liquids when ultrasonic cleaning is in operation. Always use racks, baskets, or tongs for inserting and removing objects from the cleaning tank. For every cleaning liquids used, keep readily available all manufacturers’... -
Page 5: Product Description
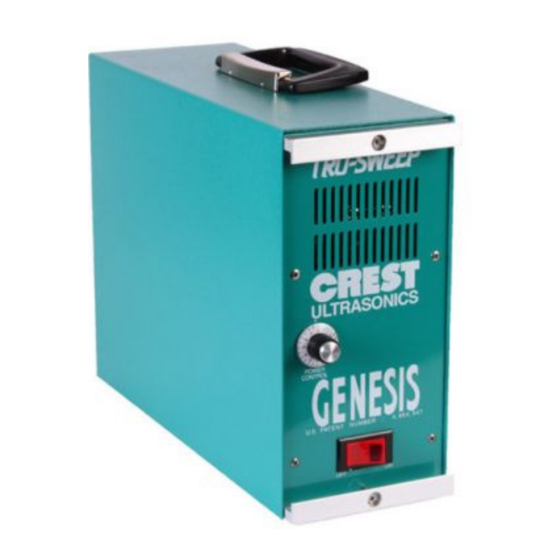
Genesis Ultrasonic Generator-IM-1.1 Product Description 2. Product Description Introduction Figure 2-1: Genesis Ultrasonic Generator front view This Genesis Ultrasonic Generator module consists of a narrow profile cabinet and a plug-in chassis. The cabinet has four rubber feet, a carrying handle, and an eight-pin connector receptacle to which is attached the line cord. -
Page 6: Power And Grounding Requirement
Genesis Ultrasonic Generator-IM-1.1 Product Description Power and Grounding Requirement The power cord from the cabinet has a conventional three-prong plug. The generator must be grounded through a third prong of the power cord or by use of a conventional grounding lug adapter. Generators are available for operation at nominal voltages of 100, 120, 200, 208, 220, 230 or 240;... -
Page 7: Standard Controls
Genesis Ultrasonic Generator-IM-1.1 Product Description Standard Controls Adjustable Output Power Intensity Control On/Off Switch with integral pilot light Figure 2-3: Genesis Ultrasonic Generator front view Degassing Modulation Selector Toggle Switch Figure 2-4: Genesis Ultrasonic Generator rear view The features on the Genesis Ultrasonic Generators are as follows: Item Feature •... - Page 8 Genesis Ultrasonic Generator-IM-1.1 Product Description Item Feature • Located at the front panel of the Genesis Ultrasonic Generator • This control may be turned fully clockwise for full output power Adjustable Output • Amplitude type PIC (Power Intensity Control) keeps the Power Intensity generator running non-stop over each half cycle of the line Control...
-
Page 9: Operating Instructions
Genesis Ultrasonic Generator-IM-1.1 Operating Instructions 3. Operating Instructions Introduction Before operating, user is required to perform manual check on items as listed below in sequence: • Verify that the plastic cap on the drain nipple of the tank is securely tight. -
Page 10: Operation
Genesis Ultrasonic Generator-IM-1.1 Operating Instructions Operation Do not skip the degassing step. Some cleaning chemicals behave peculiarly in that when they are cold and not degassed, a large burst of energy will appear in the tank immediately after the generator switch is turned “On.” In general, cleaning may not be as efficient as possible when this occurs. -
Page 11: Immersible Transducers And Generator
Genesis Ultrasonic Generator-IM-1.1 Operating Instructions Description For generators that have the optional output power intensity control on the generator module, turn the control fully clockwise for full output power. To reduce the output power, turn the control counterclockwise. Place the parts to be cleaned in a basket or fixture. Or, you may suspend a part using tongs. -
Page 12: Bulkhead Immersible And Generator
Genesis Ultrasonic Generator-IM-1.1 Operating Instructions 3.3.3 Bulkhead Immersible and Generator Follow instruction below to operate bulkhead immersible and generator: Description Place the immersible in the tank or container with the 3/4” diameter mounting stud in the appropriate hole or holes in the tank wall. The diameter of these holes should be 7/8”. -
Page 13: Routine Maintenance
Genesis Ultrasonic Generator-IM-1.1 Routine Maintenance 4. Routine Maintenance Cleaning the Generator Always disconnect the generator from its power source and from the transducers before removing the generator cabinet to service the interior. Failure to do so may result in injury or death due to the presence of high voltages.
Need help?
Do you have a question about the Crest Ultrasonics Genesis and is the answer not in the manual?
Questions and answers