Chapters
Table of Contents

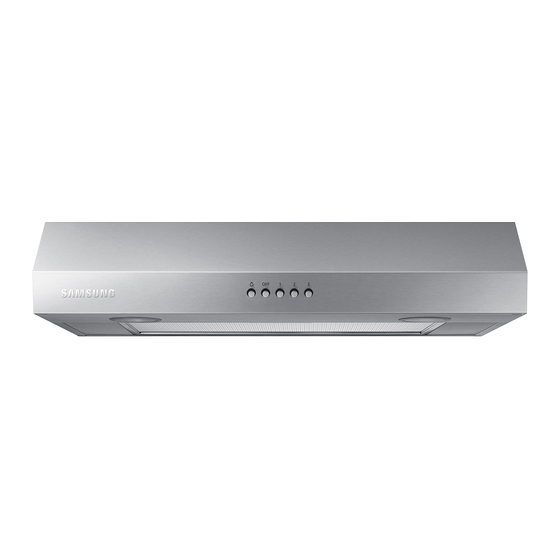
Related Manuals for Samsung NK24T4000US


Summary of Contents for Samsung NK24T4000US
- Page 1 Range Hood Hotte de la cuisine Campana de cocina Installation Instructions Guide Guide d’instructions d’installation Guía de Instrucciones para Instalación NK24T4000US/AA LIB0168579...
-
Page 2: Table Of Contents
Table of Contents Important Safety Instructions Installation Requirements Electrical Requirements Venting Requirements Venting Methods Cold Weather Installations Makeup Air Tools and Parts Dimensions and Clearances Installation Instructions Installation Instructions Venting Methods Prepare the Location Prepare Range Hood Mark Hole Locations Mark and Cut Vent Opening Drill Electrical Opening Prepare Range Hood Vents... -
Page 3: Important Safety Instructions
Important Safety Instructions APPROVED FOR RESIDENTIAL APPLIANCES FOR RESIDENTIAL USE ONLY READ AND SAVE THESE INSTRUCTIONS PLEASE READ ENTIRE INSTALLATION GUIDE BEFORE PROCEEDING. INSTALLATION MUST COMPLY WITH ALL LOCAL CODES. IMPORTANT: Save these Instructions for the Local Electrical Inspector’s use. INSTALLER: Please leave these Instructions with this unit for the owner. - Page 4 Important Safety Instructions ■ Use an extinguisher ONLY if: CAUTION - You know you have a class ABC extinguisher, and you already know For general ventilating use only. Do not use to exhaust hazardous or how to operate it. explosive materials and vapors. –...
-
Page 5: Installation Requirements
Installation Requirements Electrical Requirements Venting Methods IMPORTANT To use the hood’s top outlet to vent your hood, a 3¼ ” x 10” (8.3 x 25.4 Observe all governing codes and ordinances. cm) rectangular with a maximum vent length of 35 ft (10.7 m) or a 7” (17.8 cm) or larger round vent with a maximum length of 50 ft (15.2 m) It is the customer’s responsibility: vent system is required.This vent systems are not included and must be... -
Page 6: Tools And Parts
Part Part 3.5 x 9.5 mm Torx ®† T10 adapter 5 x 45 mm 4.5x13 mm NK24T4000US/AA 24″ (61 cm) 8 x 45 mm ⁄ " x 10" (8.3 x 25.4 cm) rectangular damper ⁄ ″ (48 cm) Tools/Materials required ⁄... -
Page 7: Installation Instructions
Installation Instructions Installation Instructions Rear Installation Diagram Use 31/4" x 10" (8.3 x 25.4 cm) rectangular with a maximum vent length We recommend that a qualified technician install the range hood. It is of 35 ft (10.7 m) for vent system. the installer’s responsibility to ensure the range hood complies with the Use the diagram or the hood as a template and mark the locations for the installation clearances specified for the product. -
Page 8: Prepare The Location
Installation Instructions WARNING USE TWO OR MORE PEOPLE TO MOVE AND INSTALL THE RANGE HOOD. FAILURE TO DO SO CAN RESULT IN INJURY. NOTE Mark the Range Hood knockouts on the wall and make the 5. Use ⁄ ” (3 mm) drill bit and drill 4 pilot holes. NOTE: Make the drill necessary cutouts before installing the hood. -
Page 9: Mark Hole Locations
Installation Instructions Mark Hole Locations Mark and Cut Vent Opening 1. Determine and clearly mark a vertical centerline on the wall and For a non-vented (recirculating) installation: skip "Mark and Cut Vent cabinet bottom. Opening" step. For 3¼" x 10" (8.3 x 25.4 cm) Rectangular Vent System Roof Venting To make a 4”... -
Page 10: Drill Electrical Opening
Installation Instructions Attach Vent Damper or Transition 4. Use saber or keyhole saw to cut the circular vent opening. Repeat steps 1-3 for the underside of the top of the cabinet. 3¼" x 10" (8.3 x 25.4 cm) Rectangular Vent Damper Centerline C abinet cutouts *5”... -
Page 11: Mounting The Hood
Installation Instructions Mounting the Hood Electrical Connection 1. Using 2 or more people, lift the hood into final position. Feed enough WARNING electrical wire through the ½” UL listed or CSA approved strain relief to make connections in the terminal box. Tighten the strain relief ELECTRICAL SHOCK HAZARD. -
Page 12: Range Hood Use And Care
Range Hood Use and Care Range Hood Description Cleaning Exterior surfaces: To avoid damage to the exterior surface, do not use steel wool or soap- filled scouring pads. Do not use chlorine based cleaners. Rub in the direction of the grain line to avoid scratching the surface. •... -
Page 13: Warranty (Usa)
SAMSUNG’s authorized service center. REVENUE OR PROFITS, FAILURE TO REALIZE SAVINGS OR SAMSUNG will repair or replace this product, at our option and OTHER BENEFITS, OR ANY OTHER SPECIAL, INCIDENTAL OR at no charge as stipulated herein, with new or reconditioned... -
Page 14: Warranty (Canada)
WITH RESPECT TO THIS PRODUCT SHALL BE BINDING ON SAMSUNG will repair or replace this product, at our option and SAMSUNG. SAMSUNG SHALL NOT BE LIABLE FOR LOSS OF at no charge as stipulated herein, with new or reconditioned... - Page 16 Sommaire Importantes Consignes de Sécurité Exigences d’Installation Exigences Électriques Exigences Relatives a la ventilation Méthodes d’ ventilation Installations par temps froid Air d' Appoint Outils et Pièces Dimensions et Dégagements Installation de la Hotte Instructions d´Installation Méthodes d’ Ventilation Préparez l' Emplacement Préparer la Hotte Marquer les emplacements des trous Marquer et Couper l' Overture de l' Event...
-
Page 17: Importantes Consignes De Sécurité
Importantes Consignes de Sécurité APPROUVÉ POUR LES APPAREILS DE TYPE RÉSIDENTIEL POUR UNE UTILISATION RÉSIDENTIELLE SEULEMENT LISEZ CES INSTRUCTIONS ET CONSERVEZ-LES VEUILLEZ LIRE CES INSTRUCTIONS AU COMPLET AVANT DE COMMENCER. L’INSTALLATION DE L’APPAREIL DOIT RESPECTER TOUS LES CODES EN VIGUEUR. IMPORTANT: Conservez ces instructions afin de pouvoir les remettre à... - Page 18 Importantes Consignes de Sécurité ATTENTION ATTENTION POUR RÉDUIRE LE RISQUE D’INCENDIE, CHOC ÉLECTRIQUE POUR MINIMISER LE RISQUE D’UN FEU DE GRAISSE SUR LA CUI- OU DOMMAGES CORPORELS, RESPECTER LES INSTRUCTIONS SINIÈRE: SUIVANTES: ■ Ne jamais laisser un élément de surface fonctionner à puissance de ■...
-
Page 19: Exigences D'installation
Exigences d’Installation Exigences électriques • La longueur du système de ventilation et le nombre de coudes doivent être réduits au minimum pour assurer une performance efficace. IMPORTANT Observez tous les codes et ordonnances en vigueur. Pour un fonctionnement le plus efficace et silencieux: Il est de la responsabilité... -
Page 20: Installations Par Temps Froid
Retirez le film protecteur recouvrant le produit avant sa mise en service. Pièces fournies • Ensemble de hotte avec ventilateur et lampes LED déjà installés. • Sac de matériel avec: NK24T4000US/AA Pièce Qté Pièce Qté 24″ (61 cm) 3.5 x 9.5 mm Adapteur Torx ®†... -
Page 21: Installation De La Hotte
Installation de la Hotte Instructions d'installation Schéma d'installation arrière Nous recommandons qu'un technicien qualifié installe la hotte. Il incombe Utilisez un rectangle de 31/4 "x 10" (8,3 x 25,4 cm) avec une longueur de à l'installateur de s'assurer que la hotte de cuisinière respecte les dé- ventilation maximale de 35 pi (10,7 m) pour le système de ventilation. -
Page 22: Préparez L'emplacement
Installation de la Hotte ATTENTION IL FAUT DEUX PERSONNES OU PLUS POUR DÉPLACER ET INSTALLER LA HOTTE DE CUISINIÈRE. LE FAIRE SEUL PEUT EN- TRAÎNER DES LÉSIONS. REMARQUE Marquez les débouchures de la hotte sur le mur et faites les découpes nécessaires avant d'installer la hotte. -
Page 23: Marquer Les Emplacements Des Trous
Installation de la Hotte Marquer les emplacements des trous Marquer et couper l'ouverture de l'évent 1. Déterminez et marquez clairement une ligne centrale (mediane) Pour une installation non ventilée (recirculation): sautez l'étape verticale sur le mur et le bas de l'armoire. «Marquer et couper l'ouverture d'évent». -
Page 24: Percer L' Overture Électrique
Installation de la Hotte Pour système de ventilation ronde de 7 "(17,8 cm) Pour les installations d'évent rectangulaires de 3¼ "x 10" (8,3 x 25,4 (ventilation de toit) • Pour les installations de ventilation par le haut, retirez le débou- Pour faire une ouverture d'aération circulaire sur la face inférieure du chure de ventilation rectangulaire supérieure (C). -
Page 25: Montage De La Hotte
Installation de la Hotte Montage de la hotte Connexion Électrique 1. À l'aide de 2 personnes ou plus, soulevez le capot en position fi nale. ATTENTION Faites passer suffisamment de fil électrique à travers le serre-câble de ½ ”homologué UL ou CSA pour effectuer les connexions dans la RISQUE DE CHOC ÉLECTRIQUE. -
Page 26: Utilisation Et Entretien De La Hotte
Utilisation et entretien de la hotte Description de la hotte Nettoyage Surfaces extèrnes: Pour éviter d'endommager la surface extérieure, n'utilisez pas de laine d'acier ou de tampons à récurer savonneux. N'utilisez pas de nettoyants à base de chlore. Frottez dans le sens de la ligne de grain pour éviter de rayer la surface. -
Page 27: Garantie (Usa)
OU DE PROFITS DEFAUT DE REALISER DES ECONOMIES OU Garantie limitée à l’acheteur d’origine AUTRES AVANTAGES OU TOUT AUTRE DOMMAGES SPE- Ce produit de la marque SAMSUNG, qui est fourni et distribué CIAUX, DIRECTS OU INDIRECTS CAUSES PAR L’UTILISATION, par la société Samsung Electronics America, Inc. (SAMSUNG) MAUVAISE UTILISATION OU L’INCAPACITE D’UTILISER CE... -
Page 28: Garantie (Canada)
PERSONNE ENTREPRISE OU SOCIETE EN MATIERE DE CE Garantie limitée à l’acheteur d’origine PRODUIT EST OBLIGATOIRE SUR SAMSUNG. SAMSUNG NE Ce produit de la marque SAMSUNG, qui est fourni et distribué SERA PAS RESPONSABLE POUR LA PERTE DE REVENUS par la société Samsung Electronics Canada, Inc. (SAMSUNG) OU DE PROFITS DEFAUT DE REALISER DES ECONOMIES OU et livré... - Page 30 Índice Instrucciones Importantes de Seguridad Requisitos de Instalación Requisitos Eléctricos Requisitos de Ventilación Métodos de Ventilación Instalación en Condiciones Climáticas Frías Aire Limpio Herramientas y Piezas Dimensiones del Producto Instalación de la Campana Instrucciones de Instalación Métodos de Ventilación Prepare la Ubicación Preparación de la Campana Determine la Ubicación del Orificio de Cableado Marcar y Cortar la Abertura de Ventilación...
-
Page 31: Instrucciones Importantes De Seguridad
Instrucciones Importantes de Seguridad APROBADO PARA APARATOS DE USO DOMÉSTICO SÓLO PARA USO DOMÉSTICO LEA Y GUARDE ESTAS INSTRUCCIONES ANTES DE CONTINUAR, LEA LAS INSTRUCCIONES POR COMPLETO. LA INSTALACIÓN DEBE CUMPLIR CON TODA LA NORMATIVA LOCAL. IMPORTANTE: Guarde estas instrucciones para su uso por parte del inspector de electricidad local. - Page 32 Instrucciones Importantes de Seguridad ADVERTENCIA ADVERTENCIA PARA REDUCIR EL RIESGO DE INCENDIOS, CHOQUE ELÉCTRICO O PARA REDUCIR EL RIESGO DE INCENDIO PROVOCADO POR GRASA LESIONES A PERSONAS, OBSERVE LO SIGUIENTE: EN LA SUPERFICIE DE LA ESTUFA: ■ ■ Use esta unidad sólo de la manera para la que fue diseñada por el Nunca deje las unidades de superficie sin vigilancia cuando estén en fabricante.
-
Page 33: Requisitos De Instalación
Requisitos de Instalación Requisitos Eléctricos El sistema de ventilación debe tener una compuerta. Si la • cubierta del techo o la pared tiene una compuerta, no use la compuerta provista con la campana de cocina. IMPORTANTE Observe todos los códigos y reglamentos aplicables. Utilice masilla de calafateo para sellar la abertura exterior de la pared o el •... -
Page 34: Aire Limpio
Ensamblaje del escudete para campana con ventilador y lámparas LED previamente instalados • Bolsa plástica con el siguiente contenido: Parte Cant. Parte Cant. NK24T4000US/AA 3.5 x 9.5 mm Torx ®† T10 adapter 24″ (61 cm) 5 x 45 mm 4.5x13 mm ⁄... -
Page 35: Instalación De La Campana
Instalación de la campana Instrucciones de Instalación Salida posterior Se recomienda que un técnico calificado instale la campana extracto- Usar la transición rectangular de 31⁄4 "x 10" (8,3 x 25,4 cm) con una ra. Es responsabilidad del instalador asegurarse de que la campana longitud máxima de ventilación de 35 pies (10,7 m) o 7 "(17,8 cm). -
Page 36: Prepare La Ubicación
Instalación de la campana Instalación en la pared ADVERTENCIA USE DOS O MÁS PERSONAS PARA MOVER E INSTALAR LA CAMPANA DE COCINA. NO SEGUIR ESTA INSTRUCCIÓN PUEDE OCASIONAR LESIONES. 5. Utilice una broca de ”(3 mm) y taladre 4 orificios guía. NOTA: Haga ⁄... -
Page 37: Determine La Ubicación Del Orificio De Cableado
Instalación de la campana Determine la Ubicación del Orificio de Cableado Marcar y Cortar la Abertura de Ventilación 1. Determine y marque claramente una línea central vertical en la pared Para una instalación sin ventilación (recirculante): omita el paso y la parte inferior del gabinete. "Marcar y cortar la abertura de ventilación". -
Page 38: Perforaciones De Conexión Eléctrica
Instalación de la campana Conecte la Transición Para ventilación circular de 7" (17.8 cm) 1. Marque una línea central debajo de la parte superior del gabinete. 2. Marque una línea de 5 ”(12.8 cm) desde la pared trasera debajo de Transición Rectangular de 3¼"... -
Page 39: Conecte El Sistema De Ventilación
Instalación de la campana Conexión Eléctrica ADVERTENCIA PELIGRO DESCARGA ELÉCTRICA. DESCONECTE EL SUMINISTRO DE ENERGÍA ANTES DE DARLE MANTENIMIENTO. VUELVA A COLOCAR TODOS LOS COMPONENTES Y PANELES ANTES DE HACERLO FUNCIONAR. NO SEGUIR ESTAS INSTRUCCIONES PUEDE OCASIONAR LA MUERTE O CHOQUE ELÉCTRICO. A. -
Page 40: Uso Y Mantenimiento De La Campana
Uso y Mantenimiento de la Campana Descripción de la Campana Limpieza Superficies exteriores: Superficies exteriores: Para evitar daños en la superficie exterior, no utilice estropajos de acero o estropajos con jabón. No utilice limpiadores a base de cloro. Frote en la dirección de la línea de la fibra para evitar rayar la superficie. -
Page 41: Garantía (Usa)
GARANTÍA EXPRESADA O GARANTÍA DADA POR ALGUNA izado por SAMSUNG . El recibo de compra original con fecha PERSONA, FIRMA O CORPORACIÓN CON RESPECTO A ESTE deberá ser presentado como prueba de compra a SAMSUNG o PRODUCTO SERÁ... -
Page 42: Garantía (Canada)
LIMITADA NO SERA EXTENDIDA A NINGÚN OTRO MÁS QUE AL por SAMSUNG . El recibo de compra original con fecha deberá COMPRADOR ORIGINAL DE ESTE PRODUCTO NO ES TRANS- ser presentado como prueba de compra a SAMSUNG o al cen- FERIBLE Y DECLARA SU RECURSO EXCLUSIVO. - Page 44 LIB0168579 Printed in Mexico 09/20...