Table of Contents
Advertisement
Quick Links
Advertisement
Table of Contents

Related Manuals for Coolpad Legacy brisa


Summary of Contents for Coolpad Legacy brisa
- Page 1 User Guide...
-
Page 2: Table Of Contents
Table of Contents Getting Started .............................. 1 Introduction ............................2 About the User Guide ........................2 Set Up Your Phone ..........................3 Parts and Functions ........................3 Battery Use ........................... 4 SIM Card ............................6 SD Card ............................7 Turn Your Phone On and Off ...................... 10 Use the Touchscreen ........................ - Page 3 View Contacts ..........................58 Contacts Screen Layout ......................59 Edit a Contact..........................60 Delete a Contact ......................... 61 Share a Contact .......................... 61 Import Contacts ........................... 62 Export Contacts .......................... 63 Messages ............................65 Text and Multimedia Messages ....................65 Gmail ............................
- Page 4 Basic Settings ........................... 118 Basic Settings ........................... 118 Wi-Fi Settings ..........................119 Data Usage Settings ......................... 120 Tethering & Mobile Hotspot Settings ..................121 Bluetooth Settings ........................122 Apps & Notifications Settings ....................123 Battery Settings ......................... 124 Display Settings ........................124 Sound Settings ..........................
-
Page 5: Getting Started
Getting Started The following set of topics will introduce you to your phone, help you get set up with service, provide an overview of the phone screen, and get you started with basic phone operations. -
Page 6: Introduction
The following topics describe the basics of using this guide and your new phone. About the User Guide Thank you for purchasing your new Coolpad Legacy Brisa. The following topics explain how best to use this guide to get the most out of your phone. -
Page 7: Set Up Your Phone
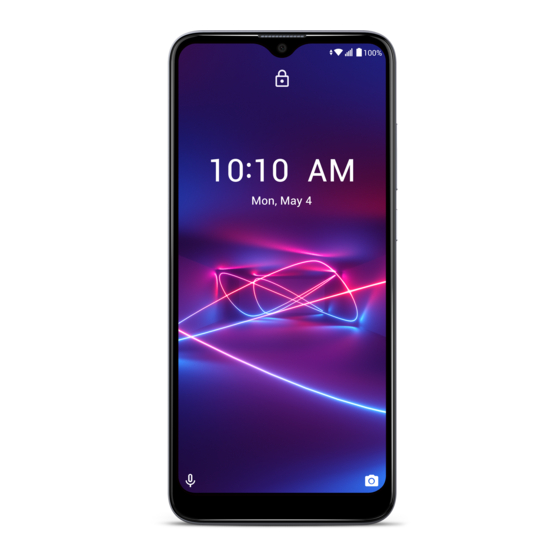
Set Up Your Phone The following topics give you all the information you need to set up your phone and wireless service the first time. Parts and Functions These topics illustrate your phone’s primary parts and key functions. Note: Your phone's screens and app layouts are subject to change. This user guide uses sample images only. -
Page 8: Battery Use
Returns you to the home screen. Home key Lets you return to the previous screen, or close a dialog box, options Back key menu, the notification panel, or onscreen keyboard. Camera lens Lets you take photos and videos. Power/Lock key Lets you turn the phone on or off or turn the screen on or off. - Page 9 Quick Charge is one of the most frequently used fast charging technologies. This technology is designed to deliver lightning-fast charging in phones, much faster than conventional charging. Your Coolpad Legacy Brisa supports Quick Charge 3.0. It will only take 2 and a half hours to fully charge your phone.
-
Page 10: Sim Card
SIM Card The SIM card is an IC card containing phone number and other customer information. Your phone’s SIM card is preinstalled and should only be accessed if directed by a customer service representative. Handling a SIM Card Keep the following in mind when handling a SIM card. ●... -
Page 11: Sd Card
● Always power off the phone before inserting/removing the SIM card. Insert SIM Card Follow these instructions to insert a SIM card. Remember to power off your phone before inserting a SIM card. Note: Your phone’s SIM card is preinstalled. These instructions are for reference only. 1. - Page 12 SD Card Cautions Data: Information stored on an SD card can become lost or changed accidently or as a result of damage. It is recommended that you keep a separate copy of important data. Your carrier is not responsible for damages from data that is lost or changed. Reading/Writing Data: Never power off while reading or writing data.
- Page 13 Remove an SD Card Follow these instructions to remove an SD card. Always power the phone off before inserting or removing an SD card. 1. Insert the SIM ejection pin into the hole to open the SIM card tray. 2. Gently pull out the SIM card tray. 3.
-
Page 14: Turn Your Phone On And Off
4. Tap Format or Format as internal, and then tap Format SD card to confirm. All data on the SD card is erased, and the card is formatted for use on your phone. Turn Your Phone On and Off The instructions below explain how to turn your phone on and off. -
Page 15: Use The Touchscreen
Your phone will power on. Depending on the settings, you may see the lock screen. Lock and Unlock Your Screen Screen Lock for information about using the screen lock. The first time you turn the phone on, you will see the startup screens. See Complete the Setup Screens for details. - Page 16 When you want to type using the onscreen keyboard, select items onscreen such as application and settings icons, or press onscreen buttons, simply tap or touch them with your finger. Tap and Hold To open the available options for an item (for example, a contact or link in a Web page), tap and hold the item.
-
Page 17: Boost Activation And Service
Double-tap Double tap on an image to zoom in. Double tap again to return. Pinch and Spread “Pinch” the screen using your thumb and forefinger to zoom out or “spread” the screen to zoom in when viewing a photo or a Web page. (Move fingers inward to zoom out and outward to zoom in.) Boost Activation and Service Before using your phone, you must set up your service with Boost Mobile. -
Page 18: Complete The Setup Screens
Activate Your Phone After setting up your account on boostmobile.com, simply turn your device on. Your device is designed to activate automatically. If you are swapping from another Boost Mobile device to a new one, be sure to turn off the old device before swapping the serial number (MEID). Once the MEID swap is complete, turn on the new device and the programming information will be pushed to your device automatically. - Page 19 Unlock with fingerprint - Enroll your fingerprint to unlock your phone or approve purchases. Unlock with face - Enroll your face to unlock your phone or approve purchases. Face unlock is less secure than other unlocking options. 3. Tap Next. Your setup is now complete. Follow the onscreen instructions to learn about basic tap menu navigation, view tutorials, or just get started.
-
Page 20: Basic Operations
Basic Operations The following topics outline basic features and operations of your phone. Basics The following topics offer an overview of your phone’s basic operations. Home Screen and Applications (Apps) List Most of your phone’s operations originate from the home screen or the apps list. 1. - Page 21 ■ Tap Recent Apps to view a list of recently used applications. Phone Settings Menu You can customize your phone’s settings and options through the Settings menu. ■ From home, swipe up and tap Settings – or – Pull down the status bar and tap Settings For more information, see Basic Settings.
-
Page 22: Applications
Portrait and Landscape Screen Orientation The default orientation for your phone’s screen is portrait (vertical), but many apps will change to landscape orientation (widescreen) when you rotate the phone sideways. Note: Not all screens will adjust for landscape orientation. Turn Auto-rotate Screen On or Off 1. - Page 23 Launch Applications All installed apps can be accessed and launched from the apps list. 1. From home, swipe up. The apps list opens. 2. Tap and app icon to launch the corresponding application. The application opens. Apps List The apps list expands to include any apps you download and install on your phone.
-
Page 24: Phone Number
Access both mobile and traditional websites on the go. Chrome View photos and watch videos. Photos Browse, shop, and play back songs purchased as well as songs you have YT Music loaded from your own music library. View your location, get directions, browse local businesses and attractions, Maps and more. -
Page 25: Airplane Mode
You will see the number listed under Phone number. Airplane Mode Airplane mode turns off all functions that emit or receive signals, while leaving your phone on so you can use apps that don’t require a signal or data. To turn on airplane mode: 1. -
Page 26: Enter Text
To turn off airplane mode: 3. Pull down the status bar. 4. Tap Airplane mode Your phone’s wireless connection features are now restored. Enter Text You can type on your phone using one of the available touchscreen keyboards or Google voice typing. Touchscreen Keyboards Your phone offers you a touchscreen keyboard for entering text. -
Page 27: Google Account
Google Voice Typing Google Voice typing uses Google voice recognition to convert speech to text. Tips for Editing Text Your phone gives you many options to make entering text easier, including copying, cutting, and pasting text, using voice-to-text input, customizing the user dictionary, using predictive text, and more. Next-word suggestions 1. - Page 28 2. Tap Google and then tap Create account. 3. Follow the prompts to set up your account. Tap Next to proceed between steps, which may include: Enter your First name and Last name. Enter your birthday and gender. ...
-
Page 29: Google Play Store
2. Tap Google, and then tap Email or phone. 3. Enter your Gmail address and password, and then tap Next. 4. Tap I agree. You are signed in to your Google Account, and your phone will synchronize the selected items. Google Play Store Google Play™... - Page 30 Find and Install an App When you install apps from Google Play app and use them on your phone, they may require access to your personal information (such as your location, contact data, and more) or access to certain functions or settings of your phone.
- Page 31 Purchasing Applications Purchase apps at your own risk. Your carrier is not responsible for any harm to you or third parties resulting from the use of purchased applications. Request a Refund for a Paid App If you are not satisfied with an app, you can ask for a refund within 15 minutes of the purchase. Your credit card is not charged and the app is uninstalled from your phone.
- Page 32 Uninstall an App You can uninstall any app that you have downloaded and installed from Google Play. 1. From home, swipe up and tap Play Store 2. Tap Menu > My apps & games. 3. Tap the app you want to uninstall, and then tap Uninstall > OK. ...
-
Page 33: Lock And Unlock Your Screen
Lock and Unlock Your Screen Your phone allows you to quickly turn the screen off when not in use and to turn it back on and unlock it when you need it. Turn the Screen Off When Not in Use ■... - Page 34 Software Update Cautions During update: The phone cannot be used until the software update is complete. It may take time to update your phone’s software. Signal during update: Update your phone where signal reception is good, and do not change location during the update process.
- Page 35 Update Your Phone’s Software Once you have backed up all your data, use the Check for update option to update your phone’s software. 1. From home, swipe up and tap Settings > System > Advanced > System Updates. 2. Tap System Updates > Check for update. ...
- Page 36 1. From home, swipe up and tap Settings > System > Advanced > System Updates > Update PRL. 2. Follow the onscreen instructions. The phone will download and install the PRL update and you will see a confirmation when complete.
-
Page 37: Your Phone's Home Screen
Your Phone's Home Screen The following topics describe how to use and customize your phone’s home screen, understand the status bar, and use the notification panel. Home Screen Basics The home screen is the starting point for your phone’s applications, functions, and menus. You can customize your home screen by adding application icons, shortcuts, folders, and more. -
Page 38: Status Bar And Notification Panel
Primary shortcuts are application shortcuts that appear in the same location Primary shortcuts on all of your phone’s home screens. These are customizable. Tap to display a list of recently used applications. Recent Apps key Tap to display the main home screen. Home key Tap to return to the previous screen. - Page 39 Main Status Icons Icon Status Bluetooth ® active GPS active ® Wi-Fi active Downloading Vibrate Network (full signal) Network (roaming) 4G LTE data service 3G data service...
- Page 40 Airplane mode Sync active Alarm set Battery (charging) Battery (full charge) Main Notification Icons Icon Notification Missed call New voicemail New Gmail New text or MMS message New Hangout message Alarm Warning Note: Additional notification icons may appear. All notifications may be accessed through the notification panel.
-
Page 41: Customize The Home Screen
Open the Notification Panel ■ Pull down the status bar. (Slide your finger down from the top of the screen.) The notification panel opens. To check notifications, tap an item in the list. Close the Notification Panel ■ Slide the notification panel up. (Slide your finger up from the bottom of the screen.) –... - Page 42 1. From home, tap and hold an empty space, and then tap Wallpapers. You can also access the wallpaper menu through settings. From home, swipe up and tap Settings > Display > Wallpaper. 2. Select from Photos or Wallpapers. 3.
- Page 43 The icon will disengage and you will see thumbnails of your home screens. 3. Drag the icon to an empty location on one of the home screens. The shortcut is added to the home screen. Add Folders to the Home Screen You can group home screen shortcuts into folders for convenient access.
- Page 44 2. To add more app shortcuts to the folder, tap and hold a shortcut and drag it on top of the new folder The new shortcut is added to the folder. Change Folder Names Once you have added folders, you can change the name easily from the folder display. 1.
-
Page 45: Making Connections
Making Connections The following set of topics will cover your phone’s ability to help you make connections, from phone calls and maintaining contacts, to text messages, email, Internet, and international services. -
Page 46: Phone Calls And Voicemail
Phone Calls and Voicemail The following topics outline the use of your device’s phone app to place and receive calls, use voicemail, and more. Place and Answer Calls The following topics describe how to directly dial calls, how to answer incoming calls, and how to use the in-call screen options. - Page 47 2. Tap the number keys on the keypad to enter the phone number. As you enter digits, Smart Dial searches for contacts that match. If you see the number you want to dial, tap it to place the call immediately without entering the rest of the number. 3.
- Page 48 Troubleshooting Question: Call does not connect. Answer 1: Was the number dialed using the area code? If not, try dialing using the full 10-digit number including the area code. Answer 2: Are you in an area with poor wireless coverage? Try calling again from another area. Call Emergency Numbers You can place calls to 9-1-1 even if the phone’s screen is locked or your account is restricted.
- Page 49 Note: If your phone is turned off, all calls automatically go to voicemail. Answer an Incoming Call 1. When a call arrives, slide up to answer it. The call begins. 2. To end the call, tap The call ends.
- Page 50 Mute the Ringing Sound To mute the ringer without rejecting the call, you can do either of the following: ● Press the Volume key. ● Press the Power/Lock key. Reject an Incoming Call ■ When a call arrives, slide down to reject it. Reject a Call and Send a Text Message You can reject an incoming call and automatically send a text message to the caller.
- Page 51 1. When a call arrives, slide up from the bottom left of the screen. The ringtone or vibration will stop and you will see a list of preset text messages. Tap one of the messages to send it to the caller. ...
- Page 52 In-Call Screen Layout Tap options to activate them during a call. ● Add call: Tap and hold to initiate a conference call (3-way call). ● Keypad/Hide: Toggle the appearance of the onscreen keypad. Show the keypad to enter additional numbers, for example, an extension or access code. ...
- Page 53 2. Tap Contacts to display the Contacts list. The contacts list appears. 3. Tap a contact. 4. Tap Call next to the number you want to call. The phone dials the number. The call begins when the other party answers. 5.
-
Page 54: Voicemail
Call from Call Log The call log list lets you quickly place calls to recent incoming, outgoing, or missed numbers. 1. From home, tap Phone to display the phone app. 2. Tap Log to display the call log list. The call log list appears. 3. - Page 55 2. Tap and hold to dial your voicemail number. Your phone dials the voicemail access number. 3. Follow the system prompts to: Create your passcode. Record your name announcement. Record your greeting. Important: Voicemail Passcode – It is strongly recommended that you create a passcode when setting up your voicemail to protect against unauthorized access.
-
Page 56: Call Settings
This puts the first caller on hold and dials the second number. 3. When you’re connected to the second party, tap Merge. Your conference call is now in session. 4. To end the three-way call, tap Note: If one of the people you called hangs up during your call, you and the remaining caller stay connected. - Page 57 Call Settings Options Use the Call Settings menu to adjust the following settings: Setting Description Display options Change the display order of contacts name and the name format. Sounds and vibration Change phone ringtone, vibrate options and keypad tones. Quick responses Create or edit quick responses.
- Page 58 2. Tap Menu > Settings. The call settings menu appears. 3. Configure your options. Tap a menu item to display its options. Select your options and follow the prompts to set them. Your call settings options are set. TTY Mode A TTY (teletypewriter, also known as a TDD or Text Telephone) is a telecommunications device that allows people who are deaf, hard of hearing, or who have speech or language disabilities, to...
- Page 59 3. Tap Accessibility > TTY mode. 4. Tap TTY Full, TTY HCO, or TTY VCO to turn TTY mode on. – or – Tap TTY Off to turn TTY mode off. Your phone’s TTY mode is set. Note: When enabled, TTY mode may impair the audio quality of non-TTY devices connected to the headset jack.
-
Page 60: Contacts
Contacts The Contacts application lets you store and manage contacts from a variety of sources, including contacts you enter and save directly in your phone as well as contacts synchronized with your Google Account, your PC, compatible email programs (including Exchange Server). Contacts Cautions Information saved in Contacts may be lost or changed if the battery is left uncharged. - Page 61 2. Tap to add a contact. The Add Contact screen appears. 3. If you have multiple account types associated with your phone, select a contact type. Select Google if you want to save contacts to your Google Account; these will be synced automatically with your Google Account online.
-
Page 62: View Contacts
Save a Phone Number You can save a phone number to Contacts directly from the phone keypad. 1. From home, tap Phone > Keypad 2. Enter a phone number and tap Add to a contact. 3. To add the number to an existing contact, tap the existing contact name. To add a new contact, tap Create new contact. -
Page 63: Contacts Screen Layout
2. Tap a contact to view its details. The contact’s detailed listing appears. Contacts Screen Layout The following illustration show’s your Contacts app layout and describes the various features. Item Description Tap to show contact’s details. Contact... -
Page 64: Edit A Contact
Tap to show thumbnail of contact entry. Tap an icon to place a call, send a Image message, etc. Search Search contacts. Index Browse contacts by letter. Add new Add a new contact. Edit a Contact Once you’ve added a contact, you can add or edit any of the information in the entry, assign a caller ID photo, customize with a unique ringtone, and more. -
Page 65: Delete A Contact
Note: To select a type (label) for a phone number, email address, or postal address (such as Mobile, Home, Work, etc.), tap the type to the right of the field. Delete a Contact You can delete a contact from the contacts details page. 1. -
Page 66: Import Contacts
3. In the Share contact via menu, select a method: Bluetooth to send the information via Bluetooth. See Bluetooth for information on pairing and Gmail to send the information as a Gmail attachment. Address the message, add a subject and a message, and then tap Send. -
Page 67: Export Contacts
2. Tap Menu > Settings > Import. You will see the Import contacts menu. 3. Tap Import contacts from .vcf file or SIM card. 4. Follow the onscreen instructions to complete the import. The contacts are imported and stored in the selected account. Export Contacts If you are saving contacts to an account that does not automatically back them up via the Cloud, you can manually back them up to .vcf file or SIM card for re-import if needed. - Page 68 2. Tap Menu > Settings > Export. You will see the Export contacts menu. 3. Tap Export to .vcf file, Share all contacts or SIM card. 4. Follow the onscreen instructions to complete the export. The contacts are exported and saved.
-
Page 69: Messages
Messages With wireless service and your phone’s messages capabilities, you have the opportunity to share information through many different channels and accounts, including Gmail (Google), personal and corporate email, and text and multimedia messages. Text and Multimedia Messages With text messages (SMS), you can send and receive instant text messages between your wireless phone and another messages-ready phone. - Page 70 4. Tap the “Text message” box and then start composing your message. 5. When done, tap Send to send the text message. Send a Multimedia Message (MMS) When you need to add a little more to a text message, you can send a multimedia message (MMS) with photos, voice recordings, audio or video files, contact cards (vCard), or appointments (vCalendar).
- Page 71 7. Tap Send to send the MMS message. Save and Resume a Draft Message While composing a text or multimedia message, tap Back to automatically save your message as a draft. To resume composing the message: 1. From home, tap Messages 2.
- Page 72 Manage Message Conversations Text and multimedia messages that are sent to and received from a contact (or a number) are grouped into conversations or message threads in the Messages screen. Text or MMS conversations let you see exchanged messages (similar to a chat program) with a contact on the screen. Read a Text Message ■...
- Page 73 3. Tap Menu > Delete. 4. Tap Delete to confirm. Delete a Single Message 1. While viewing a conversation, tap and hold the message that you want to delete. 2. Tap Delete on the options menu. 3. When prompted to confirm, tap Delete. View Contact Information from a Message When you have received a message from someone in your stored contacts, you can tap the contact’s photo or icon in the conversation to open a menu of options.
-
Page 74: Gmail
● Spam protection: Enable to make your chats stay private. ● Wireless emergency alerts: View active alerts in your area and set emergency alerts. ● SIM card messages: View messages stored in the SIM card. ● Phone number: Check your phone number. Gmail Use Google’s Gmail service and your Google Account to send, receive, and manage your Gmail messages. - Page 75 The Gmail message is sent. Gmail Composition Options ● Adding Cc/Bcc: In the mail composition window, tap next to To and then add recipients. ● Attaching Photos or Videos: In the mail composition window, tap Attach . Locate and then tap the photo or video you want to attach.
- Page 76 ● Forwarding Gmail Messages: With the Gmail message open, tap Forward , enter a recipient and an additional message, and tap Send Use Gmail Labels Gmail saves all mail in one box, but you can add labels that allow you to sort your Gmail conversation threads.
- Page 77 Mute Gmail Threads If registered on a mailing list, there will be threads with always-continuing conversations. For long threads that are not important, mute the threads and they will no longer appear in the inbox. When mail arrives that includes user's address as a recipient or in Cc, mail will again appear in the inbox. 1.
- Page 78 Add Another Google (Gmail) Account If you have multiple Gmail accounts you wish to view on your phone, you can add them from the Settings > Accounts menu. 1. From home, swipe up and tap Settings > Accounts > Add account. 2.
- Page 79 3. Tap General settings to access settings for all accounts, or tap an account name to configure settings for a specific Gmail account. General settings: Theme, Default notification action, Manage notifications, Conversation view, Conversation list density, Swipe actions, Default reply action, Auto-fit messages, Auto- advance, Open web links in Gmail, Confirm before deleting, Confirm before archiving, and Confirm before sending.
-
Page 80: Internet And Social Networking
Internet and Social Networking The following topics describe how to connect to and use the Internet on your phone, and how to access popular social networking sites such as Twitter. Chrome Browser Your phone supports the Chrome mobile Web browser. If you are signed in with a Google Account, the Chrome browser will import all your bookmarks and other Web preferences for use on your phone. - Page 81 Install the Twitter App on Your Phone Before you can use Twitter on your phone, you have to download and install the app from Google Play. 1. From home, swipe up and tap Play Store 2. Tap Google Play and search for "twitter". 3.
-
Page 82: Connectivity
Connectivity The following topics address your phone’s connectivity options, including USB file transfer and tethering, Wi-Fi, Bluetooth, and more. Transfer Files between Your Phone and a Computer You can use the supplied USB cable to connect your phone directly to your computer and transfer music, photos, and other content files. -
Page 83: Wi-Fi
Transfer Files between the Phone and a Computer 1. Connect your phone to your computer using the supplied USB/charging cable. Insert the smaller end of the cable to the charger/accessory jack at the bottom of the phone. Insert the USB end of the cable into an available USB port on your computer. You may need to remove the USB cable from the charging head to access it. - Page 84 The availability and range of the Wi-Fi signal depends on a number of factors, including infrastructure and other objects through which the signal passes. Turn Wi-Fi On and Connect to a Wireless Network Use the wireless and networks setting menu to enable your phone’s Wi-Fi radio and connect to an available Wi-Fi network.
- Page 85 Wi-Fi is enabled. You will see the names and security settings of in-range Wi-Fi networks. To disable Wi-Fi, tap the slider again 4. Tap a Wi-Fi network to connect, enter the password (if it’s not an open network), and then tap Connect.
-
Page 86: Tethering & Mobile Hotspot
3. Tap the name of the connected access point and then tap Forget. Wi-Fi is disconnected. After disconnecting from an access point, you may need to re-enter the password to reconnect. Wi-Fi Direct Use Wi-Fi Direct to connect directly to other Wi-Fi Direct devices simply via Wi-Fi, without an access point or via the Internet. - Page 87 2. Scan for Wi-Fi networks from the device and select your phone hotspot from the network list. The default name for your phone hotspot is Coolpad Legacy Brisa. You can change the name by tapping Configure Mobile hotspot > Hotspot name.
-
Page 88: Bluetooth
Bluetooth ® Bluetooth is a short-range communications technology that allows you to connect wirelessly to a number of Bluetooth devices, such as headsets and hands-free car kits, and Bluetooth-enabled handhelds, computers, printers, and wireless phones. The Bluetooth communication range is usually approximately 30 feet. - Page 89 2. Tap Connected devices > Connection preferences > Bluetooth. The Bluetooth settings open. 3. Tap the slider to turn Bluetooth on Bluetooth is enabled. To disable Bluetooth, tap the slider again Tip: You can also turn Bluetooth on or off with the toggle menu in the notification panel. Pull down the status bar to display the notification panel and then tap Bluetooth to turn Bluetooth on or off.
- Page 90 The Bluetooth settings open. 3. Tap Pair new device. Nearby devices appear in the “Available devices” list. 4. Tap a device from the “Available devices” list, and follow the onscreen instructions to pair with the device. The Bluetooth device is paired to your phone. ...
- Page 91 Unpairing from a Paired Device 1. From the Bluetooth settings menu, tap Settings next to the paired device you wish to unpair. 2. Tap Forget. The device is unpaired from your phone. To make another connection with the device, you will need to pair again.
- Page 92 Send Information Using Bluetooth You can use Bluetooth to transfer information between your phone and another Bluetooth-enabled device such as a phone or notebook computer. Types of Data You Can Send via Bluetooth You can send the following types of information, depending on the device you are sending to: ●...
- Page 93 3. Tap Menu > Share > Bluetooth. 4. Tap a paired device to receive the data. The contact information is sent. If you see a message to confirm, follow the onscreen instructions. Receive Information via Bluetooth Your phone is capable of receiving a wide variety of file types with Bluetooth, including photos, music tracks, and documents such as PDFs.
-
Page 94: Apps And Entertainment
Apps and Entertainment The following set of topics will explore the features that make your phone so much more than a phone, from the camera and productivity apps to music, entertainment, and more. -
Page 95: Camera And Video
Camera and Video You can use the camera or video camera to take and share photos and videos. Your phone comes with a camera with an autofocus feature that lets you capture sharp photos and videos. Camera Overview The camera's viewfinder screen lets you view your subject and access camera controls and options. ●... - Page 96 ● AI: Enable or disable AI for the camera. Switch Camera Modes You can swipe left or right across the camera mode options to select a camera mode. ● Slo-Mo: Slow Motion mode allows you to record a slow motion video which allows you to capture specific elements.
-
Page 97: Take Photos And Record Videos
2. Tap Settings , and tap a topic to learn more. Take Photos and Record Videos The following topics teach you how to take photos and record videos with your phone’s camera. Capturing Photos/Videos ● File Format for Photos: File format for photos is JPEG. ●... - Page 98 The camera viewfinder appears. 2. Aim the camera at your subject. 3. Tap to take the photo. The shutter clicks and the photo is captured and saved to your phone or SD card. Record Videos Record high-quality videos using your phone’s video camera. Note: If you have an SD card installed, photos and videos are stored to the SD card.
-
Page 99: View Photos And Videos Using Photos
2. Tap Video to switch to video mode and tap Video recording begins. 3. Tap to stop recording. The camera stops recording and the video is captured and saved to your phone or SD card. View Photos and Videos Using Photos Using the Photos application, you can view photos and watch videos that you’ve taken with your phone’s camera, downloaded, or copied onto your storage card or phone memory. - Page 100 For photos that are on your storage card or phone memory, you can do basic editing such as rotating and cropping. You can also easily assign a photo as your contact photo or wallpaper and share photos with your friends. View Photos and Videos You can access and view all your stored photos and videos from your phone’s Photos.
-
Page 101: Edit Photos
After selecting an album from the Albums tab, you can browse through the photos and videos of that album. Tap a photo or video to view it in full screen. By default, the photos and videos in an album are displayed in grid view. - Page 102 5. Tap Rotate to rotate the photo. The photo is rotated and saved to the phone or SD card, depending on your settings. Crop a Photo 1. From home, swipe up and tap Photos The album list opens. 2.
-
Page 103: Share Photos And Videos
5. Drag your finger inward to or outward to resize the crop box. To move the crop box to the part of the photo that you want to crop, drag the crop box to the desired size and position. 6. - Page 104 5. Tap Share and then on the Share via menu, tap Gmail. Follow onscreen prompts to complete and send the message. For more information about using Gmail, see Create and Send a Gmail Message. Send a Photo or Video by Multimedia Message Multimedia Messages (MMS) lets you send photos and videos using your phone’s messages app.
- Page 105 5. Tap Share and then on the Share via menu, tap Messages. Follow the onscreen prompts to complete and send the message. For more information about sending multimedia messages, see Send a Multimedia Message (MMS). Send Photos or Videos Using Bluetooth You can select several photos, videos, or both and send them to someone’s phone or your computer using Bluetooth.
- Page 106 5. Tap Share and then on the Share via menu, tap Bluetooth. Follow the onscreen prompts to complete and send the files. For more information, see Bluetooth.
-
Page 107: Productivity
Productivity Use your phone to stay ahead of the game with calendar, navigation, alarm, office, and more productivity apps. Calendar Use Calendar to create and manage events, meetings, and appointments. Your Calendar helps organize your time and reminds you of important events. Depending on your synchronization settings, your phone’s Calendar stays in sync with your Calendar on the Web, Exchange ActiveSync calendar, Google Calendar, and Outlook calendar. - Page 108 1. From home, swipe up and tap Calendar The Calendar app opens. 2. Tap Add The add event window opens. Enter an event title, start date/time, end date/time, etc., and then tap Save. The event is added to your calendar.
- Page 109 Selecting a Calendar ● If you have more than one calendar, select a calendar in which to add events: Select My Calendar to create an event that will appear only on your phone. Select your Google Account to create a Google Calendar event. If you have several Google Calendars on the Web, select one in which to add your event.
-
Page 110: Navigation Apps
Navigation Apps Your phone offers a number of location-based navigation programs to help you figure out where you are and get you where you’re going. Enable Location Services on Your Phone Before using any location-based services, you must enable your phone’s location feature. Maps Use the Maps app to determine your location, find directions, browse local businesses and attractions, rate and review places, and more. -
Page 111: Google
● Check Route to Destination: From the Maps app, tap , enter your current location and your destination. Route candidates appear in a list. ● Check Detailed Operation for Maps: From the Maps app, tap Menu > Help. Google Search information saved on the phone and in phone applications as well as on the Internet. -
Page 112: Clock
The calculator app launches. 2. Tap onscreen keys for calculations. Calculation results appear. Clock Your phone has a clock app that lets you set alarms, view time in time zones around the world, use a stopwatch, set a timer, and use your phone as a desk clock. Check the Time You can check the phone any time on your phone. - Page 113 2. Tap Menu > Settings > Change date & time. 3. Tap the slider next to Automatic date and time, and then set the date and time as desired. The date and time will reflect your new settings. Set Alarms Set multiple alarms using your phone’s Clock app.
- Page 114 2. Tap the Alarm tab and then tap Create alarm 3. Set the time and tap OK. Set the alarm options, including repeat pattern, alarm tone and add label. The alarm is set. Phone at Alarm Time ● At the set alarm time, the phone sounds the alarm and/or vibrates. ●...
- Page 115 Additional Clock Features Your phone’s clock app provides additional useful features including world clock, stopwatch, and timer functions. All features are available from the clock app display. ■ From home, swipe up and tap Clock The Clock appears. World Clock The world clock lets you keep track of the current time in multiple cities around the globe.
- Page 116 1. From the clock app, tap Stopwatch 2. Tap Start to begin timing. 3. Tap Stop to stop timing. Additional options include Lap to keep track of laps, Share to share timing, and Reset to reset the stopwatch to zero.
-
Page 117: Entertainment And Activities
Entertainment and Activities The following topics provide an overview of your phone’s entertainment apps, from music players and YouTube, to health apps, games, and more. YouTube Music The YT Music app lets you browse, shop, and play back songs purchased as well as songs you have loaded from your own music library. - Page 118 3. Select a library category such as Artists or Albums. 4. Tap a song. The song begins playing. Create Playlists in YT Music Organize music into playlists to fit every occasion. 1. From home, swipe up and tap YT Music 2.
-
Page 119: Youtube
4. Enter a name and tap Create. The playlist is created. YouTube View videos uploaded to YouTube and upload your own videos to your YouTube account. View YouTube Videos You can use the YouTube app to view videos on YouTube even if you aren’t signed in to a YouTube account. - Page 120 The YouTube app launches. 2. Tap Record The Record menu appears. 3. Record a video to upload. Enter a title, description, and select a privacy setting. 4. Tap Upload The video is uploaded to your YouTube channel.
-
Page 121: Settings
Settings The following set of topics will cover your phone’s settings menus and options. For an overview of the settings menu, see Basic Settings. -
Page 122: Basic Settings
Basic Settings The following topics introduce your phone’s basic settings menus. Basic Settings to access your phone’s settings menu. From the home screen, swipe up and tap Settings The table below outlines the top-level settings categories. Category Description Network & internet Enable and set Wi-Fi, mobile, data usage and hotspot options. -
Page 123: Wi-Fi Settings
About phone View device name, legal information, phone number, etc. Access Settings 1. From home, swipe up and tap Settings The settings menu opens. 2. Select categories and then select your settings options. Settings are made and applied. Tip: You can also access settings from the notification panel. -
Page 124: Data Usage Settings
2. Tap Network & internet > Wi-Fi. The Wi-Fi settings menu appears. 3. Tap the Wi-Fi slider to turn Wi-Fi on Wi-Fi is enabled. You will see the names and security settings of in-range Wi-Fi networks. To disable Wi-Fi, tap the slider again 4. -
Page 125: Tethering & Mobile Hotspot Settings
2. Tap Network & internet > Mobile network > Data usage. The data usage window opens. Data Usage Settings Operations ● Set Amount for Alert when Data Usage Increases: From the Data usage window, tap enable Set data warning, and then tap Data warning to set an amount. ●... -
Page 126: Bluetooth Settings
2. Tap Network & internet > Tethering & Mobile Hotspot. The tethering & Mobile Hotspot window opens. 3. Tap Configure Mobile Hotspot and tap the slider to turn Mobile Hotspot on Mobile Hotspot is enabled. To disable Mobile Hotspot, tap the slider again Bluetooth Settings Your phone’s Bluetooth ®... -
Page 127: Apps & Notifications Settings
● Change the Name of a Paired Device: Tap Connected devices > Previously connected devices. Tap Settings next to a paired device name, and then tap Edit , enter a new name, and tap Rename. This setting is available when Bluetooth is enabled. ●... -
Page 128: Battery Settings
Battery Settings Monitor your phone’s battery usage through this settings menu. View which functions are consuming your battery’s charge and at what percentage. 1. From home, swipe up and tap Settings 2. Tap Battery . 3. Tap items to view details. ... -
Page 129: Sound Settings
Set whether to allow the screen to rotate the display with the phone Auto-rotate screen orientation, where applicable. Font size Set font size for display. Display size Make the items on your screen smaller or larger. Screen saver Set current screen saver and the start time. Access Display Settings 1. - Page 130 Volume Set volume for ringtones, alarms, system features, etc. Vibrate for calls Enable vibration with ringtones. Do Not Disturb Enable Do Not Disturb to mute ringtones, notification sound, etc. Shortcut to prevent Set shortcut to prevent ringing. ringing Set your phone’s default ringtone. Phone ringtone Default notification sound Set a default tone for phone notifications.
-
Page 131: Storage Settings
3. Set your sound options. Your sound settings are saved and applied. Storage Settings The storage settings menu lets you manage internal storage on your phone and provides menu choices for an optional SD card (not included). 1. From home, swipe up and tap Settings 2. -
Page 132: Privacy Settings
2. Tap Cool Clean. 3. Tap Storage Cleanup to select items to optimize. Your storage space is freed up. Privacy Settings The privacy settings menu lets you manage app permissions, set lock screen notification options, check location history, etc. Privacy Settings Overview The privacy settings menu allows you to configure the following options: Privacy Setting... -
Page 133: Location Settings
Usage & diagnostics Share data to help improve your Android experience. Access Privacy Settings 1. From home, swipe up and tap Settings 2. Tap Privacy. 3. Set your privacy options. Your privacy settings are saved and applied. Location Settings The location settings menu lets you enable location service, view recent location requests, set Wi-Fi and Bluetooth scanning options, etc. -
Page 134: Security Settings
2. Tap Location. 3. Set your location options. Your location settings are saved and applied. Security Settings The Security settings menus let you set encryption options and credential storage options, set your method for unlocking your phone, and customize lock screen options. Security Setting Description Google Play Protect... - Page 135 Encrypt all data on your phone, display trusted CA certificates, view Encryption & credentials and modify stored credentials, install certificates from storage, remove all certificates, etc. Trust agents Set trust agents. Screen pinning Keep the current screen in view until you unpin. Access Security Settings 1.
- Page 136 ● Pattern ● ● Password Important: To protect your phone and data from unauthorized access, it is recommended that you use the highest security level available (Password protection). It is also recommended you frequently change your password to ensure the safety of your phone and personal data. 1.
- Page 137 1. From the Screen lock settings menu, tap PIN. 2. Enter a PIN, tap Next, re-enter your PIN, and tap OK to save the setting. The screen lock is set. If you fail to enter the correct PIN after five attempts, you will be prompted to wait for 30 seconds before you can try again.
- Page 138 Your fingerprint is enrolled. Face Unlock You can enroll your face to unlock the phone. Follow the instructions below to enroll your face. 1. From home, swipe up and tap Settings 2. Tap Security > Face Unlock > Enroll Face. 3.
-
Page 139: Accounts Settings
Note: If you fail to enter the correct password after five attempts, you will be prompted to wait for 30 seconds before you can try again. Accounts Settings The Accounts settings menu lets you add and manage all your email, social networking, and photo and video sharing accounts. -
Page 140: Digital Wellbeing & Parental Controls Settings
2. Tap Accessibility. 3. Set available accessibility options. Your accessibility settings are applied and saved. Digital Wellbeing & Parental Controls Settings The digital wellbeing & parental controls menu lets you set app timers, bedtime schedules, and set up parental controls. Access Digital Wellbeing &... -
Page 141: Google Settings
2. Tap Digital Wellbeing & Parental Controls. 3. Set available digital wellbeing & parental controls options. Your digital wellbeing & parental controls settings are applied and saved. Google Settings The Google menu lets you set up Google services and preferences, including COVID-19 Exposure Notifications, account services, on-device sharing, etc. -
Page 142: Language And Input Settings
2. Tap Google. 3. Set available Google options. Your Google settings are applied and saved. Language and Input Settings Your phone’s language and input settings let you select a language for the phone’s menus and keyboards, select and configure keyboard settings, configure speech input settings, and set your phone’s mouse/trackpad options. -
Page 143: Date And Time Settings
2. Tap System > Language & input. The Language and input settings menu opens. 3. Set options. The language and input settings are applied and saved. Language and Input Options Some of the language and input options are detailed below. ●... - Page 144 Date and Time Option Description Use network-provided Set the date and time automatically via the connected wireless network. time Set the date manually (only available when Use network-provided time Date option is disabled). Set the time manually (only available when Use network-provided time Time option is disabled).
-
Page 145: Reset Options
Your date and time settings are applied and saved. Reset Options Your phone’s Reset options menu lets you reset your phone's Wi-Fi, mobile, Bluetooth, app preferences settings or erase all data. The Factory data reset erases all data from the phone’s application storage, including: ●... -
Page 146: About Phone Settings
2. Tap System > Advanced > Reset options. The Reset options menu opens. 3. Set options. The reset settings are applied and saved. If you’re performing Erase all data (factory reset), follow the prompts to confirm the data removal. - Page 147 Check the phone’s model number and serial number. Model & hardware IMEI Check IMEI information. Check the Android version, security patch level, baseband version, Android version kernel version and build number. Check the phone’s IP address. IP address Check the phone’s Wi-Fi MAC address. Wi-Fi MAC address Check the phone’s Bluetooth address.
-
Page 148: Getting Help
Getting Help The following set of topics will cover troubleshooting tips, phone specifications, and how to contact your carrier and manage your wireless service. -
Page 149: For Assistance
For Assistance The following topics address areas of support for your phone, including troubleshooting, specifications, account information, warranty information, and customer service contact information. Troubleshooting Check the questions and answers below for troubleshooting solutions for common phone issues. Check Here First Question: Phone freezes/operation is unstable. -
Page 150: Specifications
Specifications The following tables list your phone’s and battery’s specifications. Phone Specifications Item Description Dimensions 6.52 inches x 3.01 inches x 0.34 inches Form Factor Bar, Touchscreen Antenna Built-in Network Mode LTE/UMTS/CDMA/GSM Camera Rear camera: 16+5 MP AF/front camera: 16 MP FF Earphone Jack CTIA Standard earphone jack Screen Type... - Page 151 Manage Your Account Access information about your account. You can: ● Check your minutes. ● ® Re-Boost (add money to your account). ● Change plans. ● And more. From Your Phone Access account information and other self-service tools from Boost Zone. ■...
-
Page 152: Fcc Notice And Cautions
Set Up Worry-Free Payments with Auto Re-Boost It’s the easiest way to make sure your account stays on and active. Use a credit card, debit card or bank account—whatever’s best for you. Visit boostmobile.com/reboost to get the details on all your Re-Boost options. FCC Notice and Cautions This device and its accessories comply with Part 15 of FCC Rules. - Page 153 scientific and engineering experts drawn from industry, government, and academia after extensive reviews of the scientific literature related to the biological effects of RF energy. The exposure limit for wireless mobile phones employs a unit of measurement known as the Specific Absorption Rate, or SAR. The SAR is a measure of the rate of absorption of RF energy by the human body expressed in units of watts per kilogram (W/kg).
-
Page 154: Fcc Hearing-Aid Compatibility (Hac) Regulations For Wireless Devices
Reproduction, transfer, distribution of the contents herein in any manner without the prior written permission of Coolpad Technologies, Inc. is prohibited. Coolpad Technologies, Inc. reserves the right to add, modify or delete, any of the contents herein or withdraw this documents at any time without prior...
Need help?
Do you have a question about the Legacy brisa and is the answer not in the manual?
Questions and answers