Table of Contents
Advertisement
Quick Links
Advertisement
Table of Contents

Related Manuals for Coolpad porto s E570


Summary of Contents for Coolpad porto s E570
- Page 1 Coolpad E570 User Manual...
-
Page 2: A Message From Coolpad
User guide in the operating system and Safety and regulatory guide. User guide app can be launched by tapping Porto S E570! icon on the Home screen. For more detailed information on safety precautions, please refer to Safety and regulatory guide. -
Page 3: Trademarks And Copyrights
TRADEMARKS AND COPYRIGHTS Copyright © 2015 Coolpad Technologies Inc. All Rights Reserved. All materials in this document including, without limitation, the design, the text, and any and all marks (unless otherwise indicated) are the property of Coolpad Technologies, Inc. Coolpad and the Coolpad logo are registered trademarks of Yulong Computer Telecommunication Scientific (Shenzhen) Co.,... -
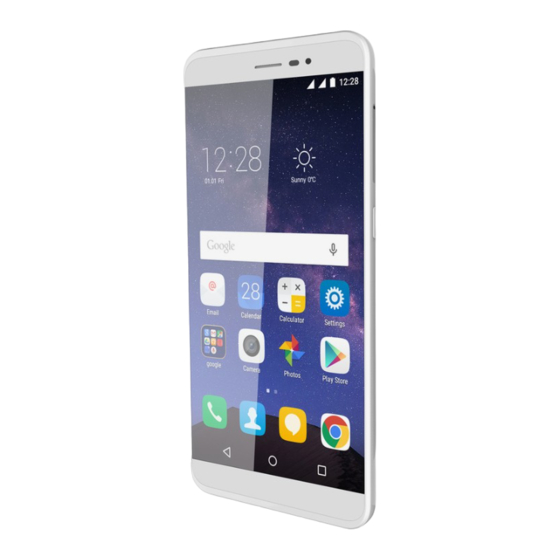
Page 4: Getting Started
GETTING STARTED Get off to a running start with your new Coolpad E570! Device layout... -
Page 5: Charging The Battery
Main keys Function • Press and hold to turn your phone on or off. Power • Press to turn on or lock the screen. • Tap to open the list of recent apps. Recents • Tap to return to the Home screen. Home •... -
Page 6: Sim Card And Micro Sd Card
SIM card and Micro SD card 1. Insert the ejection pin into the hole to loosen the card tray. 2. Pull out the card tray gently. Place the Micro SIM card on the card tray 1 and place Nano SIM card or Micro SD card on the card tray 2. -
Page 7: Power On/Off, Restart And Aeroplane Mode
Power on/off, Restart and Aeroplane mode The Power key is located on the upper, right-hand side of your phone. Power on: When the phone is off, press and hold the Power key for a few seconds to turn on the phone. Power off: When the phone is on, press and hold the Power key until the options pop up. -
Page 8: Touch Screen
Touch screen Tapping To open an app or to launch other functions, tap it with your finger. Tapping and holding Tap and hold an item or the screen for more than 2 seconds to access available options. Dragging To move an item, tap and hold it and drag it to the target position. - Page 9 Double-tapping Double tap on an image to zoom in. Double tap again to return. Swiping Swipe left or right on the Home screen to view other panels. Spreading and pinching Spread two fingers apart on a webpage or image to zoom in a part.
-
Page 10: Home Screen
Home screen Basic layout Customizing your Home screen The Home screen displays widgets, favorite apps, and more. To view other panels, swipe left or right. On the Home screen, tap and hold an empty area to access the available options including changing wallpaper settings and add widgets. -
Page 11: Notifications And Quick Settings Panel
Notifications and Quick Settings panel Notifications alert you to the arrival of new messages, calendar events, and alarms, as well as ongoing events. • When a notification arrives, its icon appears at the top of the screen. Icons for pending notifications appear on the left, and system icons showing things like the Wi-Fi signal, mobile carrier signal, or battery strength are on the right. -
Page 12: Entering Text
• Location: Turn the location service on or off. • Display brightness: Slide to lower or increase the brightness of your screen. Entering text Using the text input panel The input panel can be used to enter text. Tap the Back key to hide the input panel. -
Page 13: Taking Screenshots
Taking screenshots Focus on the image displayed on your phone screen. Press the Power key and lower Volume key at the same time. The image will be auto-saved in Photos. -
Page 14: Installing Or Uninstalling Apps
APPS Installing or uninstalling apps To purchase and download apps, tap to enter the Play Store. Note: Apps can also be downloaded from web pages using the phone browser or third-party app download software. Installing apps Browse apps by category or tap to search for a keyword. -
Page 15: Answering Or Rejecting A Call
> Settings > Speed dial. Tap a number key and choose a contact from the list. Tap the keypad, tap and hold the number key assigned to a contact to quickly call the contact. Note: The number key 1 is the default key for voicemail. It can't be set as a speed-dial number. -
Page 16: Adding A Contact
Tap Recents to view a list of your most recent incoming and outgoing calls. and then choose Call history to see more calls. Arrow icons beside a call indicate the type of call, and multiple arrows indicate multiple calls: • Missed call •... -
Page 17: Creating A Message
Note: You can also slide the scroll bar at the right of Contacts to quickly search for a contact. Editing a contact On the Contacts screen, select the contact you want to edit and then tap Edit relevant information and then tap to save the contact. -
Page 18: Searching Messages
Searching messages On the Messaging screen, tap Enter message content or keywords to quickly search for the message you need. Deleting a message On the Messaging screen, tap and hold the message conversation you want to delete. to delete the message conversation. Customising message settings On the Messaging screen, tap >... -
Page 19: Browsing Web Pages
• After opening a mail, swipe to the left or right to read earlier or later mail conversations. • at the top of your phone screen to manage your mails. • On the Email screen, you can tap > Settings to add a new email account. -
Page 20: Taking A Photo
Calendar On the Home screen, tap to enter the Calendar screen. • If you have synced your Gmail account, the first time you open the Calendar app on your phone; it will show your current calendar events. • To modify the Calendar view, tap choose Schedule, Day, 3 Day, Week, or Month... - Page 21 Fotos Find photos fast When you open the Google Photos app, you'll see all the photos and videos on your device and, if you turned on "back up & sync," anything else synced to your Google Photos library. Open the Google Photos app At the top left, touch the menu ico >...
-
Page 22: Operating The Alarm
Clock On the Home screen, tap to enter the Clock screen. You can set alarms, check the current time in many cities around the world, set a specific duration or time an event. Operating the alarm On the Clock screen, tap to switch to the Alarm tab. -
Page 23: Watch Videos
YouTube On the Home screen, tap to enter the YouTube screen. You can watch the world’s videos and keep up with your favorite YouTube channels. Sign in to access your subscriptions, playlists, uploads, purchases, history and more. Sign in to YouTube To sign in, go to >... -
Page 24: Google Apps
Limit cellular data usage by going > Settings > General > Limit cellular data usage. When enabled, HD video will only stream on a Wi-Fi connection. Google apps Google provides entertainment, social media, and business apps. Google Play Store is all-in-one entertainment point with music, movies, books and apps on the web. - Page 25 tap Add network in the pop-up window. Enter the SSID network name and select the correct security mode. Tap Save. Setting advanced Wi-Fi options On Wi-Fi screen, tap > Advanced. You will be notified whenever a public network is available. If you do not want to be notified, drag the slider for Network notification to the left.
-
Page 26: Sending Files Via Bluetooth
automatically connect to your phone whenever it is turned on. Turn Bluetooth on and your phone will automatically scan for nearby Bluetooth devices. If your phone stops scanning before other Bluetooth device is ready, tap > Refresh. Within the list, tap the ID of the Bluetooth device so as to pair with it. -
Page 27: Cellular Networks
Cellular networks On the Home screen, tap to enter the Settings screen. Under Wireless & networks, tap More > Cellular networks. • Data roaming: Connect to data services when you are roaming. • Preferred network type: With 4G/3G/2G available. • Access Point Names: Set up access point names (APNs). - Page 28 the time set. • Daydream: When Daydream is on, your device displays photos, colours, and more while it is charging or docked. Set the daydream type or when to daydream. Tap the daydream switch to turn off this function. • Font size: Set the font size according to your preference.
-
Page 29: Setting A Screen Unlock Pattern
To control what location information your device can use, tap > Personal > Location. When the Location switch is on, you can do any of the following: • Change the Location mode between High accuracy, Battery saving and Device only. •... -
Page 30: Adding An Account
Setting a screen unlock voice You can set a screen unlock voice to unlock your phone. • > Personal > Security > Screen lock > Voice unlock. • Speak a command with 3-6 syllables, and then repeat 3-6 times. • Tap Continue. -
Page 31: Date And Time
Note: Before restoring factory settings, it is vital that you first back up all important data on the phone; otherwise all data will be lost after factory settings have been restored. Date & time On the Home screen, tap > System > Date & time. Automatic date &... - Page 32 Read the safety information carefully to ensure that you use this wireless device in a correct and safe manner. Yulong Computer Telecommunication Scientific (Shenzhen) Co., Ltd. Address: Coolpad Information Harbor, 2nd Mengxi Road, Hi-Tech Industrial Park (North), Nanshan District, Shenzhen, P.R.C...
-
Page 33: Technical Data
TECHNICAL DATA Specs & hardware Specifications 143 × 72 × 7.6 mm Dimensions Form factor Antenna Built-in SIM card Micro SIM or Nano SIM GSM (900/1800/1900MHz) Network UMTS (900/2100MHz) LTE (800/1800/2100/2600MHz) Camera Front 2MP + Rear 8MP Ф3.5mm CTIA standard Headset jack Screen Parameters Type... -
Page 34: In-Box Contents
In-box contents Name Quantity Phone Battery (built-in) Travel Charger USB Cable Warranty Card Quick Start Guide Headphones Note: The items supplied with the phone and any available accessories may vary depending on the region or service provider. -
Page 35: Declaration Of Hazardous Substances
Declaration of hazardous substances Toxic or hazardous substances or elements Poly Parts Name ated (VI) Board and ○ ○ ○ ○ ○ ○ Accessori ○ ○ ○ ○ ○ ○ Plastics ○ ○ ○ ○ ○ ○ Metals ○ ○ ○... - Page 36 Safety and regulatory guide...
-
Page 37: Please Read Before Proceeding
Please read before proceeding THE BATTERY IS NOT FULLY CHARGED WHEN YOU TAKE THE DEVICE OUT OF THE BOX. Important health information and safety precautions When using this product, the safety precautions below must be taken to avoid possible legal liabilities and damages. Retain and follow all product safety and operating instructions. -
Page 38: Environment Restrictions
• Keep the product dry and away from water or other liquids as this could result in a short circuit. • The phone should only be connected to products that bear the USB-IF logo or have completed the USB-IF compliance program. •... -
Page 39: Hearing Aids
Hearing aids Some digital wireless phones may interfere with some hearing aids. In the event of such interference, you may want to consult your service provider, or call the customer service line to discuss alternatives. Electrical safety • Avoid using your phone near metal structures (for example, the steel frame of a building). - Page 40 • There are noticeable signs of overheating. • The product does not operate normally when you follow the … operating instructions. • Avoid hot areas. • Avoid wet areas. • Avoid using your device after a dramatic change in temperature. NOTICE: When taking the device from low-temperature conditions into a warmer environment or from high-temperature conditions into a cooler environment, allow the device to...
- Page 41 (RoHS) and its amendments. TCCM s.r.o. hereby declares that this product conforms to the requirements and other relevant provisions of Directive 1999/5 EC. A copy of the Declaration of conformity is available at: www.coolpad.eu/support...
Need help?
Do you have a question about the porto s E570 and is the answer not in the manual?
Questions and answers