Table of Contents
Advertisement
Quick Links
EN
Operating Manual
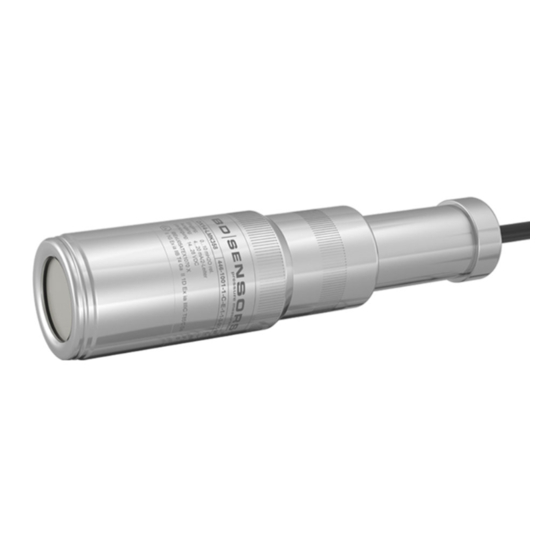
Probe LMK / LMP
LMK 306, LMK 307, LMK 307T, LMK 309, LMK 358,
LMK 358H, LMK 382, LMK 382H, LMK387, LMK 387H
LMK 806, LMK 807, LMK 808, LMK 809, LMK 858,
LMP 305, LMP 307, LMP 307iLMP 307T, LMP 308,
LMP 308i, LMP 808
LMP 308
www.bdsensors.com
Headquarters
Eastern Europe
BD SENSORS GmbH
BD SENSORS s.r.o.
BD-Sensors-Str. 1
Hradištská 817
D - 95199 Thierstein
CZ - 687 08 Buchlovice
Germany
Czech Republic
Tel.: +49 (0) 9235-9811-0
Tel.: +42 (0) 572-4110 11
Fax: +49 (0) 9235-9811-11
Fax: +42 (0) 572-4114 97
Russia
China
BD SENSORS RUS
BD SENSORS China Co, Ltd.
39a, Varshavskoe shosse
Room B, 2nd Floor, Building 10,
RU - Moscow 117105
No. 1188 Lianhang Rd.
201112 Shanghai,
Russia
China
Tel.: +7 (0) 95-380 1683
Tel.: +86 (0) 21-51600 190
Fax: +7 (0) 95-380 1681
Fax: +86 (0) 21-33600 613
The addresses of our distribution partners are listed on our
homepage www.bdsensors.com. It is possible to download
data sheets, operating manuals, ordering codes and certifi-
cates, as well.
1. General information
1.1 Information on the operating manual
This operating manual contains important information on
proper usage of the device. Read this operating manual
carefully before installing and starting up the pressure
measuring device.
Adhere to the safety notes and operating instructions which
are given in the operating manual. Additionally applicable
regulations regarding occupational safety, accident preven-
tion as well as national installation standards and engineer-
ing rules must be complied with!
This operating manual is part of the device, must be kept
nearest its location, always accessible to all employees.
This operating manual is copyrighted. The contents of this
operating manual reflect the version available at the time of
printing. It has been issued to our best knowledge. BD
SENSORS is not liable for any incorrect statements and
their effects.
– Technical modifications reserved –
1.2 Symbols used
DANGER! – dangerous situation, which may result in
death or serious injuries
WARNING! – potentially dangerous situation, which
may result in death or serious injuries
CAUTION! – potentially dangerous situation, which
may result in minor injuries
!
CAUTION! – potentially dangerous situation, which
may result in physical damage
NOTE – tips and information to ensure a failure-free
operation
1.3 Target group
WARNING! To avoid operator hazards and damages of
the device, the following instructions have to be worked
out by qualified technical personnel.
1.4 Limitation of liability
By non-observance of the operating manual, inappro-
priate use, modification or damage, no liability is as-
sumed and warranty claims will be excluded.
1.5 Intended use
- The probes have been developed for continuous level
measurement. It is the operator's responsibility to check
and verify the suitability of the device for the intended
application. If any doubts remain, please contact our
sales department in order to ensure proper usage. BD
SENSORS is not liable for any incorrect selections and
their effects!
- Permissible media are gases or liquids (no solids and
frozen media), specified in the data sheet. In addition it
has to be ensured, that this medium is compatible with
the media wetted parts.
- The technical data listed in the current data sheet are
engaging and must be complied with. If the data sheet
is not available, please order or download it from our
homepage. (http://www.bdsensors.com)
WARNING! – Danger through improper usage!
1.6 Package contents
Please verify that all listed parts are undamaged included in
the delivery and check for consistency specified in your
order:
- probe
- mounting instructions
- with option SIL2 version:
Functional Safety Manual, Functional Safety Data
Sheet
2. Product identification
The device can be identified by its manufacturing label. It
provides the most important data. By the ordering code the
product can be clearly identified.
Nominal
Type designation
Ordering code
pressure
range
Signal
Supply
Cable colours
Fig. 1 manufacturing label
!
The manufacturing label must not be removed from the
device!
3. Mechanical installation
3.1 Mounting and safety instructions
WARNING! Install the device only when depressurized
and currentless!
WARNING! This device may only be installed by
qualified technical personnel who has read and under-
stood the operating manual!
!
Handle this high-sensitive electronic precision
measuring device with care, both in packed and
unpacked condition!
!
There are no modifications/changes to be made on the
device.
!
Do not throw the package/device!
!
To avoid damaging the diaphragm, remove packaging
and protective cap directly before starting assembly.
The delivered protective cap has to be stored!
!
Place the protective cap on the pressure port again
immediately after disassembling.
!
Handle the unprotected diaphragm very carefully - it is
very sensitive and may be easily damaged.
!
Do not use any force when installing the device to
prevent damage of the device and the plant!
!
When placing the device into operation or after mainte-
nance work, the probe has to be submerged slowly into
the medium! A rough immersion into the medium can
damage or destroy the diaphragm.
!
If there is any danger of damage by lightning or
overpressure when the device is installed outdoor, we
suggest
putting
a
sufficiently
overpressure protection between the supply or switch
cabinet and the device
3.2 Installation steps for probe
- Carefully remove the pressure measuring device from
the package and dispose of the package properly.
- Mount the device according to your demands.
Usually, the probe has been delivered without mount-
ing accessories. For different mounting demands,
BD SENSORS offers as accessories mounting clamps,
terminal clamps and mounting flanges.
Do not use freely suspended probes with an FEP cable
if effects due to highly charging processes are ex-
pected.
3.3 Installation steps for flange version
(LMK 382 / LMK 382 H)
- Carefully remove the pressure measuring device from
the package and dispose of the package properly.
- Please ensure that the mounting thread is clean and
free of damage.
- Check to ensure that the O-ring fits properly in the
groove.
- Screw in the mounting thread of the transmitter in the
transmitter flange.
- Next, tighten it by an open-end wrench. (approx. 25 Nm)
- Install the flange according to your demands.
If a new transmitter flange is needed, it can be ordered
from BD SENSORS.
3.4 Removing the protection cap (if existing)
For the protection of the diaphragm, some of the probes
have a plugged-on protection cap. If the device shall be
used in high-viscosity media such as sludge, a removal of
the cap before start-up is necessary. Thus, the sensor
becomes flush and the medium will attain quickly to the
diaphragm.
If it is necessary for your application to remove the
protection cap, this has to be done with utmost care.
To prevent a damage of the diaphragm, please follow
these instructions.
Removal by hand
- Hold the probe in a way that the protection cap points
upwards.
- Hold the probe with one hand on the sensor section
(1).
- Remove the protection cap (2) with the other hand.
Serial
Removal with a tool (recommended)
number
Fig. 2 removal of protection cap
- Hold the probe in a way that the protection cap points
upwards.
- Slide a small tool such as a screwdriver (8) straight
through two opposite drill holes in the protective
cap (2).
- Lever it off by moving up the handle of the screwdriver.
Make sure that the sensor (7) under the protection cap
will not be damaged!
3.5 Cable protection (optional)
On order, the probe has been delivered with cable protec-
tion; if the device has optionally been prepared for mounting
with stainless steel or PVC pipe, a suitable cable protection
has to be mounted by the customer.
The probe must be installed in such a way that rubbing
or impact of the device, e. g. against a tank wall, is
prevented. It is also important to consider the operating
conditions such as flow conditions.
4. Electrical Installation
WARNING! Install the device only when currentless!
Establish the electrical connection of the device according to
the technical data shown on the manufacturing label, the
following table and the wiring diagram.
Pin configuration:
Electrical connections
Supply +
Supply −
Signal + (only 3-wire)
LMK 307T and LMP 307T
Supply P+
Supply P–
Supply T+
Supply T–
dimensioned
cable colours
wh (white)
bn (brown)
gn (green)
Shield
gn/ye (green / yellow)
cable colours
wh (white)
bn (brown)
gr (gray)
pn (pink)
Shield
gn/ye (yellow / green)
Advertisement
Table of Contents

Related Manuals for BD Sensors LMK 306


Summary of Contents for BD Sensors LMK 306
- Page 1 SENSORS is not liable for any incorrect selections and groove. their effects! LMK 306, LMK 307, LMK 307T, LMK 309, LMK 358, - Screw in the mounting thread of the transmitter in the LMK 358H, LMK 382, LMK 382H, LMK387, LMK 387H - Permissible media are gases or liquids (no solids and transmitter flange.
- Page 2 If the diaphragm is calcified, it is recom- In order to facilitate stock keeping and maintenance, the mended to send the device to BD SENSORS for decalcifica- Prevent the damage or removal of the PTFE filter probe head is plugged to the cable assembly with a connec- tion.
Need help?
Do you have a question about the LMK 306 and is the answer not in the manual?
Questions and answers