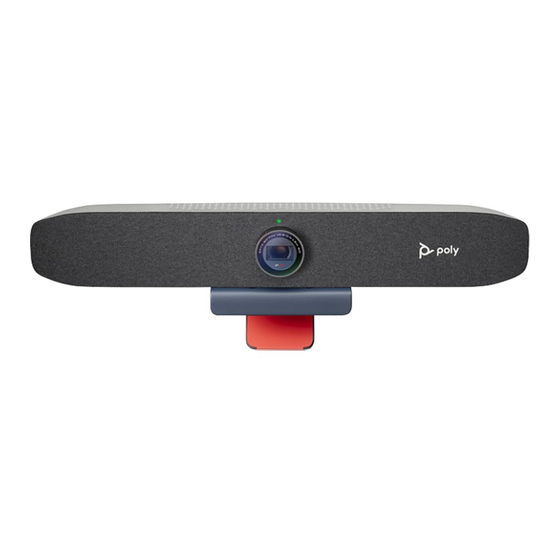
Poly Studio P15 Manual
Hide thumbs
Also See for Studio P15:
- User manual (11 pages) ,
- Manual (8 pages) ,
- Documentation (10 pages)
Table of Contents
Advertisement
Polycom Documentation
Copyright © 2021, Polycom, Inc. All rights reserved. No part of this document may be reproduced, translated into
another language or format, or transmitted in any form or by any means, electronic or mechanical, for any purpose,
without the express written permission of Polycom, Inc
6001 America Center Drive
San Jose, CA 95002
USA
Printed from Polycom, Inc. (http://documents.polycom.com)
Advertisement
Table of Contents

Summary of Contents for Poly Studio P15
- Page 1 Polycom Documentation Copyright © 2021, Polycom, Inc. All rights reserved. No part of this document may be reproduced, translated into another language or format, or transmitted in any form or by any means, electronic or mechanical, for any purpose, without the express written permission of Polycom, Inc 6001 America Center Drive San Jose, CA 95002 Printed from Polycom, Inc.
-
Page 2: Table Of Contents
Poly Studio P15 Hardware Overview........ -
Page 3: Before You Begin
Before You Begin This guide describes how to use the Poly Studio P15 personal video bar. Audience, Purpose, and Required Skills This guide is intended for beginning users, as well as intermediate and advanced users, who want to learn more about the features available with their Poly Studio P Series device. -
Page 4: Privacy Policy
Privacy Policy Poly products and services process customer data in a manner consistent with the Poly Privacy Policy. Please direct comments or questions to privacy@poly.com Related Topics Related Poly and Partner Resources Printed from Polycom, Inc. (http://documents.polycom.com) Page 4... -
Page 5: Getting Started
Before you use your device, familiarize yourself with its features. Poly Studio P15 Hardware Overview The following figures display the hardware features on the Poly Studio P15 personal video bar. The table lists each feature numbered in the figures. Front View Table 1. -
Page 6: Use The Poly Studio P Series Device Privacy Shutter
Security lock Related Topics Getting Started Use the Poly Studio P Series Device Privacy Shutter Your Poly Studio P Series device provides a built-in physical cover that blocks the camera lens to protect your privacy. Procedure • Do one of the following: Rotate the privacy shutter ring counterclockwise to open the shutter. -
Page 7: Computer And Cable Requirements
Getting Started Computer and Cable Requirements Make sure that your computer and USB cable meet the following requirements to use a Poly Studio P series device as the camera and audio accessory. Your computer must have one of the following operating systems: •... -
Page 8: Led Status Indicators
LED Status Indicators Your device provides an LED above the camera to help you understand the device’s behaviors. The following table lists each LED and its associated status. Table 1. Basic Poly Studio P15 LED Indicators Status Indicator Status Device is powered on, the shutter is open, and the device is... -
Page 9: Advanced Tips For Great Video Conferences
• Mount and position the camera so that your eyes are level with the top third of your screen and your face appears in the middle area of the video stream. • Avoid wearing bright colors, all-light or all-dark clothing, or very busy patterns like small checks or narrow stripes. - Page 10 Camera and People Positioning • Try not to fidget too much, especially if you’re the only one on camera. • Include all the people in the room (if possible), or introduce everyone in the room at the beginning of a meeting. •...
-
Page 11: Accessibility Features
Bright lighting increases the range of in-focus objects, but inappropriate direct lighting might make you look harsh or somber. Poly recommends using indirect fluorescent lighting in a mid- range, neutral color temperature (3600 K to 4500 K). You can find the color temperature of your lighting on the packaging. -
Page 12: Users Who Are Deaf Or Hard Of Hearing
Related Topics Getting Started Users Who Are Deaf or Hard of Hearing Your device includes accessibility features for users who are deaf or hard of hearing to use the system. The following table lists the accessibility features for users who are deaf or hard of hearing. Table 1. - Page 13 The following table lists the accessibility features for users with limited mobility. Table 1. Accessibility Features for Users with Limited Mobility Accessibility Feature Description Your device has an integrated speaker and Built-in speaker and microphone microphone that enable you to hear audio and speak without having to use a headset.
-
Page 14: Using Your Poly Studio P Series Device
Connect your Poly Studio P Series device to your computer with the provided USB cable. Once you plug in the device, you can start using the Poly Studio P Series personal video bar. Default Poly Studio P Series Device Features Several features are enabled by default on your device. -
Page 15: Set Poly P Series Device As The Default Audio And Video Device
Set Poly P Series Device as the Default Audio and Video Device When you use the Poly Studio P Series personal video bar with a supported application for video calls, you may need to set the device as the default audio and video device of your application. -
Page 16: Factory Reset Poly Studio P15
Poly Lens Desktop app. Note MacOS doesn’t support automatic updates. For more information on updating your device, see the Poly Lens Desktop App User Guide. Related Topics Using Your Poly Studio P Series Device Printed from Polycom, Inc. (http://documents.polycom.com)


Need help?
Do you have a question about the Studio P15 and is the answer not in the manual?
Questions and answers