Subscribe to Our Youtube Channel
Summary of Contents for Havis TSD-201
- Page 1 Owner’s Manual 12.5" Capacitive Touch Screen Display with Integrated Hub TSD-201 TSD-201_0MN_11-20...
-
Page 2: Before Beginning
Before Beginning Havis is pleased to provide this Owner’s Manual to aid in the proper installation and use of the TSD-201, 12.5" Capacitive Touch Screen Display with Integrated Hub. For questions regarding the set-up of your TSD-201, 12.5" Capacitive Touch Screen Display with Integrated Hub , please contact Havis at 1-800-524-9900 or visit www.havis.com for additional product support and information. -
Page 3: Specifications
Certifications CAN ICES-3 (A)/NMB-3(A) FCC 47CFR, Part 15 compliance: This is an FCC Class B device. Any changes or modifications to the model TSD-201 not expressly approved by Havis, Inc. could void the user's authority to operate this equipment. EU DECLARATION OF CONFORMITY [CWN1] Manufacturers Name: Havis, Inc. -
Page 4: Parts Included
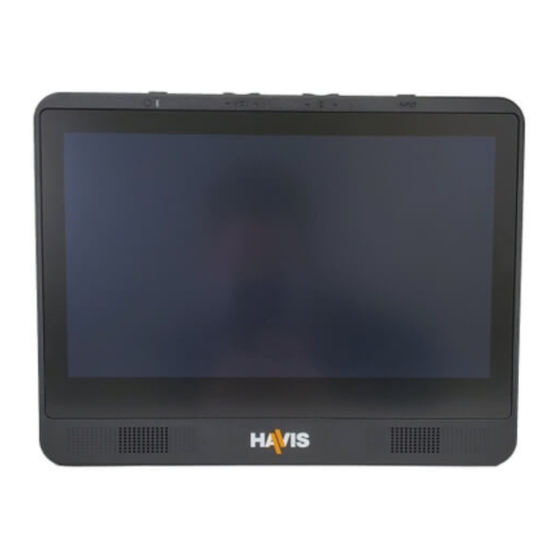
Parts Included 12.5” CAPACITIVE TOUCH SCREEN Power Volume Brightness Input Button Control Control Switch (- and +) (- and+) Power Indicator 2-Point Multi-Touch Capacitive Screen Speaker (right) Speaker (left) VESA 75 Mounting (4x M4 thread) Strain Relief Anchor Points Strain Relief Anchor Points... -
Page 5: Display Hardware
EXTENDING THE 20 FOOT USB CABLE IS NOT RECOMMENDED UNLESS AN ACTIVE (INDEPENDENTLY POWERED) REPEATER IS USED. POWER SUPPLY, CABLES, & MOUNTING HARDWARE (Havis Part # HW-EL-0143) (Havis Part # HW-EL-0006) (Havis Part # HW-EL-0078) Power Supply Hardwareincludes: 1. Zip Ties (2) 2. -
Page 6: Port Identification
Port Identification RIGHT HAND LEFT HAND SIDE VIEW SIDE VIEW BE CERTAIN TO CONNECT THE USB CABLES TO THE CORRECT USB PORTS ON THE TOUCH SCREEN DISPLAY AS OUTLINED IN SIDE VIEW. POWER (12V DC IN) USB 3.0 (to Keyboard/ Other) USB 3.0 (to External PC) HDMI... -
Page 7: Installation
Installation CONNECTING TO POWER 1. Connect threaded end of the DC input cable to the Touch Screen Display and the other end to the Lind Power Supply. 2. Connect one end of the cigarette lighter power cable to the Lind Power Supply. 3. - Page 8 Installation CONNECTING TO EXTERNAL PC, PHONE, AND OPTIONAL KEYBOARD/ACCESSORIES (NOT INCLUDED WITH TSD-201, 12.5" CAPACITIVE TOUCH SCREEN DISPLAY WITH INTEGRATED HUB ) 1. Connect one end of the USB 2.0 cable (male-female) to Touch Screen Display and the other end to the optional keyboard or other accessory (not included).
-
Page 9: Example Installation
Installation EXAMPLE INSTALLATION Keyboard External PC USB 3.0 USB 3.0 HDMI LAN/ETHERNET USB 3.0 Router USB-C USB 3.0 Printer Scanner Phone External PC Tablet... -
Page 10: Cable Management
VEHICLE MOUNTING 1. Havis provides a variety or mounting solutions including vehicle-specific mounting solutions for the TSD-201. To check availability of a mounting solution for your vehicle, go to www.havis.com or call 1-800-524-9900 for more information. 2. Be sure to follow all installation instructions included with your mounting solution. -
Page 11: Operation
Operation TURNING ON/OFF 1. With the Touch Screen Display connected to the Lind Power Supply and the Input Device, press the Power Button. 2. The Power Indicator will illuminate green (Powered ON Mode). 3. The Touch Screen Display receives data from the system and displays the output on the screen. If Power Indicator illuminates amber, Touch Screen Display has power (Standby Mode), but is not receiving signal from input device. -
Page 12: Using Control Buttons
Operation USING CONTROL BUTTONS 1. Volume: Press and hold either button (VOL+ or VOL-) until the volume OSD appears on the screen. Then, press (+) to increase, or (-) to decrease the volume. 2. Brightness: Press and hold either button (+ or -) until the brightness OSD appears on the screen. Press (+) to increase, or (-) to decrease the brightness. -
Page 13: Related Products
Related Products Havis offers a wide variety of accessory products specifically for use with your TSD-201. For more information or to order, please visit www.havis.com. TSD Mounting Solutions Havis offers a variety of mounting solutions, including light-weight motion devices and vehicle-specific mounting solutions for the TSD-201, 12.5"...


Need help?
Do you have a question about the TSD-201 and is the answer not in the manual?
Questions and answers