
Related Manuals for Stulz Mini-Space DX CCD51A


Summary of Contents for Stulz Mini-Space DX CCD51A
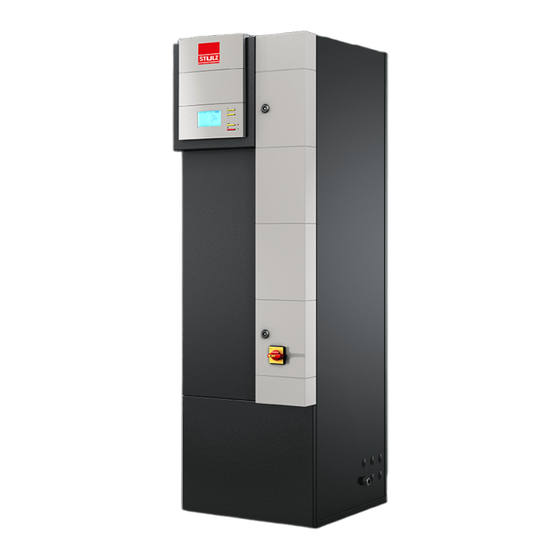
- Page 1 IT Cooling Solutions Mini-Space DX Index G20 Issue 1.2017 Precision Air Conditioning Units 380-415/3/50 Original instructions...
-
Page 2: Table Of Contents
Contents 1. Safety ...........................3 1.1 Marking ..............................3 1.2 Safety instructions ..........................3 1.3 Handling refrigerants .........................3 1.4 Safety and environmental requirements ....................4 2. Residual risks ......................5 3. Transport / Storage .....................7 3.1 Delivery of units ..........................7 3.2 Transport ............................7 3.3 Storage ..............................7 4. -
Page 3: Safety
This cooling unit contains fluorinated greenhouse gas covered by the Kyoto protocol. In STULZ units the refrigerant R407C (R410A in units with EC compressor) is used as standard. Refrigerants are volatile, or highly volatile fluorinated hydrocarbons which are liquefied under pressure. They are incombustible and not hazardous to health when used as intended. -
Page 4: Safety And Environmental Requirements
Independent conversion and manufacture of replacement parts The system may only be converted or modified after consultation with STULZ. Original replacement parts and re- placement parts/accessories authorised by STULZ are an aid to safety. Unacceptable operating methods The operating safety of the system is only guaranteed when it is used as intended. -
Page 5: Residual Risks
2. Residual risks Transport, Installation Area Cause Danger Safety note Under the unit Defective lifting device Bruising Keep away from under the unit Beside the unit Uneven or insufficient Bruising by tipping Make sure, the foundation is even foundation or raised floor over of the unit and stable and that the raised floor stand... - Page 6 Operation Area Cause Danger Safety note In the lower part of Leaks in the refrigerant Discharge of refrigerant under In case of fire wear pro- the unit, refrigerant piping, defective safe- high pressure, explosion of tective mask. piping ty valve/high pressure pipe sections, formation of acid switch, fire vapours with open flames...
-
Page 7: Transport / Storage
3.2 Transport The Stulz A/C units can be moved by lifting devices with ropes, for this the ropes have to be fixed at the pallet, and the upper unit edges have to be protected by wooden laths or metal brackets in such a way that they could not be caved in. -
Page 8: Description
5, 7, 9, 13, 15, 18, 22, 25 D, U - Downflow, Upflow CC = Compact Clima Page code Manufacturer address: / 07.2016 / G20 STULZ GmbH Page code: Klimatechnik DE - German Holsteiner Chaussee 283 Date of issue Index... -
Page 9: Intended Use
4.2 Intended use This A/C unit is used to control room temperature and air humidity. The A/C unit is designed for indoor installation. Any use beyond this is not deemed to be use as intended. 4.3 Function of the A/C unit The A/C unit is exclusively operated by the controller in the front panel and the main switch in the electric box. -
Page 10: Technical Data
- Cooling water pipes: Hz). In this case, see the technical data by the help of max. water head pressure: 16 bar the "Stulz Select" planning tool. - Required min thermal load: 20% of nom. cooling cap. The unit design, the external dimensions, the weight,... - Page 11 Design conditions for technical data: Electrical connection: 400V / 3ph / 50Hz external static pressure for Downflow units: 20 Pa external static pressure for Upflow units: 50 Pa Return air conditions for evaporator capacity: 24°C, 50% rel. humidity Cooling fluid (G): Water, 30% ethylen glycol Fluid inlet temperature: 30°C...
-
Page 12: Technical Data
5.2 Technical Data CCD/U ... A/G Modell Type DX-Kälteleistung R407C DX-cooling cap. R407C total total 12,1 13,8 18,1 21,9 26,0 24°C/50% r.F. 24°C/50% r.h. sensibel sensible 11,1 11,9 18,1 21,9 24,1 Auslegungsfüllmenge R407C G Nominal refrigerant charge, G dm³ Wasservolumenstrom G Water flow G m³/h m³/h... -
Page 13: Dimensional Drawings
5.3 Dimensional drawings Cabinet size 1 Cabinet size 2 /07.2016/G20... -
Page 14: Installation
6. Installation 6.1 Positioning Check that the installation site is appropriated for the unit weight, which you can read in the technical data. The A/C unit is designed for the inside installation on a level base. The solid base frame contributes significantly to an even weight distribution. -
Page 15: Opening The A/C Unit
6.3 Connection of the piping 6.3.1 Refrigerant piping (A units) 6.3.1.1 Design To design the piping between the A/C unit and the condenser follow the instructions in chapter "2. Refrigerant piping" of document "General-DX". This document is available in the e-Stulz area. /07.2016/G20... -
Page 16: Position Of The Refrigerant Connections
6.3.1.2 Position of the refrigerant connections Downflow - CCD 51/71/91/131/151 A Front view: Rear view: Refrigerant line connection Section A-A Gerät Unit Druckleitung Pressure line Flüssigkeitsleitung Liquid line Gerät Unit Druckleitung Pressure line Flüssigkeitsleitung Liquid line The refrigerant connections are located near the compressor and are la- belled by the inscriptions "pressure pipe"... - Page 17 Upflow - CCU 51/71/91/131/151 A Rear view: Front view: Refrigerant line connection Section A-A Gerät Unit Pressure line Druckleitung Liquid line Flüssigkeitsleitung Gerät Unit Pressure line Druckleitung Liquid line Flüssigkeitsleitung The refrigerant connections are located near the compressor and are la- belled by the inscriptions "pressure pipe"...
- Page 18 Downflow - CCD 181/221/251 A Rear view: Front view: Refrigerant line connection Section A-A Gerät Unit Pressure line Druckleitung Liquid line Flüssigkeitsleitung Gerät Unit 181 / 221 Pressure line Druckleitung Liquid line Flüssigkeitsleitung The refrigerant connections are located near the compressor and are la- belled by the inscriptions "pressure pipe"...
- Page 19 Upflow - CCU 181/221/251 A Rear view: Front view: Refrigerant line connection Section A-A Gerät Unit Pressure line Druckleitung Liquid line Flüssigkeitsleitung Gerät Unit 181 / 221 Pressure line Druckleitung Liquid line Flüssigkeitsleitung The refrigerant connections are located near the compressor and are la- belled by the inscriptions "pressure pipe"...
-
Page 20: Filling The Refrigerant Circuit
6.3.1.3 Filling the refrigerant circuit 1. Solder the pipe ends of the external refrigerant piping coming from the aircooled condenser to the refrigerant pipe connections of the A/C unit. 2. Connect a 24 V AC voltage or a permanent magnet at the solenoid valve in the liquid line in order to open the valve. -
Page 21: Water Piping
On new or renovated condenser water systems, ensure that the external pipework is thoroughly flushed, to remove construction debris and other particulate matter, before connecting to the new Stulz cooling units. A strainer should be fitted at the unit inlet, to protect the heat exchangers from fouling and possible blockage. - Page 22 For connecting the unit to the external system remove the protective caps from the flanges of the water pipes. Water remaining from the test run may escape when the protective caps are removed. The water connections are executed in the shape of a screw connection with a soldering connection.
- Page 23 Downflow/Upflow - CCD/U 51/71/91/131/151 G Rear view: Rear view: Water pipe diameters Section A-A Gerät Unit Eintrittsleitung Inlet pipe Austrittsleitung Outlet pipe Gerät Unit Downflow Downflow Kühlwasser- Cooling water Eintrittsleitung inlet pipe Kühlwasser- Cooling water Austrittsleitung outlet pipe All dimensions in mm. Upflow Upflow Kühlwasser-...
- Page 24 Downflow/Upflow - CCD/U 181/221/251 G Rear view: Rear view: Section A-A Water pipe diameters Gerät Unit Eintrittsleitung Inlet pipe Austrittsleitung Outlet pipe Downflow Upflow Gerät Unit 181/221 251 181/221 251 Kühlwasser- Cooling water Eintrittsleitung inlet pipe Kühlwasser- Cooling water All dimensions in mm. Austrittsleitung outlet pipe In general the pipes of downflow units...
-
Page 25: Condensate Drain Connection
6.3.3 Condensate drain connection Syphon installation Ensure that there is a sufficient height difference between the fan pan and the upper bow of the syphon or the highest part of the drain tube, in order to avoid a water column in the drain syphon caused by the pressure in the suction area of the A/C unit, which prevents the draining of the condensate water p = –300 Pa Example: Static pressure in the suction area:... -
Page 26: Electrical Connection
6.4 Electrical connection Ensure that the electric cables are de-energized. The electric cables are only to be connected by an authorised specialist. The unit must dipose of an effective earthing. Do not touch electronical components, without taking care of protective ESD measures. The power supply system on site and the pre-fuses must be designed for the total current of the unit (see technical data). -
Page 27: Commissioning
7. Commissioning The unit must be installed and connected in accordance with the chapter on "installation" before initial commissioning. • Make sure that the master switch is off and the unit is de-energized. • Open the electrical compartment door of the unit using the key provided. •... - Page 28 Do not turn the adjustment screw beyond the end of the calibrated scale range, as it may result in overheating and short-circuit at the consumer or in the destruction of the power switch. non-calibrated range • Adjustment of the power switches according to electrical data sheet. •...
-
Page 29: Maintenance
8. Maintenance 8.1 Safety instructions All maintenance work is to be carried out under strict compliance with the country-specific accident prevention regu- lations. In particular we refer to the accident prevention regulations for electrical installations, refrigerating machines and equipment. Non-compliance with the safety instructions can endanger people and the environment. Maintenance work is only to be carried out on the units by authorized and qualified specialist staff. -
Page 30: Refrigerant Circuit
8.3 Refrigerant circuit Refrigerant charge - Quantity and Purity Quantity - Check the sight glass and the LP switch. An unsufficient charge causes the formation of bubbles in the sight glass or in extreme cases the triggering of the LP-switch. An operation with an unsufficient refrigerant quantity over a longer period leads to a reduction of cooling capacity and to high superheating temperatures, which have a disadvantageous effect on the compressor lifetime. -
Page 31: Air Circuit
Compressor In the compressor there is an ester oil charge, which does not have to be renewed under normal operation conditions and holds out for the unit's lifetime. However, it is possible that the ester oil, as it reacts hygroscopically, has taken up humidity of the air after repeated recharging of the refrigerant circuit due to repair works. -
Page 32: Water Circuit
Repairs on the refrigerant circuit Trained refrigeration technician (tightness, filter drier exchange) Repairs on the main components of the refrigerant circuit Stulz service technician (compressor, expansion valve, condenser, evaporator) Repairs on the water circuit (tightness) Trained service technician Repairs on the electrics Trained electrician /07.2016/G20... -
Page 33: Malfunction
9. Malfunction Alarm message Cause for alarm Cause Elimination C7000: High pressure switch has 1. outside temperature too high Install bigger condenser. Compressor # triggered or 2. cooling water temperature too Check drycooler. error high 3. condenser fan defective. Check function. 4. -
Page 34: Dismantling And Disposal
10. Dismantling and disposal The A/C unit can only be dismantled by qualified specialists. Switch off the A/C unit at the controller and at the master switch. Switch off power conducting cables to the unit and secure them against being switched on again. Disconnect the A/C unit from the de-energized network. Dispose of the refrigerant in the unit in accordance with the disposal and safety regulations applicable on site The refrigerant may not be discharged into the atmosphere, but must be returned to the manufac- turer, if it is not reused. -
Page 35: Contents Of The Ce Declaration Of Conformity
11. Contents of the CE Declaration of Conformity The undersigned 2016 STULZ GmbH Klimatechnik Holsteiner Chaussee 283 22457 Hamburg hereby confirms that the units listed below, in the version marketed by us, fulfil the requirements of the harmonised EC directives and EC safety standards listed below. - Page 37 12.1 Steam humidifier The steam humidifier is an optional extra for your A/C unit. It is installed complete and integrated within the function and method of operation of the A/C unit. Details concerning the connection assignment for the power supply can be found in the electrical diagrams in the appendix.
- Page 38 Danger that may arise from the unit DANGER! Danger of electric hazard! The steam humidifier OEM2 is operated with mains voltage. One may get in touch with live parts when the unit is open. Touching live parts may cause severe injury or danger to life. Prevention: Before carrying out any work set the steam humidifier OEM2 out of operation as described in chapter 12.1.3.5 (switch off the unit, disconnect it from the mains and stop the water supply) and secure the unit against inadvertent power-up.
- Page 39 12.1.1.2 Wiring diagram of the control unit ECCM/S input signal from the C7000 controller to C7000 alarm input Danger Mains voltage Level sensor steam cylinder Rotary switch unit type Fuse control board (2 A, time-lag) Drain/Info key F2/Q2 Automatic fuse control voltage Sx% Potentiometer power limitation F3/Q3 MCB humidifier %rH Potentiometer humidity value...
- Page 40 12.1.1.3 Configuration of the control unit ECCM/S Setting the capacity limitation “Sx%” Use the potentiometer “Sx%” to set the capacity limitation in % of the maximum capacity (setting range: 25...100%, factory setting: 100%). Setting the control signal With the jumpers on jumper block “JP1” you can set the control signal. The control signal is adjusted on 0-10V, none of the jumpers "mA", "SP", "2P"...
- Page 41 12.1.2 Supply connections The steam humidifier is installed and electrically connected in the A/C unit. The local regulations of the water supply company are to be complied with when making the hydraulic connection. We recommend the installation of an Aqua-stop valve in the water supply of the humidifier. In ad- dition to this, the room, in which the A/C unit with the humidifier is installed, should be equipped with a water detection system.
- Page 42 12.1.3 Operation 12.1.3.1 Function of the display and operating elements on the control unit ECCM/S 1 Drain/Info key – press key shortly: opens and closes the drain valve (manual draining). Note: the drain valve is automatically closed after 10 minutes. –...
- Page 43 12.1.3.2 Commissioning Proceed as follows when putting the unit into operation: 1. Examine the steam humidifier and installation for possible damage. 2. Open the shut-off valve (if existant) in the water supply line. 3. Switch on control fuse and humidifier power switch in electric box. Switch on main switch. 4.
- Page 44 12.1.4 Fault elimination Important! Most operational malfunctions are not caused by faulty equipment but rather by improper installation or disregarding of planning guidelines. Therefore, a complete fault diagnosis always involves a thorough examination of the entire system. Often, the steam hose connection has not been properly executed, or the fault lies with the humidity control system.
- Page 45 12.1.4.4 Malfunction lists “Warning” “Error” Cause Remedy yellow LED blinks red LED blinks Control board defective Please contact your unit supplier. Control board defective Water conductivity too low (after Wait. initial operation). Max. filling level Water conductivity too low for type Select correct steam cylinder type.
- Page 46 12.1.5 Maintenance You find a detailed description of the maintenance procedures in chapter 5 of the humidifier service manual. This manual is available on the website www.stulz.com in the e-Stulz area under „Downloads/Precision A/C“ as a pdf document. Here you can only see a diagram, which shows the average life cycle of a steam cylinder in dependance of the runtime and the total hardness.
- Page 47 12.2 Reheat The reheat is an optional extra for your A/C unit. It is installed complete and integrated in the function and method of operation of the A/C unit. It is used to heat up the air. The following versions of the heater are available: - Electrical reheat - Hot water reheat (HW) - Hotgas reheat (HG)
- Page 48 Installation The reheats are installed and connected in the A/C unit. The HW reheat is to be connected on site to the external hot water circuit. The pipelines are to be routed out of the A/C unit. The diameters for the connection piping of the HW reheat are listed in the following table.
-
Page 49: Options
12.3 Air Circuit Options EU5 filter (only for size 2) The EU5 filter is used instead of the standard EU4 filter and cuts down on air contamination to a greater extent. Condensate pump The condensate pump is delivered lose. The type of pump depends on the A/C unit equipment. without steam humidifier: condensate pump type AB-1 F/M, March with steam humidifier:... - Page 50 Air discharge to the front - Downflow The A/C unit features a closed unit bottom and a grille with horizontal fins in the lower section of the front. The fins can be manually adjusted so that the discharge angle of the supply air can be influenced. Size 2: Size 1: Air discharge zone, keep clear...
- Page 51 Air discharge plenum - Upflow The air discharge plenum is set on the A/C unit without being screwed. Dimensions Construct. size 1 Baugröße 1 Construct. size 2 Baugröße 2 1000 /01.2017/air_MSDX...
- Page 52 Unit base for air discharge Size 1: The unit base is designed for downflow units which are installed in rooms without a raised floor and serves for the discharge of the supply air. With upflow units this unit base serves for the return air suction.
- Page 53 Base for duct connection and air damper - Upflow The base is set on the A/C unit without being screwed. The duct is fixed on the base with 4 M8 screws. Size 1: 4xM8-nut set up from above. 1: The surface between the base and the fan support must be sealed with an appropriate adhesive tape.
- Page 54 Air damper - Upflow An air damper can only be provided on the discharge side for downflow and upflow units. The most frequent use of the air damper is shown, on the discharge side of upflow units. For the installation of an air damper on the upflow unit a connection base (see page before) is necessary.
- Page 55 Adaptor plate for damper below the unit - Downflow Size 1: Top view Front side Size 2: Top view Front side /01.2017/air_MSDX...
- Page 56 Air damper - Downflow Here the use of the air damper on the discharge side of downflow units is shown. For the installation of an air damper below the downflow unit an adaptor plate (see page before) is necessary. Size 1: Bottom view Front side Size 2:...
- Page 57 Filter top with flexible duct The filter top with flexible duct is determined for the suction side connection at downflow units. Installation - Fix the flexible duct on the filter top by four M10 screw connections. - Set the filter top with mounted flexible duct on the A/C unit without screwing it to the A/C unit. Size 1: /01.2017/air_MSDX...
- Page 58 Filter top with flexible duct Size 2: 1000 /01.2017/air_MSDX...
- Page 59 Ecocool (only for downflow version) With the Ecocool function outside air is used for cooling the room air and is mixed with the return air via louvers. Two louvers per unit are installed. At the downflow unit the louvers are situated on top and at the upper part of the rear side. The louver at the rear allows outside air to come into the unit.
- Page 60 Dimensions - Size 1 - Downflow with Ecocool louvers rear side front side Return air Outside air /01.2017/air_MSDX...
- Page 61 Dimensions - Size 2 - Downflow with Ecocool louvers front side rear side 125 125 125 125 125 125 Return air 1000 Outside air /01.2017/air_MSDX...
- Page 63 12.4 Raised floor stand The floor stand is used to adjust the height of the A/C unit to the existing raised floor and consists of an encircling rectangular profile of galvanized steel with adjustable screw sockets. Anti vibration compound is recommended bet- ween concrete floor and base plate.
- Page 64 Connecting the bars View from below) Angle Connection Butt Joint Cross Connection Minimum distances and mounting instructions Please observe that the floor stand must be decou- Raised floor stand Z (min. 50) pled from the surrounding floor plates by damping insertions and that mafund plates are laid under the floor supports.
- Page 65 Detail of raised floor connection Raised floor stand Adjustable support plate Adjusting nut Support pipe Support base Mafund strips Raised floor cut out angle Continuous seal profile Before unit installation Raised floor plate Angled bracket Permanently elastic seal Fixing Sealing detail Sealing detail when distance Z <...
- Page 67 12.5 Electrical Options Three Phase Control The phase monitoring relay monitors a phase failure and a phase reversal. Excess voltage, undervoltage and the phase imbalance are monitored in relation to the set values. In case of a phase failure the phase monitoring relay is de-energized without delay and triggers an alarm. If the moni- toring relay detects a wrong phase sequence during the A/C unit start, it is not energized and prevents the unit start.
- Page 68 Second Power Supply in separate box (for size 1 only) This option provides an automatic commutation between two power supply networks. In case of failure of the main power supply the A/C unit has the possibility to restart operation by commutation to the second supply network.
- Page 69 Maximum cross-section of the supply lines main switch single-wire or multi-wire mm² finely stranded conductor mm² Requirements: - Network configuration TN-S, TN-C-S (400V +/-10%, 3 phases, N, PE, 50/60 Hz) - The housing is intended only for indoor installation. - Use only copper conductors for 75°C. - Install two back-up fuses in the supply lines.The size of the back-up fuses depends on the terminal equipment (A/C unit).
- Page 71 12.6 Refrigerant Circuit Options A/C unit type A with hot gas bypass extension Low tem- Air section perature section Collector Evaporator Hot gas bypass In order to reduce the switching rate and thus increase the life of the compressor, the refrigerant circuit can be en- hanced by a hot gas bypass or with a suction throttle.
- Page 72 Adjustable HP/LP switch The compressor is controlled and monitored by the controller of your A/C unit. Permanently set high-pressure and low-pressure switches are required as sensors for this. An adjustable version of these HP/LP switches is supplied in order to individually adapt the switching points for the high pressure and low pressure to the operating conditions. EN/04.2014/refrigerant/2...
- Page 74 Fax: +61 (2) 96 74 67 22 sales@stulz.com.au STULZ AUSTRIA GmbH Lamezanstraße 9 1230 Wien Tel.: +43 (1) 615 99 81-0 Fax: +43 (1) 616 02 30 info@stulz.at STULZ BeLGIUm BVBA Tervurenlaan 34 1040 Brussels Tel.: +32 (470) 29 20 20 info@stulz.be STULZ AIR TeCHnoLoGY AnD SeRVICeS SHAnGHAI Co., LTD. Room 5505, 1486 West Nanjing Road, JingAn Shanghai 200040 P.R. China Tel.: +86 (21) 3360 7133 Fax: +86 (21) 3360 7138 info@stulz.cn STULZ eSPAÑA S.A. Avenida de los Castillos 1034 28918 Leganés (Madrid) Tel.: +34 (91) 517 83 20 Fax: +34 (91) 517 83 21 info@stulz.es STULZ FRAnCe S.
Need help?
Do you have a question about the Mini-Space DX CCD51A and is the answer not in the manual?
Questions and answers