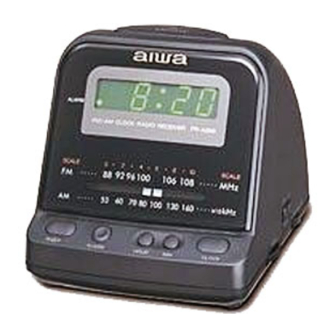
Aiwa FR-A250 Operating Instructions Manual
Aiwa fr-a250 alarm clocks: user guide
Hide thumbs
Also See for FR-A250:
- Service manual (16 pages) ,
- Service manual (15 pages) ,
- Service manual (15 pages)
Table of Contents
Advertisement
Quick Links
WARNING
TO REDUCE THE RISK OF FIRE OR
ELECTRIC SHOCK, DO NOT EXPOSE
THIS APPLIANCE TO RAIN OR
MOISTURE.
FR-A250
U
q
RADIO RECEIVER
k
RECEPTOR DE RADIO
OWNER'S
RECORD
For your convenience,
record the model
number
and serial
number (you will find it in the battery compartment)
in the space
provided
below.
Please refer to them when you contact
your
Aiwa dealer in case of difficulty.
Model No.
FR-A250
1
'erialNO
~
Advertisement
Table of Contents

Related Manuals for Aiwa FR-A250


Summary of Contents for Aiwa FR-A250
- Page 1 For your convenience, record the model number (you will find it in the battery compartment) provided below. Please refer to them when you contact Aiwa dealer in case of difficulty. FR-A250 Model No. ‘erialNO number and serial in the space...
- Page 2 “CAUTION:TO REDUCE THE RISK OF ELECTRIC SHOCK, DO NOT REMOVE COVER (OR BACK). NO USER-SERVICEABLE PARTS INSIDE. REFER SERVICING TO QUALIFIED SERVICE PERSONNEL.” The symbols are located on the bottom Explanation of Graphical Symbols: The lightning flash /4’/ symbol, within an equilateral is intended to alert the user to the presence...
- Page 3 PRECAUCIC)NES Todas Ias instrucclones deseguridad deben Ieerseantesde hacerfuncionarel Instrucciones de seguridad y de funcionamlento referencia en el future. Deben respetarse todas Ias advertencias en el aparato y en Ias instrucciones de funcionamiento. cumplirse Ias instrucciones de funcionamiento Ias sugerencias para su segurfdad a continuation. Instalacion Agua y Iwnedad —...
- Page 4 PFIECAUTIONS Electric Power 1 lJowersources -Connect this unit only to power sources specified in the Operating Instructions, the unit. 2 Polarization —As a safety feature, equipped with polarized AC power plugs which can only be inserted one way into a power outlet. impossible to insert the AC power plug into an outlet, turn the plug over and try again.
- Page 5 PRECAUCIONES Alimentacion electrica Fuentes de alimer?tsciorr — Conecte el aparato solamente a Ias fuentes de alimentacion especificadas Instrucciones y del modo indicado en el mismo aparato. Polarization— Como medida de seguridad, aparatos cuentan con enchufes de corriente polarizados, cuales pueden enchufarse en el tomacorriente unadireccion.
- Page 6 PRECAUTIONS Maintenance Clean the unit only as recommended Instructions. Damage Requiring Service Have the units serviced by a qualified service technician -The AC power cord or plug has been damaged – Foreign objects or liquld have gotten inside the unit -The unit has been exposed to rain or water –The unit does not seem to operate normally...
- Page 7 PRECAUCIONES Mantenimiento Limpie de acuerdo a Ias instrucciones instrucciones. Desperfectos que requieren servicio Solicite la reparation de SLI aparato autorizado en Ios siguientes cases: – Cuando se haya daiiado el cable de corriente o el enchufe – Cuando hayan penetrado objetos o Iiquidos en el interior del aparato –Cuando se haya expuesto el aparato a agua o Iluvia...
-
Page 8: Backup Function
BACKUP FUNCTION If the AC power supply is interrupted, off and the alarm setting is canceled. To back up the clock and alarm, insert a 6F22 battery in the battery compartment rear of the unit. The backup battery is not for radio reception. Note The backup function lasts about 10 minutes. - Page 9 FUNCION DE RESPALDO Si se corta la fuente de corriente indication del reloj y se cancela la alarma. Para mantener el respaldo del reloj la alarma, instale portapilas en la parte trasera del aparato. La pila de respaldo no sirve para escuchar la radio. Nota La funcion de respaldo...
-
Page 10: Setting The Clock
SETTING THE CLOCK + @ 1 Connect the AC power cord to a wall outlet (@). The clock display begins flashing. 2 While holding down CLOCK, press HOUR to set the hour. 7:00 7:00 a.m. 7:00. 7:00 p.m. 3 While holding down CLOCK, press MIN to set the minute. -
Page 11: Ajuste Del Reloj
AJUSTE DEL RELOJ + @ 1 Conecte el cable electrico en el tomacorriente pared (@). La pantalla del reloj empieza a destellar. 2 Mientras mantiene oprimido CLOCK oprima HOUR para ajustar la hors. 7:OOA.M. 7:000 7:00 P.M. 3 Mientras mantiene oprimido do CLOCK oprima para ajustar 10s minutes. -
Page 12: Radio Reception
RADIO RECEPTION — 1 Set ALARMIPOWER to ON. 2 Set BAND to select FM or AM. 3 Turn the TUNING control to tune into a station. 4 Adjust the volume. To turn off the radio Set ALARM/POWER to (!) STANDBY. For better reception + @ Extend the FM wire antenna fully. -
Page 13: Reception Radio
RECEPCION DE LA RADIO 1 Mueva el ALARM/POWER a ON. 2 Mueva al BAND para seleccionar FM o AM. 3 Gire el control TUNING para sintonizar una emiaora. 4 Ajuste el voiumen. Para deaeoneetar la radio Mueva el ALARM/POWER a & STANDBY. Para una mejor recepcion + @ FM: Extienda completamente la antena de cable FM. -
Page 14: Alarm Setting
ALARM SETTING The radio or buzzer automatically time every day. 1 While holding the alarm time. 7:00 7:00 a.m. SLEEP OFF 7:000 7:00 p.m. 2 Set ALARM/POWER When the preset time comes, the radio or buzzer sounds. To turn off the alarm, OFF. -
Page 15: Ajuste De La Alarma
AJUSTE DE LA ALARMA La radio o la alarma suenan automaticamente especificada todos Ios d~as. 1 Mantenga oprimido el ALARM y oprima para ajustar la hors de la alarma. 7:00 A.M. 7:00 7:ooo 7:oO P.M. 2 Mueva el ALARM/POWER a RADIO o BUZZER. Cuando Ilega la hors programada,... -
Page 16: Sleep Timer Setting
SLEEP TIMER SETTING You can use the sleep timer to turn the radio off automatically after up to 1 hour 59 minutes. Before setting, tune in to a station. (See page 12.) 1 Set ALARM/POWER to d) STANDBY. 2 While holding down SLEEP, press MIN to set the time to turn off the radio. -
Page 17: Ajuste Del Temporizador Para Dormir
AJUSTE DEL TEMPORIZADOR PARA DORMIR Se puede utilizar el temporizador para dormir automaticamente la radio despues minutes. Antes de este ajuste, sintonice una emisora. pagina 13.) 1 Mueva el ALARM/POWER a (!) STANDBY. 2 Mantenga oprimido SLEEP y oprima hors de desconexion de la radio. -
Page 18: Specifications
SPECIFICATIONS Power source AC 120 V, 60 output 280 mW (EIAJ) Power consumption Speaker 57 mm, 8 ohms Frequency range FM: 67.5-108 AM: 530 – 1,710 kHz Antennas FM wire antenna Ferrite bar antenna for AM Dimensions (W x H x D) 124x 126x 160mm (5x 5 x 6 Approx. -
Page 19: Especificaciones
ESPECIFICACIONES Fuente de alimentacion CA de 120 V, 60 Hz 280 mW (EIAJ) Salida Consumo electrico Altavoz 57 mm, 8 ohmios Gama de frecuencias FM: 87,5 – 108 MHz AM: 530 – 1.710 kHz Antenaa Antena de cable FM Antena de barra de ferrita para Dimensioned (An. - Page 20 8Z-FNJB-903-11 981 214CY0-OX printed in Hong Kong AIVVA CO.,LTD.
Need help?
Do you have a question about the FR-A250 and is the answer not in the manual?
Questions and answers