Table of Contents
Advertisement
Quick Links
Advertisement
Table of Contents

Subscribe to Our Youtube Channel
Related Manuals for SphygmoCor XCEL

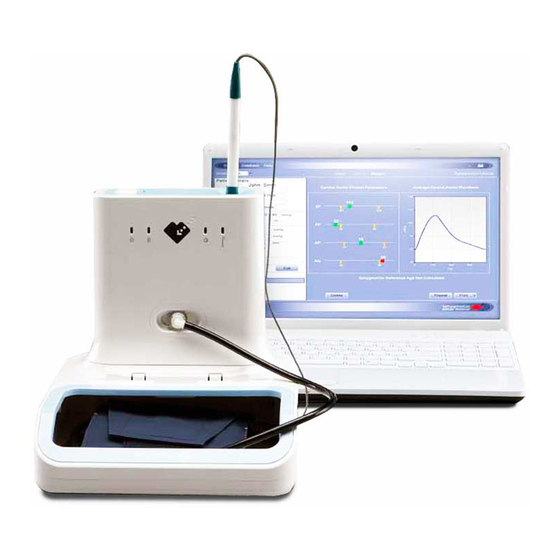
Summary of Contents for SphygmoCor XCEL
- Page 1 Service Manual SphygmoCor XCEL System...
-
Page 2: Table Of Contents
Contents Operator’s Manual Cross Reference ..................5 Calibrating SphygmoCor XCEL ....................6 SphygmoCor XCEL Calibration Kit Operating Instructions ............. 6 Calibration Setup ........................8 SphygmoCor XCEL Calibration Software ................8 SphygmoCor XCEL Calibration Steps .................. 11 Calibration Troubleshooting ....................31 Finding Com Port ...................... - Page 3 Copyright ® SphygmoCor XCEL Service Manual Copyright © 2020 AtCor Medical Pty. Ltd., Sydney Australia. All rights reserved. Under the copyright laws, this manual cannot be reproduced in any form without prior written permission of AtCor Medical Pty. Ltd. DCN: 101397 Manual Revision: 6.0...
- Page 4 If the operator is not familiar with Windows operations, please refer to the Windows User Manual or Windows Online Help. Trademarks ® “SphygmoCor ” is a registered trademark of AtCor Medical Pty Ltd. Millar, IBM, IBM PC, Microsoft, Windows, Excel, and InstallShield, are the registered trademarks of their respective holders.
-
Page 5: Operator's Manual Cross Reference
Operator’s Manual Cross Reference This Service Manual shall be used in conjunction with the SphygmoCor XCEL Operator’s Manual. Refer to the SphygmoCor XCEL Operator’s Manual for the following: • Applicable standards • Components, accessories, and spare parts • Contraindications •... -
Page 6: Calibrating Sphygmocor Xcel
Calibrating SphygmoCor XCEL Warning: The SphygmoCor XCEL System requires annual calibration. Failure to do so may result in the device being out of specification. This may result in inaccurate measurements. When calibration is due, the following message will appear in the SphygmoCor XCEL application: Note: The SphygmoCor XCEL device will continue to take measurements even though the calibration period has expired. - Page 7 WARRANTY: The SphygmoCor® XCEL Calibration Kit components are guaranteed for one year from the date of purchase Calibration Kit Components The Calibration Kit contains the following components: 1- Calibration Pneumatic kit 2- 1/8 ” male to 1/8” male adapter 3- 3/16” male to 3/16” male adapter 4- 3/16”...
-
Page 8: Calibration Setup
Sphygmomanometer mercury column or anaerobic Sphygmomanometer, with reading in mmHg, and resolution of 1mmHg) using one of the adaptors provided. Connect the other tube of the Calibration Pneumatic Kit to the cuff hose of SphygmoCor XCEL using the lockable connection as illustrated in the following figure. - Page 9 Communications USB port Operating Systems Windows 7 Professional + SP1, or Windows 8 Pro Software Download & Installation Download 1- Open the ATCOR Medical website www.atcormedical.com and navigate to the Download Portal. 2- Enter the required User information to access the Download Portal. 3- Select and download the Calibration Kit Software zip file.
- Page 10 4- Click Next when the Next button is enabled. 5- Click Next when this screen appears. 6- Click Install when this screen appears. Page 10...
-
Page 11: Sphygmocor Xcel Calibration Steps
Restarting the Calibration Procedure Section in the Calibration Troubleshooting section. 1- Turn the SphygmoCor XCEL device ON, and connect the USB cable to your computer. 2- Connect either the tonometer supplied with your SphygmoCor XCEL or the Calibration Kit Dongle to the SphygmoCor XCEL device. - Page 12 5- Select the Com port number that is connected to the SphygmoCor XCEL device using the drop down menu and click Connect Note: To find the Com port that is connected to the SphygmoCor, please refer to the Finding Com Port Section in the Calibration Troubleshooting section.
- Page 13 Note: The following screen appears if the incorrect Com port has been selected. Please refer to the Finding Com Port Section in the Calibration Troubleshooting section. 6- If successfully connected, click Continue in the bottom right hand corner Page 13...
- Page 14 Note: The following screen appears if the tonometer or Calibration Kit Dongle is not connected, or if the cuff hose is connected to the SphygmoCor XCEL device. If this message is displayed, connect the tonometer or Calibration Kit Dongle and disconnect the cuff hose then click Continue 7- The software will display this message for a few seconds.
- Page 15 8- Connect the cuff hose on the SphygmoCor XCEL and click Continue Page 15...
- Page 16 9- The software will display this message 10- Review the pressure displayed on the manometer or Sphygmomanometer Page 16...
- Page 17 11- Enter the pressure value in whole numbers (no decimal points) and Click Continue Note: The pressure value should be entered within 30 seconds; otherwise the following screen will appear: Page 17...
- Page 18 If this message appears, turn OFF and then ON the SphygmoCor XCEL device, close the SphygmoCor XCEL Calibration software, and repeat the calibration procedures from step 1. Please refer to Restarting the Calibration Procedure Section in the Calibration Troubleshooting section.
- Page 19 15- If the manometer readings is between 25-35 mmHg click Continue. Note: If the manometer reading is not between 25-30 mmHg, close the SphygmoCor XCEL Calibration software and start the calibration procedures from Step 1. Please refer to Restarting the Calibration Procedure Section in the Calibration Troubleshooting section.
- Page 20 16- Click Continue 17- View the pressure displayed on the manometer or Sphygmomanometer Page 20...
- Page 21 18- If the manometer reading is between 180-190 mmHg click Continue. Note: If the manometer reading is not between 180-190 mmHg, close the SphygmoCor XCEL Calibration software and start the calibration procedures from Step 1. Please refer to Restarting the Calibration Procedure Section in the Calibration Troubleshooting section.
- Page 22 19- Disconnect the cuff hose on the SphygmoCor XCEL and click Continue 20- The software will show a message. Page 22...
- Page 23 21- Connect the cuff hose on the SphygmoCor XCEL and click Continue Page 23...
- Page 24 Note: Once pumping starts ensure to click Continue within 3 minutes. If not, a message will appear informing that the calibration was unsuccessful. Then close the SphygmoCor XCEL Calibration Software, turn off/on the module and repeat the calibration procedures from Step 1. Please refer to Restarting the Calibration Procedure Section in the Calibration Troubleshooting section.
- Page 25 Note: Once pumping starts ensure to click Continue within 3 minutes. If not, a message will appear informing that the calibration was unsuccessful. Then close the SphygmoCor XCEL Calibration Software, turn off/on the module and repeat the calibration procedures from Step 1. Please refer to Restarting the Calibration Procedure Section in the Calibration Troubleshooting section.
- Page 26 25- The software will display this message. 26- Using the bulb, pump until the pressure on the manometer is slightly above 250 mmHg. Release the pressure slightly using the release knob on the bulb. When the pressure drops back to 250 mmHg, click Continue.
- Page 27 Note: If this message appears (calibration was unsuccessful), then turn OFF and ON the device and close the SphygmoCor® XCEL Calibration Software and repeat the calibration procedures from step 1. Please refer to Restarting the Calibration Procedure Section in the Calibration Troubleshooting section.
- Page 28 28- Upon successful calibration, enter the calibration date (year, month & date) then click Continue If the Continue button is pressed without entering a date, close the SphygmoCor XCEL Calibration software, turn OFF and then ON the SphygmoCor XCEL device, and repeat the calibration procedures from step 1.
- Page 29 29- For verification purposes, the date is required to be entered for a second time. Enter the calibration date (year, month & date) then click Continue If the Continue button is pressed without entering a date, close the SphygmoCor XCEL Calibration software, turn OFF and then ON the SphygmoCor XCEL device, and repeat the calibration procedures from step 1.
- Page 30 Note: Once the calibration has been completed successfully, a calibration summary report will be generated and saved as “XCEL_CAL_REPORT_SN_DATE.txt” in the same directory where the application was installed (default installation directory is “C:\AtCor\XCEL calibration\”, but this can be changed by the installer during the installation process).
-
Page 31: Calibration Troubleshooting
Calibration Troubleshooting Finding Com Port To find the com port that is connected to the SphygmoCor XCEL device, follow these steps: 1- Connect the SphygmoCor XCEL device to the computer via the USB cable. Ensure your SphygmoCor Software is closed. -
Page 32: Restarting The Calibration Procedure
4- Expand the PORTS (COM & LPT) section. 5- The SphygmoCor XCEL will appear as ‘USB Serial Port’ and the COM Port number will be displayed next to ‘USB Serial Port (COM##)’. 6- In the Calibration Kit software you will need to select the Com Port number (COM##) from the drop down list.
Need help?
Do you have a question about the XCEL and is the answer not in the manual?
Questions and answers