Table of Contents
Advertisement
Advertisement
Table of Contents
Troubleshooting

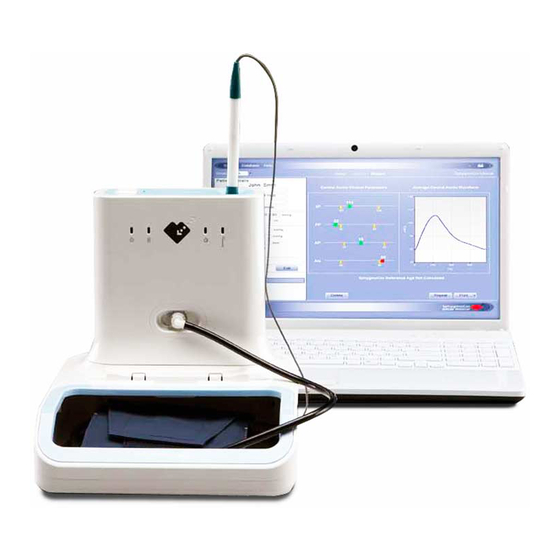
Summary of Contents for SphygmoCor XCEL
- Page 1 Service Manual SphygmoCor XCEL System...
-
Page 2: Table Of Contents
Calibrating SphygmoCor XCEL ....................19 SphygmoCor XCEL Calibration Kit Operating Instructions ........... 19 Calibration Setup ........................21 Installation of the SphygmoCor XCEL Calibration Software ..........22 SphygmoCor XCEL Calibration Steps .................. 24 Calibration Troubleshooting ....................44 Finding Com Port ......................44 Restarting the Calibration Procedure ................ - Page 3 Copyright ® SphygmoCor XCEL Service Manual Copyright © 2013 AtCor Medical Pty. Ltd., Sydney Australia. All rights reserved. Under the copyright laws, this manual cannot be reproduced in any form without prior written permission of AtCor Medical Pty. Ltd. DCN: 101397 Manual Revision: 4.0...
-
Page 4: Cautions, Warnings And Contraindications
IBM, Microsoft, and Windows are the registered trademarks of their respective holders. Caution Federal (USA) law restricts this device to sale by or on the order of a physician Cautions, Warnings and Contraindications Please refer to the SphygmoCor XCEL Operator’s Manual (DCN 101335) for the list of cautions, warnings and contraindications. -
Page 5: Troubleshooting Sphygmocor Xcel
The SphygmoCor XCEL device is connected to your computer. The SphygmoCor XCEL device is plugged into an AC outlet and the power switch is toggled to the “on” position. The Power light is illuminated (if it is not illuminated, refer to Condition 2 “The POWER light is off”... -
Page 6: Sphygmocor Xcel Software
The following is a list of possible errors that may be encountered. Note: If any error occurred where the code is not listed in the following table, exit XCEL software, turn OFF/ON the device and then start XCEL software. If problem persists please contact AtCor Medical Technical support. - Page 7 Error Code Error Message Action Ensure use of correct cuff size, correct positioning and fit Remove any obstructions between the cuff and patient’s arm After completing the above steps, attempt another measurement Unable to continue Brachial Ensure that the hose is not bent or pinched Calibration due to pneumatic ...
- Page 8 Unable to migrate data due to Ensure that the PC can locate the SQL data database error (Code = 611). server. Restart the SphygmoCor XCEL software. 800* Database server is not responding Restart the computer (Code = 800).
- Page 9 Error Code Error Message Action the cuff Ensure use of the correct cuff size and that it is correctly positioned Turn the device OFF and ON. Attempt Capture again. 2049 Unable to continue Capture due to Ensure the device is connected to the unsuccessful inflation of cuff (Code computer.
- Page 10 Turn the device OFF and ON. (Code=2077) Ensure that the device is connected to the (Code=2078) computer. Exit the XCEL software Start the XCEL software In the Setup screen, click on the System and select Find Module. ...
- Page 11 2091 One of these messages related Close SphygmoCor XCEL Software to “incomplete calibration” XCEL Electronics Module need to be calibrated. error will appear: Please refer to SphygmoCor XCEL Calibration KIT or contact AtCor Medical for technical support. (a) Unable to find the...
- Page 12 Unable to generate PWA Report Ensure there is enough memory in the (Code= 3054). computer. Ensure that the user has read/write permission where the XCEL software installed. Ensure use of correct cuff size, correct positioning and fit ...
-
Page 13: Database Manager
In the Setup screen, click System and select Find Module. 3136* Unable to continue due to the Upgrade SphygmoCor XCEL software incompatible database version (code=3136) *If the problem persist persists, please contact AtCor Medical Technical support. Database Manager Database Manager allows you to backup and restore databases. You should backup the database regularly to protect against the possibility of losing important patient data. -
Page 14: Restore A Database
The Database – Restore feature is used if a database becomes corrupted or needs to be installed onto another PC. Note: When the SphygmoCor XCEL is used by multiple users, SphygmoCor XCEL should not be accessed by other users before the database is restored. - Page 15 Navigate to the location of the backup file and click Open. The restore will be completed automatically. Note: When restoring the SphygmoCor XCEL database from an earlier version , a message will appear indicating that database upgrade report is generated and the earlier version XCEL database is backed up.
-
Page 16: Basic System Care
Caution: Do not spill liquids on any component. Weight Weight applied to the top of the SphygmoCor XCEL device may cause the unit enclosure to crack and other parts to be damaged. Caution: Do not place any objects on top of the SphygmoCor XCEL device. Items on top of the SphygmoCor XCEL device may obscure or inadvertently activate the Stop Button. -
Page 17: Shutting Down
Disassembly of the device by unauthorized personnel voids any warranty conditions. Cleaning Instructions To clean the SphygmoCor XCEL device, first unplug it from the computer and the power outlet. Using a damp cloth with mild detergent, gently wipe the equipment. Do not use other cleaning agents. Ensure excess liquids are wiped immediately from the equipment. -
Page 18: Pwv Thigh Cuff Care
Caution: Do not immerse the tonometer in any liquid as this will damage the tonometer electronics. Do not use coarse cloths for wiping the tonometer as this will damage the sensitivity of the transducer. PWV Thigh Cuff Care Cleaning Cuffs: Removable covers on straight and contoured cuffs make cleaning easy. The cuff covers are made of Nylon and Velcro. -
Page 19: Calibrating Sphygmocor Xcel
Calibrating SphygmoCor XCEL Warning: The SphygmoCor XCEL System requires annual calibration. Failure to do so may result in the device being out of specification. This may result in inaccurate measurements. When calibration is due, the following message will appear in the SphygmoCor XCEL application: Note: The SphygmoCor XCEL device will continue to take measurements even though the calibration period has expired. - Page 20 WARRANTY: The SphygmoCor® XCEL Calibration Kit components are guaranteed for one year from the date of purchase Calibration Kit Components The Calibration Kit contains the following components: 1- Calibration Pneumatic kit 2- 1/8 ” male to 1/8” male adapter 3- 3/16” male to 3/16” male adapter 4- 3/16”...
-
Page 21: Calibration Setup
Sphygmomanometer mercury column or anaerobic Sphygmomanometer, with reading in mmHg, and resolution of 1mmHg) using one of the adaptors provided. Connect the other tube of the Calibration Pneumatic Kit to the cuff hose of SphygmoCor XCEL using the lockable connection as illustrated in the following figure... -
Page 22: Installation Of The Sphygmocor Xcel Calibration Software
Installation of the SphygmoCor XCEL Calibration Software Minimum computer requirements to install the XCEL Calibration Software Type IBM Compatible PC Processor Intel or compatible Nominal Speed 2GHz minimum Memory 1GB RAM minimum Hard Disk 2GB for Installation Accessories DVD drive... - Page 23 4- Click Next when the Next button is enabled. 5- Click Next when this screen appears. 6- Click Install when this screen appears. Page 23...
-
Page 24: Sphygmocor Xcel Calibration Steps
Restarting the Calibration Procedure Section in the Calibration Troubleshooting section. 1- Turn the SphygmoCor XCEL device ON, and connect the USB cable to your computer. 2- Connect either the tonometer supplied with your SphygmoCor XCEL or the Calibration Kit Dongle to the SphygmoCor XCEL device. - Page 25 5- Select the Com port number that is connected to the SphygmoCor XCEL device using the drop down menu and click Connect Note: To find the Com port that is connected to the SphygmoCor, please refer to the Finding Com Port Section in the Calibration Troubleshooting section.
- Page 26 Note: The following screen appears if the incorrect Com port has been selected. Please refer to the Finding Com Port Section in the Calibration Troubleshooting section. 6- If successfully connected, click Continue in the bottom right hand corner Page 26...
- Page 27 Note: The following screen appears if the tonometer or Calibration Kit Dongle is not connected, or if the cuff hose is connected to the SphygmoCor XCEL device. If this message is displayed, connect the tonometer or Calibration Kit Dongle and disconnect the cuff hose then click Continue 7- The software will display this message for a few seconds.
- Page 28 8- Connect the cuff hose on the SphygmoCor XCEL and click Continue Page 28...
- Page 29 9- The software will display this message 10- Review the pressure displayed on the manometer or Sphygmomanometer Page 29...
- Page 30 11- Enter the pressure value in whole numbers (no decimal points) and Click Continue Note: The pressure value should be entered within 30 seconds; otherwise the following screen will appear: Page 30...
- Page 31 If this message appears, turn OFF and then ON the SphygmoCor XCEL device, close the SphygmoCor XCEL Calibration software, and repeat the calibration procedures from step 1. Please refer to Restarting the Calibration Procedure Section in the Calibration Troubleshooting section.
- Page 32 15- If the manometer readings is between 25-35 mmHg click Continue. Note: If the manometer reading is not between 25-30 mmHg, close the SphygmoCor XCEL Calibration software and start the calibration procedures from Step 1. Please refer to Restarting the Calibration Procedure Section in the Calibration Troubleshooting section.
- Page 33 16- Click Continue 17- View the pressure displayed on the manometer or Sphygmomanometer Page 33...
- Page 34 18- If the manometer reading is between 180-190 mmHg click Continue. Note: If the manometer reading is not between 180-190 mmHg, close the SphygmoCor XCEL Calibration software and start the calibration procedures from Step 1. Please refer to Restarting the Calibration Procedure Section in the Calibration Troubleshooting section.
- Page 35 19- Disconnect the cuff hose on the SphygmoCor XCEL and click Continue 20- The software will show a message. Page 35...
- Page 36 21- Connect the cuff hose on the SphygmoCor XCEL and click Continue Page 36...
- Page 37 Note: Once pumping starts ensure to click Continue within 3 minutes. If not, a message will appear informing that the calibration was unsuccessful. Then close the SphygmoCor XCEL Calibration Software, turn off/on the module and repeat the calibration procedures from Step 1. Please refer to Restarting the Calibration Procedure Section in the Calibration Troubleshooting section.
- Page 38 Note: Once pumping starts ensure to click Continue within 3 minutes. If not, a message will appear informing that the calibration was unsuccessful. Then close the SphygmoCor XCEL Calibration Software, turn off/on the module and repeat the calibration procedures from Step 1. Please refer to Restarting the Calibration Procedure Section in the Calibration Troubleshooting section.
- Page 39 25- The software will display this message. 26- Using the bulb, pump until the pressure on the manometer is slightly above 250 mmHg. Release the pressure slightly using the release knob on the bulb. When the pressure drops back to 250 mmHg, click Continue.
- Page 40 Note: If this message appears (calibration was unsuccessful), then turn OFF and ON the device and close the SphygmoCor® XCEL Calibration Software and repeat the calibration procedures from step 1. Please refer to Restarting the Calibration Procedure Section in the Calibration Troubleshooting section.
- Page 41 28- Upon successful calibration, enter the calibration date (year, month & date) then click Continue If the Continue button is pressed without entering a date, close the SphygmoCor XCEL Calibration software, turn OFF and then ON the SphygmoCor XCEL device, and repeat the calibration procedures from step 1.
- Page 42 29- For verification purposes, the date is required to be entered for a second time. Enter the calibration date (year, month & date) then click Continue If the Continue button is pressed without entering a date, close the SphygmoCor XCEL Calibration software, turn OFF and then ON the SphygmoCor XCEL device, and repeat the calibration procedures from step 1.
- Page 43 Note: Once the calibration has been completed successfully, a calibration summary report will be generated and saved as “XCEL_CAL_REPORT_SN_DATE.txt” in the same directory where the application was installed (default installation directory is “C:\AtCor\XCEL calibration\”, but this can be changed by the installer during the installation process).
-
Page 44: Calibration Troubleshooting
Calibration Troubleshooting Finding Com Port To find the com port that is connected to the SphygmoCor XCEL device, follow these steps: 1- Connect the SphygmoCor XCEL device to the computer via the USB cable. Ensure your SphygmoCor Software is closed. -
Page 45: Restarting The Calibration Procedure
4- Expand the PORTS (COM & LPT) section. 5- The SphygmoCor XCEL will appear as ‘USB Serial Port’ and the COM Port number will be displayed next to ‘USB Serial Port (COM##)’. 6- In the Calibration Kit software you will need to select the Com Port number (COM##) from the drop down list. -
Page 46: Spare Parts List
AtCor Medical reserves the right to modify the design and specifications contained within without prior notice. The product or component pictures shown in this manual may vary compared to the system supplied to you. Brachial cuff – a pneumatic cuff with a tube connection to the SphygmoCor XCEL device Part numbers: ... - Page 47 USB cable (2m) - connects the SphygmoCor XCEL device to a PC or laptop. Always use the USB cable provided Part Number: 1-00858 – USB Cable 2m Storage Tray – provides storage of cuffs, as well as a mounting platform for the SphygmoCor XCEL device.
-
Page 48: Technical Specifications
0 - 300mmHg Resolution 1 mmHg Tonometer Uncalibrated pressure transducer Maximum Intended Design Life The Maximum Intended Design Life of the SphygmoCor XCEL device is 5 Years. The Maximum Intended Design Life of the Tonometer is 3 Years. Page 48... -
Page 49: Minimum Computer Requirements
1024 x 768 pixels Resolution Operating Systems Windows XP Professional SP3 (32 bits), Windows 7 Professional, or Windows 8 Pro. Classification of SphygmoCor System The SphygmoCor XCEL System is classified as follows: Class II Double insulated Type BF Equipment ... -
Page 50: Standards
Cuff Indicator Status Indicator Emergency Stop Standards The SphygmoCor XCEL System is designed, tested and approved to the following standards: Medical electrical equipment -- Part 1: General requirements for safety IEC/EN 60601-1:1988+A1+A2 (2 Ed.), CSA C22.2 No 601.1-M90 (2003), UL 60601-1 (2003) IEC/EN 60601-1:2005 (3 Ed.), CSA C22.2 No 60601.1 (2008), ANSI/AAMI ES60601-1 (2005+A2)
Need help?
Do you have a question about the XCEL and is the answer not in the manual?
Questions and answers