Table of Contents
Advertisement
Quick Links
Advertisement
Table of Contents

Related Manuals for Ricoma RCP-3301

Summary of Contents for Ricoma RCP-3301
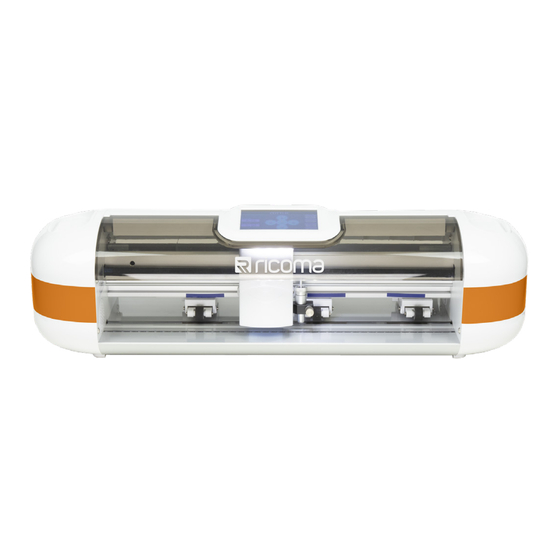
- Page 1 QUICK START GUIDE RCP-3301 MINI CUTTING PLOTTER RICOMA INTERNATIONAL CORPORATION 11555 NW 124th St, Miami, FL 33178 Telephone: (305) 418-4421 | Toll Free: 1-888-292-6282 Fax: (305) 418-5036 | Email: info@ricoma.com Copyright ©2021 Ricoma ricoma.com All rights reserved...
-
Page 2: Definition Of Symbols
If you are not going to use the machine for a long time, please unplug the power cable from the receptacle to avoid fires or electrical shortages from occurring. Ricoma Quick Start Guide... - Page 3 Any operation is forbidden in case of storms or lightning to prevent damage of the machine. Do not pull the cartridge by hand to avoid damage to the mainboard when the plotter is powered on. Ricoma Quick Start Guide...
-
Page 4: Standard Accessories
STANDARD ACCESSORIES Item Part Quantity Power cord USB Cable Blade holder * In machine Blade * 1pc in machine Pen and pen holder Dongle/or Signmaster *Optional Manual Ricoma Quick Start Guide... - Page 5 2. Please DO NOT lose the Signmaster PSN code. If you need to change computers to install Signmaster, please deactivate it before installing it in another computer. 3. Signmaster is supported by all windows systems. 4. If you encounter any problems, please refer to the troubleshooting section (refer to file 1.5). Ricoma Quick Start Guide...
-
Page 6: Usb Driver Installation
“USB Driver Setup.” After that, your computer should display the following window: After driver installation, windows will close automatically and the computer will display the Click “Finish”. following window. Click “Next”. Ricoma Quick Start Guide... - Page 7 Select COM:3, then click “Advanced”. To log USB “serial port (COM3)”, click the right mouse button. To change the port number, click on the “COM Port Number” drop down box to select the correct port number. Ricoma Quick Start Guide...
-
Page 8: Installation
3.1.2 Connect the cutting plotter to the computer by USB cable, or put a U-Disc directly into the cutter. 3.1.3 DO NOT connect to power until you ensure the connection is grounded and is the proper voltage. 3.2 Installing cutting tool CAUTION Don’t touch the blade top with your finger to prevent injury. Ricoma Quick Start Guide... - Page 9 Signmaster Software. 3. Follow the Signmaster Operation manual for more details and watch the informational video to learn what a Basic cut and Contour cut are. Contour cut: Please refer to your Signmaster Software Manual. Ricoma Quick Start Guide...
- Page 10 You can set the offset and overcut setting under the Properties-Cut option or through your connection. (Establishing a connection can be done through a Windows port-file/Direct COM when linked with any computer with a Windows system.) Ricoma Quick Start Guide...
- Page 11 3.3B Computer installation ( If working with CorelDRAW): Note: Due to customers using different Versions of CorelDRAW (some even using the Cracked version), the dongle sometimes does not match with the plotter, so using Signmaster is preferred. Ricoma Quick Start Guide...
- Page 12 4. Use the “Force Testing” button to test the force of your cutter by cutting a small square. If you are able to get a perfect square, it means the cutting force and blade length are correct. Ricoma Quick Start Guide...
- Page 13 4.3.1 Press “Setting” and you should see the screen below: 4.3.2 Press “Speed” to set the speed of the cutter and you will see the screen below: 4.3.3 Press “Cutting Force” to set the cutting force and you will see the screen below: Ricoma Quick Start Guide...
- Page 14 4.3.7 Press the “Light control” to control the LED light of the cutter. You will see the screen below when you press it: Notice: When doing a Contour cut, we do not recommend opening the light. Ricoma Quick Start Guide...
- Page 15 0.25 with an overcut of 1-2. To cut 3M reflective film, set offset to 0.65 with an overcut of 0.65 and so on. Basically, you need to adjust the data and test before cutting your main design. Ricoma Quick Start Guide...
- Page 16 1. In Signmaster, click “Vinyl Spooler”. Then, choose “Windows Port” in connection and click “File” in port. 2. Save the plt. file and put the plt. file into the U-Disc. 3. Insert the U-Disc into the plotter and press “U-Disc”. Then, choose the right plt. file to cut. Ricoma Quick Start Guide...
- Page 17 3. Insert the U-Disc into the plotter and press “Menu” where you will see the “U-Disc” button. Choose the correct plt. file and set it on repeat. The camera will scan the marks and start cutting. Ricoma Quick Start Guide...
-
Page 18: Troubleshooting
2. To check the position of the blade, follow the images below: Take out the holder. Tighten the screw of the blade holder until the blade Take out the blade. is close to the surface (you will be able to feel this with your finger). Ricoma Quick Start Guide... - Page 19 Note: To cut reflective film, you need to use sharper blades. 4. If the material is shifting when you contour cut (like in the picture below), please check the instructions on the next page to recalibrate your design. Ricoma Quick Start Guide...
- Page 20 Answer 1: Your printing file is not the same size (1:1) as your design file. Answer 2: Your printing material was not placed into the cutter properly. If the plotter still fails the mark scan, please click “settings”, then “camera” and then “backlight” to try again. Ricoma Quick Start Guide...
- Page 21 To see the relationship between speed and character size, please refer to the following table: Size of font(mm) Speed (mm) 2-10 10-30 80-200 30-50 200-350 50-500 350-500 >500 Ricoma Quick Start Guide...
- Page 22 (4). Select “closing compensation” and adjust the value. Generally, the value should be set to 0.5. 6.12 Question: Why is the machine not paving some letters when cutting? Answer: (1). Check if the machine is applying enough pressure. (2). Reinstall the software. Ricoma Quick Start Guide...
- Page 23 6.19 Question: Why does the plotter seem out of control sometimes? Answer: Maybe while transporting or using it, the signal line was disconnected. To fix this, open the Ricoma Quick Start Guide...
- Page 24 If it seems the plotter is overheating, please unplug it immediately and contact a local agent or maintenance center as a servo displacement may have occurred. Ricoma Quick Start Guide...
- Page 25 Baochangli Industrial Park, Jinlong Road 3, TEL: (305) 418-4421 | FAX: (305) 418-5036 Shenzhen, P.R. China (Post: 518118) Toll Free: 1-888-292-6282 TEL: 400-900-2939 | 0755-25857772-8630 | FAX: +86-755-2585-7773 Website: www.ricoma.com | Email: info@ricoma.com Website: www.ricoma.com.cn | Email: rcm@ricoma.cn Ricoma Quick Start Guide...
Need help?
Do you have a question about the RCP-3301 and is the answer not in the manual?
Questions and answers