Advertisement
Quick Links
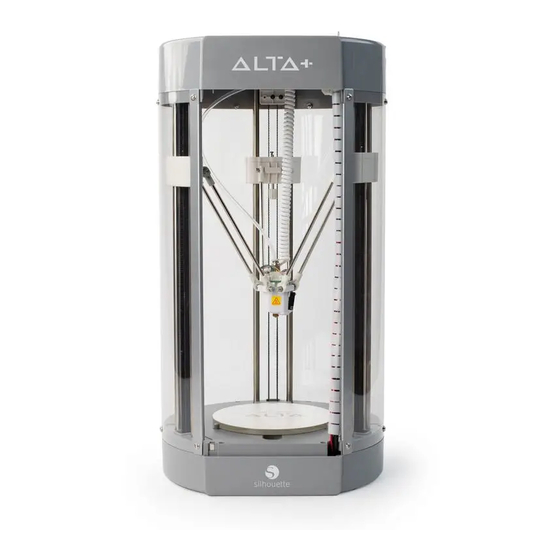
Silhouette Alta® Plus
Print Head Replacement
Preparation
Silhouette Alta® Plus machine
Preinstalled print head
Replacement print head unit
Tools
#2 Phillips head screwdriver
4. Remove the hose.
4.1 Push the collar of the connector on the print head down.
4.2 Pull the hose up to remove it.
6. Remove the cable connectors.
6.1 Pinch the side of the thick connector and pull up.
6.2 Pinch the power cable that connects the fan and pull up.
(DO NOT PULL THE WIRE.)
Remove the preinstalled print head
1.
Remove the filament from the print head and wait for the
print head to cool.
2. Remove the Alta platform (also known as the build plate).
3. Using your hand, move the print head flush against the
print bed. Adjust the print head position so that it rests in
the center.
5. Remove the three (3) Phillips head screws from the top of the
print head. TIP:
REMOVE THE SCREWS LEFT TO RIGHT.
7.
Remove the print head.
Advertisement

Subscribe to Our Youtube Channel
Related Manuals for Silhouette Alta Plus


Summary of Contents for Silhouette Alta Plus
- Page 1 Silhouette Alta® Plus Print Head Replacement Preparation Remove the preinstalled print head Silhouette Alta® Plus machine Preinstalled print head Replacement print head unit Tools #2 Phillips head screwdriver Remove the filament from the print head and wait for the print head to cool.
- Page 2 5. Attach the hose. Be sure the wire and the hose are 6. After putting the Alta platform back into place, you’re ready not crossed. to start printing with the Alta Plus again.
Need help?
Do you have a question about the Alta Plus and is the answer not in the manual?
Questions and answers